Staring at bare walls with no idea how to fill them? These Cricut wall decor ideas bring personality to your home
Wall art is not limited to paintings and framed photographs. Some of the most interesting displays are made from materials such as layered paper, thin wood veneer, cut vinyl and painted surfaces.
Each creates a different finish, and the right technique depends on the design and the material being used.
A Cricut makes it possible to cut intricate shapes, prepare painting stencils and personalise ready-made boards without having to create every detail by hand.
These 27 Cricut wall decor ideas you can make yourself explore those possibilities, from custom keepsake displays to decorative panels and useful wall organisers, with ideas that go beyond the usual quote signs.
Custom products can attract buyers long after wedding season ends. See 21 Personalized Cricut Items People Actually Buy for more ideas with everyday appeal.
Cricut Wall Decor Ideas
1. Layered City Skyline Shadow Boxes
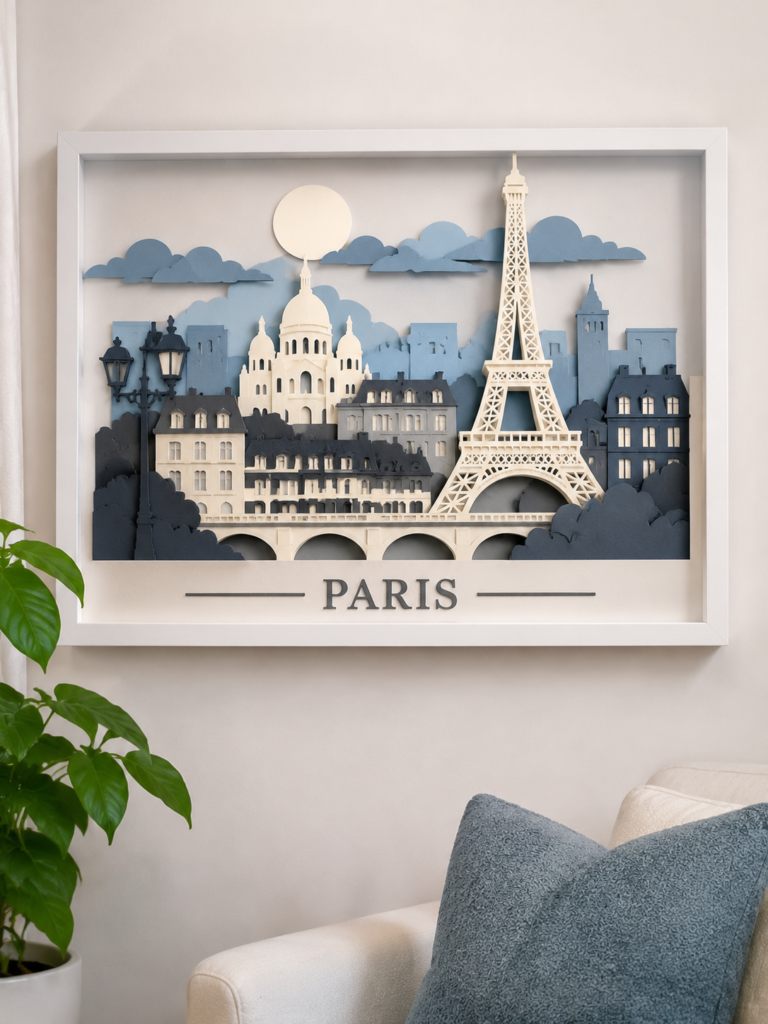
Imagine a framed picture of a city, but instead of one flat image, it has several layers of paper buildings arranged one behind another.
The result is a dimensional display that adds depth and visual interest to a plain wall. It also brings a personal touch to a living room, home office or hallway, especially when the skyline represents a place that holds special memories.
How to make it: Choose a city or town and find a clear image of its skyline. Simplify the buildings into a few sections that can be cut separately in Cricut Design Space.
Cut each section from cardstock, using different shades to distinguish the buildings in the foreground from those in the background.
Place the first cutout at the back of a shadow box, then attach the remaining layers with foam adhesive squares to create space between them.
Check that the buildings remain visible through the frame and that the layers do not look too crowded.
Finish with the city’s name, a recognisable landmark or the year of a memorable visit.
Christmas shoppers often look for gifts with a personal touch. Explore 30 Cricut Projects to Make and Sell for Christmas for seasonal products to add to your range.
2. Custom Topographic Map Frames
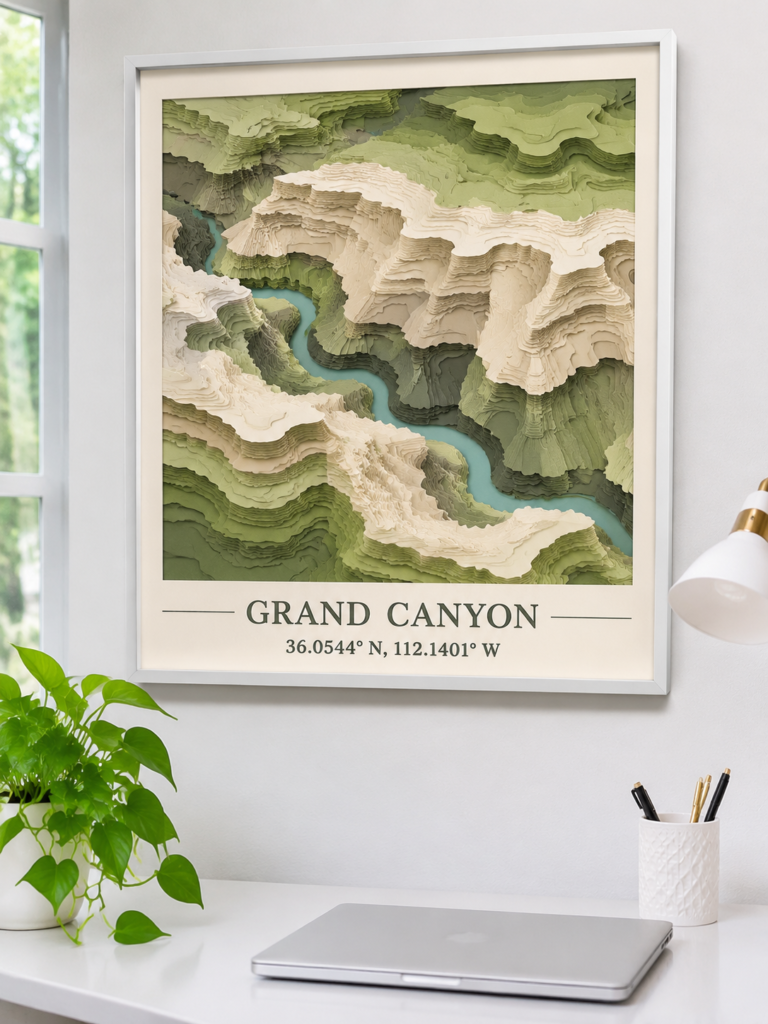
The curved lines on a topographic map show the shape of the land, including hills, valleys and changes in elevation.
Turn those details into wall art by choosing a location that has personal meaning, such as a mountain, island, lake or favourite hiking destination.
Layered contour lines in different shades of cardstock create a raised effect, giving the framed design more depth than an ordinary printed map. It makes an interesting feature for a study, living room or travel-inspired space.
How to make it: Find a genuine topographic map of your chosen location and use its contour information as the basis for the design.
Bring the lines into Cricut Design Space and simplify them where necessary, keeping enough space between neighbouring lines for clean cuts.
Cut the separate contours from cardstock, then stack them in the correct order inside a deep frame using foam spacers.
Add the location’s name or coordinates beneath the map. Keep the original map as a reference so the finished artwork does not misrepresent the landscape.
A low-cost project can still make an attractive product. These 29 Cricut Projects You Can Make For Under $5 And Sell For More offer budget-friendly inspiration.
3. Family Tree Name-Disc Displays
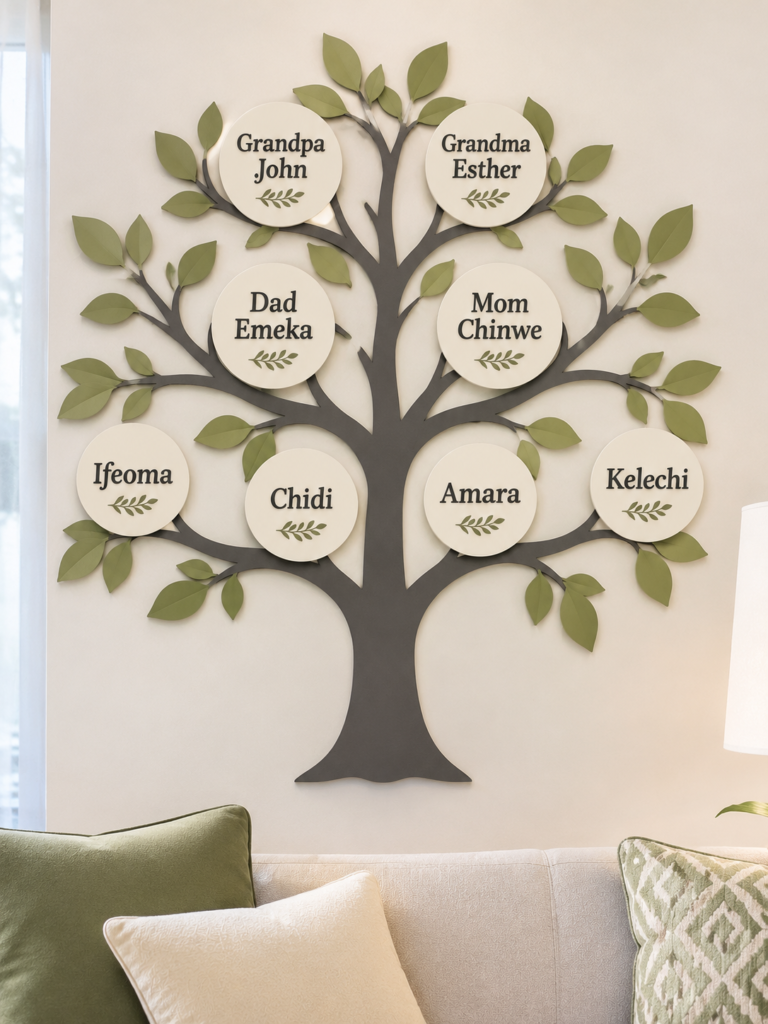
Family photographs are not the only way to show family history on a wall.
This design uses a tree-shaped arrangement, with individual name discs representing family members across different generations.
The branches give the display a natural shape, while the names make it a personal feature for a family room, hallway or shared living space.
How to make it: Start with a backing board large enough to accommodate the family without squeezing the names together.
Cut the trunk and branches from suitable vinyl or thin wood veneer, depending on the surface and your Cricut machine’s material compatibility.
Add separate wooden name discs to the branches, arranging grandparents, parents, children and other relatives according to the family structure.
Apply names using adhesive vinyl or another suitable lettering method. Leave some unused space where possible, especially when the family may want to add more names later.
Sales matter, but the profit left after expenses matters too. Explore 27 Cricut Projects With High Profit Margins for ideas worth considering.
4. Personalised House Portrait Plaques
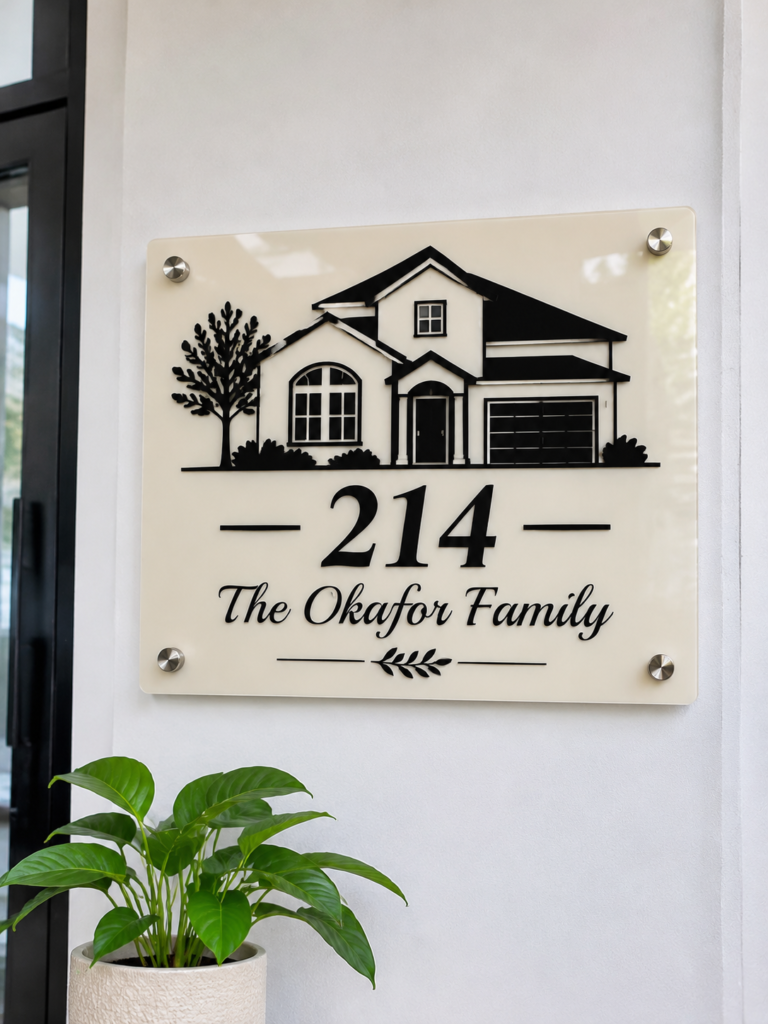
The shape of a familiar roof, the position of a front door or the outline of a favourite window can make a house instantly recognisable.
Capture those features in a personalised plaque that celebrates a family home. Displayed in an entryway or hallway, it adds character while giving the space a connection to the people who live there.
How to make it: Take a clear photograph of the house, preferably from the front, where the roofline, windows and entrance are easy to see.
Use the photograph as a reference to create a simplified outline that can be cut with your Cricut. Remove tiny details that may not cut or transfer cleanly, then apply the design to a suitable plaque using adhesive vinyl.
For a full-colour version with more architectural detail, print the illustration and frame it instead. Add the house number, family name or year the home was built to complete the piece.
Starting a craft business can feel easier with straightforward products. Find beginner-friendly inspiration in 23 Easy Cricut Crafts To Sell For Beginners.
5. Framed Handwritten Recipe Displays
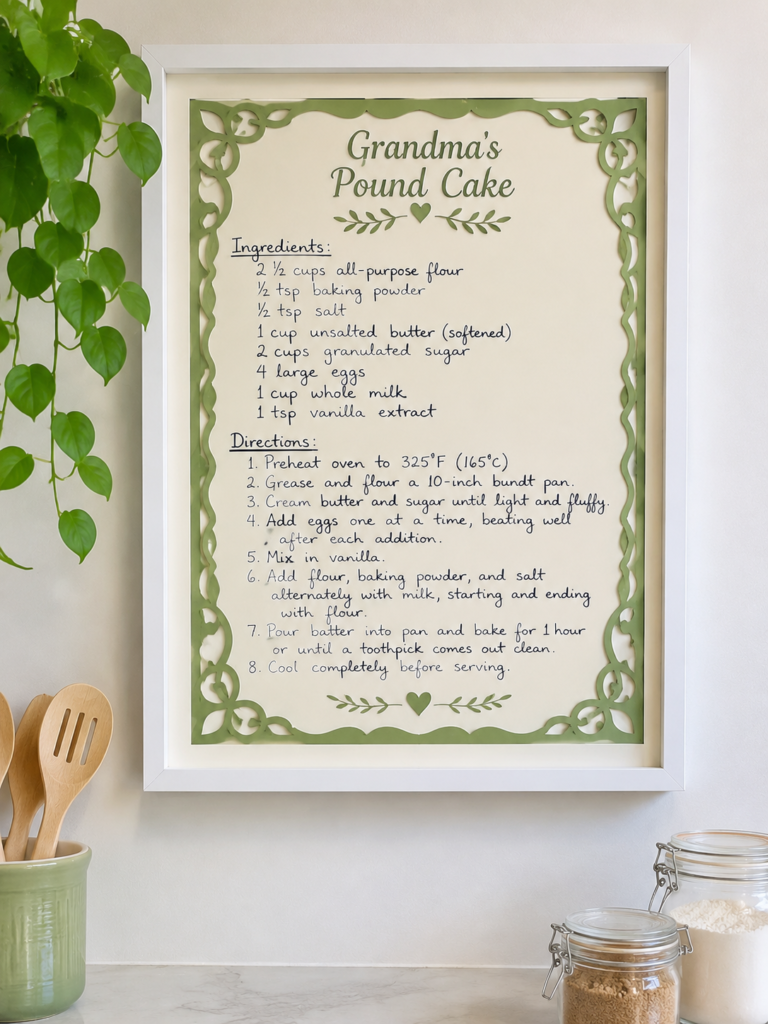
Some recipes carry memories that go beyond the ingredients. The handwriting of a parent, grandparent or loved one can make an ordinary recipe card especially meaningful.
Framing the original writing turns it into a personal display for a kitchen or dining area, where it can be appreciated without being handled during cooking.
How to make it: Scan the original recipe or photograph it in good, even lighting.
Save an untouched copy before making any edits. Improve the contrast and remove marks around the writing only where necessary, taking care not to alter the handwriting itself. Print the cleaned image to fit your frame.
Cricut can add a decorative border, the recipe title or a small personalised detail, but printing is usually the better choice for preserving the complete handwriting, especially where letters are joined or very fine.
Choose a frame with a backing that complements the paper without distracting from the original writing.
A name, date or personal message can make a product feel special. Browse 21 Personalized Cricut Items People Actually Buy for more custom product ideas.
6. Pet Silhouette Memorial Panels
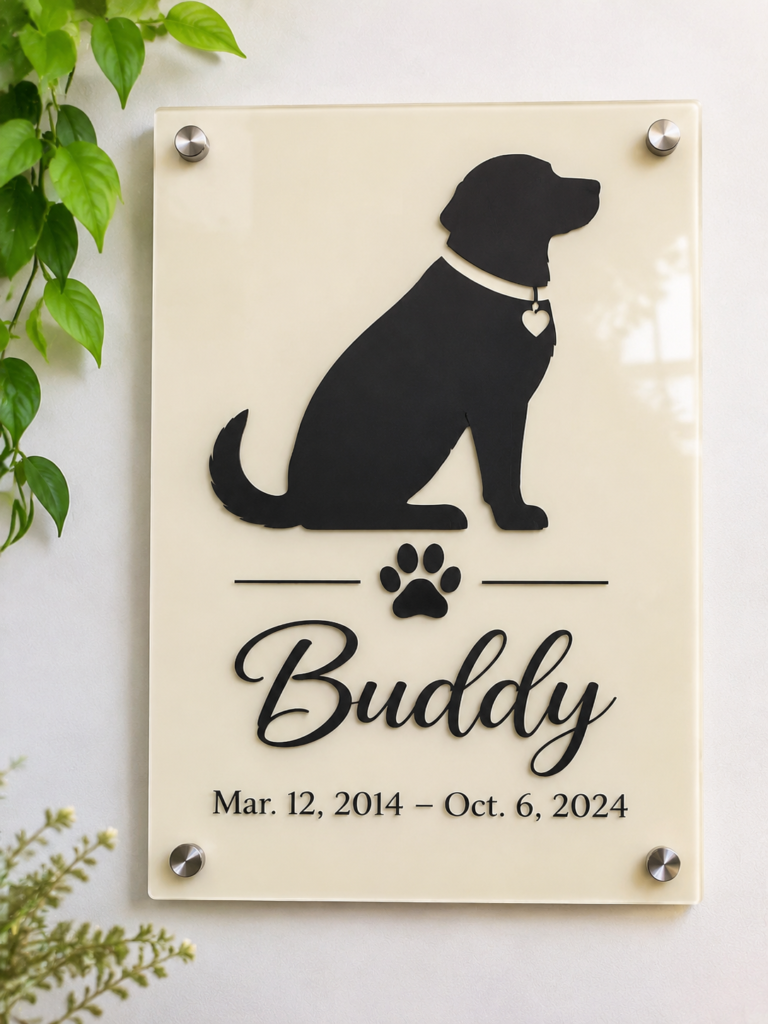
A pet’s familiar profile can become a touching piece of wall art.
The outline of its ears, head, tail or sitting position gives the design its identity, while a name or small message makes the panel more personal. Display it in a quiet corner, bedroom or hallway as a lasting reminder of a much-loved companion.
How to make it: Select a photograph that shows the pet’s outline clearly against the background. Remove the background and simplify the image into a silhouette in Cricut Design Space.
Pay attention to distinctive features, such as the shape of the ears or tail, so the finished cutout still resembles the pet.
Cut the design from adhesive vinyl and apply it to a suitable plaque or backing board.
For photographs with detailed markings, facial features or several colours, use a printed portrait instead of forcing every detail into a single vinyl silhouette. Finish with the pet’s name or a short date.
Meeting customers face-to-face calls for products that catch their attention. Get ideas from 20 Cricut Products to Sell at Craft Fairs.
7. Travel Keepsake Shadow Boxes
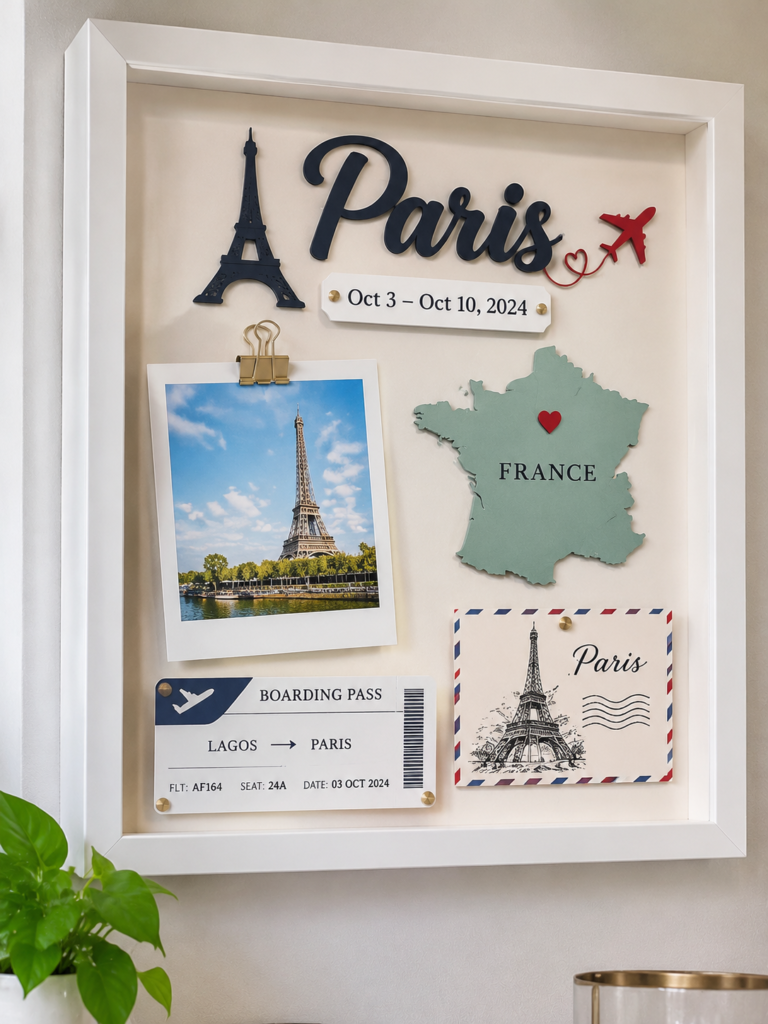
Tickets, postcards, photographs and small souvenirs often end up stored away after a trip.
A travel keepsake shadow box brings these items together in one display, turning a collection of memories into a feature for a living room, hallway or home office.
The combination of real mementoes and personalised labels also gives the artwork more character than a standard travel poster.
How to make it: Choose a shadow box deep enough to hold the items without pressing them against the glass.
Arrange the keepsakes on the backing first, grouping them by destination, date or experience. Use photo corners or suitable archival-quality mounting materials to secure photographs and paper souvenirs without damaging them.
Cricut can cut destination names, dates, small labels and decorative map shapes from cardstock or vinyl.
Place larger items towards the back and smaller details towards the front, keeping the arrangement balanced and leaving enough room for each keepsake to be seen.
You don’t have to spend a fortune on supplies to get started. These 29 Cricut Projects for Beginners Using Dollar Store Items make budget crafting more accessible.
8. Architectural Line Drawing Wall Prints
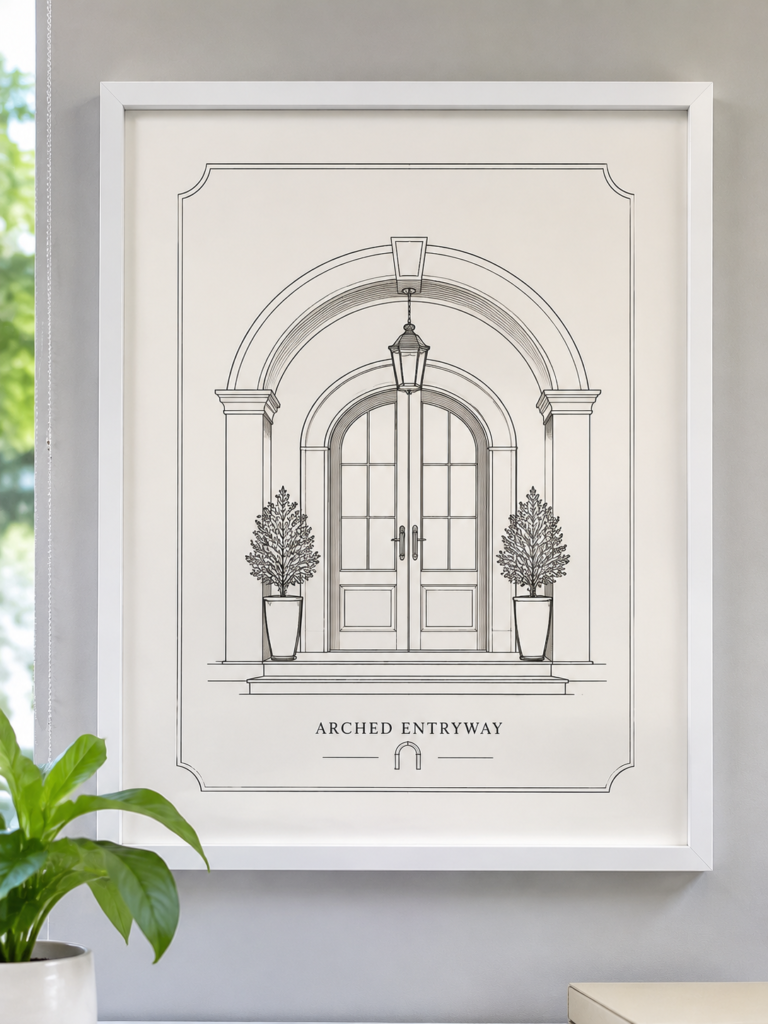
The details that give a building its character can make beautiful wall art. Think of an arched doorway, a spiral staircase, an old-fashioned window or the front of a building with distinctive columns.
These architectural features can be turned into minimalist illustrations that add an elegant, understated look to a hallway, study or living room.
Among these Cricut wall decor ideas, this one is especially suitable for people who appreciate buildings and architectural design.
How to make it: Choose a clear photograph of the architectural feature you want to illustrate. Trace its main outlines in a design programme, removing unnecessary background details.
For a bold, simple illustration, convert the outlines into shapes that Cricut can cut from heavy cardstock.
Keep the lines thick enough to survive cutting and handling.
More detailed drawings are better printed on art paper and placed in a frame rather than converted into narrow vinyl or paper cuts. A simple frame and generous white space will help the illustration stand out.
Wedding orders are only one way to earn from your machine. See 35 Profitable Cricut Projects You Can Make From Home for more business ideas.
9. Painted Colour-Block Wall Art Panels
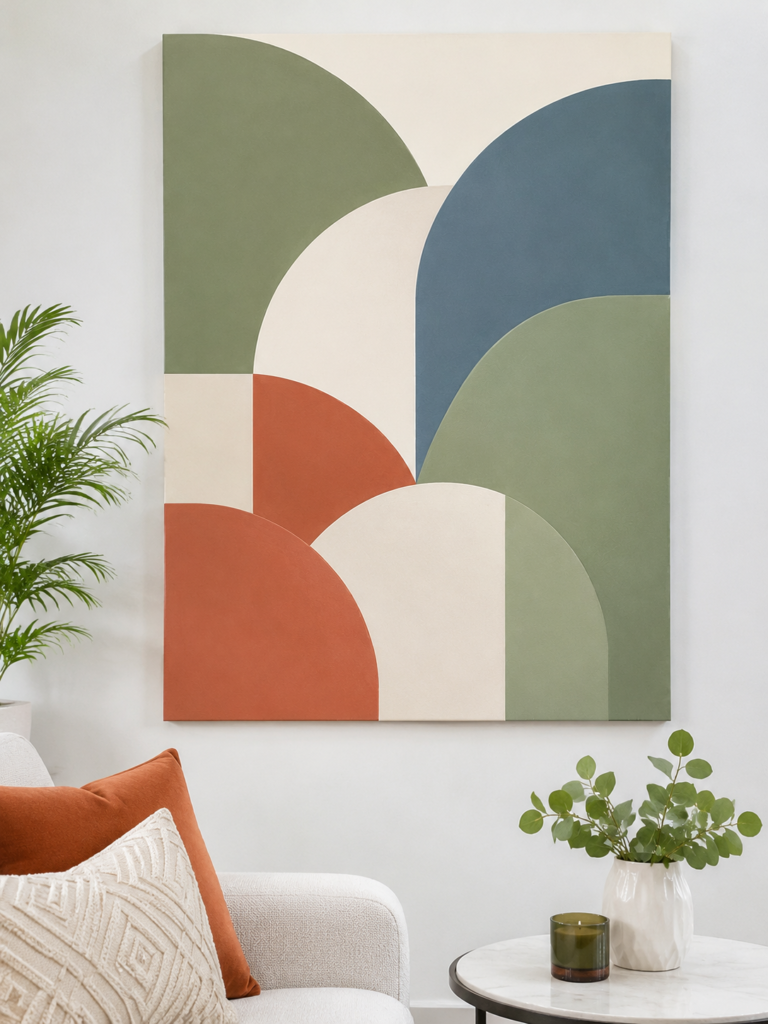
Colour-block artwork uses areas of solid colour to create a striking composition without relying on detailed illustrations.
Overlapping arches, curved sections and angular shapes can bring colour to an otherwise plain wall.
Making the design on separate panels also gives you room to experiment with different colour combinations before settling on a final arrangement.
How to make it: Sketch the arrangement on paper first and decide which colours should meet at each boundary.
Cut the shapes from stencil film using your Cricut, then position the stencil on a smooth, prepared art board. Apply one paint colour at a time with a stencil brush or sponge, using a light amount of paint to reduce seepage beneath the edges.
Allow each section to dry before repositioning the stencil or applying another colour. Remember, the Cricut prepares the stencil; painting and finishing the panel are separate steps.
Not sure which handmade products have selling potential? Take a look at 33 Cricut Projects That Actually Sell Well for inspiration.
10. Faux Stained-Glass Effect Wall Panels
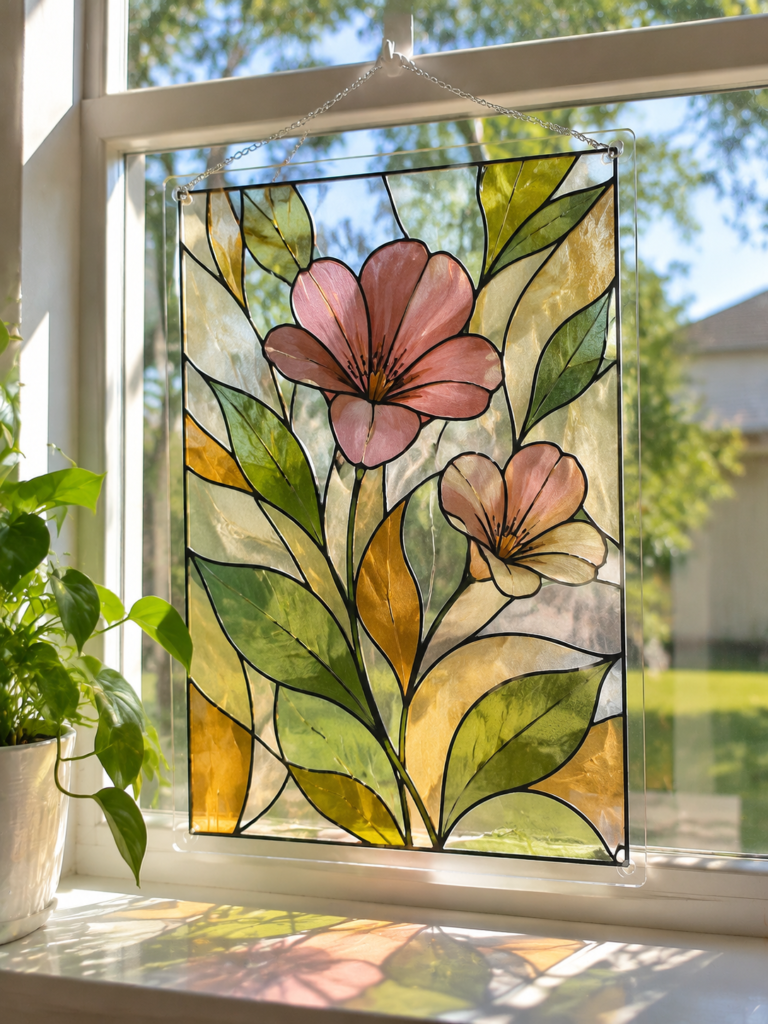
Coloured sections separated by dark outlines give stained-glass artwork its distinctive appearance.
You can recreate a similar look with translucent coloured film on a clear panel, using geometric shapes, flowers or a central decorative motif.
Hung near a window, the finished piece can catch incoming daylight and introduce patches of colour into the room.
How to make it: Choose a clear acrylic panel or another suitable transparent backing that can safely support the design.
Plan the pattern so the coloured sections fit together without leaving awkward gaps. Cut the shapes from translucent window film or material specifically intended for this type of application.
Arrange them on the panel, following the manufacturer’s application instructions, then add dark leading-style strips or outlines to separate the sections.
This is a decorative imitation, not real stained glass, so choose materials according to the intended light exposure and display location.
Reach shoppers beyond your local area with products suited to online stores. Explore 33 Best Cricut Projects to Make and Sell Online.
11. Painted Faux-Mosaic Wall Art
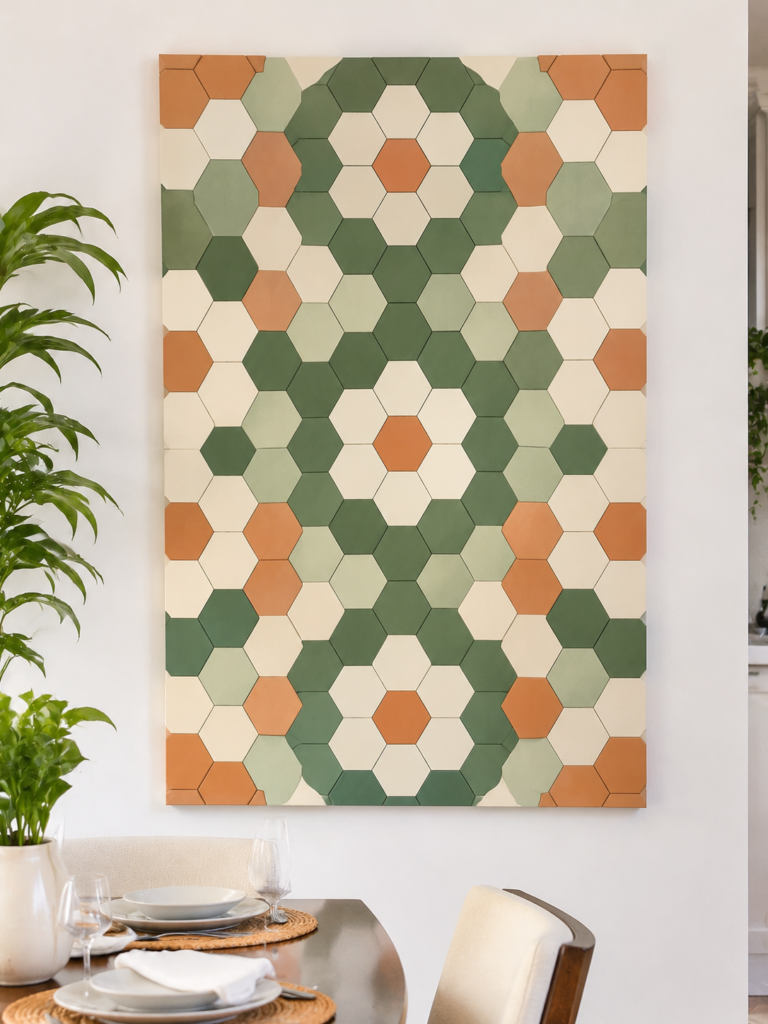
Small repeated shapes can create the appearance of a mosaic without the weight, cost or installation work involved in using ceramic tiles.
This project uses a painted surface to imitate that tiled arrangement, making it suitable for colourful accent panels in kitchens, dining areas or other parts of the home.
How to make it: Select a simple shape, such as a square, diamond, hexagon or small arch, and repeat it across a prepared art board.
Use Cricut to cut a stencil with evenly spaced openings. Position the stencil carefully and apply suitable acrylic paint with a stencil brush or sponge.
Work in sections, allowing the paint to dry before moving the stencil to avoid smudging the pattern.
Keep the gaps between shapes consistent to preserve the mosaic appearance. The finished panel is painted artwork, not a tiled or washable backsplash.
A small craft business can begin with a few manageable products. Find ideas in 31 Easy Cricut Projects to Make and Sell for Extra Money.
12. Geometric Wood Veneer Inlay Panels
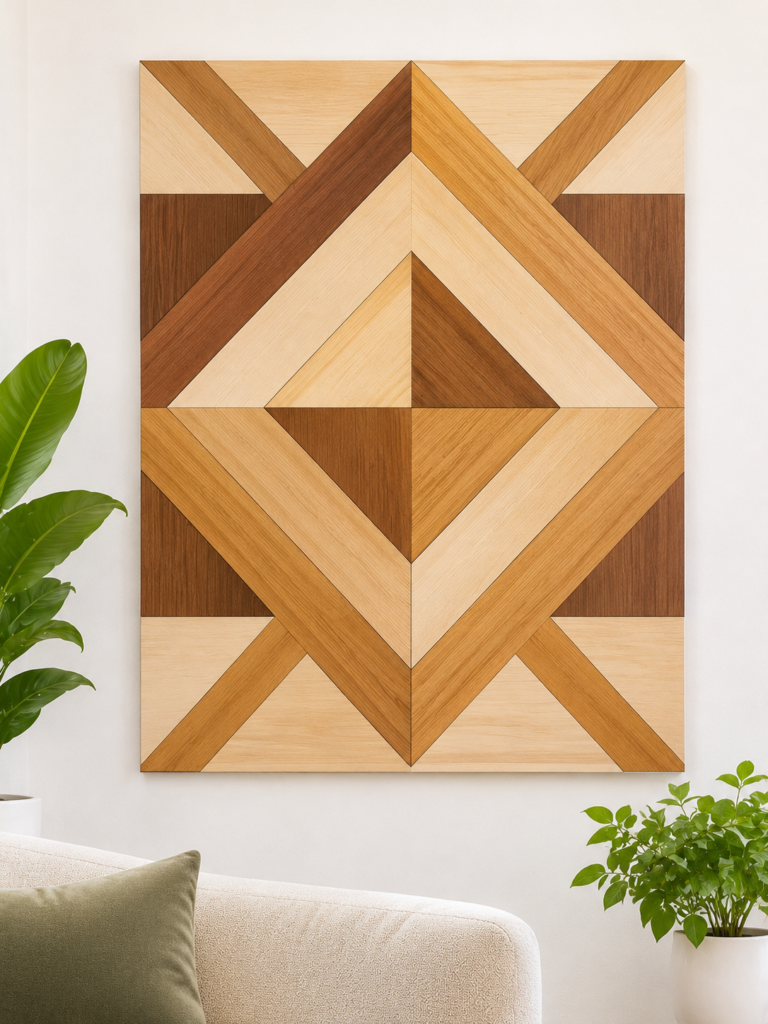
Natural wood grain gives geometric artwork a different character from paper or painted designs.
For this project, thin wood veneer shapes are arranged on a backing board to form patterns such as interlocking triangles, diamonds or repeated hexagons.
The variation in the grain adds warmth and texture, making the finished panel an attractive feature in a living room, study or bedroom.
How to make it: Draw the complete pattern first and decide which pieces will use different wood tones or grain directions.
Cut the shapes from Cricut-compatible natural wood veneer, following the manufacturer’s machine and blade requirements.
Cricut’s natural wood veneer instructions specify compatible Maker, Explore and Venture machines with a Deep-Point Blade, so check your model before purchasing the material.
Use a StrongGrip mat as directed and perform a test cut.
Arrange the pieces on a rigid backing board, check that their edges meet neatly, then attach them with an adhesive suitable for veneer. Avoid excess adhesive, which can seep out or affect the appearance of the wood.
Make cluttered cupboards and storage spaces easier to manage with 27 Easy Cricut Projects for Organizing Your Home.
13. Decorative Mirror Corner Accents
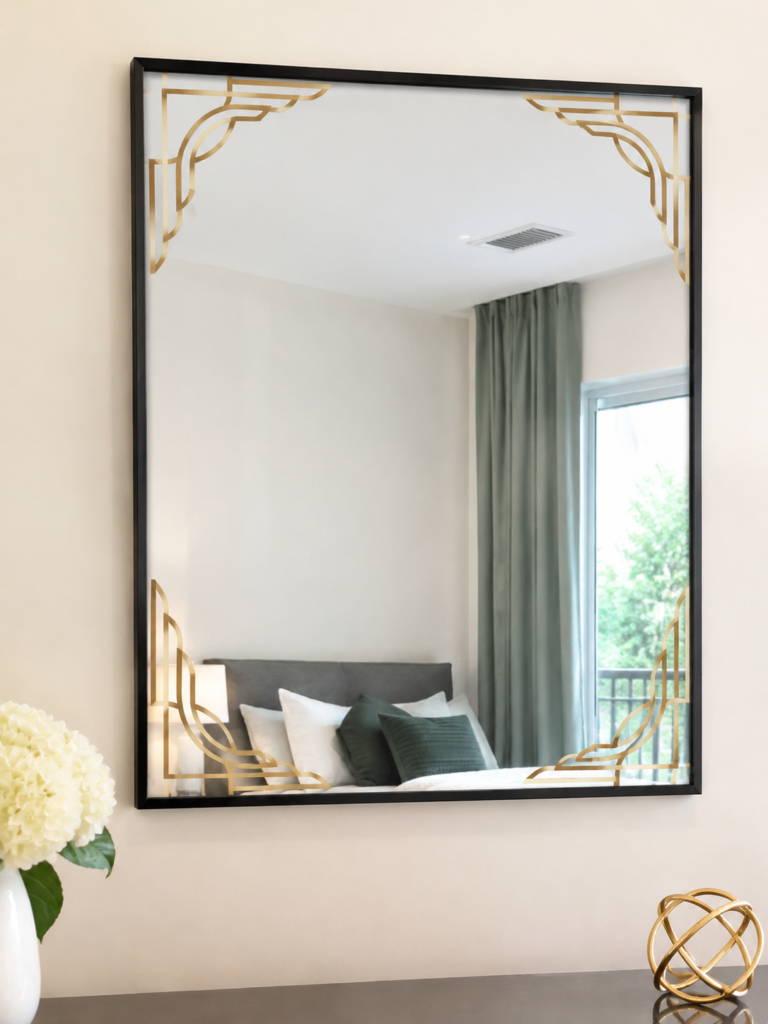
Plain mirrors can look more distinctive with a little decoration around their edges.
Delicate geometric patterns, curved corner details or Art Deco-inspired lines can give an ordinary mirror a more finished appearance without covering the reflective area.
This is a simple way to introduce a decorative feature into an entryway, bedroom or dressing area.
How to make it: Measure the mirror and plan the decoration around its corners or outer border. Create matching designs in Cricut Design Space, checking that opposite corners are properly aligned.
Cut the shapes from adhesive vinyl suitable for glass, then clean and dry the mirror before application. Use transfer tape to position the design and a scraper tool to smooth it down.
Keep the central reflective area clear and avoid placing decorations where they obstruct the user’s view. The result is a customised mirror rather than a replacement for its original frame.
From custom labels to useful accessories, 25 Easy Cricut Projects for Your Kitchen offers creative ideas for everyday kitchen tasks.
14. Customised Wall Clock Faces
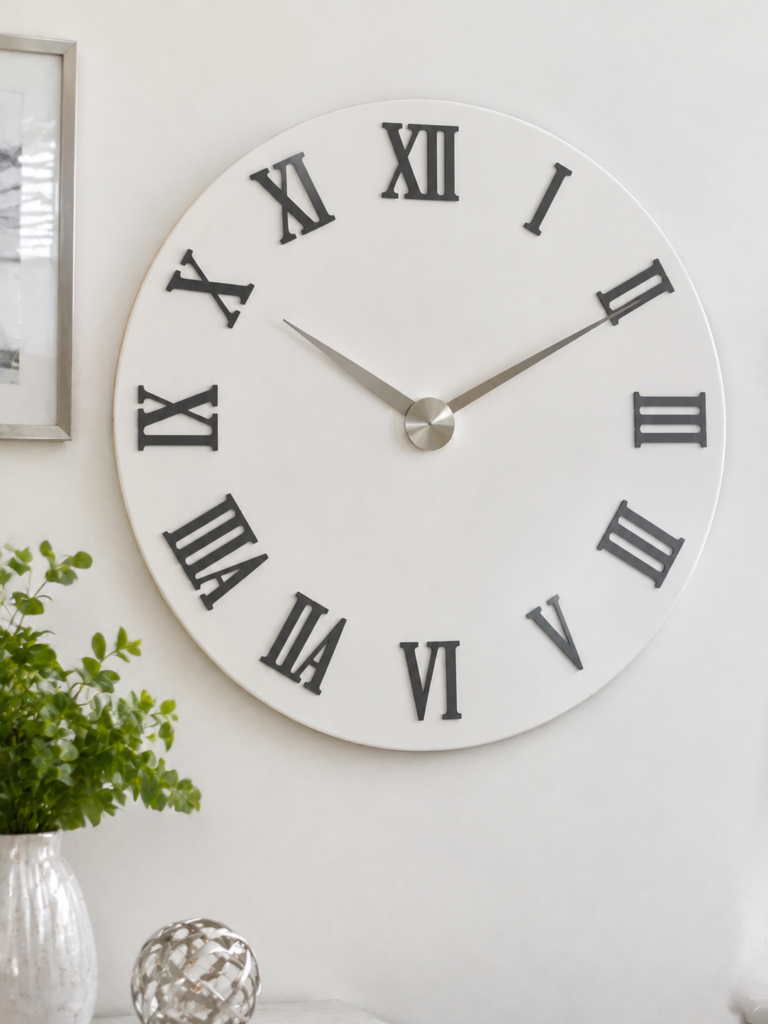
Numbers are not the only way to mark the hours on a wall clock. You can use Roman numerals, small geometric symbols, family initials or a theme that suits the room.
A customised clock gives a functional object a more personal appearance and can tie together the colours or style of a kitchen, office or living space.
How to make it: Begin with a blank clock face that has a compatible central opening for the clock mechanism. Decide whether you want all twelve hour markers or a simpler arrangement with only the main positions marked.
Use a ruler and divide the face into twelve equal sections so the markers sit accurately. Cut the numbers or decorative details from adhesive vinyl and apply them to the surface.
Install the purchased clock mechanism and hands according to its instructions, making sure the hands have enough clearance to move without catching on the decoration.
Cricut creates the personalised face details; the mechanism and hands are separate components.
Don’t throw away those leftover vinyl pieces just yet. These 23 Cricut Projects You Can Make with Scrap Materials put small supplies to creative use.
15. Magnetic Family Notice Boards
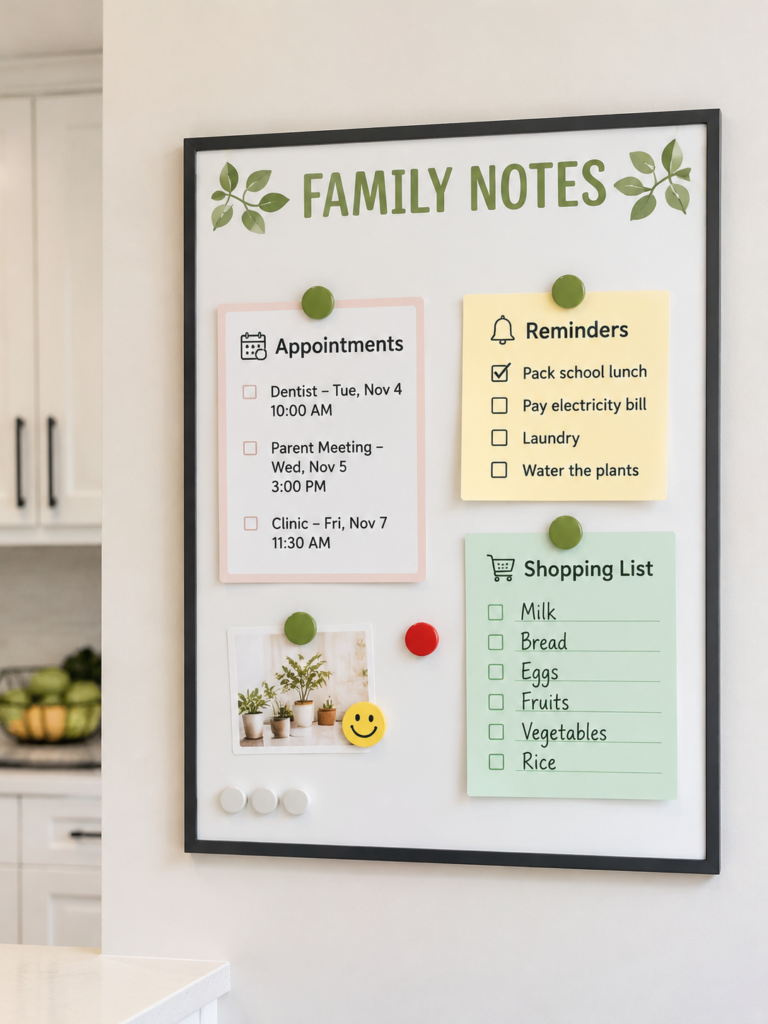
School reminders, appointment cards, shopping lists and important household messages can quickly get scattered across different surfaces.
A magnetic family notice board gives these everyday notes one visible place, while personalised lettering makes it look like part of the room rather than an ordinary office board.
Hang it in the kitchen, hallway or family command centre where everyone can check it easily.
How to make it: Start with a board that has a genuinely magnetic surface, such as a suitable metal notice board.
Decorate the top with a family name or title cut from adhesive vinyl, then add smaller labels such as Reminders, Appointments and To Do.
Test the magnets on the finished surface to ensure they still hold notes securely. Remember that a metallic-looking decorative board is not necessarily magnetic.
Make the celebration feel more personal with 20 Easy Cricut Projects for Birthdays and Parties, featuring ideas for memorable occasions.
16. Framed Dry-Erase Weekly Planners
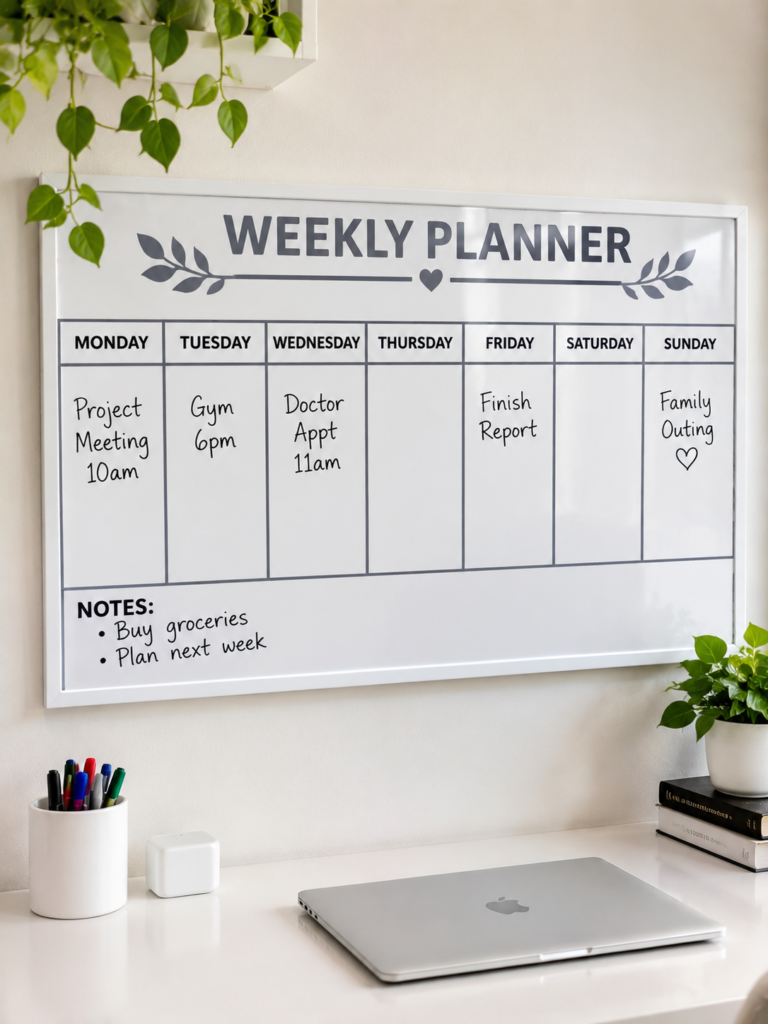
Keeping track of school activities, work commitments and family appointments becomes easier when the week’s schedule is visible.
This framed planner provides a reusable writing surface that can be updated as plans change. Its clean layout also makes it a useful addition to a kitchen, study area or home office.
How to make it: Choose a dry-erase-compatible board or insert that fits inside your frame. Plan seven sections for the days of the week, with additional space for notes or important reminders.
Cut the headings and dividing lines from adhesive vinyl using your Cricut, then apply them to the board.
Keep the writing areas free of permanent decoration so dry-erase markers can be used and wiped away easily. Ordinary adhesive vinyl does not become a dry-erase surface simply because it is applied to a board.
Store-bought presents aren’t the only way to make someone feel special. Find thoughtful handmade inspiration in 31 Easy Cricut Projects for Gifts.
17. Framed Chalkboard Message Panels
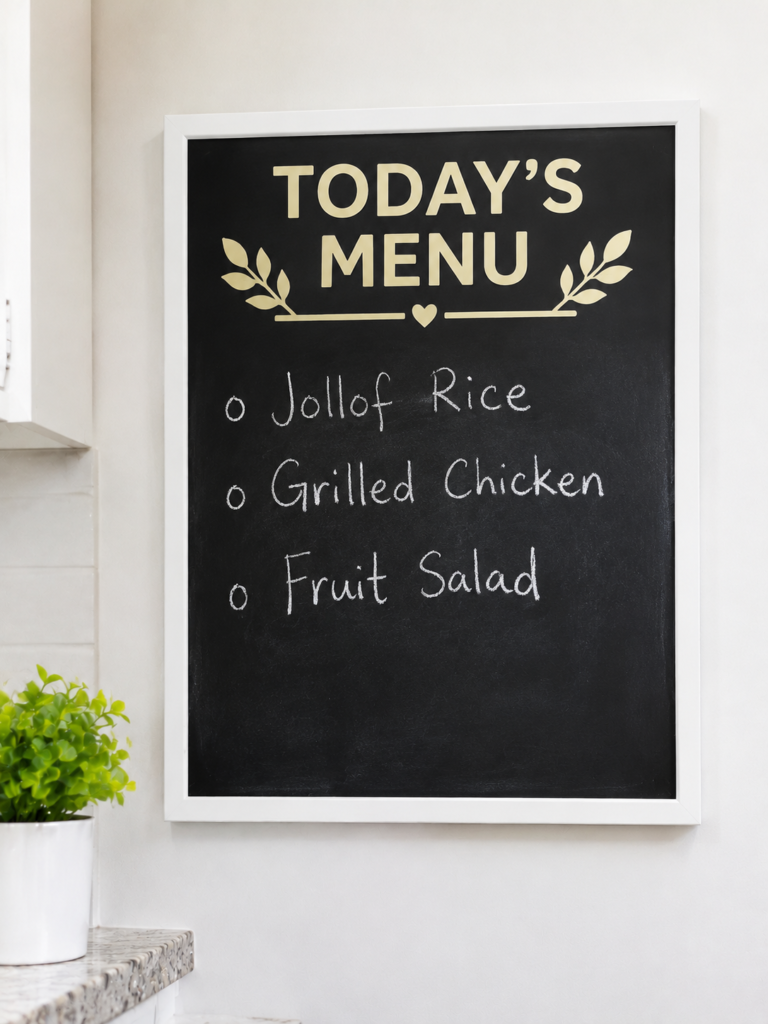
Give household messages a dedicated space with a framed chalkboard panel.
Unlike a fixed printed sign, this wall accessory can display changing notes, reminders, inspirational messages or the week’s menu. A personalised heading and attractive frame help it blend into a kitchen or dining area.
How to make it: Use a ready-made chalkboard or a suitable board finished with chalkboard paint or chalkboard vinyl.
Cut a title such as Today’s Menu, Family Notes or Leave a Message from adhesive vinyl and position it above or below the writing area. Keep permanent lettering away from the section where messages will be written.
Follow the chalkboard material manufacturer’s preparation instructions so the surface is suitable for writing and erasing.
Cute accessories and personalised creations can appeal to younger audiences. See 30 Cute Cricut Projects for Teen Girls for fresh project ideas.
18. Personalised Entryway Key Racks
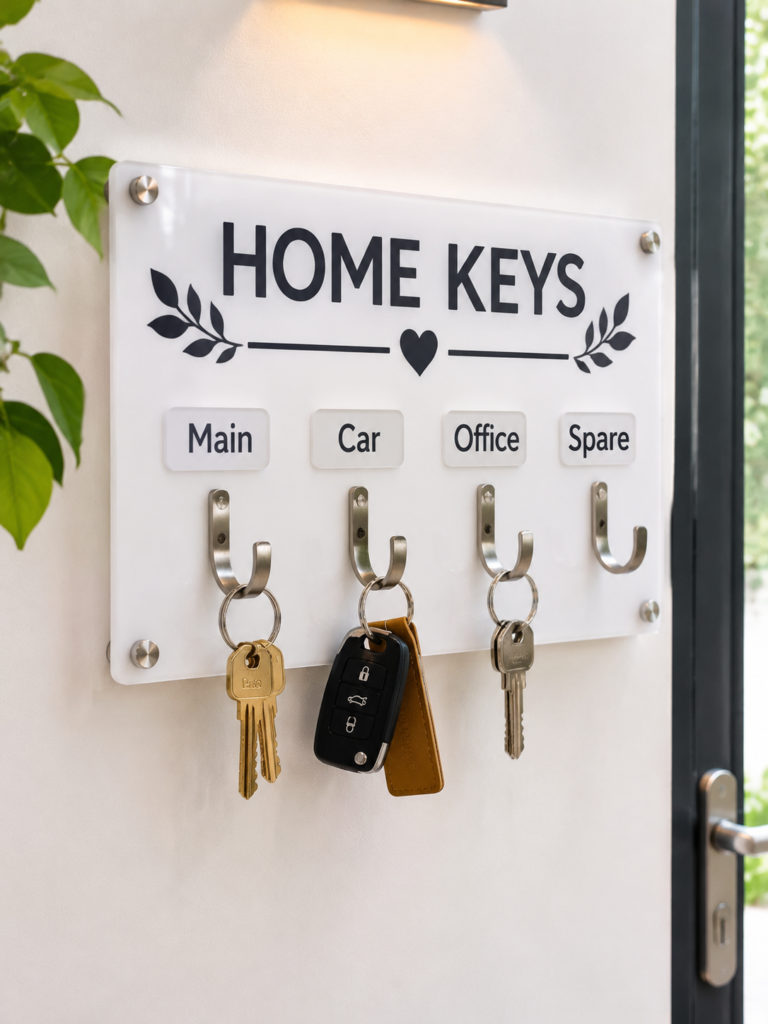
Keys are easy to misplace when everyone in the household drops them in a different place. A wall-mounted key rack gives each person a designated spot and keeps frequently used keys close to the door.
Personalised names or labels make the arrangement easier to follow while adding a finished touch to an otherwise overlooked entryway.
How to make it: Choose a sturdy wooden board with enough width for the number of hooks required. Arrange the hooks with sufficient space between them so keyrings do not overlap.
Use Cricut to cut a family name, individual names or simple labels from adhesive vinyl and apply them above the corresponding hooks.
Attach the hooks securely with suitable screws, then mount the finished rack using fixings appropriate for the board’s weight and wall type.
Vinyl decoration adds the personal detail, but the board and hardware must carry the load.
Plain walls and overlooked corners can benefit from a creative touch. Browse 29 Easy Cricut Projects for Home Decor for ideas to personalise your space.
19. Wall-Mounted Mail Sorter Plaques
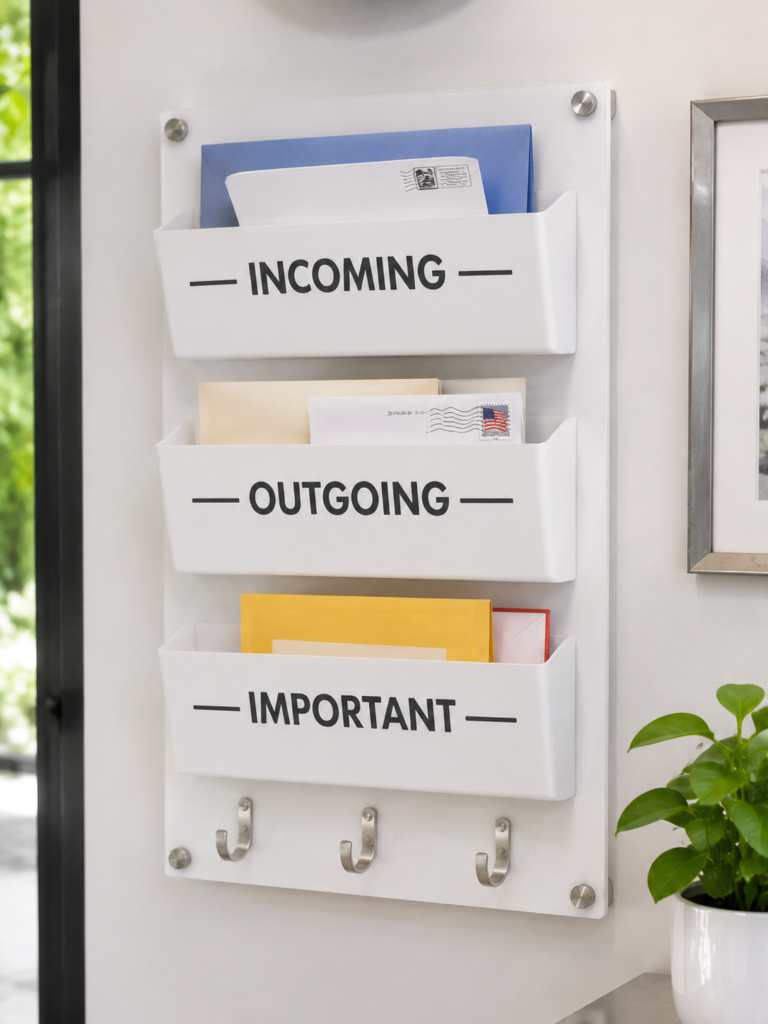
Letters, bills and important documents can easily become mixed together on a table or countertop.
A wall-mounted mail sorter provides separate compartments for incoming post, outgoing letters or different household members. Placing it near the entrance makes it easier to sort mail before it gets lost among other items.
How to make it: Use a ready-made wooden mail organiser or assemble a backing board with separate compartments. Check that each compartment is deep and wide enough to hold the type of envelopes and papers it will receive.
Cut labels such as Incoming, Outgoing or family members’ names with your Cricut and apply them to the front. Reinforce the organiser’s attachment points and choose wall fixings that can support its weight when filled with mail.
This is one of the more useful Cricut wall decor ideas for combining personalisation with everyday organisation.
Cardstock can create much more than basic paper shapes. Explore 27 Easy Cricut Projects Using Cardstock for creative ways to use it.
20. Decorative Jewellery Display Boards
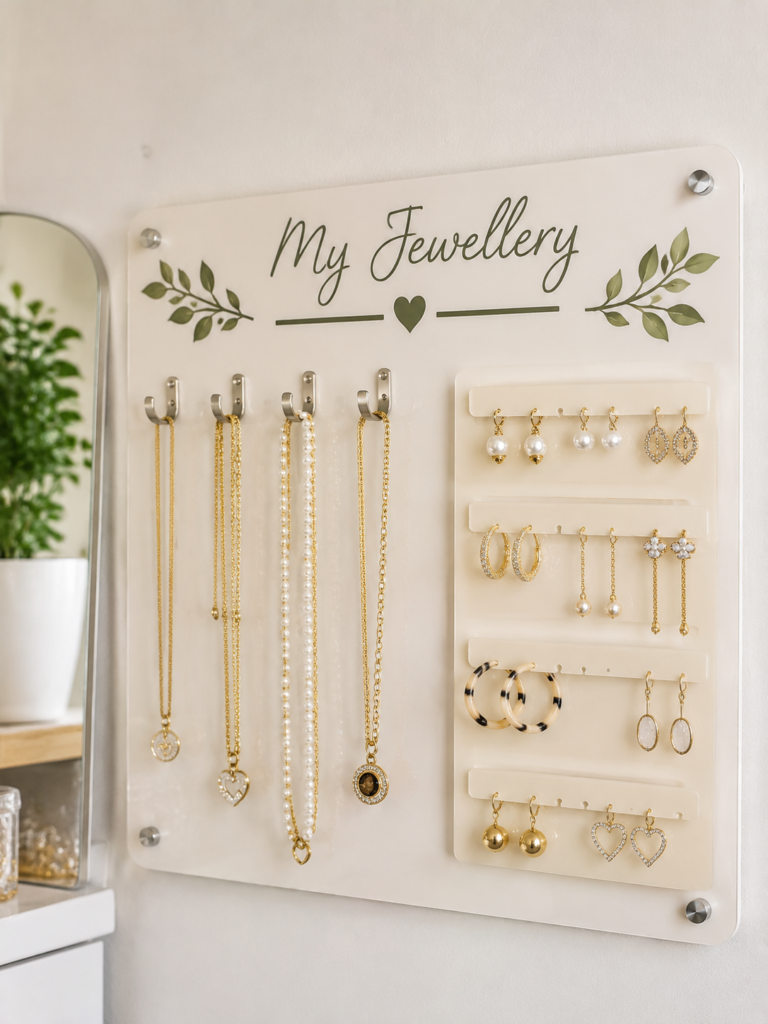
Necklaces hidden in boxes or tangled together in drawers are not always easy to find when getting dressed.
A jewellery display board puts frequently worn pieces within view while turning them into part of the room’s decoration. It can also make a dressing area feel more organised and personal.
How to make it: Select a backing board large enough to accommodate the jewellery collection. Add hooks along the top or sides for necklaces and bracelets, leaving enough space between them to prevent tangling.
Earrings require a different arrangement, such as small drilled holes, mesh or purpose-made holders; adhesive vinyl alone cannot support them.
Use Cricut-cut names, labels or decorative shapes to personalise the board, then secure all hooks and holders firmly. Position it where the jewellery can be reached without knocking other pieces off their hooks.
Give compatible blanks colourful, permanent designs with 25 Easy Cricut Projects Using Cricut Infusible Ink.
21. Sports Medal Display Boards
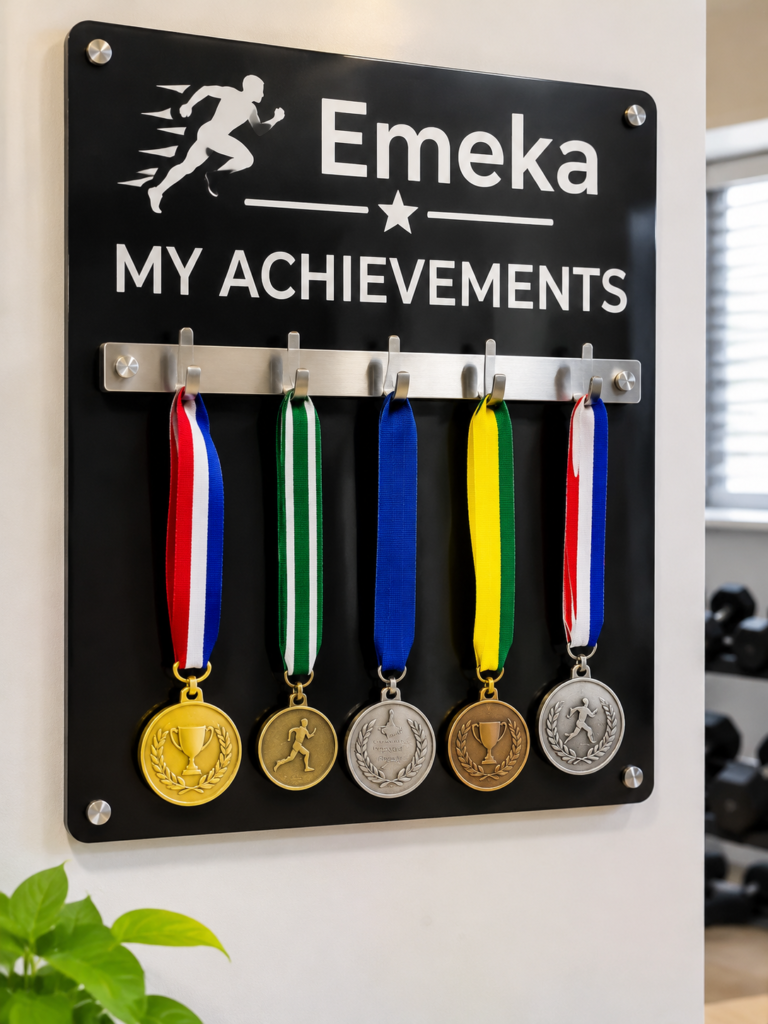
Medals often represent months of practice, personal milestones and memorable competitions.
Rather than keeping them tucked away in a drawer, arrange them on a dedicated display board that celebrates the recipient’s achievements.
Personalised lettering and a sport-specific design can make the display a meaningful feature in a bedroom, study or home gym.
How to make it: Choose a sturdy wooden backing board and plan the number of medals it needs to hold.
Add the recipient’s name, sport, team or a short heading using Cricut-cut vinyl. Install metal hooks or a suitable medal-holding bar, spacing them so the ribbons hang freely without bunching together.
The hooks and mounting system must support the combined weight of the medals, so do not rely on vinyl or decorative backing material for structural strength. Use appropriate wall fixings for the finished board.
Vinyl makes it possible to personalise a wide range of everyday items. Start with 23 Cricut Projects for Beginners Using Vinyl.
22. Children’s Artwork Display Rails
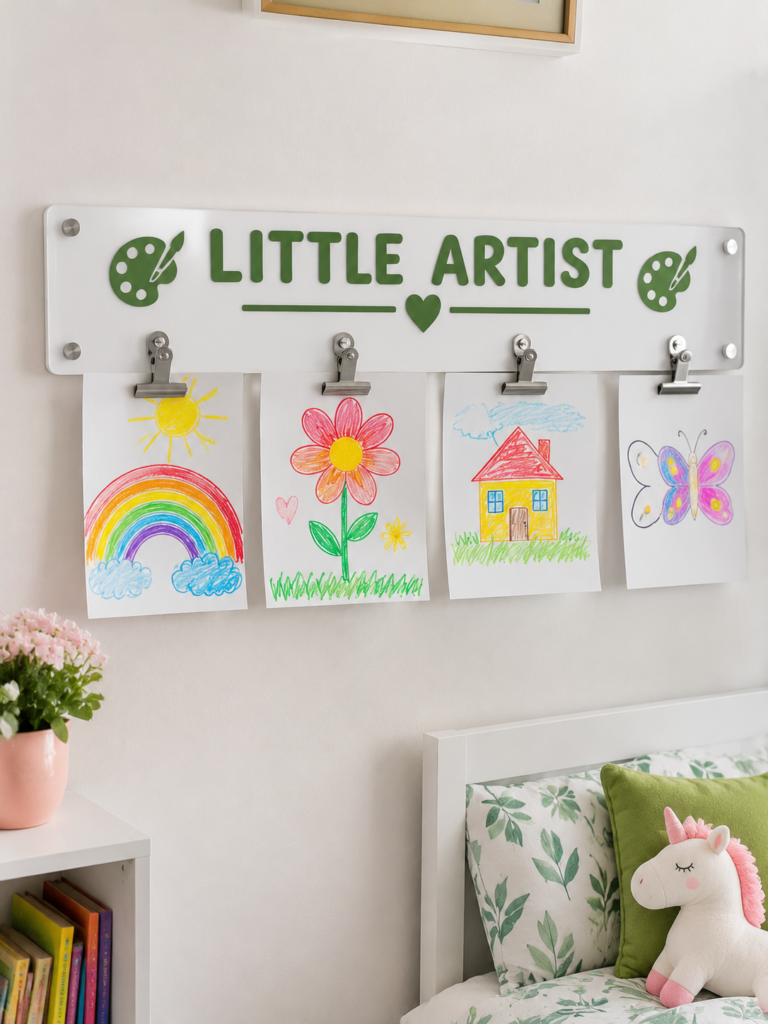
Children bring home drawings, paintings and school projects that deserve more than a temporary place on the refrigerator.
An artwork display rail creates a changing gallery where new creations can take the place of older ones without constantly adding more frames to the wall. It also gives children a visible place to share their work with the family.
How to make it: Start with a wooden rail long enough to display several sheets of artwork. Attach clips or paper holders along its length, leaving enough room for different paper sizes.
Use your Cricut to add a child’s name, Little Artist or another personalised title to the front. Check that the clips hold paper securely without tearing it and that the rail is firmly attached to the wall.
For a growing collection, consider adding a second rail beneath the first to create a simple gallery arrangement.
Wedding products can sit alongside other handmade items in your shop. Find more selling ideas in 25 Easy Cricut Projects to Make and Sell for Extra Money.
23. Custom Growth Chart Wall Rulers
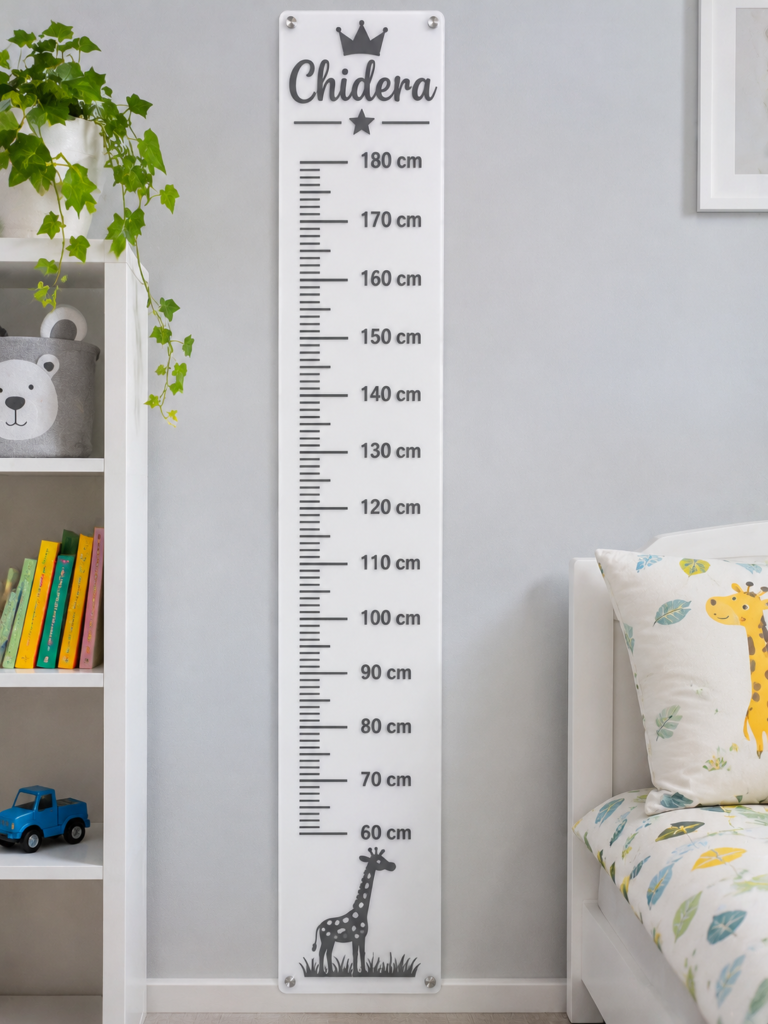
Children grow quickly, and a growth chart gives families a way to record those changes over the years.
Instead of marking measurements directly on a wall, create a tall wooden ruler that can become part of a child’s bedroom or playroom decor.
Personalised lettering and a carefully designed scale make it both a decorative feature and a keepsake that can move with the family.
How to make it: Start with a long, straight wooden board and decide on the measurement system before creating the design.
Build the scale with evenly spaced markings and clearly labelled measurements, checking every interval against a reliable ruler or measuring tape.
Add a child’s name or a small decorative detail, then transfer the design onto the board using adhesive vinyl.
Pay particular attention to the starting point: the chart must account for the distance between its bottom edge and the floor when mounted. Verify the completed scale before recording any measurements.
Simple designs can still catch a buyer’s eye. See 21 Simple Cricut Projects for Beginners That Actually Sell for ideas worth trying.
24. Personalised Nursery Name and Birth Detail Plaques
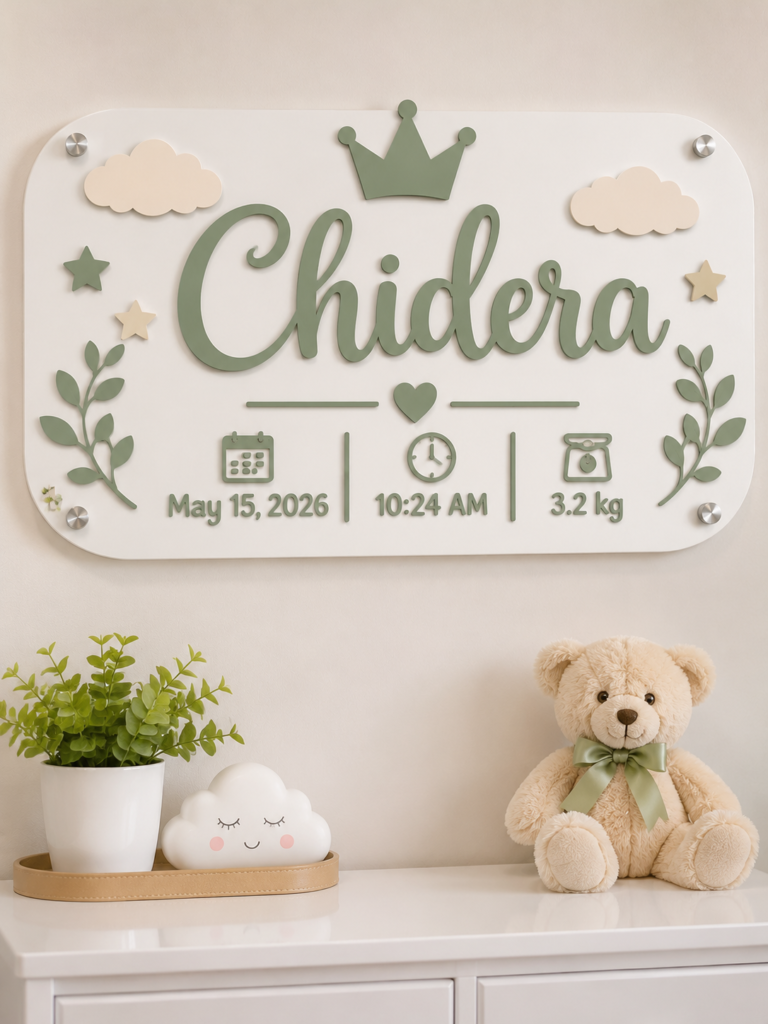
A child’s name can become the focal point of a nursery wall when displayed on a personalised plaque.
Adding selected birth details, such as the date, time or birth weight, makes the piece more meaningful and gives the room a personal finishing touch.
Soft colours, simple illustrations and carefully arranged lettering can also complement the nursery’s existing colour scheme.
How to make it: Choose a wooden or acrylic plaque with enough space for the name and additional details.
Make the name the largest element, then arrange the smaller information beneath it so everything remains easy to read.
Add decorative details such as stars, clouds, animals or simple floral shapes without allowing them to compete with the lettering.
Apply the cut vinyl to the prepared surface and check every spelling, date and measurement before fixing the design permanently. This is particularly important when making a plaque from details supplied by someone else.
New to Cricut and unsure where to begin? These 22 Easy Cricut Projects for Beginners You Can Make at Home offer an approachable starting point.
25. Interchangeable Seasonal Wall Medallions
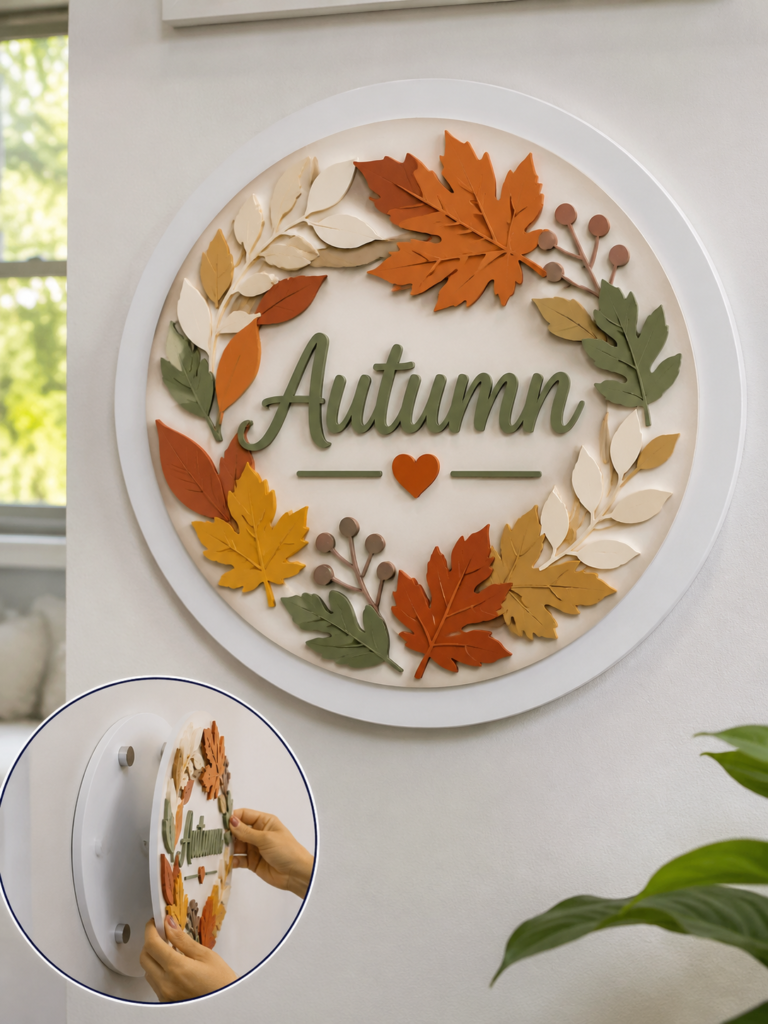
Seasonal decorations often require replacing an entire display whenever a new occasion arrives.
An interchangeable medallion solves this by keeping one base on the wall while allowing the decorative centre to change.
A floral design for spring, a sun motif for summer, autumn leaves or a festive winter arrangement can refresh the same space throughout the year without requiring a completely new wall piece each time.
How to make it: Create a fixed circular backing with a removable front insert. Decide on one standard diameter and make every seasonal design to fit that measurement.
Cardstock, thin decorative wood or suitable pre-cut blanks can provide different finishes, depending on the design.
Attach the inserts with hook-and-loop fasteners or another secure, removable fastening system.
Test each one to ensure it stays in place and can be changed without damaging the backing. Keep the decorative layers thin enough to fit the frame or mounting arrangement.
Get comfortable with your machine through 19 Easy Cricut Projects for Beginners, featuring simple ideas to practise.
26. Personalised Door Welcome Plaques
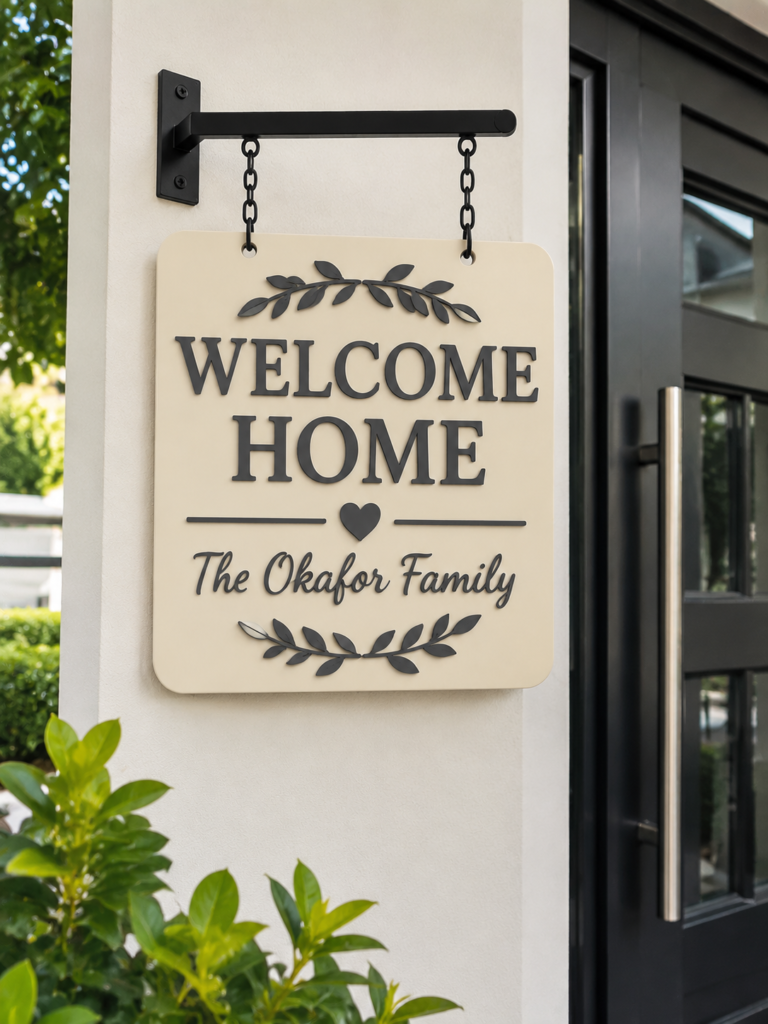
The entrance to a home offers an opportunity to introduce its character before visitors even step inside.
A personalised welcome plaque can display a family name, house number or short greeting, giving the doorway a more distinctive appearance.
Decorative lettering, painted details or a simple seasonal motif can make the entrance feel more inviting while complementing the home’s exterior style.
How to make it: Choose a plaque material and finish according to where it will hang. A sheltered indoor entrance has different requirements from an exposed front door that receives rain and direct sunlight.
Create the lettering and decorative details, then apply them to the prepared blank.
Outdoor-rated vinyl may be suitable for some exterior applications, but the board, adhesive and protective finish must also be appropriate for the conditions.
Add secure hanging hardware and make sure the completed plaque can withstand its intended display environment.
Personalised presents become more meaningful when they reflect the recipient. Explore 33 Cricut Projects for Beginners That Make Great Personalized Gifts for gift-making inspiration.
27. Backlit Personalised Name Signs
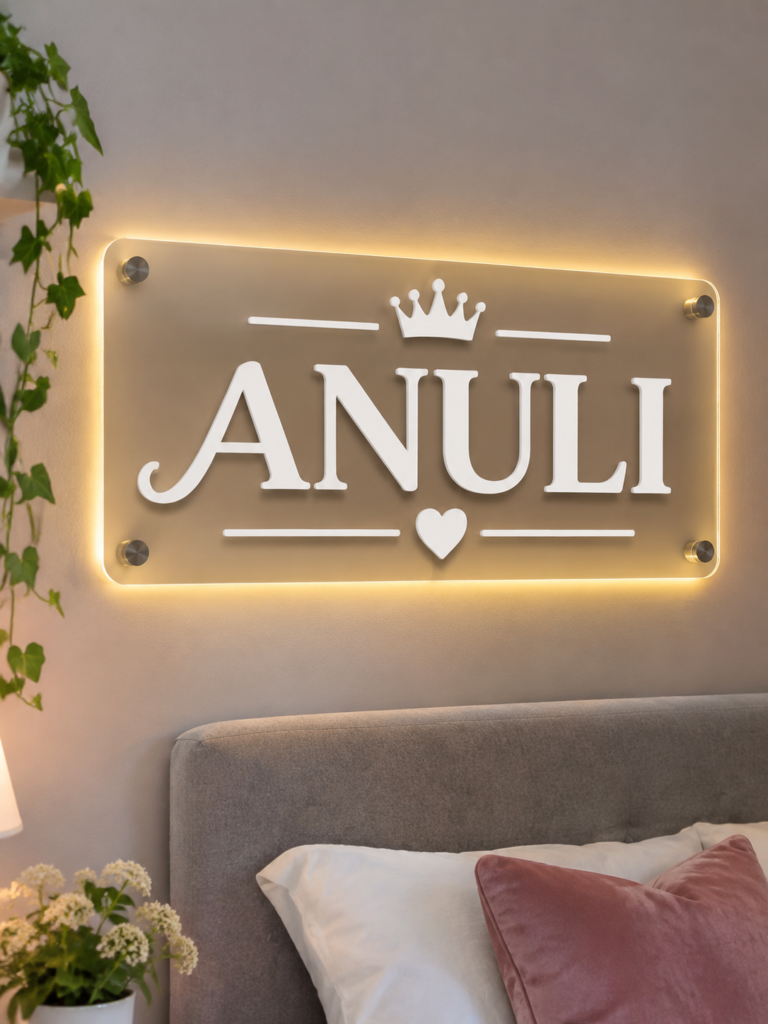
Ordinary lettering takes on a different appearance when light shines around or behind it.
A backlit name sign creates a soft illuminated feature that can make a bedroom, nursery or entertainment space feel more distinctive, especially when the surrounding room lighting is low.
The glow also helps the lettering stand out without relying on elaborate decorative details.
How to make it: Start with a suitable clear or translucent panel and a ready-made LED lighting kit designed for sign-making. Plan the name or wording so the letters remain readable when illuminated.
Apply compatible vinyl lettering or attach layered decorative letters to the panel, then position the LED components according to the kit manufacturer’s instructions.
Keep the wiring neatly routed and provide the ventilation and clearance required by the lighting system.
Check that every material is suitable for use with the selected LED kit. The Cricut handles the decorative lettering and shapes; the electrical components and lighting system must be purchased separately.
Keep little hands busy with creative activities from 35 Easy Cricut Projects for Kids.
What to check before making Cricut wall decor
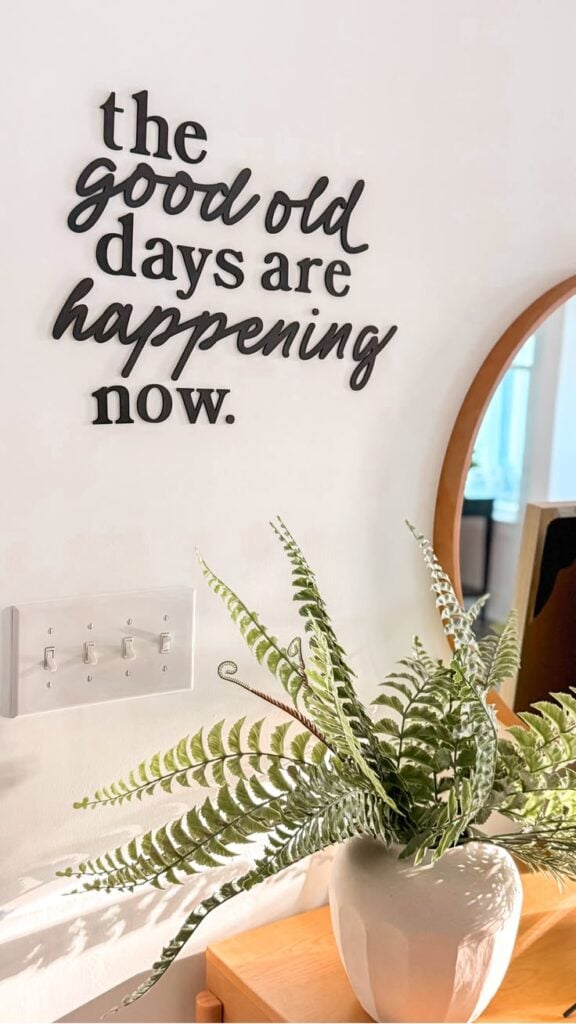
Before starting any of these Cricut wall decor ideas, check that your machine, materials and chosen display surface are suitable for the project.
A little preparation can prevent wasted supplies, poor results and damage to your walls.
1. Check whether your Cricut can cut the material
Cricut machines cut compatible materials such as adhesive vinyl, paper, cardstock and stencil film.
Some models can also handle speciality materials, including certain types of wood veneer. However, the machine does not cut every craft material used in these projects.
Wooden boards, acrylic panels, mirror blanks, clock mechanisms and mounting hardware are often purchased ready-made, with the Cricut adding the lettering or decorative details.
Check Cricut’s material compatibility guide for your machine before buying supplies, as the recommended blade, mat and settings can vary.
2. Choose wall vinyl carefully
Removable vinyl is generally a better choice than permanent adhesive vinyl for temporary wall designs, but removal is not guaranteed to be damage-free.
Wall texture, paint type, paint condition and how recently the surface was painted can all affect how well vinyl sticks and comes off. Test a small, hidden area first and follow the vinyl manufacturer’s instructions.
Cricut states that its removable vinyl can last up to two years under specified conditions, but this is not a guarantee for every painted wall.
Permanent vinyl is more suitable for longer-lasting applications on compatible surfaces.
Handmade ornaments, decorations and festive details can make the season more special. See 31 Easy Cricut Projects for Christmas.
How to make large wall designs without misalignment
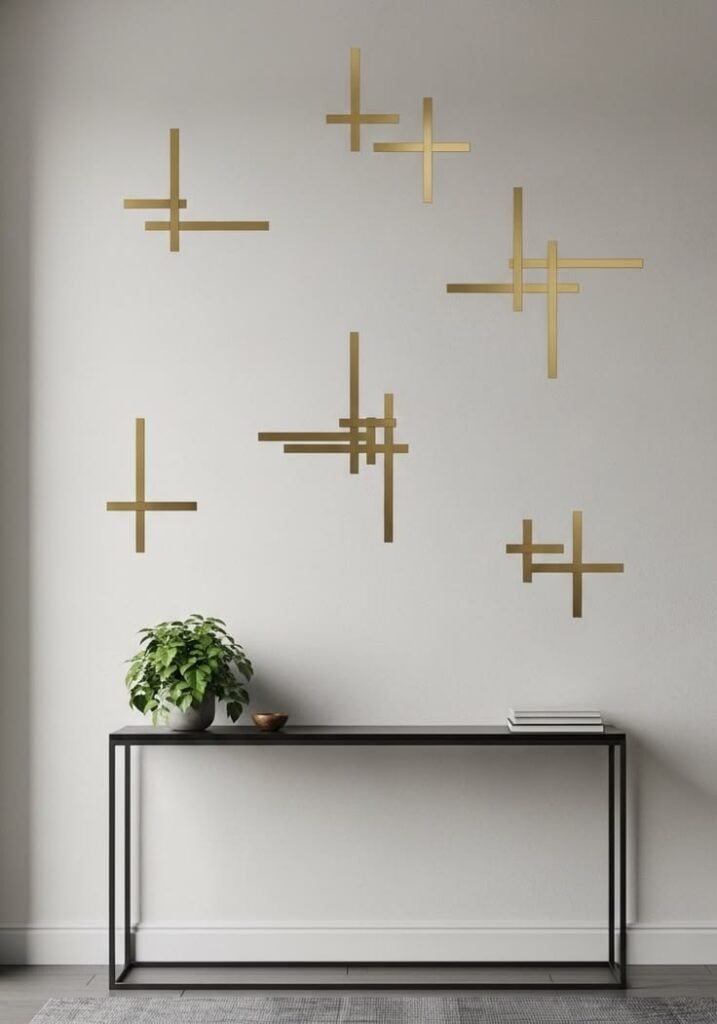
Large Cricut wall decor designs, such as quotes, murals and oversized lettering, are easier to apply when you work in sections rather than handling the entire design at once.
These steps help keep the spacing even and prevent parts of the design from sitting crooked on the wall.
- Break the design into sections: Check the size limits of your machine and divide oversized lettering, quotes or patterns into smaller pieces that are easier to cut and handle.
Keep the design open in Cricut Design Space as a reference so you can see how the sections fit together. Leave clear reference points where the pieces should meet, and avoid unintended gaps or overlaps.
- Mark a level guide on the wall: Decide where the design should sit, then use a spirit level or laser level to mark a light reference line with painter’s tape.
Measure the centre of the wall or the intended display area so the design does not end up off-centre. This guide will help you position each section consistently.
Sometimes the hardest part of crafting is choosing what to make next. Find fresh inspiration in 30 Cricut Projects to Make When You Don’t Know What to Make.
- Apply transfer tape carefully: Choose regular Cricut Transfer Tape for most smooth vinyl types. StrongGrip is intended for textured vinyl and may be too sticky for ordinary vinyl.
For large designs, Cricut recommends securing a small part of the tape to the design first, then unrolling it gradually and smoothing it down with a scraper. Burnish across the design and its reverse side before removing the backing paper.
- Attach one section at a time: Position the first piece along your reference line and secure a small area before removing the rest of its backing. Smooth the vinyl onto the wall with a scraper, working outward from the attached area.
Repeat with the remaining sections, checking their alignment against your guide as you go. Cricut also recommends starting at the centre or one end when applying long designs and working outward.
- Remove the transfer tape slowly: Peel it back at a low, sharp angle rather than pulling it straight away from the wall. Should any vinyl lift with the tape, press it back down, burnish again and continue peeling carefully.
No heat press? You can still make plenty of useful and creative items. Check out 21 Cricut Projects for Beginners Without a Heat Press.
Conclusion
That large blank wall above the sofa does not have to stay empty, and the space beside the front door can be more than just somewhere to hang a clock.
A handmade piece can give these areas a character that ordinary store-bought decorations may not capture.
The beauty of these Cricut wall decor ideas is that you can choose the colours, details and materials to suit your room rather than settling for a design that almost fits.
Look around your home and pick the wall that could use a little attention. You may already have a project in mind that would make that space feel more complete.