Looking for something different to create with your Cricut? Find fresh Cricut projects to make, including useful crafts, children’s activities and creative experiments.
Creative block can creep in even when you own a Cricut and have plenty of experience using it. You open Design Space, scroll through designs, consider projects you have already tried and close the software without cutting a single thing.
Sometimes, the problem is not a lack of materials or creativity but getting stuck on the same familiar uses for your machine.
Cricut can do considerably more than cut names from vinyl or create decorative shapes for crafts.
Depending on your machine and compatible accessories, you can use it to construct moving paper mechanisms, make precision stencils, develop packaging prototypes, create engraved pieces and experiment with paper engineering.
These 30 Cricut projects to make when you don’t know what to make bring together different applications of the machine, including some that introduce techniques you may not have tried before.
Supposedly, you want a quick project to get your creativity moving again or something more challenging to learn, there are plenty of new directions to take.
Affordable materials can still produce thoughtful handmade presents, especially when a simple Dollar Store item is personalised with a name or design. Find more inspiration in 31 Easy Cricut Projects for Gifts.
Cricut Projects to Make
1. Reusable Gift Tags
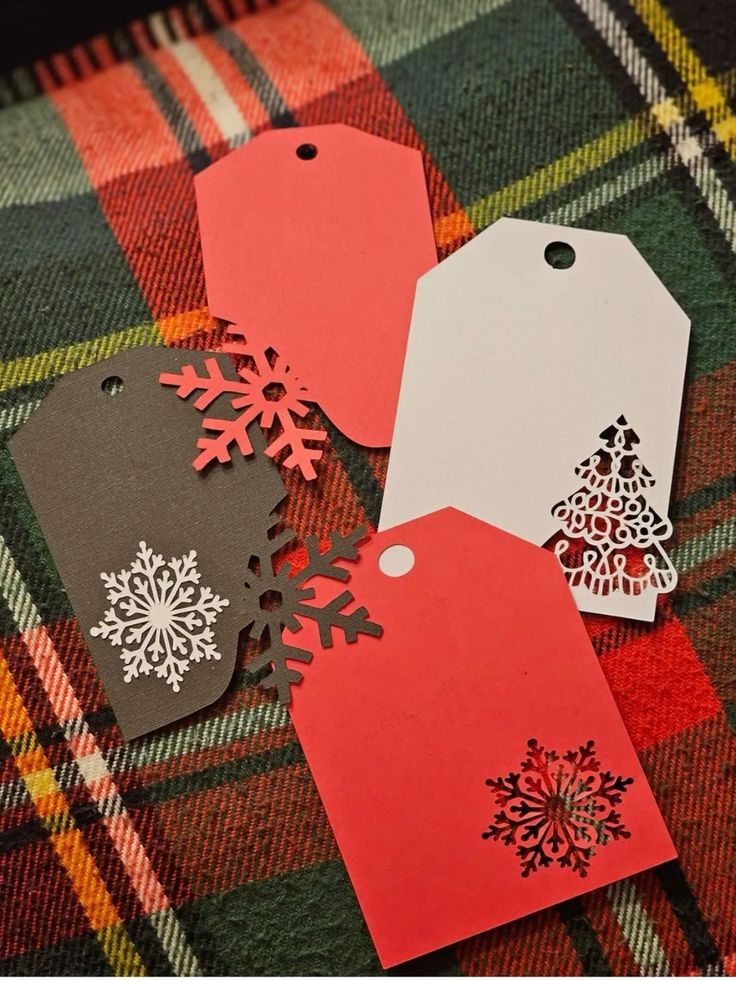
Instead of making a new gift tag every time you wrap a present, create a small collection of reusable tags that can be brought out for different occasions.
Cut them from sturdy cardstock or thin kraft board in shapes such as circles, rounded rectangles, luggage tags or simple gift-label silhouettes.
Add a small hole near the top for threading ribbon or twine, leaving enough space to write the recipient’s name and a short message.
For a reusable finish, laminate the tags or cover them with a suitable dry-erase surface so you can write on them, wipe them clean and use them again. You can also add a small decorative detail using your Cricut’s drawing function rather than cutting several layers of material.
One detail worth considering is the writing surface. Ordinary cardstock is suitable for tags intended for one-time use, but repeated writing and erasing can wear it down.
A laminated surface with a compatible dry-erase marker makes the tags more practical for repeated use.
2. Page Corner Bookmarks
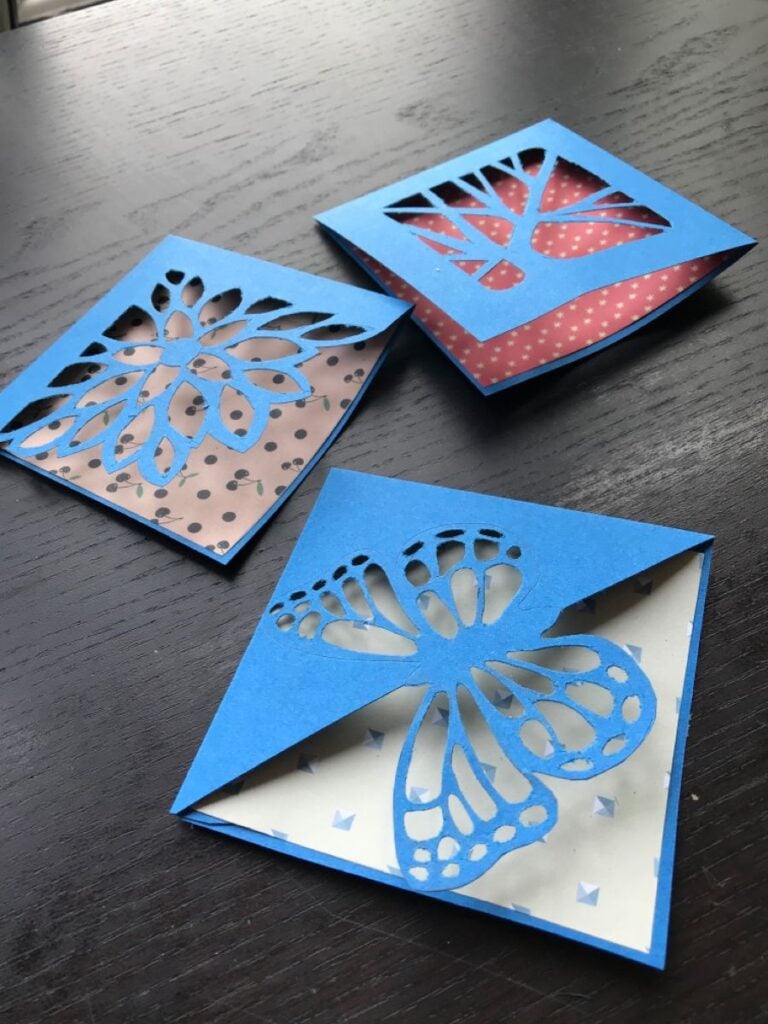
Loose bookmarks can easily fall out when a book is carried in a bag or moved around. A corner bookmark offers a different solution because it fits over the page rather than sitting loosely between two sheets.
Cut a pocket-style template from medium-weight cardstock, fold it into shape and secure the edges to create a small sleeve.
The Cricut can produce the main shape and cut decorative details for the front, such as flowers, animals or geometric patterns.
Keep the pocket opening wide enough to slide over a page without forcing it, and avoid bulky embellishments that could leave marks on the paper.
Teenagers may enjoy custom accessories and room items made with inexpensive supplies. More age-specific ideas are featured in 30 Cute Cricut Projects for Teen Girls.
3. Book Review Cards
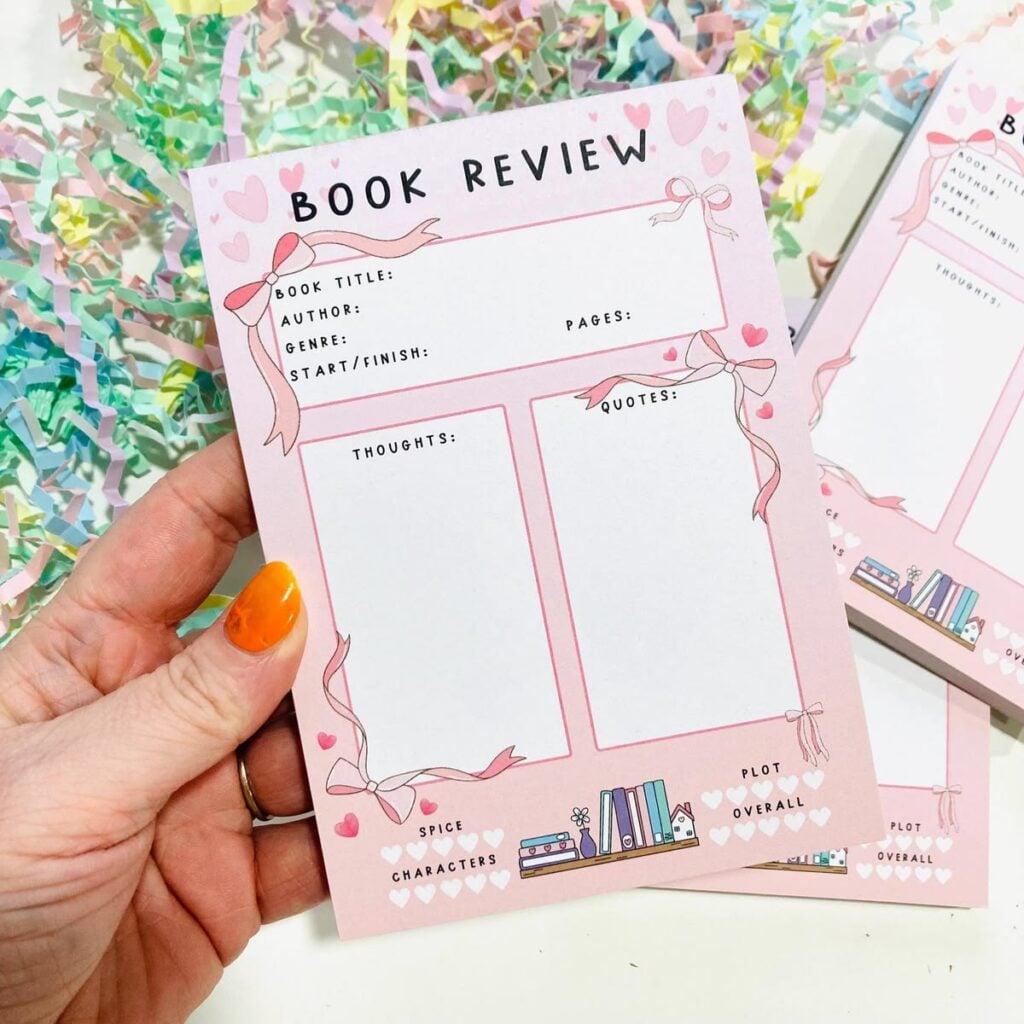
A completed book often leaves readers with details they want to remember, but those impressions can become difficult to retrieve months later.
Individual review cards provide a simple record of each book without requiring a lengthy journal entry. Set aside spaces for the title, author, completion date, rating, favourite passage and a short personal review.
A Cricut can cut the cards to a consistent size and use its drawing function to add headings and writing lines. Leave enough blank space for handwritten notes; an attractive layout is of little use when there is nowhere to write.
4. Reading Challenge Tracker
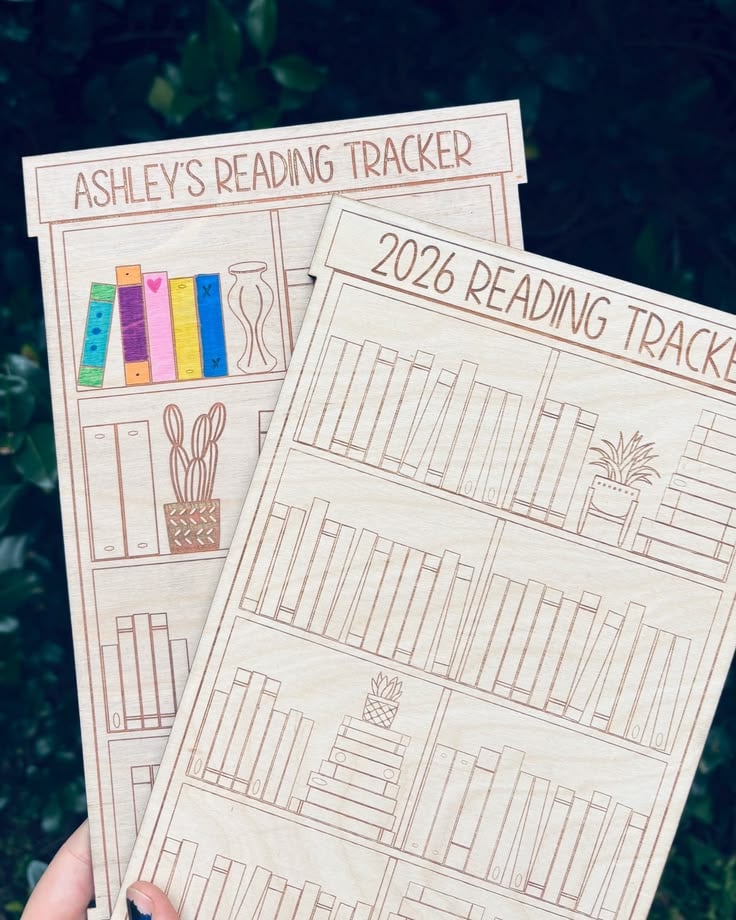
A reading goal becomes easier to follow when progress is visible. A tracker with numbered spaces gives readers somewhere to record each completed book, whether the target is 12 books in a year or a shorter personal challenge.
The Cricut can cut the tracker into a bookshelf, open-book or simple rectangular design, with numbered spaces added through drawing or cut lettering.
For something that can be updated throughout the year, laminate the finished tracker and use a dry-erase marker. Make each space large enough to write in or mark clearly.
Plain storage baskets, frames and containers from discount shops can become decorative pieces with a little personalisation. See 29 Easy Cricut Projects for Home Decor for more ways to customise everyday items.
5. Recipe Divider Tabs
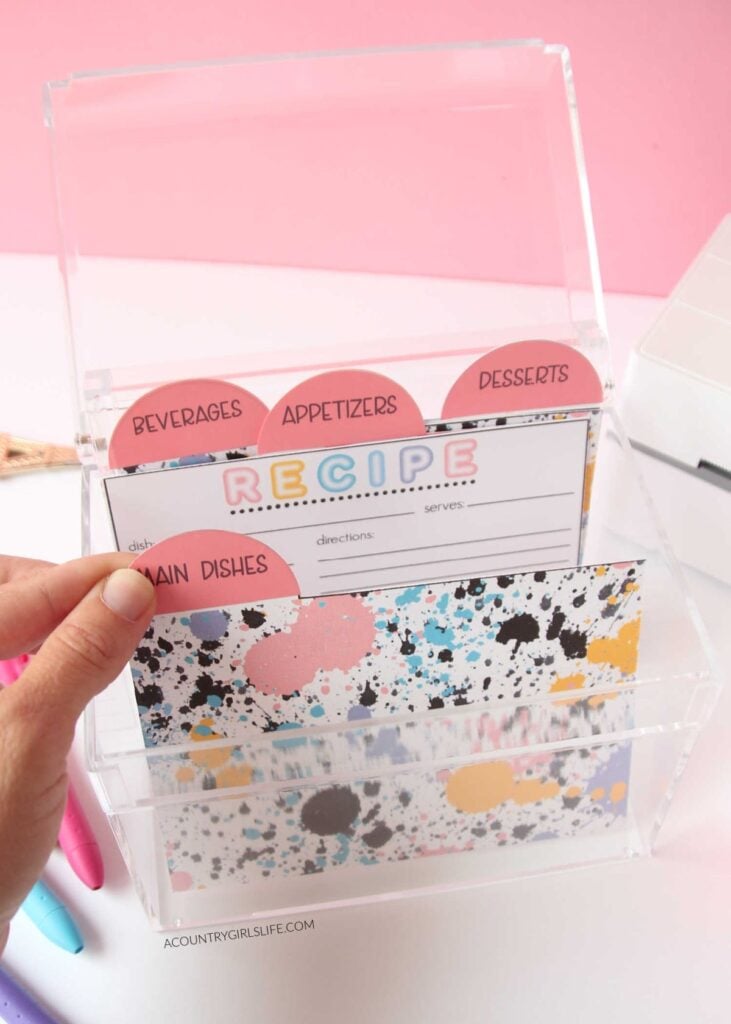
Finding a particular recipe in a thick binder can take longer than expected, especially when handwritten recipes, printed pages and clipped instructions are mixed together.
Divider tabs make the collection easier to navigate. Create separate sections for baking, breakfast, main dishes, soups, desserts and drinks, then cut the dividers from cardstock using the Cricut.
The tabs should extend beyond the edges of the recipe pages so their labels remain visible when the binder is closed.
Lamination is worth considering for dividers that will be handled frequently, particularly in a kitchen where splashes and food residue are possible.
Cardstock is another affordable material for making tags, paper decorations and small personalised projects. Readers can find more ideas in 27 Easy Cricut Projects Using Cardstock.
6. Paper Pencil Toppers
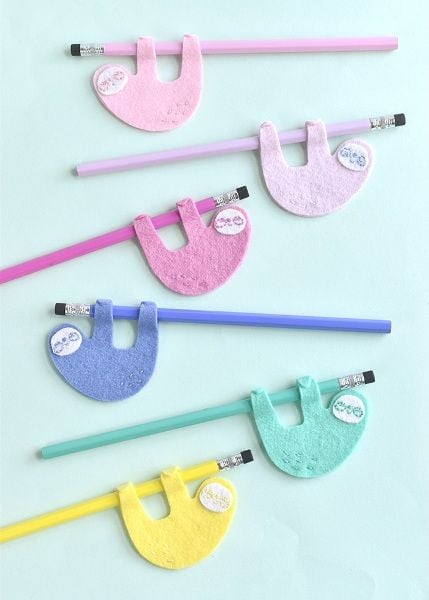
A simple pencil becomes more interesting with a small decorative topper, and the project offers a straightforward way to experiment with layered paper shapes.
Animal faces, stars, fruit and miniature characters are suitable designs, provided they remain lightweight. Cut matching front and back shapes, then attach them to a narrow paper sleeve that fits around the pencil.
The sleeve is important because a flat decoration glued directly to the pencil may not stay in place. Keep the finished topper small enough that it does not interfere with holding or sharpening the pencil.
7. Envelope Liners
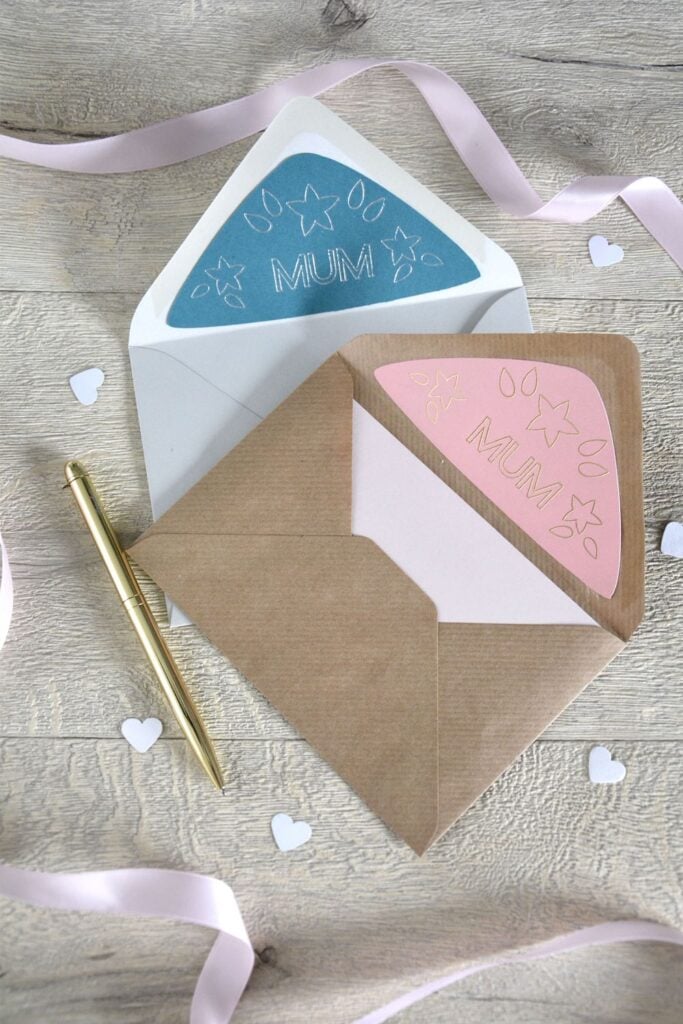
The inside of an envelope provides an opportunity to introduce colour and pattern without changing its exterior. A paper liner can complement a handwritten letter, invitation or announcement, particularly when the envelope itself is plain.
Measure the envelope’s interior and flap, then use the Cricut to cut a matching insert from lightweight decorative paper.
The liner should stop below the envelope’s sealing strip and fit without bunching along the sides. Thick cardstock is unsuitable for most envelope liners because it adds unnecessary bulk and can make the envelope difficult to close.
8. Folded Paper Gift Boxes
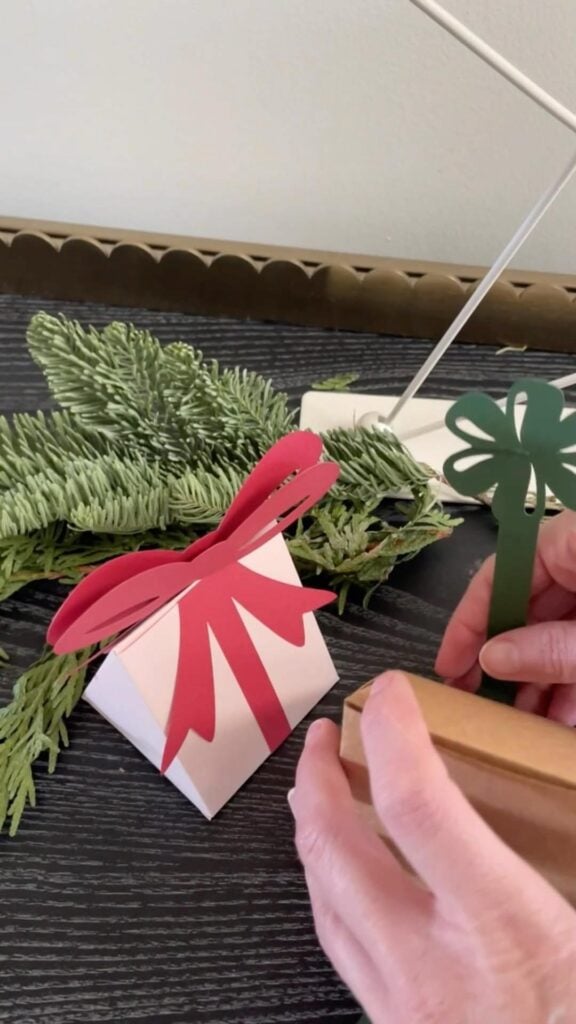
Small items often need packaging that is better suited to their size than a large commercial box. A folded cardstock box can hold lightweight jewellery, wrapped sweets, buttons, small stationery items or party favours.
Choose a box template based on the dimensions of the intended contents, then use the Cricut to cut its panels and score the fold lines with a compatible scoring tool.
Fold along the score marks and secure the tabs with paper adhesive. Before producing several boxes, assemble one sample to check the fit, corner alignment and strength of the finished structure.
Some inexpensive fabric accessories can also be personalised with Infusible Ink, provided the blank has the required compatible polyester content and coating. 25 Easy Cricut Projects Using Cricut Infusible Ink shares more projects using this technique.
9. Jigsaw Puzzles
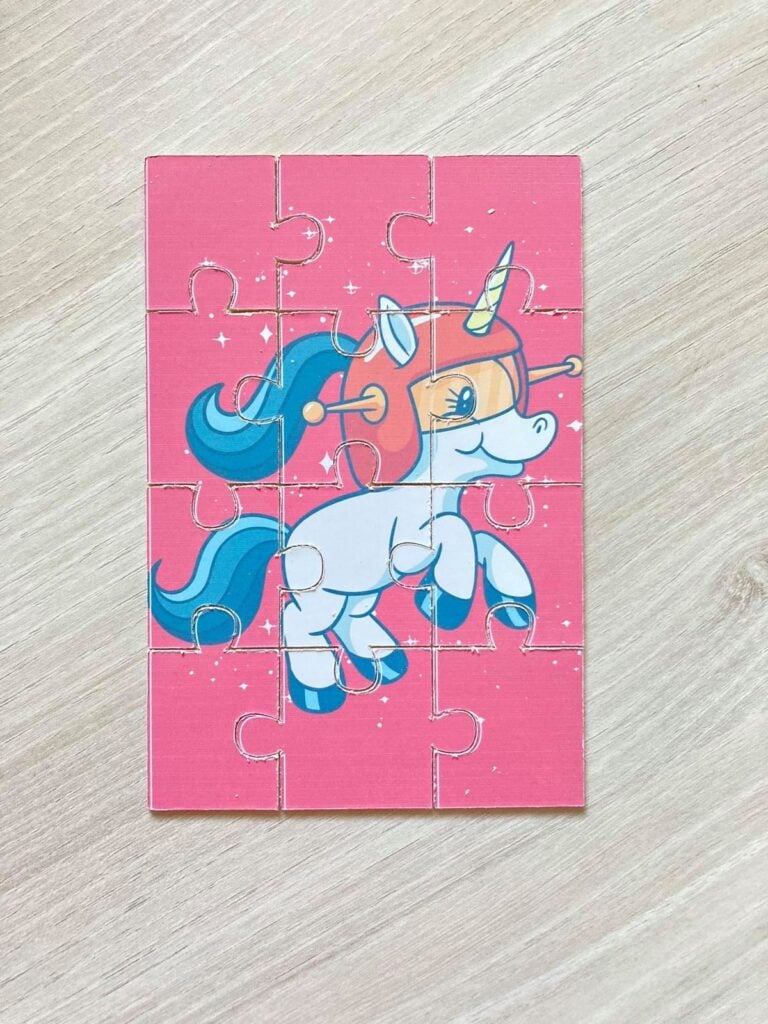
A homemade jigsaw puzzle can turn a favourite illustration, family photograph or child’s drawing into an activity that can be completed more than once.
Print the chosen image onto suitable cardstock, attach it to a firm backing material and use the Cricut to cut simple interlocking puzzle shapes. For a first attempt, start with a small puzzle of about 6–12 pieces rather than a complicated design with many tiny sections.
The backing needs to be firm enough to prevent the pieces from bending during handling. Also, test the cut on a spare piece of the same material before cutting the finished picture.
This is one of the Cricut projects to make when you want to experiment with Print Then Cut, although the supported material thickness and print dimensions depend on your machine.
Many inexpensive blanks can be decorated with adhesive vinyl or paper designs, so a heat press is not always necessary. Readers can find more alternatives in 21 Cricut Projects for Beginners Without a Heat Press.
10. Paint Colour Swatch Cards
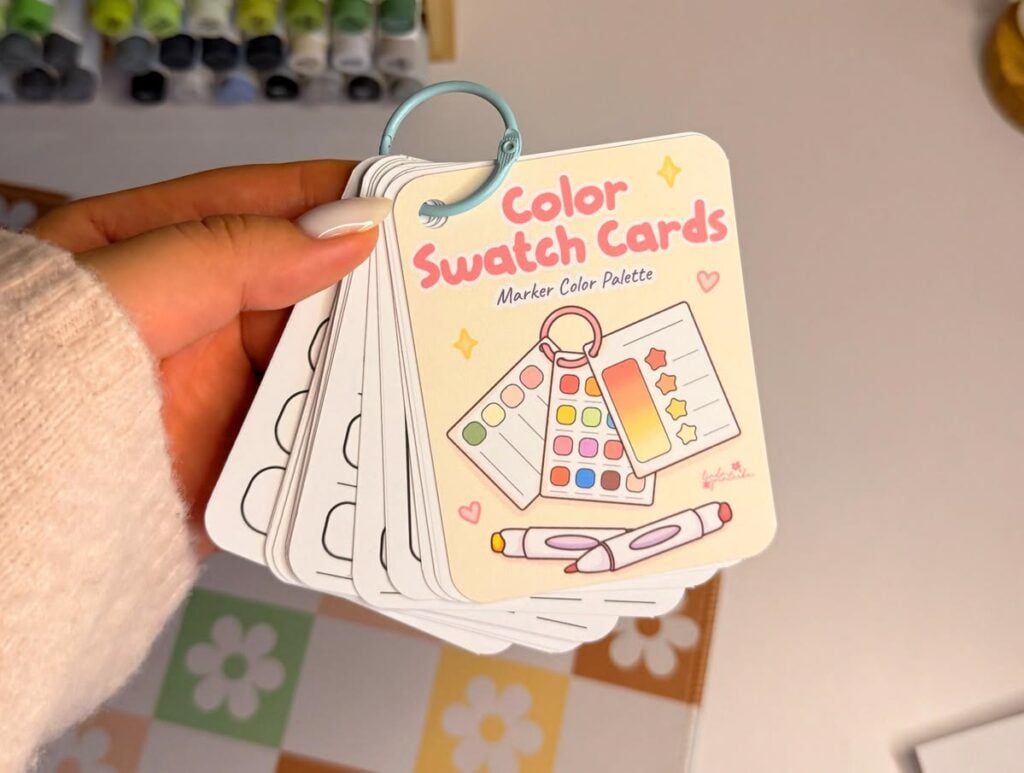
Artists often mix a colour they like but struggle to reproduce the same shade later. A collection of paint swatch cards provides a simple reference for recording those mixtures.
Cut uniform cards from watercolour paper or another paper suited to the paint being used, then add spaces for the colour name, paint brand, colour combination and date.
For a more useful reference, include a small painted sample alongside the written information. You can use the Cricut drawing function to add headings and dividing lines, but leave the actual painting until after cutting.
Watercolour paper can be relatively thick, so check your machine’s material compatibility and test the cut before producing a complete set.
Adhesive vinyl can give plain Dollar Store containers, notebooks and other suitable surfaces a customised finish. More beginner-friendly examples are available in 23 Cricut Projects for Beginners Using Vinyl.
11. Pressed Flower Bookmarks
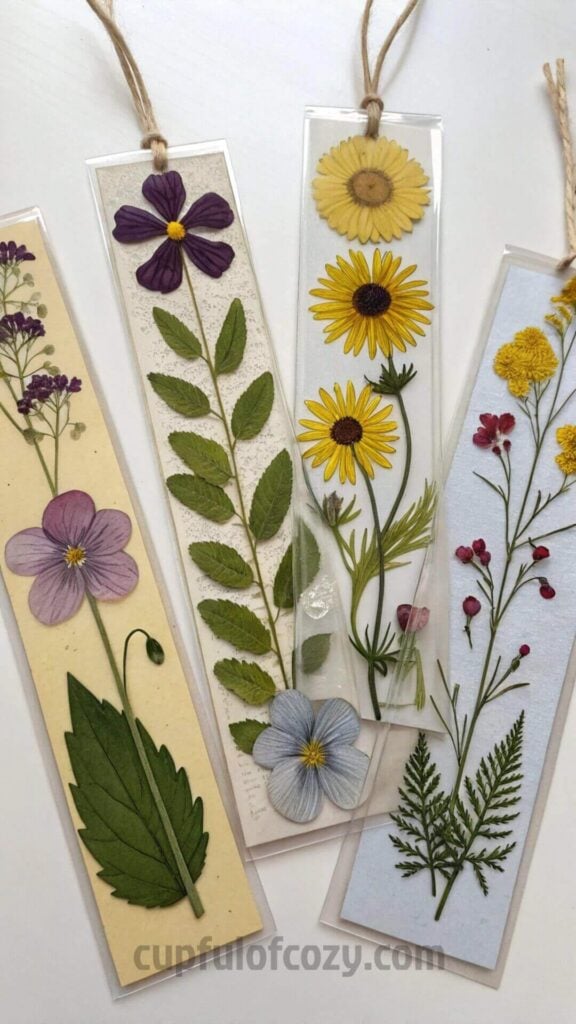
Pressed flowers can make attractive bookmarks, but their delicate petals and stems need protection from repeated handling. Start by selecting completely dried, flattened flowers.
Arrange them on a paper bookmark base, leaving enough room around the edges for a neat finish.
The Cricut can cut the bookmark shapes and small decorative details, while the floral arrangement and lamination are completed separately.
One important detail is moisture. Flowers that have not dried completely can discolour or develop mould when sealed.
Use a suitable laminating pouch or clear protective covering, following its instructions, and leave a small margin around the design so the pressed material remains enclosed. Avoid using fresh flowers directly in the finished bookmark.
Plain treat bags, containers and accessories can be customised for Halloween celebrations using suitable vinyl and cardstock. 33 Easy Cricut Projects for Halloween offers more seasonal inspiration.
12. Embroidery Pattern Stencils
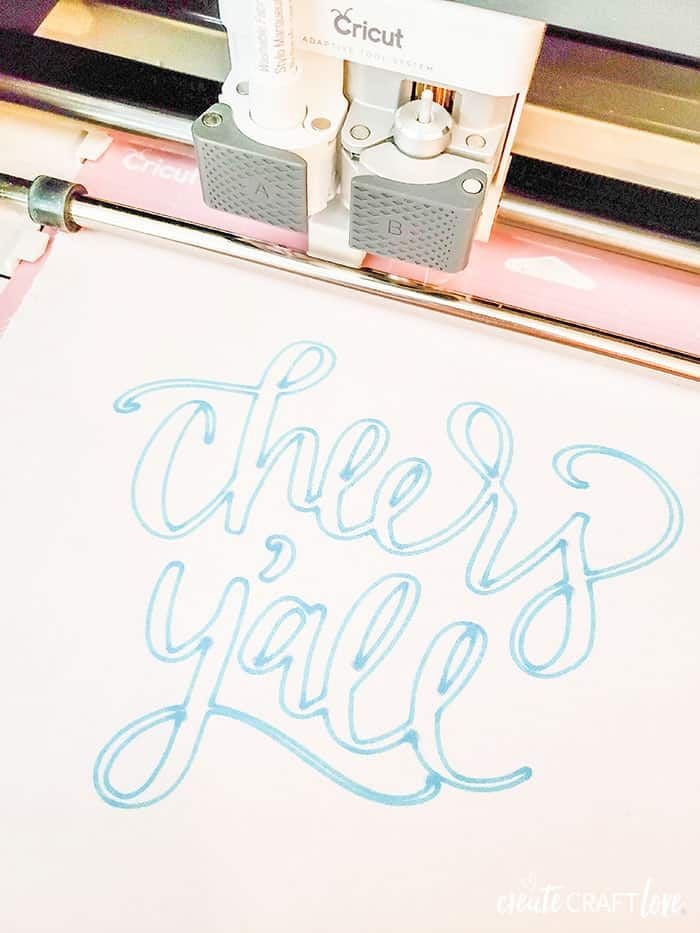
Transferring an embroidery design onto fabric can be difficult when the pattern contains repeated shapes or fine details. A reusable stencil offers another way to position the design before stitching.
Cut a simple outline from suitable stencil material, place it over the fabric and transfer the design using a fabric-safe marking method.
For example, a small collection of leaves, stars, flowers or geometric shapes can be arranged into a repeated embroidery pattern.
Keep the stencil openings large enough for the marking tool to pass through without smudging.
Also, test the marking method on a fabric offcut first to make sure the marks can be removed without leaving stains. The Cricut prepares the stencil; the embroidery itself is done by hand.
13. Sewing Pattern Labels
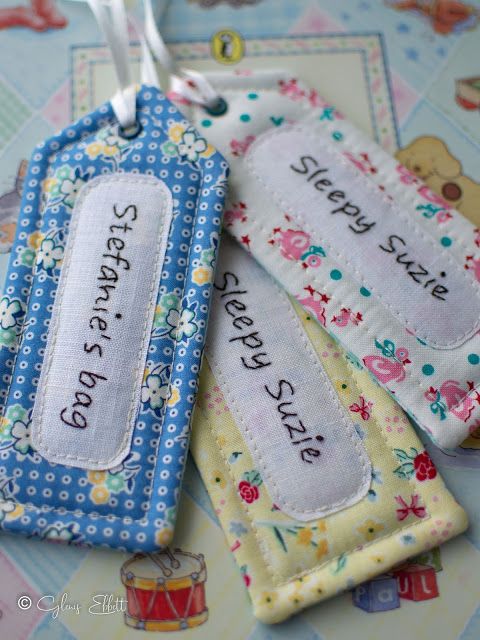
When sewing patterns contain several pieces, it is easy to confuse similar shapes, especially when working with different garment sizes or fabric sections.
Make reusable labels that identify each pattern piece by name, size, cutting instructions and the number of pieces required.
For example, a label might read Front Bodice – Cut 2 – Main Fabric, while another identifies the sleeve or waistband.
Use the Cricut to cut the labels from cardstock or suitable writable material, then attach them to the corresponding pattern pieces with clips or removable fasteners.
Avoid permanently sticking labels to delicate tissue patterns, as removing them may tear the paper. This project is particularly useful when organising a collection of patterns that will be used repeatedly.
Low-cost blanks can help reduce the initial expense of making products to sell, although material quality and the time spent personalising each item still matter. Explore 25 Easy Cricut Projects to Make and Sell for Extra Money for more product ideas.
14. Watercolour Painting Masks
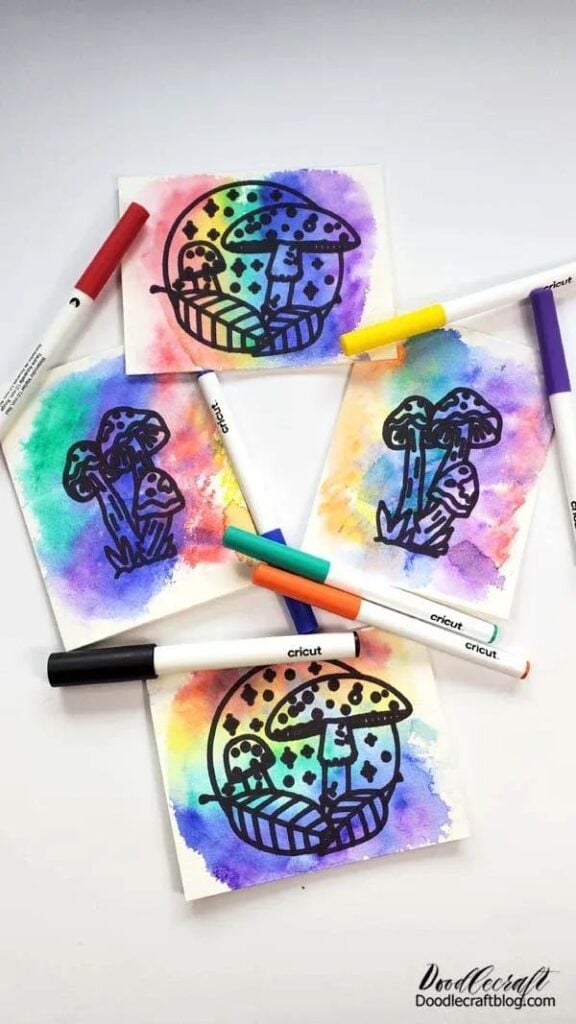
Watercolour artists often need to keep certain parts of a painting white while applying colour around them. A masking template can make this easier, particularly when repeating shapes or creating clean geometric areas.
Use the Cricut to cut simple shapes from suitable masking film or watercolour masking material, then position them over the areas you want to protect.
The choice of material matters here. Ordinary adhesive vinyl is not automatically suitable for watercolour masking because its adhesive may damage paper or leave residue.
Choose a product specifically intended for the surface and painting technique, and test it on a spare piece of the same paper before using it on finished artwork. Remove the mask according to the manufacturer’s instructions.
15. Scrapbook Photo Corners
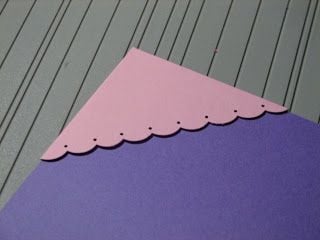
Photo credit: @ Unknown
Photographs do not always need to be glued directly onto scrapbook pages. Paper photo corners provide an alternative by holding the corners of a picture while leaving most of the photograph untouched.
Cut small triangular or pocket-style pieces from decorative cardstock, fold them where necessary and attach them to the scrapbook page to create slots for the photograph.
The advantage is that pictures can be removed or replaced without peeling adhesive from their backs. Make sure the openings are sized to accommodate the photograph corners without squeezing them.
For treasured or irreplaceable photographs, use acid-free and photo-safe paper and adhesive so the mounting materials are suitable for long-term storage.
Beginners interested in selling handmade items can start by testing a few simple products before buying supplies in bulk. 21 Simple Cricut Projects for Beginners That Actually Sell offers more ideas to consider.
16. Mini Paper Dolls
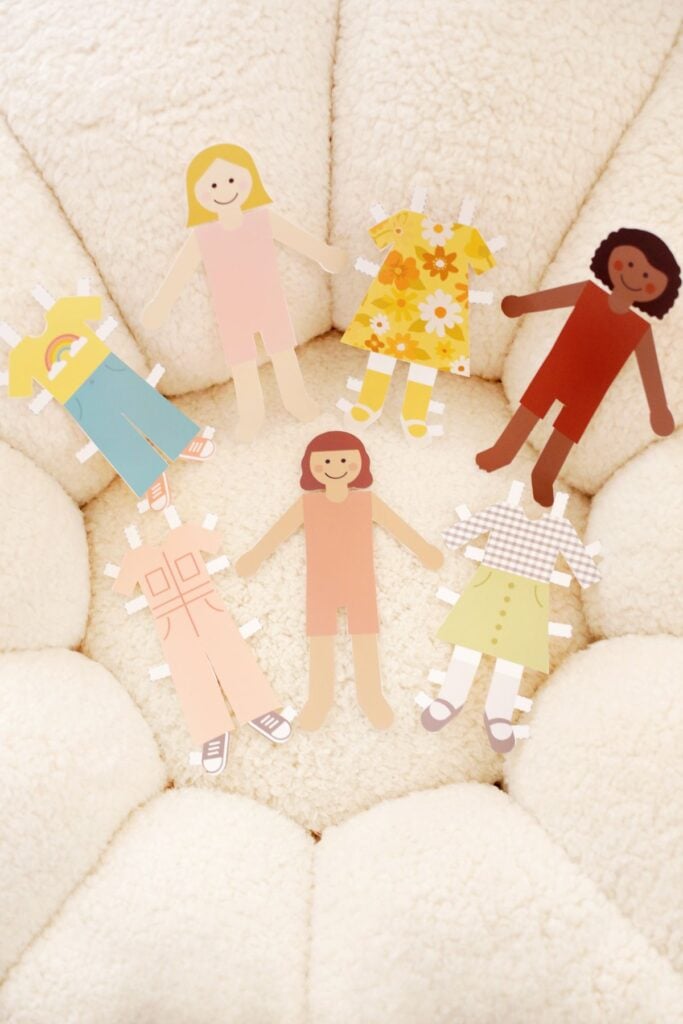
Paper dolls are a simple way to turn cut shapes into an activity for children, storytelling or imaginative play. Create a basic character with separate clothing pieces, such as shirts, dresses, trousers, skirts, hats and shoes.
The Cricut can cut the character and clothing outlines from cardstock, while small tabs can be added to help the clothes fold over the figure and stay in position.
Start with a relatively large character and simple clothing shapes. Very small pieces can be difficult for young children to handle, and narrow tabs may tear after repeated use.
You can also create several outfits for the same figure, allowing children to mix and match clothing rather than making a completely new doll for every design.
17. Drawer Measurement Labels
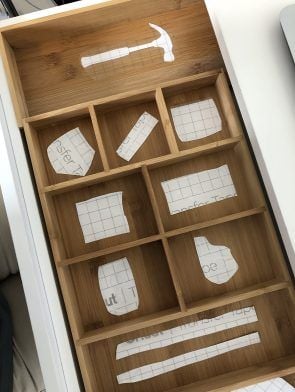
Knowing the exact dimensions of a drawer can save time when buying organisers, cutting drawer liners or replacing storage inserts.
Create a set of measurement labels showing the drawer’s width, depth and height, then attach each one inside the corresponding drawer or to its storage plan. Cricut can cut the labels to a consistent size and add the measurements using its writing function or cut lettering.
For a useful set, include the drawer’s location as well as its dimensions, such as desk – top drawer or workbench – tool drawer.
Use writable adhesive labels or removable label material so measurements can be updated when the drawer’s contents or layout changes.
Measure the inside space rather than the outside of the furniture, especially when planning to fit an organiser.
Making projects with affordable blanks is also a good way to practise basic cutting and application techniques at home. 22 Easy Cricut Projects for Beginners You Can Make at Home has more beginner-friendly options.
18. Reusable Plant Labels
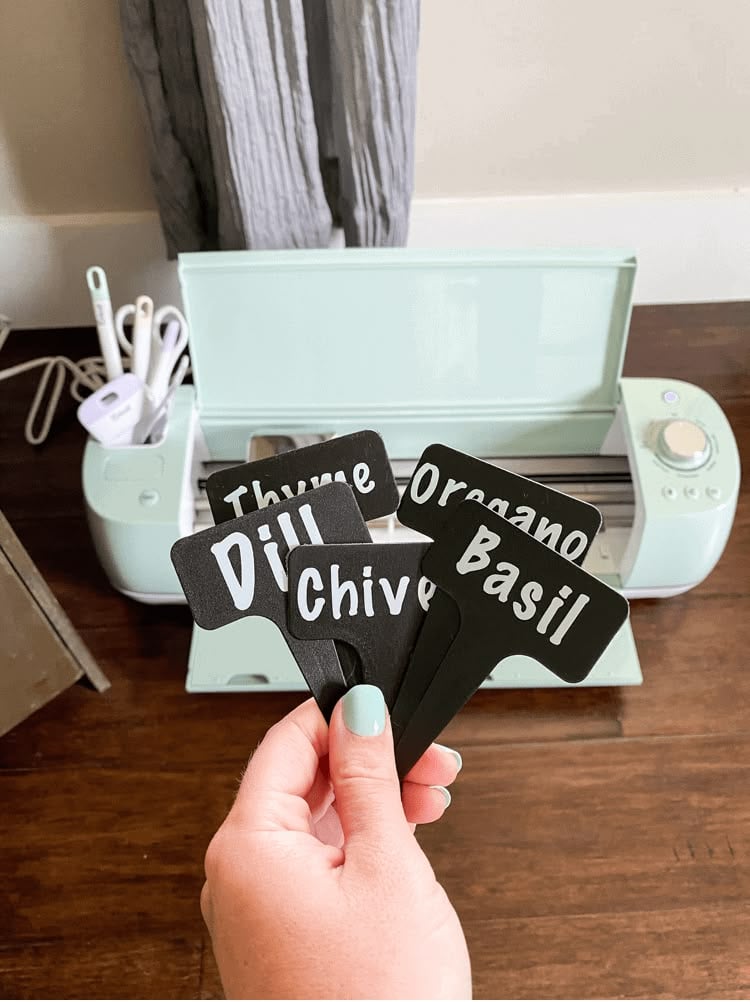
Plant names can become difficult to remember when several seedlings look alike, particularly during the early stages of growth.
Instead of relying on handwritten scraps of paper that deteriorate outdoors, create reusable plant markers with names such as basil, mint, tomatoes or parsley.
Cricut can cut the marker shapes and add the plant names using compatible permanent vinyl or its writing function on a suitable surface.
Choose a material designed to withstand outdoor moisture and sunlight, such as suitable weather-resistant plastic. Ordinary cardstock and untreated paper are poor choices for labels left in garden beds.
Leave enough writing space to add planting dates or other details, and make the markers easy to clean before using them for a different plant.
19. Freezer Date Labels
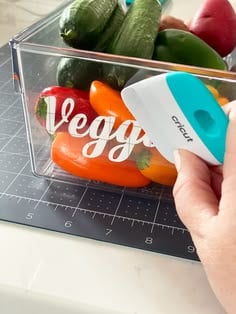
Food containers can look almost identical once they are placed in the freezer, making it difficult to tell what is inside or when it was stored.
Create a set of writable freezer labels with space for the food name, freezing date and, where useful, portion size. Cricut can cut uniform labels and add printed headings or writing guides to make the information easier to record.
Use freezer-safe labels or removable materials that can tolerate low temperatures and condensation. Test the label on a container before making a large batch, as some adhesives become less reliable in cold conditions.
Leave a clear area for handwriting, and avoid treating the date as a guarantee of food safety; storage conditions and recommended freezer storage periods still matter.
Simple designs on inexpensive materials can help new users become familiar with their Cricut machine without taking on complicated projects. Find more starting points in 19 Easy Cricut Projects for Beginners.
20. Window Sun Catchers
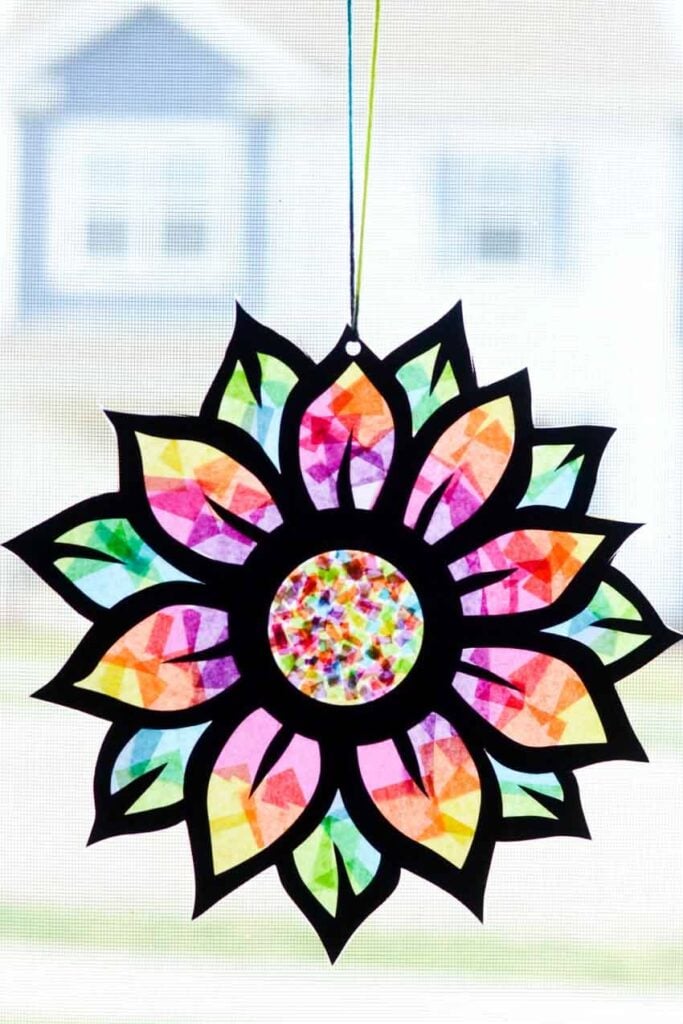
Coloured translucent shapes can turn an ordinary window into a simple light display without covering the whole glass.
Use Cricut to cut designs such as overlapping circles, leaves, stars or geometric patterns from translucent craft film intended for window applications. Combining two or three colours can create interesting intersections where the shapes overlap.
The material matters here: ordinary opaque adhesive vinyl will block light rather than let it pass through. Choose a translucent film that is suitable for the surface and can be removed without damaging it.
Arrange the pieces on a clean window, leaving enough space between shapes for sunlight to pass through. This project is particularly useful for experimenting with colour and shape without making a permanent window decoration.
21. Cord Identification Tags
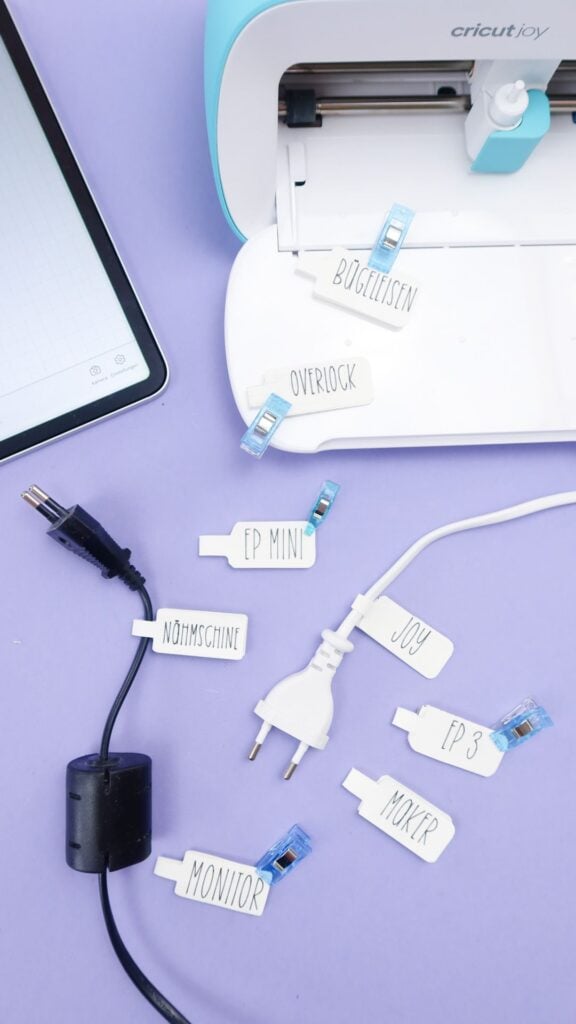
When several charging cables and electronic cords share one power strip, identifying the right one can become an annoying exercise. Small identification tags offer a simple solution.
Cut narrow tags with Cricut, then add short labels such as phone, tablet, lamp or speaker. You can also use different shapes or colours to distinguish cords belonging to different devices.
Design each tag with a space for the cord to pass through or a small opening that allows it to wrap around the cable.
Use flexible, durable material that will not crack when handled, and make sure the opening is wide enough for the cord without being so loose that the tag slides off.
Keep tags away from plugs, ventilation openings and any part of a cable that becomes warm during use.
A plain mug, tote bag or notebook can become a more personal present with a suitable design. More gift inspiration appears in 33 Cricut Projects for Beginners That Make Great Personalized Gifts.
22. Reusable Cleaning Checklist
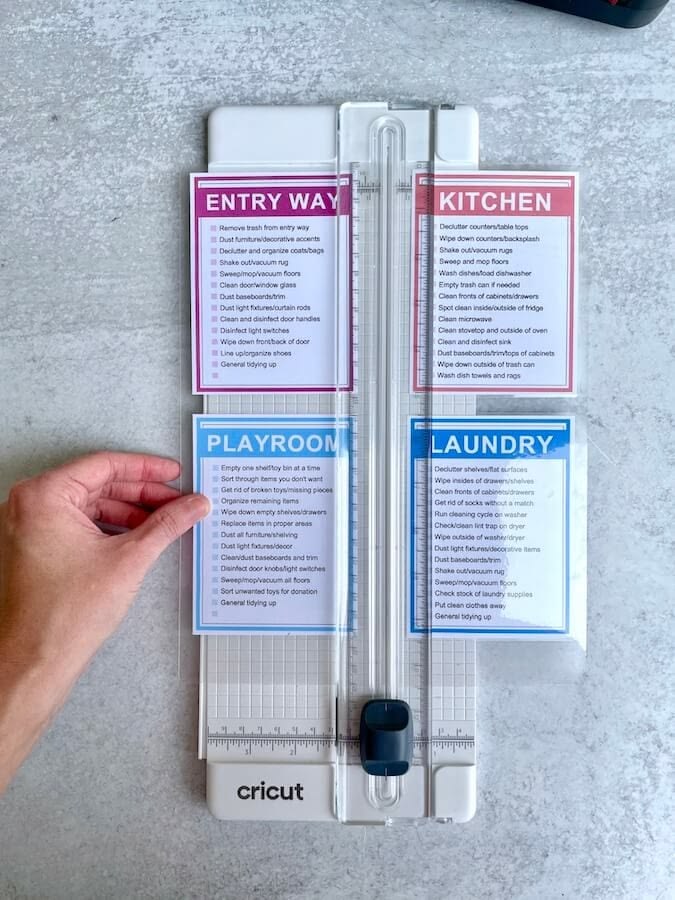
Keeping track of household cleaning tasks is easier when the jobs are written down rather than left to memory. Create a reusable checklist divided into areas such as the kitchen, bathroom, bedrooms and shared spaces.
Cricut can cut the board or backing shape and add headings, task names and checkboxes using compatible vinyl or its writing function.
For repeated use, cover the finished checklist with a suitable dry-erase surface or place it inside a dry-erase sleeve. This allows household members to mark completed jobs and clear the board when the next cleaning round begins.
Keep the tasks specific, such as wipe kitchen counters, clean the bathroom mirror or empty the bins, rather than using broad instructions that are easy to overlook.
23. Light Switch Labels
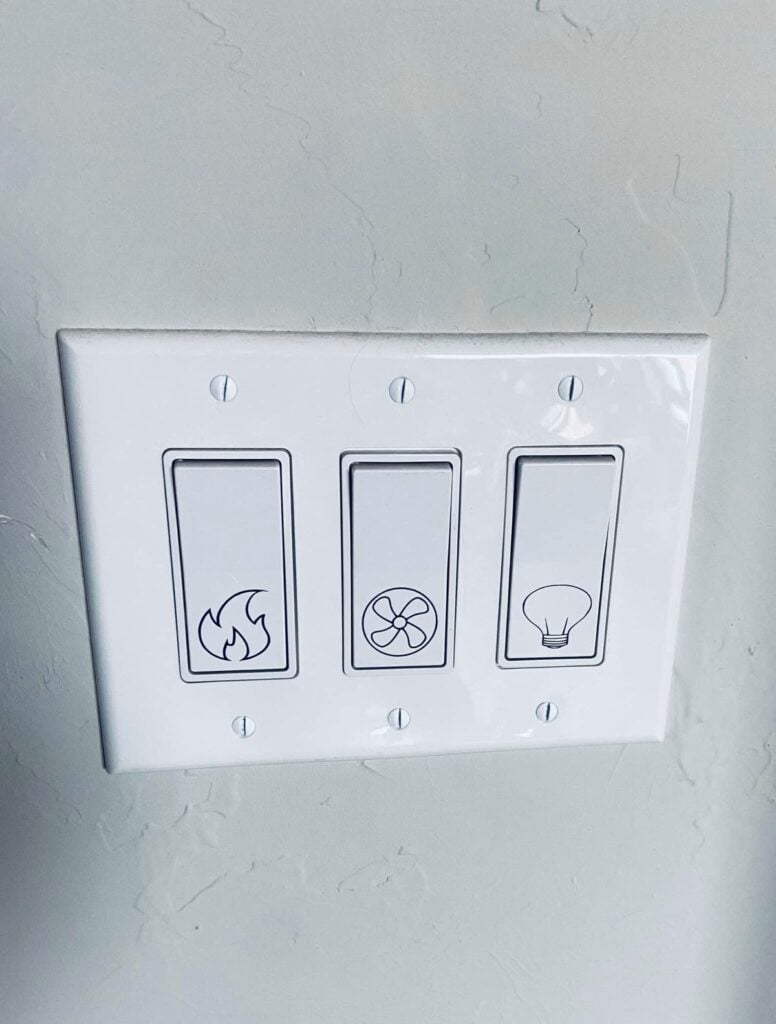
Rooms with several switches can leave visitors guessing which one controls the main light, an outdoor lamp or an extractor fan.
Small labels placed beside the relevant switches can make the controls easier to identify. Use Cricut to cut neat lettering or simple symbols, keeping the wording short enough to read at a glance.
Before cutting, measure the available space around each switch plate.
Choose a thin adhesive material suitable for the surface, and position the labels where they will not interfere with the switch mechanism or cover screws and openings.
This is especially useful in utility rooms, hallways and shared spaces where several controls are grouped together.
Children can enjoy decorating suitable inexpensive craft supplies with adult supervision. 35 Easy Cricut Projects for Kids has more ideas for creative activities.
24. Furniture Protection Pads
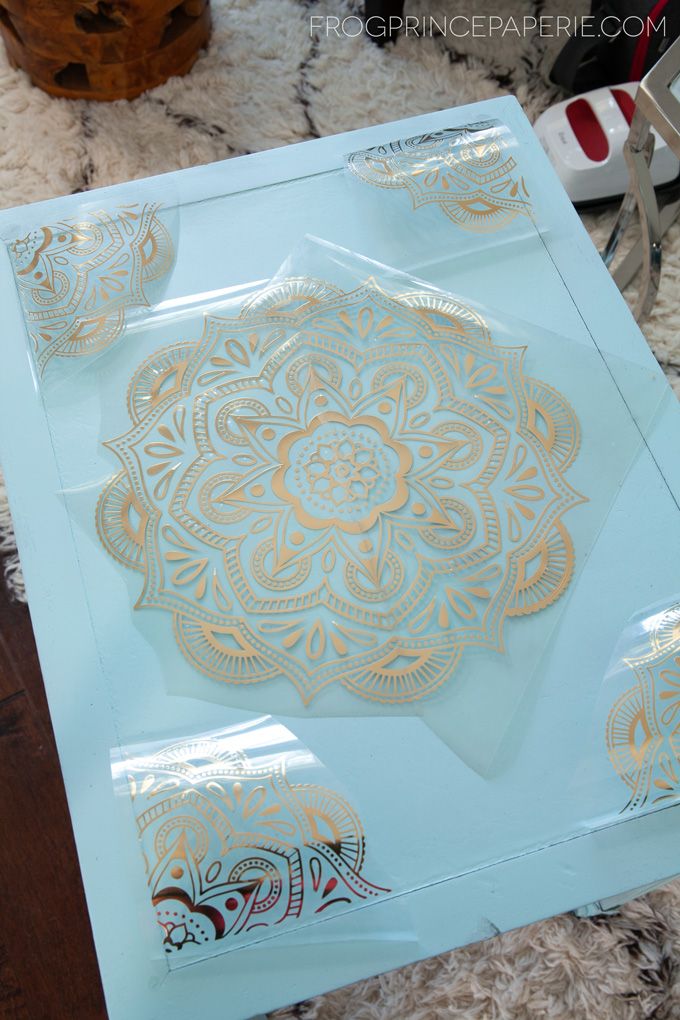
Scratches on hard floors often happen when chairs, stools and small tables are moved without adequate protection beneath their feet.
Cricut can help cut felt into matching circles, squares or custom shapes sized to fit different furniture legs. Trace or measure the bottom of each leg first, then cut a test piece to check the fit before making the full set.
Use felt intended for furniture protection rather than thin decorative felt that may wear through quickly.
The pads can be attached with a suitable adhesive backing or furniture-pad adhesive, depending on the material and the type of furniture foot.
Clean the surface before attaching them, and check the pads periodically because grit trapped underneath can still scratch a floor.
25. Custom Paper Crowns
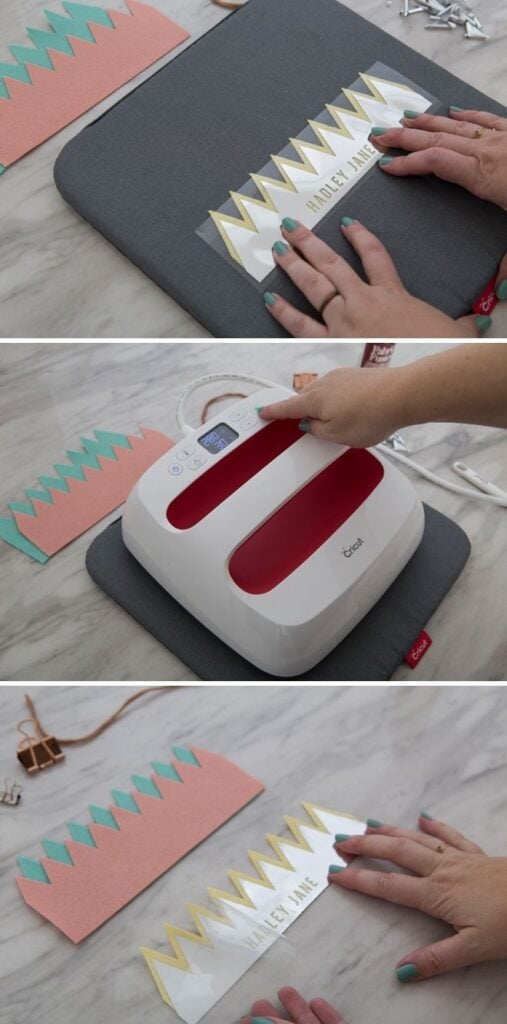
Birthday celebrations, school plays and dress-up activities often call for simple costume accessories.
Custom paper crowns are easy Cricut projects to make because you can experiment with different crown shapes, decorative points, initials and cut-out patterns without needing specialised materials.
Cut the main crown from sturdy cardstock, then add separate shapes, letters or small decorations to personalise it.
Measure the wearer’s head before setting the crown’s length, and include an adjustable joining section so it can fit comfortably.
For children’s activities, keep the decorations securely attached and avoid small embellishments that could become choking hazards for younger children.
Dollar Store supplies can also be useful for making affordable festive decorations, gift tags and seasonal accessories. See 31 Easy Cricut Projects for Christmas for more holiday projects.
26. Paper Finger Puppets
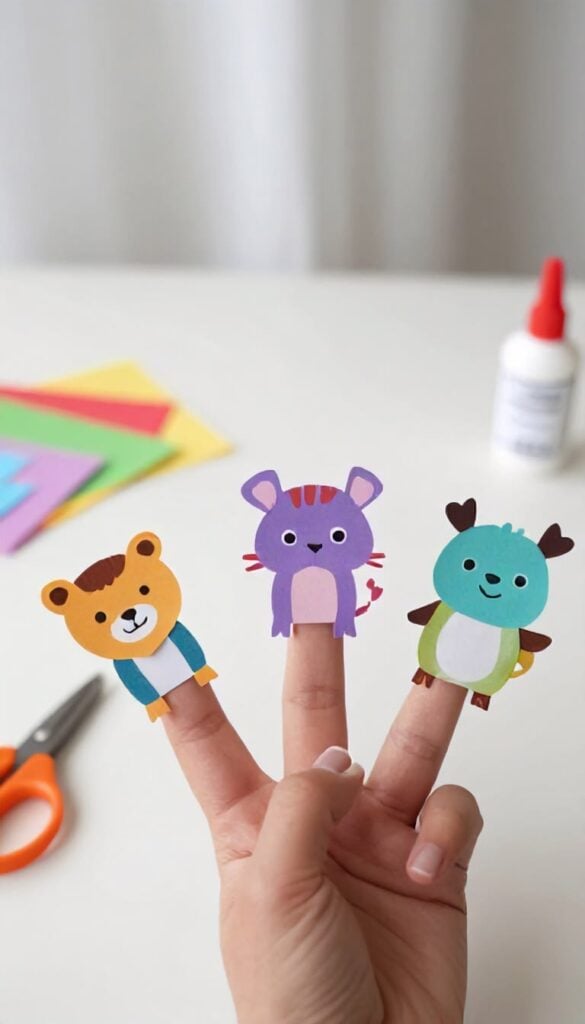
Storytelling becomes more interactive when children can give each character a face and a voice. Paper finger puppets offer a simple way to create animals, people or storybook-inspired characters using cardstock and small folded paper loops.
Cricut can cut the character shapes and smaller features, while the loops are attached to the back to hold each puppet on a finger.
Keep the characters large enough for children to handle, with facial details that remain visible after assembly.
A small collection of familiar animals or characters can become a storytelling set for home, classroom or Sunday school activities. Use sturdy paper, and make sure the finger loops are wide enough to slide on and off comfortably.
27. Shadow Matching Cards
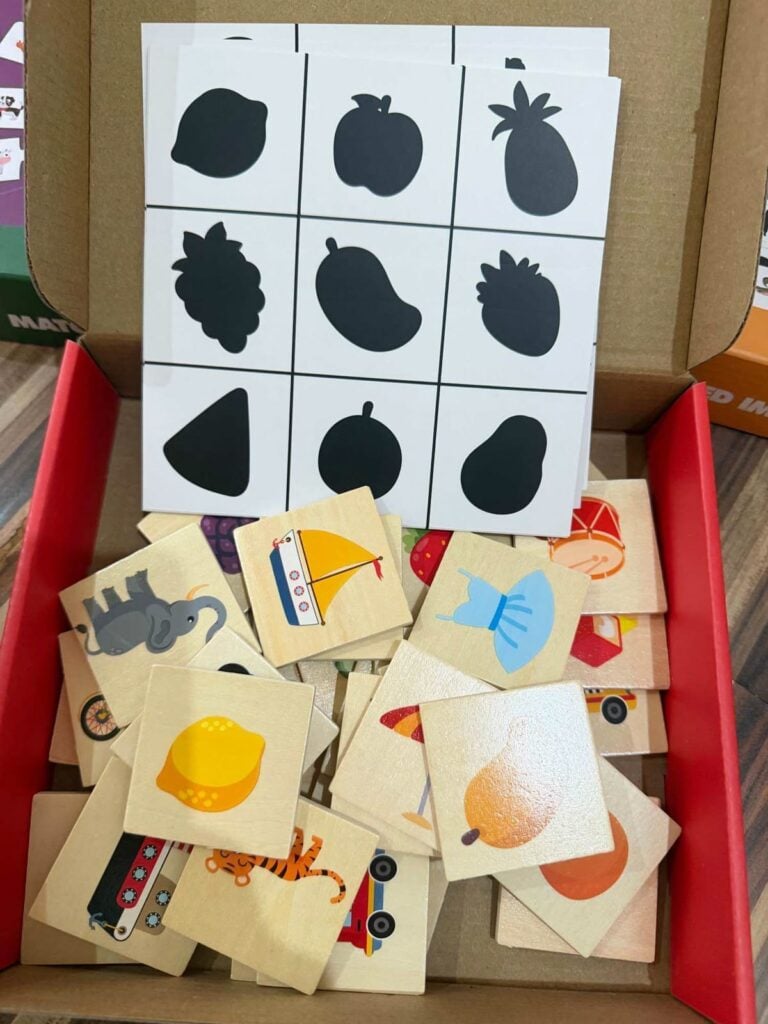
Matching pictures to their silhouettes gives children a simple way to practise visual recognition and observation.
Create two sets of cards: one showing familiar objects in full colour and another showing the same objects as solid black shapes. Cricut can cut the cards and silhouette shapes consistently, making it easier to prepare matching pairs.
Choose objects with recognisable outlines, such as a ball, fish, cup, tree or house.
Avoid pictures with too many small details, since the purpose is to help children identify an object from its overall shape. Number the backs of the cards discreetly to make sorting and checking pairs easier after play.
Baskets, bins and small containers from discount shops can be personalised to organise everyday household items. 27 Easy Cricut Projects for Organizing Your Home offers more practical projects.
28. Paper Spinning Tops
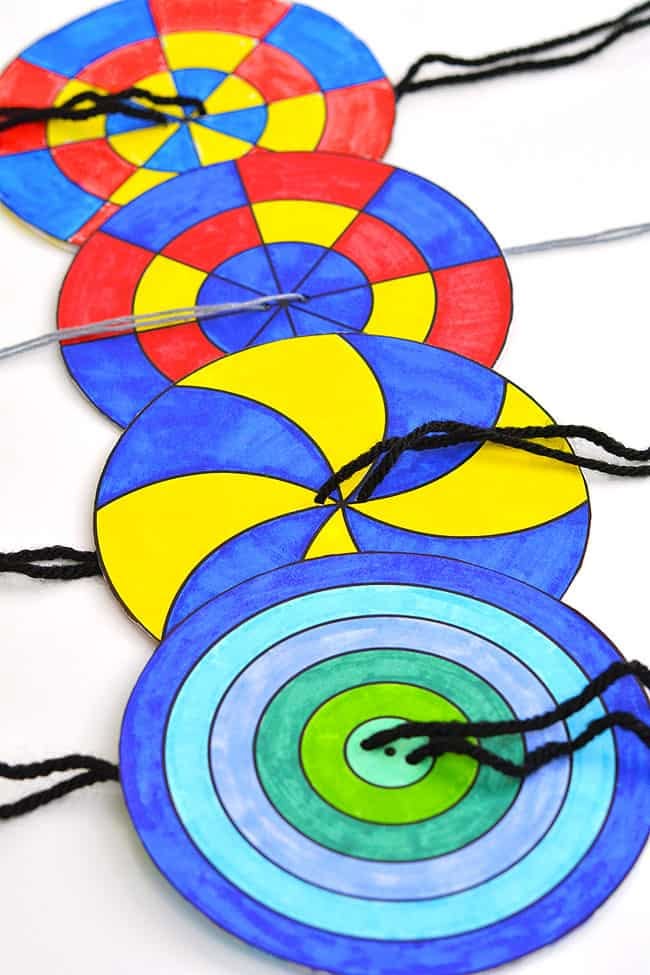
Paper spinning tops are a fun way to see how shape, balance and rotation work together.
Cut matching circular designs from cardstock using Cricut, then attach them securely around a suitable central spindle, such as a purpose-made paper top base or an appropriate lightweight craft component.
Different colour sections and patterns can create interesting visual effects as the top spins.
Accuracy matters more than decoration here. Keep the circular pieces centred on the spindle and avoid adding heavy embellishments to one side, as uneven weight can affect the spin.
Test the design with a simple prototype before cutting several versions, and supervise younger children when using small central components.
29. DIY Paper Fortune Teller
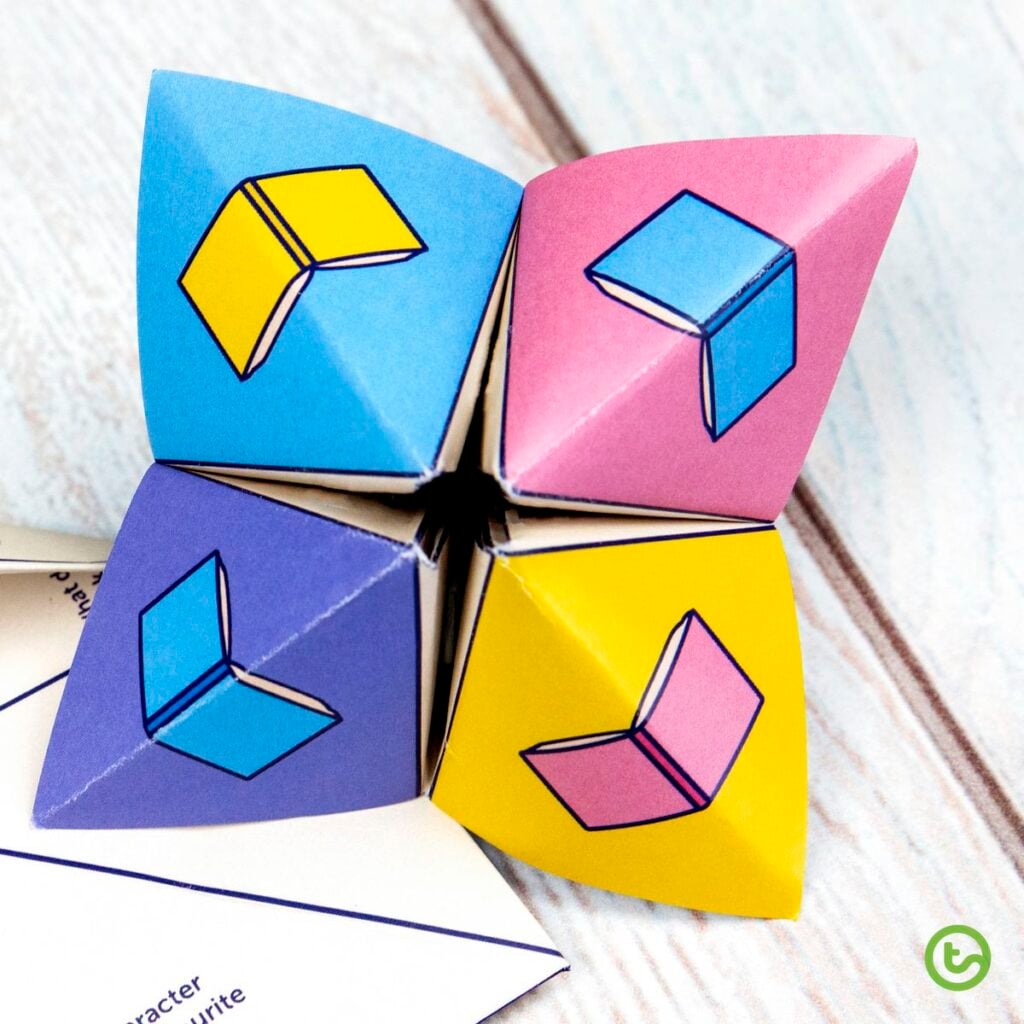
The traditional folded paper fortune teller is a good way to turn a simple sheet of paper into an interactive game. Use Cricut to cut a precise square and add numbers, colours, questions or short messages before folding it into the familiar four-pocket shape.
The finished piece can contain conversation prompts, silly challenges, positive messages or questions for a party activity.
Use lightweight paper that folds cleanly rather than thick cardstock, which can make the pockets difficult to open and close. Keep text away from the fold lines so it remains readable after assembly.
This is one of the simpler Cricut projects to make when you want to combine paper cutting with a little hands-on folding.
Small leftover pieces of vinyl and cardstock can be used to customise inexpensive blanks without opening a new sheet for every project. See 23 Cricut Projects You Can Make with Scrap Materials for more ways to use offcuts.
30. Colouring Stencils for Kids
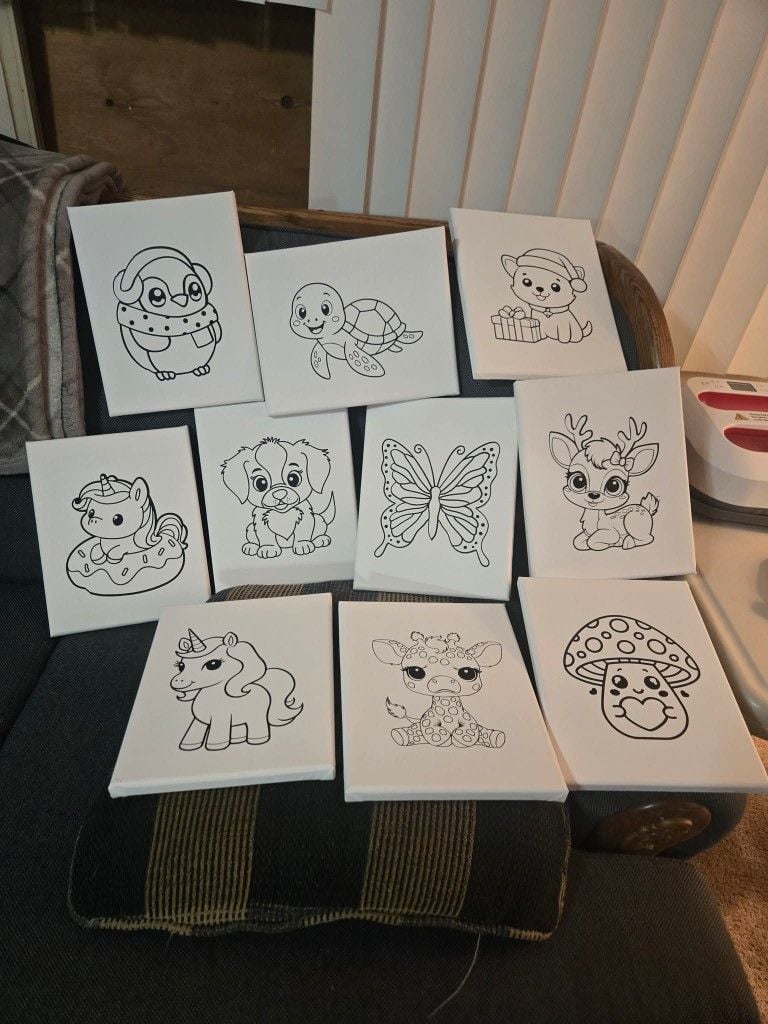
Children who enjoy drawing may appreciate having reusable outlines to guide their pictures. Create a set of colouring stencils featuring familiar subjects such as animals, vehicles, flowers, numbers and basic shapes.
Cricut can cut the outlines from suitable stencil material, leaving openings that children can trace with crayons, pencils or washable markers.
Choose a material that is flexible enough to sit flat on paper but sturdy enough to withstand repeated handling.
Leave enough space around each opening so the stencil does not become fragile, particularly around narrow details such as animal legs or flower stems. Simple, recognisable shapes are usually easier for younger children to trace than intricate designs.
Affordable containers and jars can also be turned into labelled pantry storage, provided the decoration is applied to suitable surfaces and kept away from food-contact areas. More kitchen-specific ideas are in 25 Easy Cricut Projects for Your Kitchen.
How to Get More Creative With Your Cricut Machine
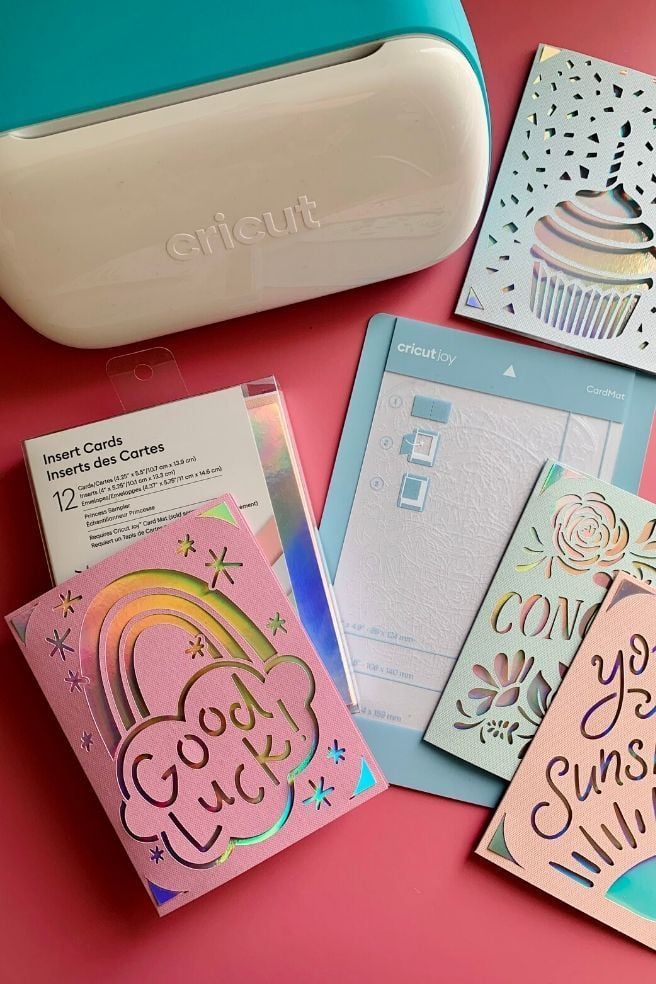
Getting more creative with Cricut starts with understanding the different ways your machine can work with materials. Cutting is only one function.
Depending on your model and compatible tools, you can also draw, score, foil, engrave, deboss or use Print Then Cut to create projects with printed details and precisely cut outlines.
A useful way to develop new ideas is to experiment with one unfamiliar feature at a time. For example, try using the scoring tool to create neat folds in cardstock, or use the drawing function to add handwritten-style details to a paper design.
You can also upload your own SVG files, combine basic shapes in Design Space or adapt an existing design to serve a different purpose.
Pay attention to material compatibility before experimenting. Not every Cricut machine supports every tool or material, and some techniques require specific accessories.
Start with small test cuts, keep notes on settings that work and build on successful experiments. Over time, this gives you a wider range of skills and more original Cricut projects to make.
Conclusion
Sometimes, the hardest part of owning a Cricut isn’t learning how to use it; it’s finding a reason to turn it on.
You may have plenty of cardstock, vinyl and leftover materials, yet keep returning to the same few designs because nothing new comes to mind. These Cricut projects to make offer a way out of that creative rut, with ideas that put your machine to work in less familiar ways.
Some may introduce you to a technique worth practising, while others could become useful additions to your home, classroom or next children’s activity.
Pick an idea you haven’t tried, make it your own and share your finished project in the comments. I’d love to see what you come up with!
Low-cost cups, favour bags and party decorations can be personalised for birthdays and other celebrations. 20 Easy Cricut Projects for Birthdays and Parties has more ideas for these occasions.
Frequently Asked Questions
1. Do I need Cricut Access to make Cricut projects?
No. You can use the free version of Design Space, upload your own designs, create shapes and text, or purchase individual images and fonts.
Cricut Access is an optional subscription that provides access to additional designs, fonts and features.
2. Can I use my own designs with a Cricut machine?
Yes. Design Space allows you to upload your own artwork and turn it into cuttable designs. You can upload common image formats such as PNG and JPG, as well as vector formats such as SVG.
3. Do all Cricut machines make the same projects?
No. The projects you can make depend on your machine’s cutting capabilities, compatible materials and available tools.
Some machines handle basic paper and vinyl projects, while certain Maker models support a wider range of materials and specialised operations. Check your machine’s compatibility before choosing a project.
4. Can I use Cricut Design Space without an internet connection?
Yes, but with limitations. Design Space for desktop and iOS supports offline use when you download your projects, images and fonts beforehand.
Android does not currently support offline use, and features such as uploading images and Print Then Cut require an internet connection.
5. Can I make Cricut projects without a cutting mat?
Yes, provided your machine supports matless cutting and you use compatible Smart Materials.
For ordinary cardstock, paper and many other materials, you will generally need an appropriate cutting mat to hold the material in place. Always check the material and machine requirements before loading it.