Got small Cricut offcuts left over? These Cricut projects you can make with scrap materials put those leftover pieces to creative use.
After finishing a Cricut project, there are often small pieces of vinyl, cardstock, iron-on and fabric left on the cutting mat. Some are too small for another large design but still have enough material for a useful little project.
Rather than throwing them away or buying new supplies for every craft, these leftover pieces can be put to good use.
Here are 23 Cricut projects you can make with scrap materials, along with ideas for making the most of different materials and avoiding unnecessary waste.
Handmade birthday keepsakes can also make thoughtful presents for other occasions, and 31 Easy Cricut Projects for Gifts has more ideas for personalised items.
The Practical Value of Reusing Scrap Materials
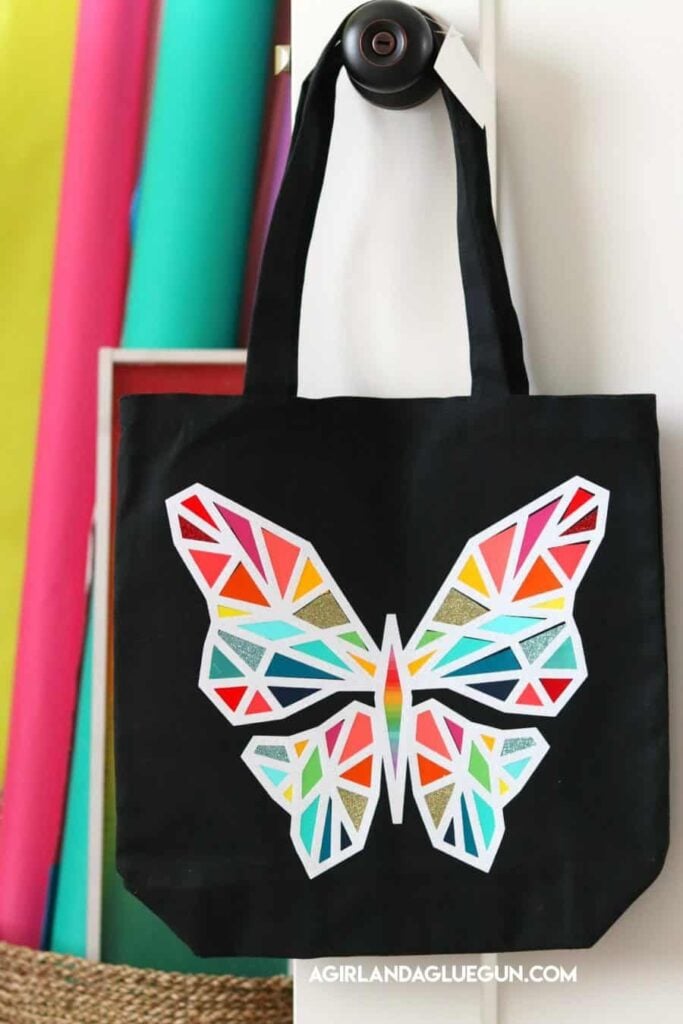
Small leftover pieces of cardstock, vinyl and fabric can still be useful, even when they are no longer large enough for the original project. Rather than setting them aside and forgetting about them, take a moment to see what each piece can do.
A short strip of vinyl, for example, may be enough for a small decorative design, while a fabric offcut could provide a few appliqué shapes.
The important thing is to work with the material available. Check its size, condition and type before choosing a project.
A piece with creases, damaged backing or frayed edges may not give the result expected, and some materials require particular blades, mats or preparation before cutting.
With a little sorting and planning, leftover pieces can be put to use without buying a fresh sheet for every small project.
Teen celebrations often call for designs that reflect individual interests and styles. Readers planning a party for a teenager can find more inspiration in 30 Cute Cricut Projects for Teen Girls.
1. Mosaic-Style Bookmarks
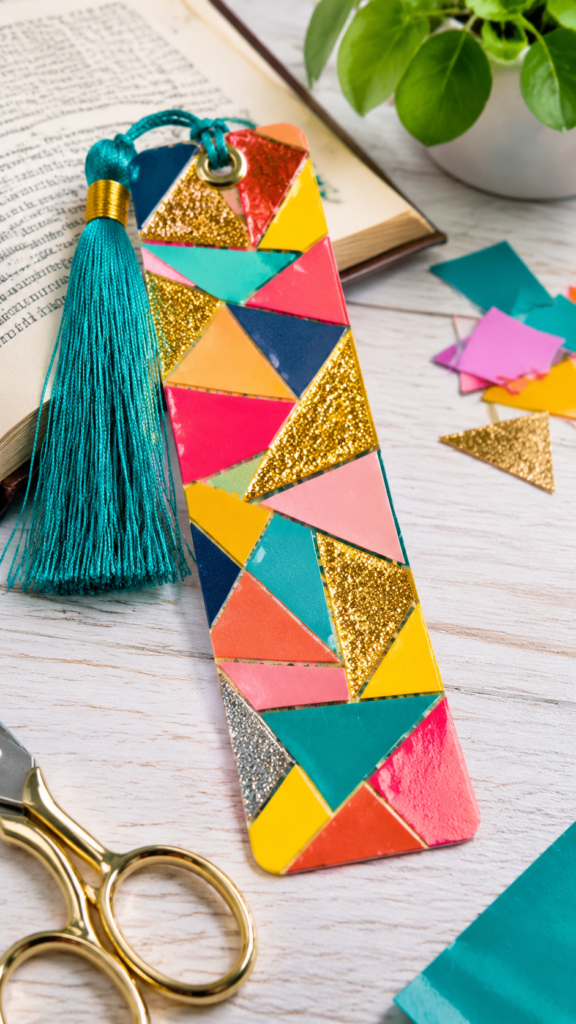
Not every vinyl offcut has to match the next one in colour or shape. That is what makes a mosaic bookmark interesting. It is a decorative bookmark made by combining small pieces of adhesive vinyl to form a larger design.
The pieces can create geometric patterns, colourful blocks, abstract artwork or simple pictures. Using different colours gives the bookmark a patchwork-like appearance, with each small piece contributing to the overall design.
2. Decorative Game Piece Overlays
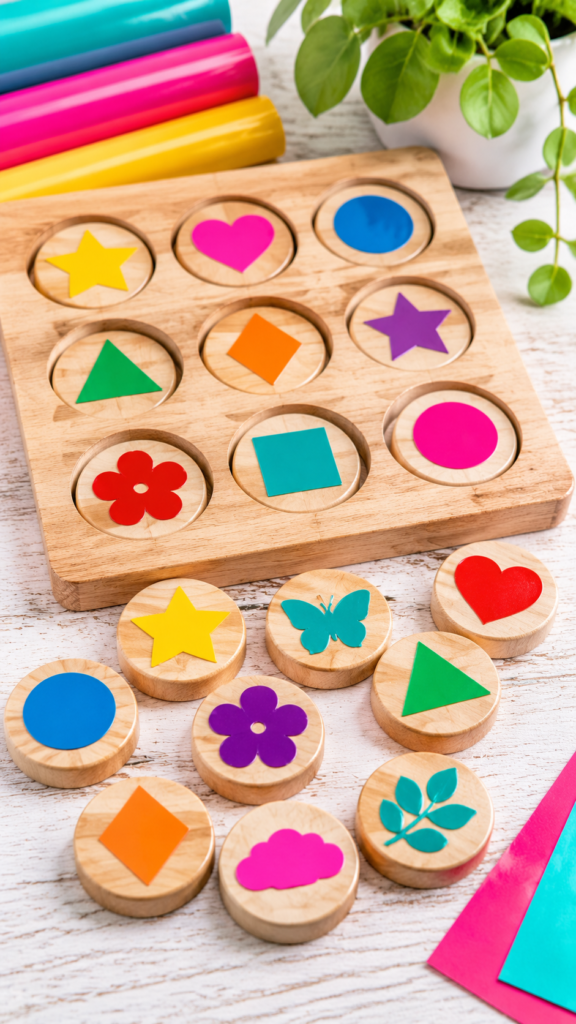
Plain wooden game pieces can be given a more distinctive appearance with small adhesive vinyl details.
For example, pieces from a homemade matching game could have different coloured symbols, numbers or simple pictures instead of relying on colour alone. This can make the set easier to identify and give a handmade game a consistent look.
Choose pieces with a smooth, flat surface and use designs that remain within the available space.
Avoid covering the bottom or sides of pieces that must slide, stack or fit into a board. Very small pieces may be better decorated with a single simple shape than several layers of vinyl.
Some party decorations, such as framed signs and personalised displays, can be reused as room accents after the celebration. See 29 Easy Cricut Projects for Home Decor for more ideas.
3. Colour-Block Phone Grip Designs
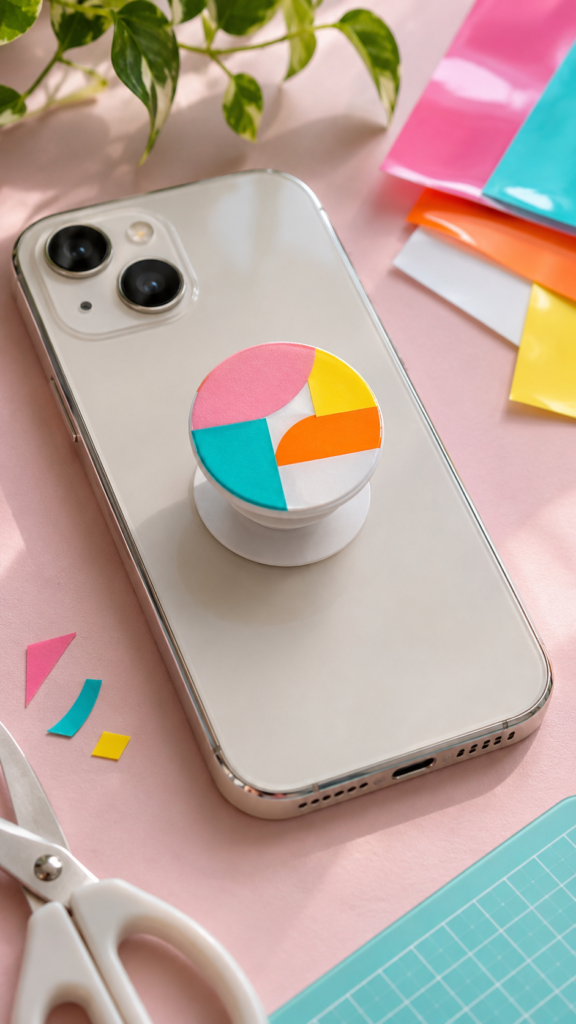
A plain phone grip can become a small colour-block design using leftover adhesive vinyl.
Rather than covering the entire accessory, combine a few contrasting shapes to create a pattern that follows its circular or square surface. The important consideration is the grip material.
Many phone grips have silicone-like, rubberised or textured surfaces that do not hold ordinary adhesive vinyl reliably. A smooth, hard plastic surface is a more suitable choice.
Keep the design on the stationary outer face, away from the expanding mechanism and the area that attaches to the phone.
4. Miniature Vinyl Art for Pencil Cases
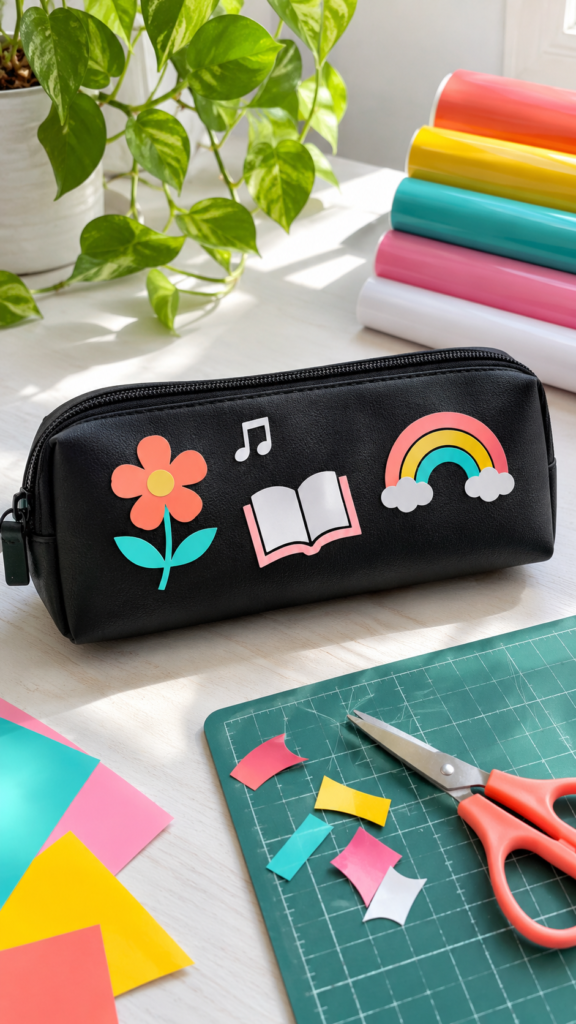
Small vinyl scraps can be used to create miniature artwork on a plain pencil case, such as a tiny book, a flower, a music symbol or a simple set of initials. This works best on pencil cases with a smooth plastic or coated surface, where adhesive vinyl can make direct contact.
Fabric pencil cases are less straightforward because ordinary adhesive vinyl is not designed to bond reliably to woven fabric. For those, compatible iron-on vinyl may be a better option, provided the fabric can tolerate the required heat.
The distinction matters because choosing the wrong vinyl can leave the design peeling away after use.
Invitations, cake toppers, favour tags and banners are among the party details that can be made with cardstock. More material-based inspiration is available in 27 Easy Cricut Projects Using Cardstock.
5. Decorative Cable Organiser Designs
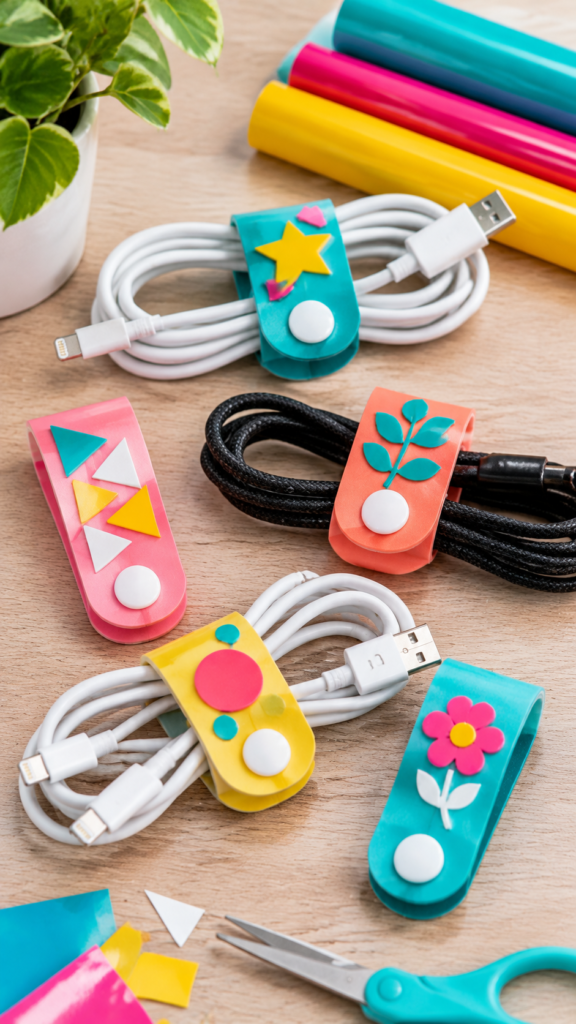
Reusable cable organisers, particularly flat plastic or smooth silicone-free styles, can be personalised with small vinyl details.
A simple colour mark, symbol or short initial can help distinguish one organiser from another when several are kept together in a bag or desk drawer.
This is more useful than adding a large decorative design because the organiser still has to bend, wrap or fasten around a cable. Keep the vinyl on a flat outer section and away from folds, snap closures and fastening surfaces, where repeated movement can cause the edges to lift.
One important distinction across these four projects: adhesive vinyl is not suitable for every surface. It is most dependable on clean, smooth, non-porous materials.
Soft silicone, textured rubber and untreated fabric can be difficult surfaces for ordinary adhesive vinyl, so the material of the blank should be considered before cutting the design.
6. Small Sleeve and Cuff Motifs
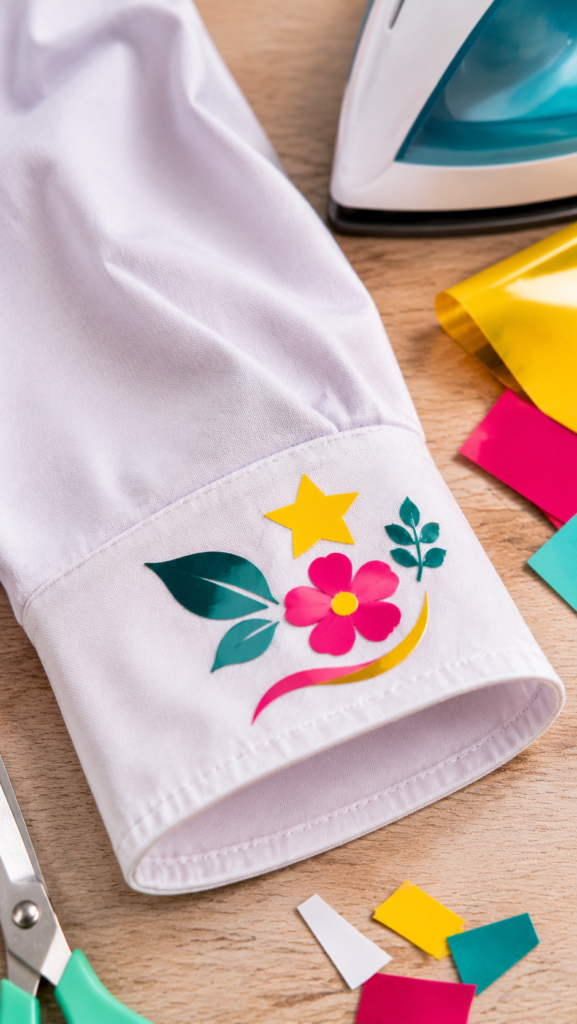
Small iron-on vinyl pieces are useful for adding a little detail to plain clothing without covering a large area. A small star, leaf, initial or simple line design can sit on a shirt sleeve or near the cuff.
Among the Cricut projects you can make with scrap materials, this is a practical way to use leftover HTV that is too small for a full shirt design.
Check the garment’s care label before pressing, as delicate fabrics and some synthetic materials may not tolerate the heat required.
Follow the temperature, pressing time and pressure recommended for the particular HTV rather than using one setting for every material.
Matching birthday shirts and fabric accessories offer another way to personalise a celebration. Readers interested in transfer projects can explore 25 Easy Cricut Projects Using Cricut Infusible Ink.
7. Colourful Fabric Elbow Patches
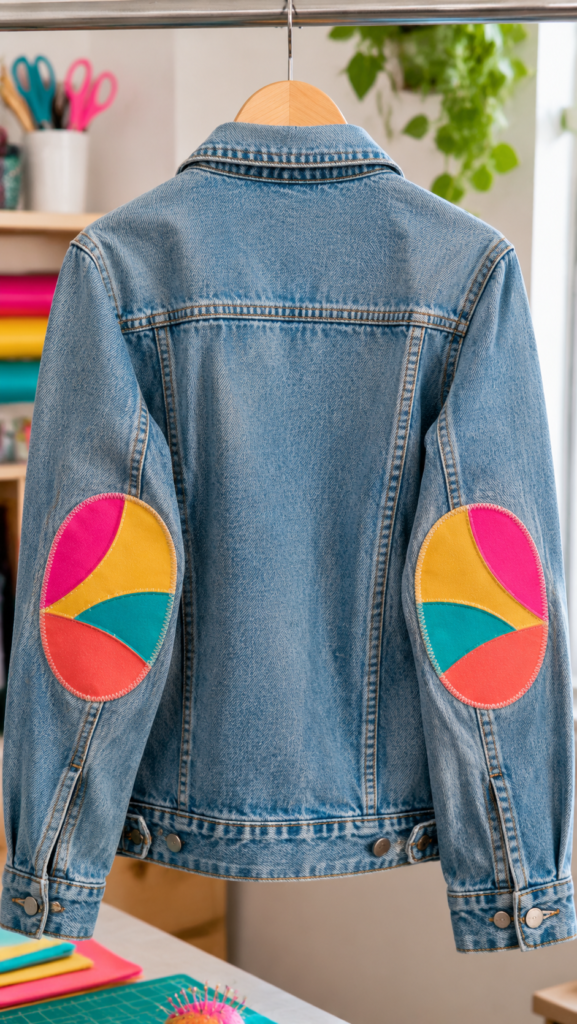
Leftover iron-on vinyl can be cut into circles, ovals or other simple shapes to create decorative elbow patches on suitable clothing. Contrasting colours can make the patches stand out, while matching colours give a more subtle finish.
These are decorative details, not replacements for proper fabric patches when an elbow has a hole or badly worn area. For clothing that needs reinforcement, a suitable fabric patch and sewing may be necessary.
Check that both the garment and the iron-on material can withstand the required pressing temperature.
8. Layered Appliqué for Fabric Book Covers
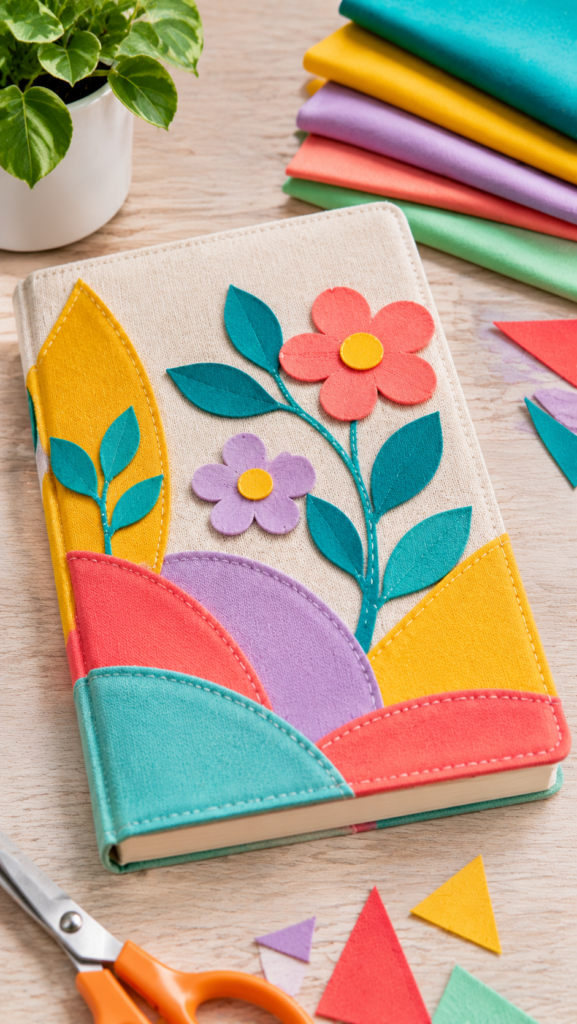
Small pieces of iron-on vinyl in different colours can be combined to create a layered design on a fabric book cover. A simple arrangement of leaves, initials or shapes can give a plain notebook cover a more personal appearance.
This project is best suited to a fabric cover that can tolerate heat and has a reasonably smooth pressing area.
Plan the layers before pressing, since each piece must be positioned carefully to avoid covering details that should remain visible. Also check the HTV manufacturer’s instructions for layering; some finishes are not designed to be pressed on top of one another.
Vinyl is useful for adding names, dates and decorative details to cups, favour boxes and other party supplies. 23 Cricut Projects for Beginners Using Vinyl shares more ways to work with this material.
9. Decorative Shoe Tongue Accents
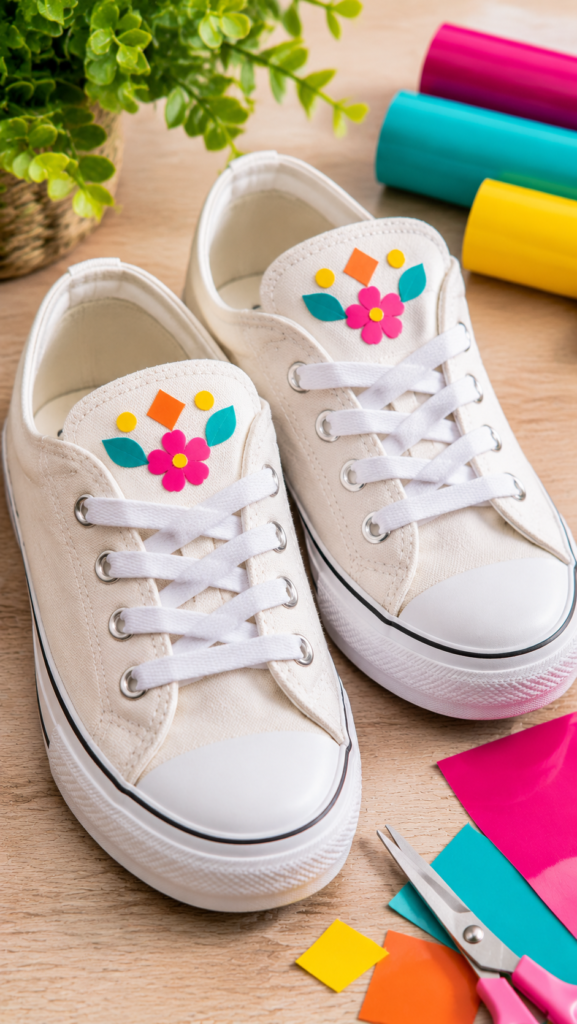
A small iron-on design can add colour to the fabric tongue of a suitable pair of shoes.
Simple initials, symbols or small shapes are more appropriate than a large design, which may crease or feel uncomfortable when the shoe is worn. However, shoe construction varies considerably.
Some tongues contain foam, padding, synthetic coatings or materials that cannot safely withstand direct heat. Only attempt this project when the shoe manufacturer and HTV instructions support the application method. Do not assume that a fabric-looking surface is automatically safe to press.
10. Small Motifs for Fabric Storage Baskets
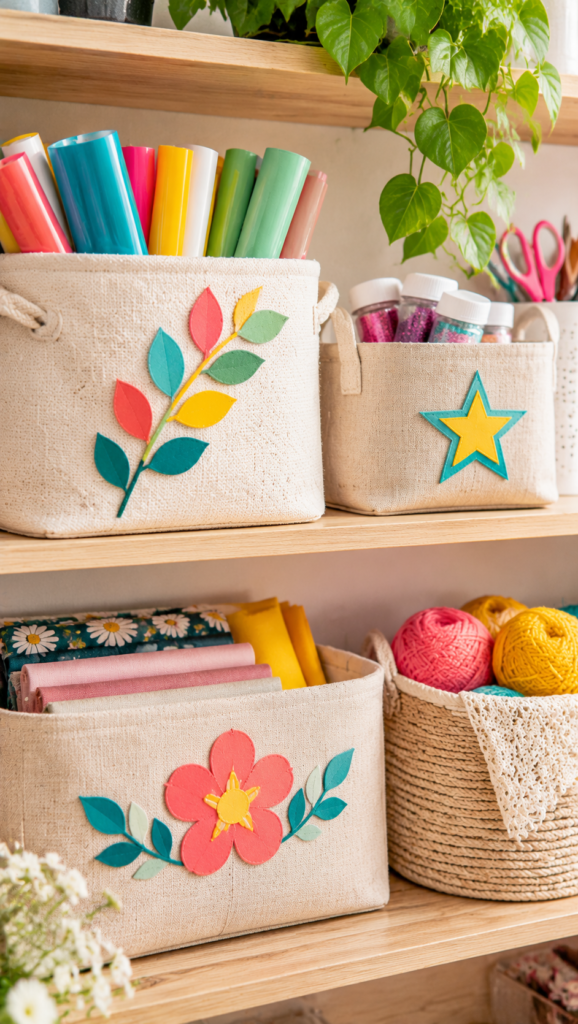
Plain fabric storage baskets can be personalised with small iron-on motifs cut from leftover HTV. A simple leaf, star or geometric shape can distinguish baskets used for sewing supplies, stationery or other small items.
Before cutting, check the basket’s fabric composition and construction.
Some baskets have stiffeners, plastic supports or coatings that may be damaged by heat. A removable fabric panel, where available, may be easier to decorate than pressing directly onto the assembled basket.
Making several copies of a popular party item could also become a small business opportunity. 25 Easy Cricut Projects to Make and Sell for Extra Money offers product ideas to consider.
11. Paper Bead Strips
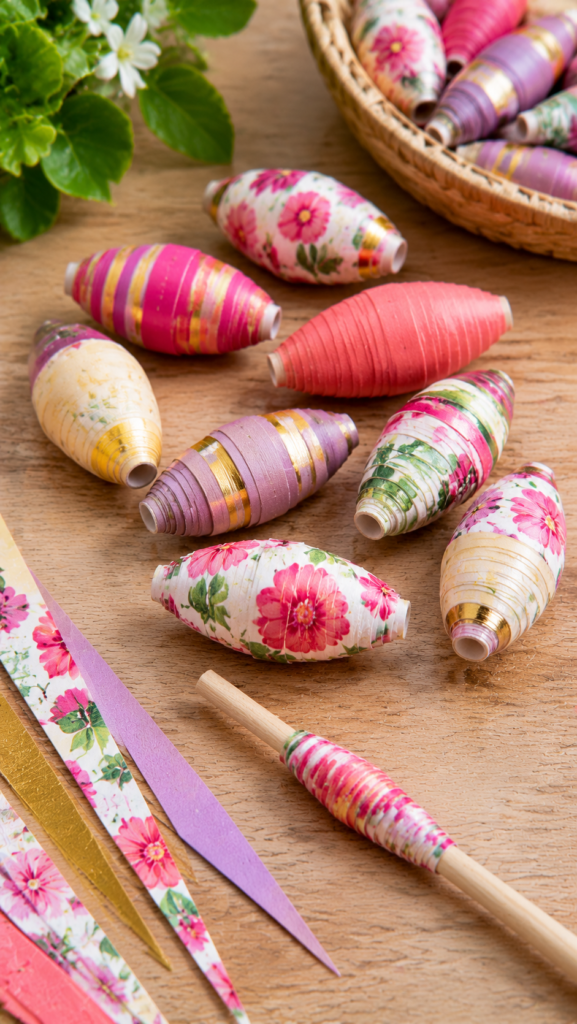
Paper bead strips are a useful way to use narrow pieces of decorative paper that may otherwise be difficult to fit into another project.
The strips are cut into long, tapered shapes, then rolled by hand around a thin stick or bead roller and secured with a little glue.
The wider end forms the centre of the bead, while the narrow end finishes the roll. Lightweight paper is generally easier to roll than thick cardstock, which can crease instead of forming a smooth bead.
The Cricut handles the cutting, while the rolling and finishing are done by hand.
12. Woven Paper Panels
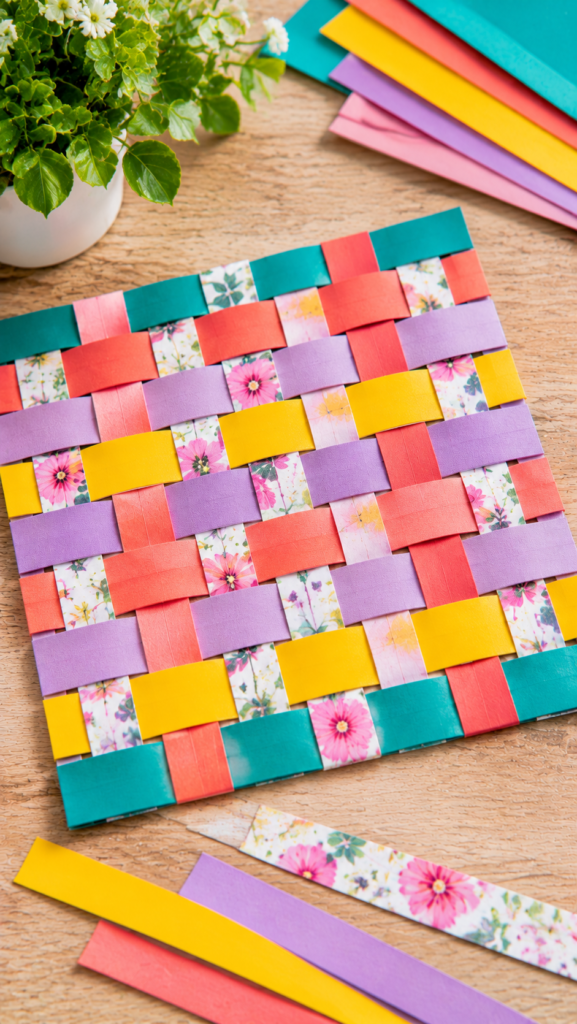
Different paper scraps can be turned into small woven panels for handmade cards, collage work or decorative paper projects. Cut the paper into strips of similar width, then weave them over and under one another to form a simple pattern.
Two contrasting colours make the weave easier to follow, while patterned paper can add more detail.
Keep the strips wide enough to handle without tearing, particularly when using thin scrapbook paper. Very thick cardstock may also be difficult to weave because it does not bend easily at the crossing points.
Readers interested in turning their crafting skills into income can also browse 21 Simple Cricut Projects for Beginners That Actually Sell for more beginner-friendly product ideas.
13. Layered Paper Mosaic Initials
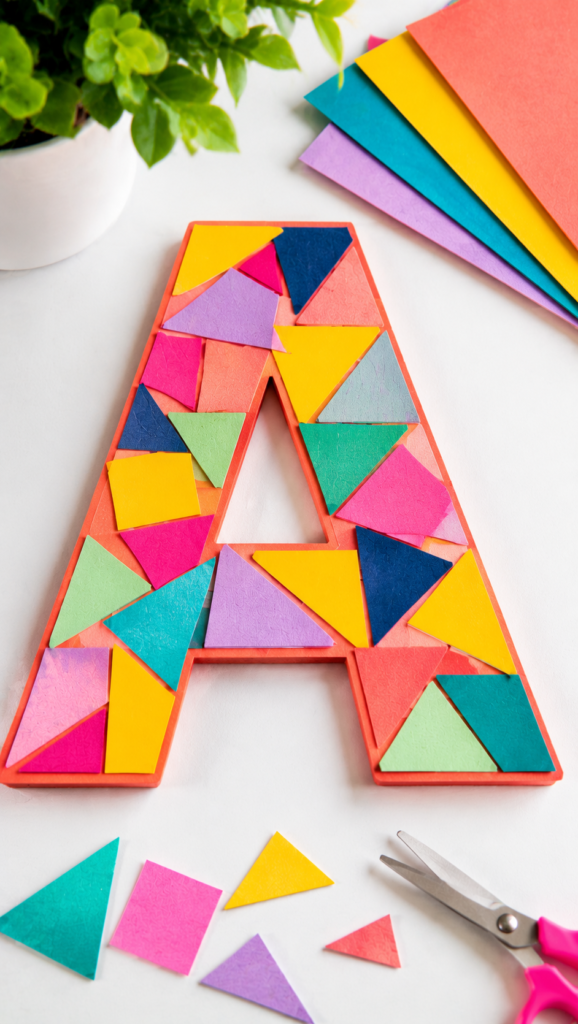
This project uses small cardstock pieces to fill the shape of a large letter, creating a colourful mosaic effect. Cut an initial from a larger piece of cardstock to serve as the base, then arrange small triangles, squares or irregular shapes inside its outline.
Different colours can be mixed to create contrast, or similar shades can be used for a more coordinated finish.
Before gluing, check that the pieces fit within the letter without covering its outline. A pair of tweezers can make it easier to position smaller pieces accurately.
14. Miniature Paper Theatre Backdrops
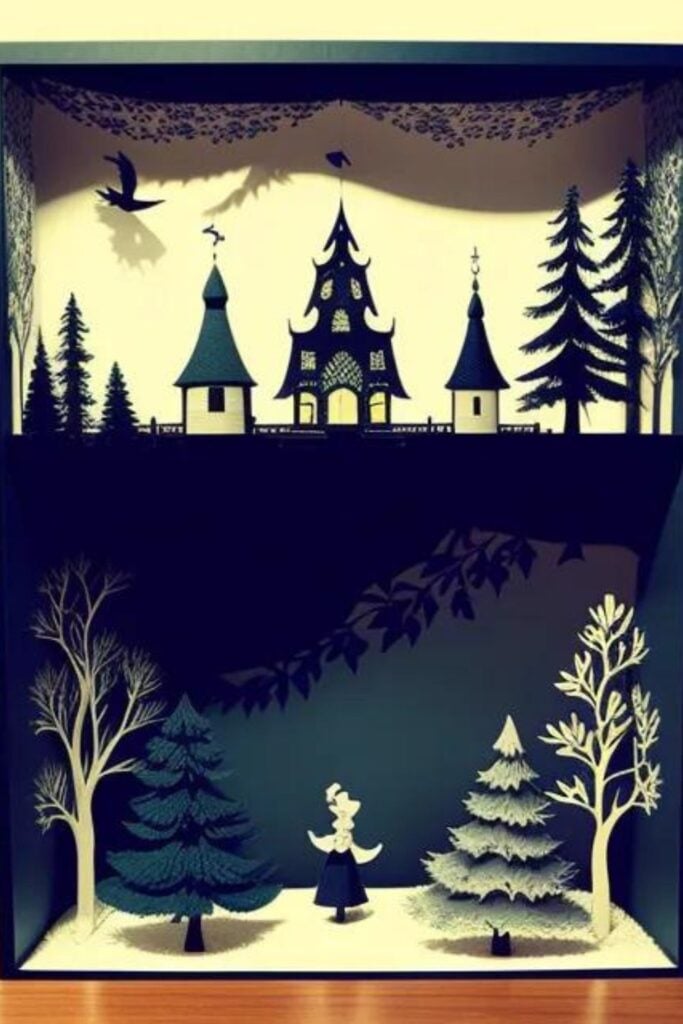
Leftover cardstock can become scenery for a small tabletop paper theatre. Cut simple elements such as trees, houses, mountains, clouds or buildings, then arrange them at different positions to create a scene.
The pieces can stand upright with folded paper tabs attached to their backs or with small folded supports at the bottom.
This makes the project useful for storytelling activities, classroom demonstrations and children’s creative play. Choose cardstock that is firm enough to stand but not so thick that the small folds become difficult to make.
Beginners who want to practise before taking on a larger party project can start with simple designs made at home. 22 Easy Cricut Projects for Beginners You Can Make at Home provides more options.
15. Decorative Paper Tabs for File Folders
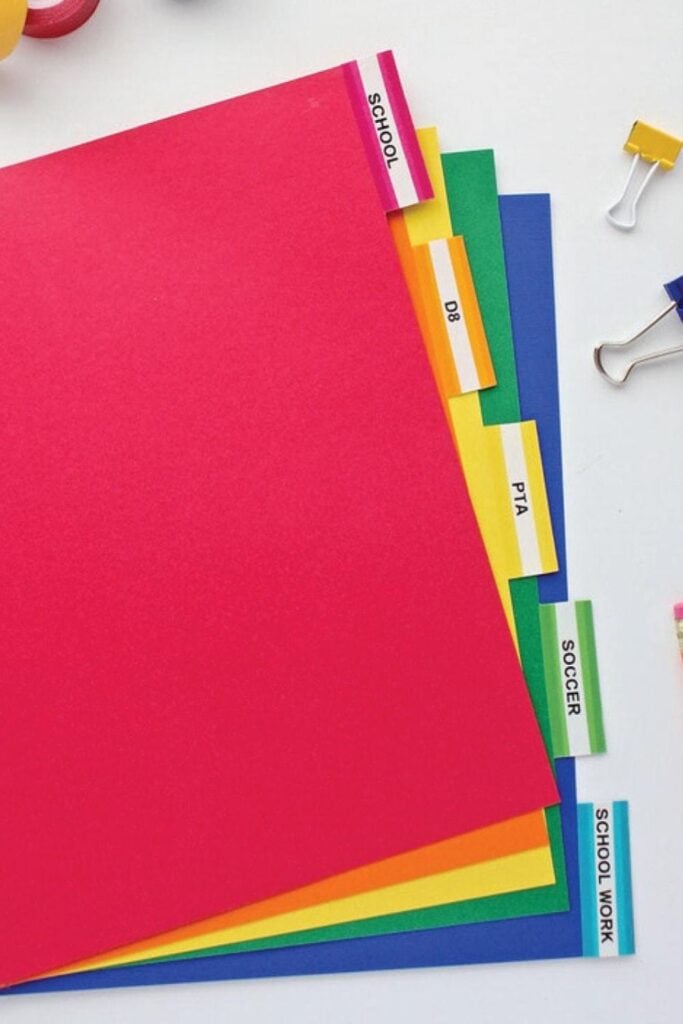
Small cardstock offcuts can be cut into tabs for separating documents, school notes, recipes or craft records. Each tab can carry a short heading, number or colour to make a collection easier to sort.
The shape should leave enough room for a readable label and a section that can be attached securely to the folder or divider.
Thin paper may bend with repeated handling, so a reasonably firm cardstock is a better choice. These tabs can also be made in different colours to distinguish sections without printing a full set of new dividers.
16. Paper Quilling Shapes
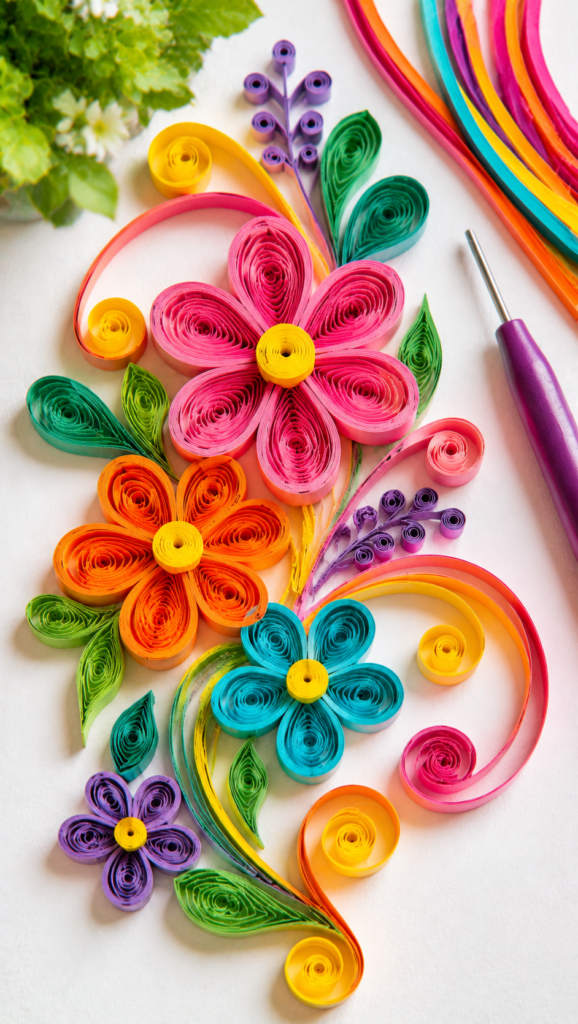
Paper quilling uses narrow strips of paper rolled and shaped into coils, teardrops and other decorative forms.
Leftover paper can be cut into strips of consistent width with a Cricut, making preparation easier when several matching shapes are required. The strips are then rolled by hand using a quilling tool or a thin skewer.
Paper that is too thick may resist rolling, while very thin paper can tear during shaping. Keeping the strip width consistent also helps the finished coils look more uniform.
Learning basic cutting and assembly techniques can make it easier to create neat party decorations. Readers can build those skills with 19 Easy Cricut Projects for Beginners.
17. Small Paper Stencils for Art Practice
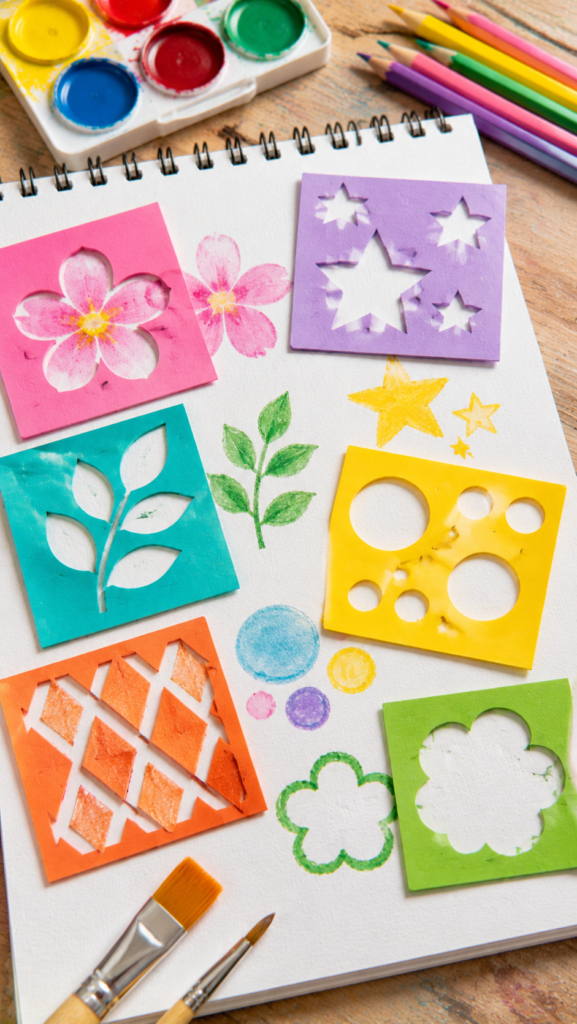
Simple shapes cut from cardstock scraps can serve as temporary stencils for drawing, colouring and light painting exercises. Circles, leaves, stars and basic geometric patterns are easy to reuse across sketchbook pages or paper craft projects.
Place the stencil flat against the paper and hold it steady while applying colour to prevent paint or ink from spreading beneath the edges.
Ordinary cardstock is suitable for occasional dry or light-use applications, but it can soften, warp or tear when exposed to wet paint repeatedly. For stencils intended for frequent reuse or washing, use a suitable reusable stencil material instead.
18. Felt Hair Bow Components
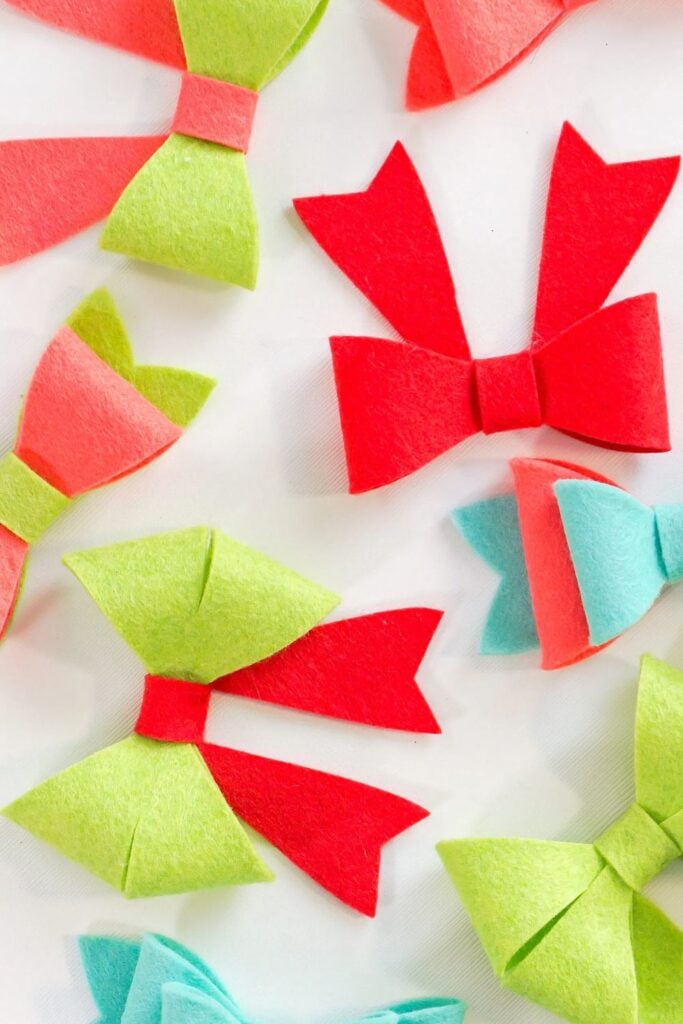
Small felt offcuts can provide the pieces needed to make miniature hair bows. Cut two or three shapes, such as a bow body and a narrow centre strip, then bring them together by hand with a few stitches or a suitable fabric adhesive.
Different felt colours can be combined to make bows for children’s hair accessories, dolls or craft projects. The thickness of the felt matters during cutting.
Thin craft felt may be suitable for some Cricut machines with the appropriate blade and settings, while thicker or dense felt may not cut cleanly. Check the material recommendations for the machine before using an offcut.
A birthday celebration is also a chance to give the celebrant something made especially for them. More personalised present ideas appear in 33 Cricut Projects for Beginners That Make Great Personalized Gifts.
19. Felt Finger Puppet Accessories
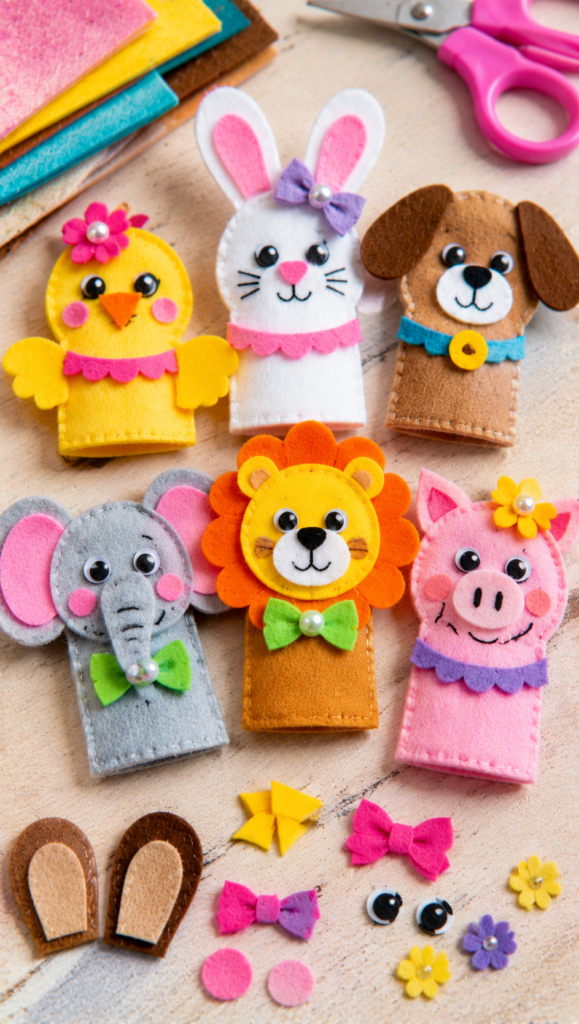
A small piece of felt can go a long way when making details for finger puppets. Rather than using fresh felt for every component, use offcuts to cut ears, eyes, collars, hats, hair or other small features.
These details can be glued or stitched onto a separately made puppet body.
For example, a brown felt scrap could provide several pairs of animal ears, while a small yellow piece could become beaks or decorative collars. Keep the shapes simple enough to cut and handle, especially when making several puppets.
For children’s projects, securely attach small details and avoid loose pieces that could present a choking hazard to young children.
20. Fabric Patchwork Coasters
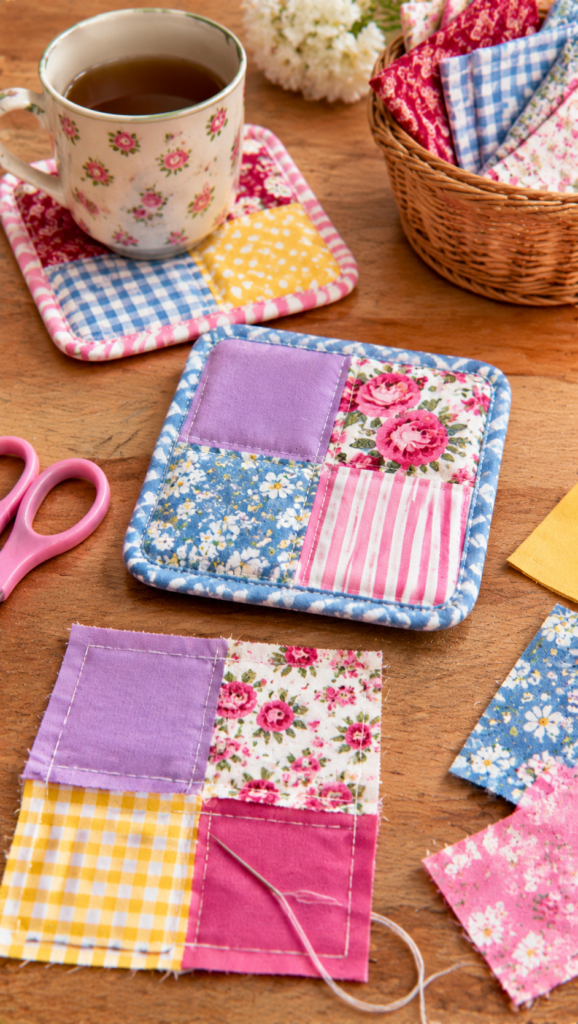
Small fabric scraps with different prints or colours can be brought together to make patchwork coasters.
Cut the pieces into matching squares, arrange them into a pattern and sew them together to form the top layer. A backing fabric and suitable batting can then be added before quilting and finishing the edges.
A Cricut can help cut compatible fabric into consistent shapes, but it does not join or sew the pieces.
Fabric stabiliser may be needed to prevent stretching or shifting during cutting, depending on the fabric and machine. Choose fabrics that can be washed and pressed appropriately, particularly because coasters are likely to encounter spills and moisture.
Children can help with selected parts of party preparation, such as choosing colours or assembling simple decorations with adult supervision. 35 Easy Cricut Projects for Kids has more age-appropriate crafting ideas.
21. Small Fabric Appliqué Shapes for Quilting
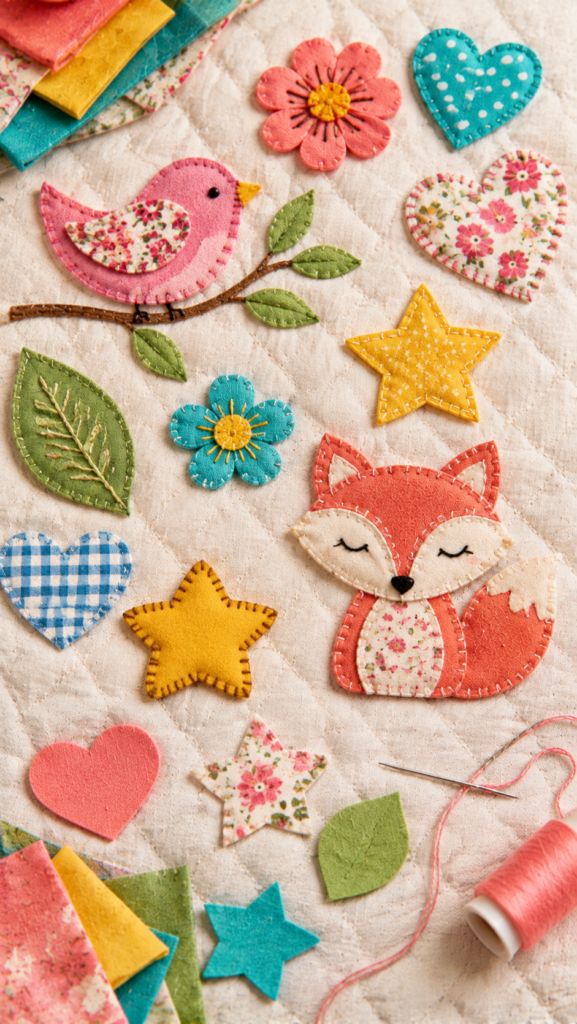
Fabric offcuts can be used to cut small appliqué shapes for quilts, cushion covers and other sewn projects. Hearts, leaves, stars and simple animal shapes can be cut from leftover fabric and added to a larger fabric design.
The main advantage of cutting these shapes with a Cricut is consistency, especially when several copies of the same shape are required. However, fabric can stretch, fray or shift while being cut.
A suitable stabiliser helps hold it in place, while the correct blade and cutting method depend on the fabric and Cricut model. The cut shapes will still need to be attached by sewing or another suitable appliqué method.
22. Leather or Faux-Leather Corner Bookmarks
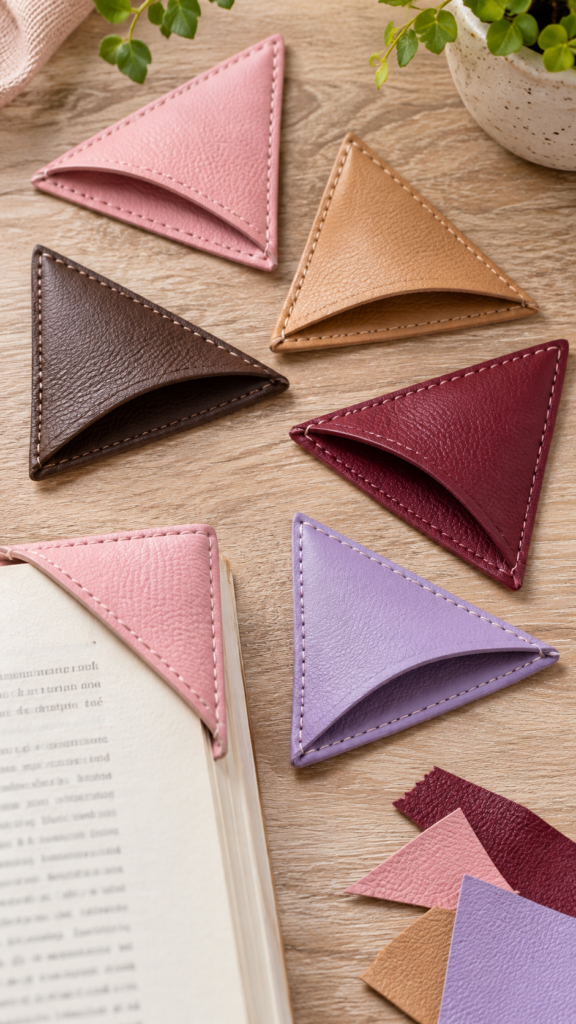
Thin leather or compatible faux leather offcuts can be used to make corner bookmarks that slip over the corner of a book page. Cut two matching corner-shaped pieces, then join the edges that form the pocket while leaving the opening clear.
This creates a small holder that stays on the page without requiring a separate clip.
The material should be flexible enough to slide over a page without making the corner too bulky.
Cricut cutting compatibility varies with the material, thickness and machine. Some projects require a specific blade, so check the manufacturer’s material guidance before cutting rather than assuming that every leather or faux-leather scrap will work.
23. Scrap Material Sample Swatch Book
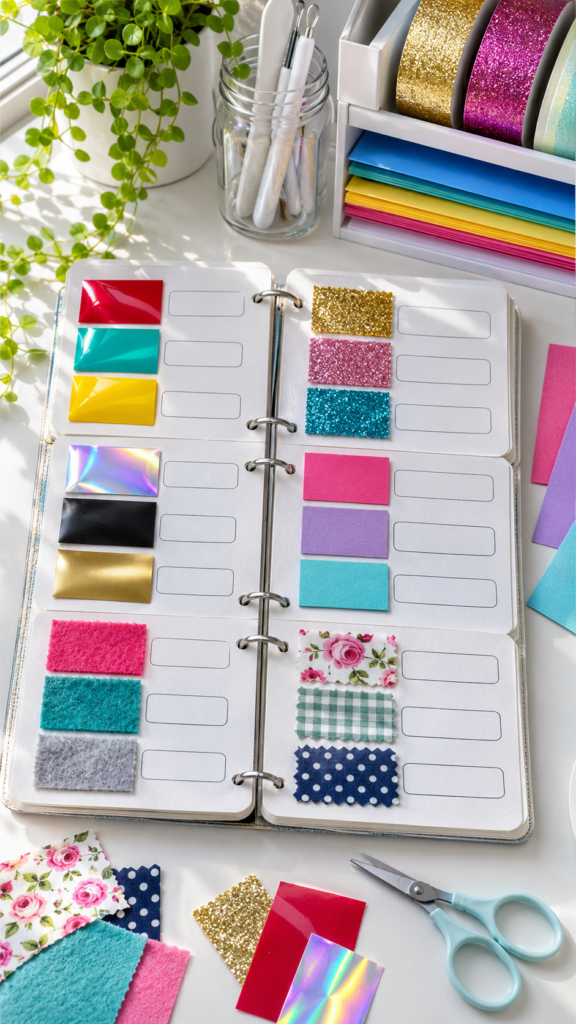
A sample swatch book is a useful project for keeping track of the materials left over from different crafts.
Cut small, consistent samples of vinyl, iron-on, cardstock, felt and other materials, then attach them to pages in a small ring-bound booklet.
Beside each sample, record its name, colour, finish, brand if known, and any cutting or pressing settings that worked. For HTV, also note the recommended application temperature and time from the manufacturer’s instructions.
This gives you a reference when planning future projects and makes it easier to identify materials that might otherwise be mistaken for one another. It is also a practical way to keep track of scraps before buying more supplies.
The same Cricut skills used for birthday decorations can come in handy when preparing for the festive season. 31 Easy Cricut Projects for Christmas offers seasonal projects to try.
What Counts as a Usable Cricut Scrap?
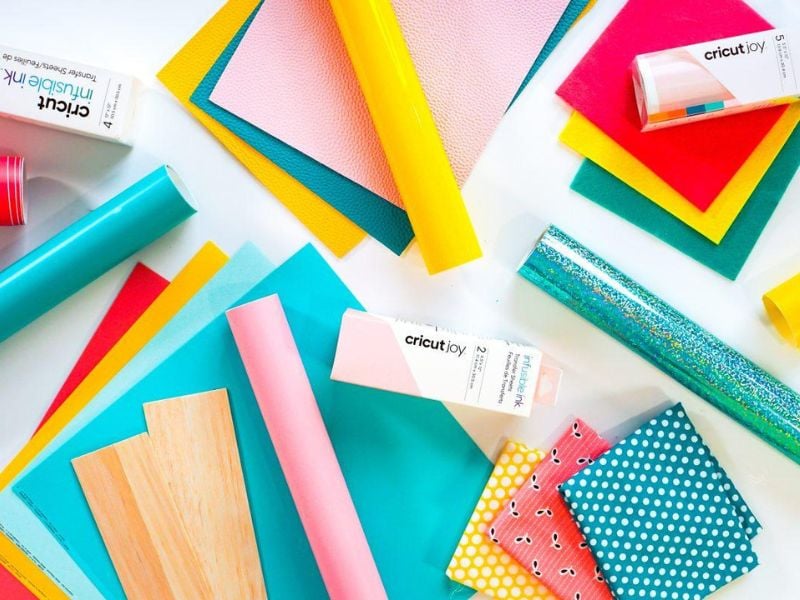
Not every leftover piece is suitable for another cut, even when it looks large enough. Before choosing from the Cricut projects you can make with scrap materials, check the type, condition and usable area of each piece.
A scrap may have enough material for a small design but still cause problems if its backing is damaged, its surface is dirty or the material cannot be cut with the available machine and blade.
- Adhesive vinyl: Check that the backing paper is intact and the adhesive side is free from dust, lint and other debris. Creases can also make it difficult to apply the finished design smoothly. A small, clean piece is often more useful than a larger piece with damaged adhesive.
- Iron-on vinyl (HTV): The clear carrier sheet helps hold the cut design in position during transfer. Keep it intact wherever possible, especially when working with small letters or detailed shapes. Pieces with torn or missing carrier material can be difficult to weed, position and press accurately.
- Cardstock: Look for pieces without deep creases, torn edges or bent areas that could affect the finished cut. A small offcut can still be useful for a letter, tab or decorative shape, provided the design fits within the flat, undamaged section.
- Fabric: Check for frayed edges, loose threads, stains and areas that have stretched out of shape. Some fabrics also require stabilising before cutting to prevent movement or distortion. The appropriate preparation depends on the fabric and the Cricut machine being used.
- Felt, leather and faux leather: These materials require closer attention to thickness and cutting compatibility. Felt density varies, while leather and faux leather can differ in thickness, flexibility and surface finish.
Check Cricut’s material guidance for the specific machine, blade and cutting method before using these offcuts. A piece that is suitable for hand-cutting may not be suitable for machine cutting.
Readers planning a themed celebration later in the year can also find ideas for decorations and accessories in 33 Easy Cricut Projects for Halloween.
Which Cricut Tools and Supplies Help with Scrap Projects?
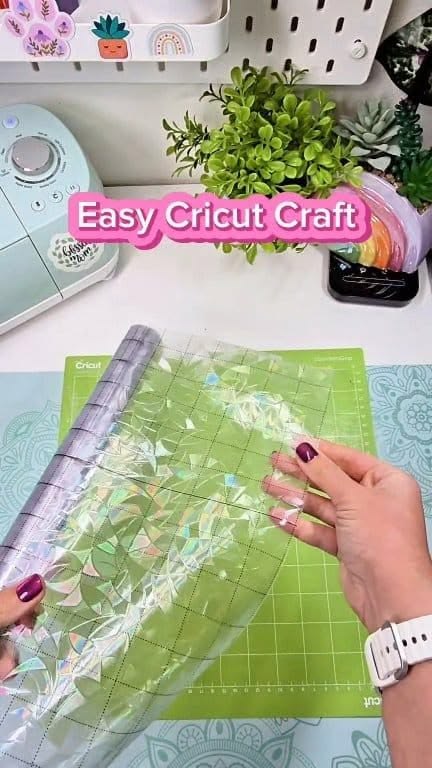
Small offcuts can be harder to handle than full sheets. A suitable mat keeps the material from shifting, a sharp blade helps produce clean cuts, and the right transfer tools make delicate designs easier to apply.
The supplies below are useful for different stages of scrap crafting, although the correct choice depends on the material and Cricut model.
1. Cricut Cutting Mats
A cutting mat holds material in place while the machine cuts. Cricut mats come in different grip strengths, so choosing one based on the material helps prevent it from moving during cutting or becoming difficult to remove.
- LightGrip mat (blue): Suitable for lightweight paper, vellum and light cardstock.
- StandardGrip mat (green): Commonly used for adhesive vinyl, iron-on and medium-weight cardstock.
- StrongGrip mat (purple): Designed for heavier materials such as specialty cardstock, glitter cardstock and supported materials with greater weight or density.
- FabricGrip mat (pink): Designed for fabric cutting and used with compatible Cricut machines and blades.
For scrap projects, the mat should be clean enough to hold small pieces securely. A scrap that shifts during cutting can produce an incomplete or inaccurate design. Check the mat recommendations for the particular machine and material before cutting.
2. Weeding Tools
A weeding tool has a fine point that helps lift unwanted pieces from a cut design. This is particularly useful when working with small vinyl letters, narrow shapes and intricate designs where fingers may struggle to remove the excess material without disturbing the intended design.
A basic weeding tool is usually sufficient for everyday adhesive vinyl and iron-on projects. Tweezers can also help lift tiny pieces, especially when several small details are close together.
3. Fine-Point Blade
A fine-point blade is commonly used for everyday Cricut cutting projects involving paper, cardstock, adhesive vinyl and iron-on materials. It is suitable for many of the small shapes used in scrap projects, provided the material is listed as compatible with the machine and blade.
A blade that has become dull or damaged may leave rough edges, incomplete cuts or details that are difficult to weed. Check the cut quality before assuming that a material setting is the problem. Thicker materials, bonded fabric and other specialised materials may require a different blade.
4. Fabric Stabiliser and Backing Materials
Fabric can shift, stretch or fray while being cut, particularly when the design contains small or detailed shapes. A suitable stabiliser or iron-on backing can help support the fabric, depending on the cutting method and machine.
5. Scrap Storage Folders and Envelopes
Small leftover pieces are easy to misplace, particularly when several colours and material types are kept together. Clear folders, envelopes or shallow storage pockets can help separate adhesive vinyl, iron-on, cardstock, felt and fabric scraps.
Label each section with the material type, colour and finish. Keep adhesive vinyl and iron-on in their original protective liners where possible, and avoid folding or creasing pieces that need to remain flat for cutting.
This simple organisation also makes it easier to see which offcuts are large enough for another project.
6. Small Scissors and a Craft Knife
Small scissors are useful for trimming uneven edges, removing damaged sections and cutting offcuts into manageable shapes before placing them on a Cricut mat. A craft knife can help with careful manual trimming, especially when preparing paper or other suitable materials.
These tools are useful for finishing and preparation, but they should not replace the Cricut blade when a design requires precise machine-cut shapes. Use a cutting mat when working with a craft knife, and handle the blade carefully.
7. Transfer Tape
Transfer tape helps move a cut adhesive vinyl design from its backing paper onto the intended surface while keeping the pieces in position. It is particularly useful for designs containing several small shapes, letters or separate elements that need to maintain their arrangement.
Choose the transfer tape according to the vinyl finish. Standard transfer tape works with most smooth vinyl types, while StrongGrip transfer tape is intended for certain textured vinyl finishes, such as glitter vinyl. StrongGrip can be too adhesive for ordinary vinyl. Also, transfer tape is not used for every Cricut material: it should not be used to transfer cardstock designs.
Not every birthday project requires a heat press; paper crafts, vinyl decorations and other materials can be cut or assembled using suitable tools. 21 Cricut Projects for Beginners Without a Heat Press has more options.
Conclusion
Scrap materials are worth keeping when they can still produce a clean, useful cut. The key is to match each leftover piece to a project that suits its size, material type and condition rather than trying to use every small offcut.
A little organisation also makes a difference: storing vinyl, cardstock, fabric and other materials separately helps prevent damage and makes suitable scraps easier to find.
The 23 Cricut projects in this guide show that leftover materials can serve more purposes than a test cut or a place in the scrap bin.
With the right tools, a compatible machine and realistic expectations about what each material can do, small offcuts can become finished craft pieces while helping reduce unnecessary waste.