Give her fresh ideas to try with these Cricut projects for teen girls, with creative designs for personal accessories, school, hobbies, and thoughtful gifts.
Teenage years come with changing interests, favourite colours, new friendships, and little things that become part of someone’s identity.
But finding craft projects that feel age-appropriate can be difficult when many ideas are either too childish or simply repeat the same personalised mugs, T-shirts, and notebooks.
This collection takes a different route, with 30 cute Cricut projects for teen girls that include useful personal accessories, creative ways to keep memories, hobby-related items, and thoughtful gifts.
Some are simple enough for a first Cricut project, while others offer room to experiment with different materials and techniques
21 Simple Cricut Projects for Beginners That Actually Sell shares more beginner-friendly projects you can make with the goal of selling them.
What You Need Before Starting These Cricut Projects
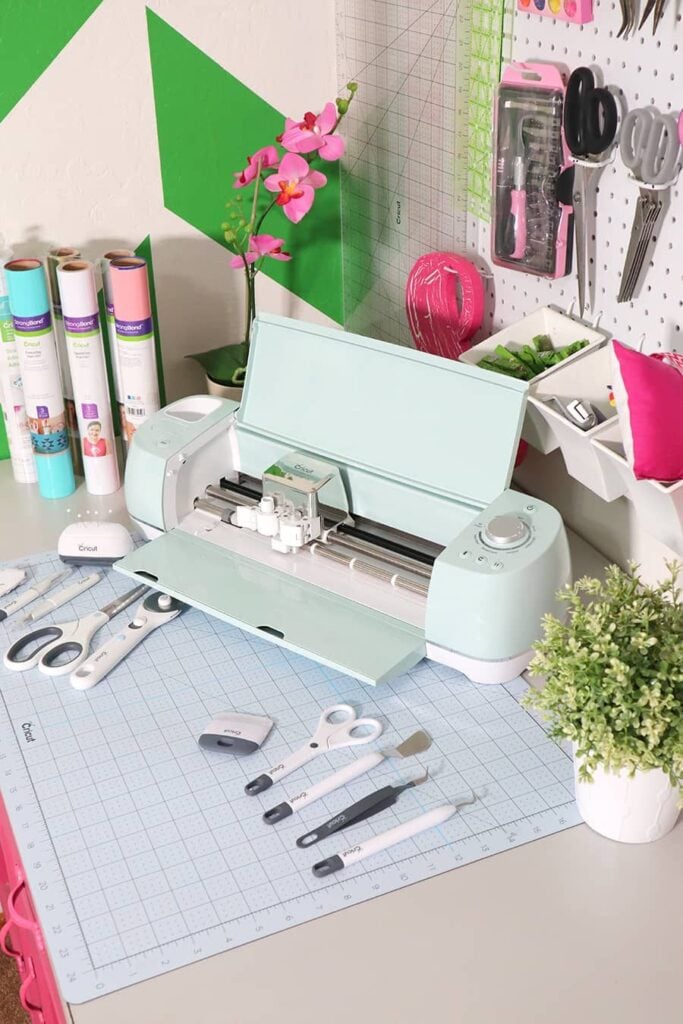
The materials you need will depend on the projects you choose and the Cricut machine you own. Here are the main supplies and what each one is used for:
- Cricut cutting machine: Cuts designs from compatible materials such as vinyl, cardstock, and iron-on.
- Adhesive vinyl: Decorates suitable hard surfaces, including storage tins, cases, and containers.
- Heat-transfer vinyl (HTV): Adds designs to compatible fabric items such as pouches and eye masks.
- Cardstock: Used for bookmarks, gift tags, notebook dividers, party props, and other paper crafts.
- Transfer tape: Moves cut adhesive-vinyl designs from their backing onto the chosen surface.
- Weeding tools: Remove the unwanted vinyl surrounding letters, shapes, and other cut details.
- Scraper tool: Helps smooth vinyl during application and remove air bubbles.
- Cutting mats: Hold materials in place when the selected machine and material require a mat.
- Cricut-compatible pens: Write names, headings, labels, and other details on compatible materials.
- Inkjet printer: Prints full-colour designs for compatible Print Then Cut projects. Not every Cricut machine supports this feature; for example, the original Cricut Joy does not, while Joy Xtra does.
- Heat press or EasyPress: Applies HTV to compatible fabrics using the temperature, pressure, and timing specified for the material.
You don’t need to buy everything at once. Start with the supplies required for the projects you plan to make, and check your machine’s compatibility before purchasing materials or accessories.
If you’re still learning how to use your machine, 22 Easy Cricut Projects for Beginners You Can Make at Home offers simple projects to practise with at home.
Personal Accessories That Feel Individual
Small accessories are a good place to start because they don’t require large amounts of material, and a little personalisation can make an everyday item easier to recognise.
The important thing is to choose designs and blanks that work together. A Cricut can cut very fine details, but that doesn’t mean every detail will transfer neatly onto a small or curved surface.
1. Personalised Earbud Case Decals
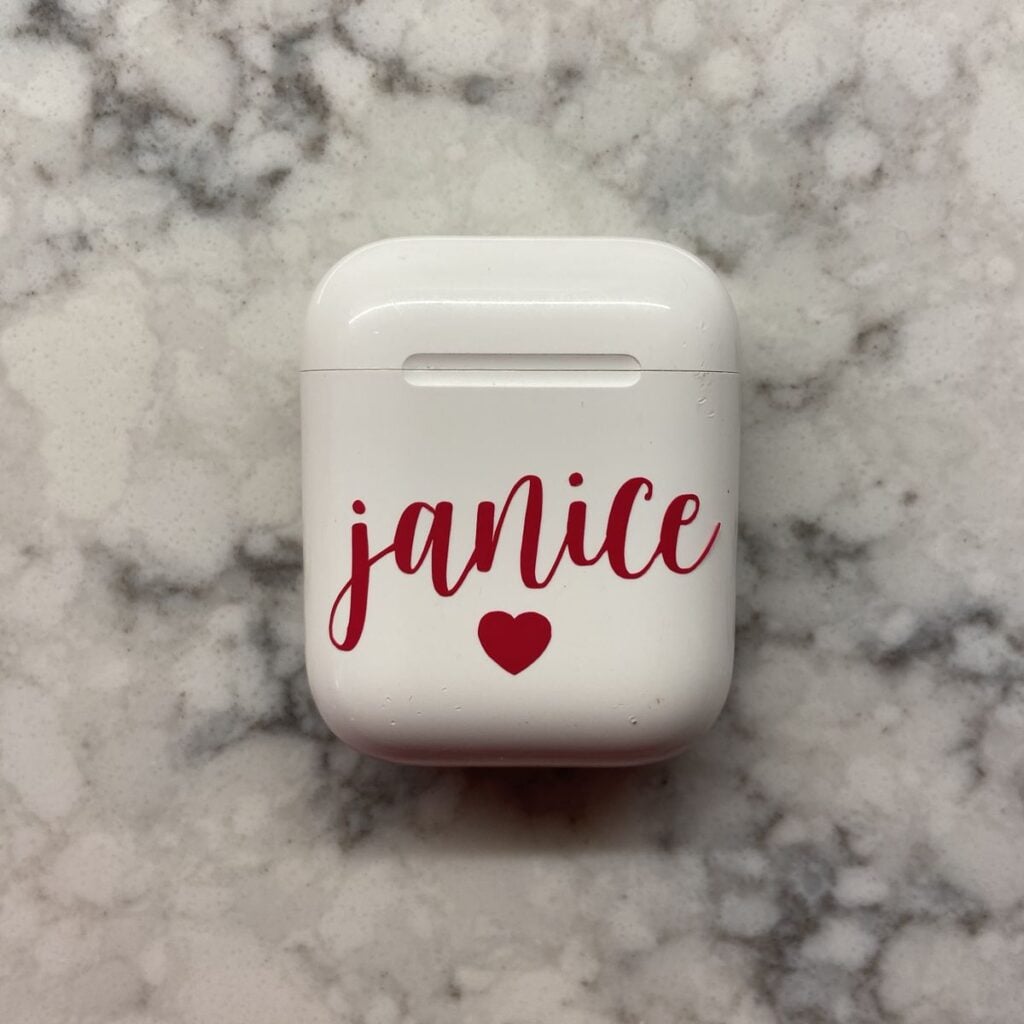
Earbud cases often have limited space for decoration, so a small initial, flower, star, or simple symbol is usually more suitable than a complicated design.
Cut the motif from adhesive vinyl and apply it to the flat outer part of a compatible case. For example, a teenager could use her initial with a tiny flower in a contrasting colour to distinguish her case from similar ones.
Start by measuring the usable area while the case is closed. Leave space around the lid seam, charging port, and any openings. Create the design slightly smaller than the available area so it doesn’t catch when the lid opens.
Very thin letters and tiny cutouts can tear during weeding or lift when transferred, so use a bold, simple design. Make a test cut from a small vinyl scrap before cutting the final version.
Clean the case with a method suitable for its material and let it dry before applying the decal. Avoid covering sensors, buttons, or charging connections.
2. Custom Phone Grip Inserts
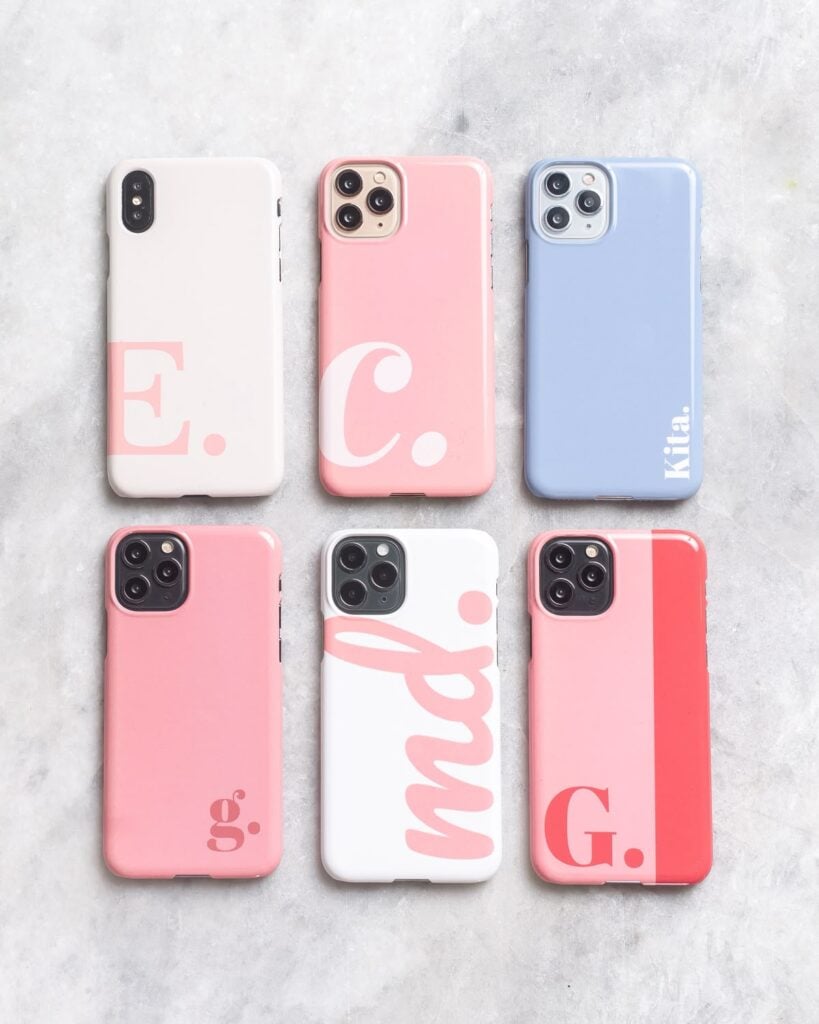
Some phone grips have a removable decorative disc or insert that can be replaced with a different design.
This makes it possible to create a personalised insert featuring initials, a favourite colour combination, a simple pattern, or a small printed photograph. Unlike decorating the outside of the grip, this approach keeps the design within the part intended to be changed.
First, check the phone grip manufacturer’s instructions to confirm that its decorative section is removable. Take out the existing insert, if the design allows it, and use it as a template for the replacement. Trace its outline or measure its diameter, then check the shape and thickness before cutting.
Cardstock may work for some insert designs, while others may require a thin printable material. The replacement must sit flat and fit without forcing the grip closed.
Don’t cover the expanding mechanism or add vinyl to moving or textured parts, as this can affect how the grip functions.
3. Decorated Compact Mirror
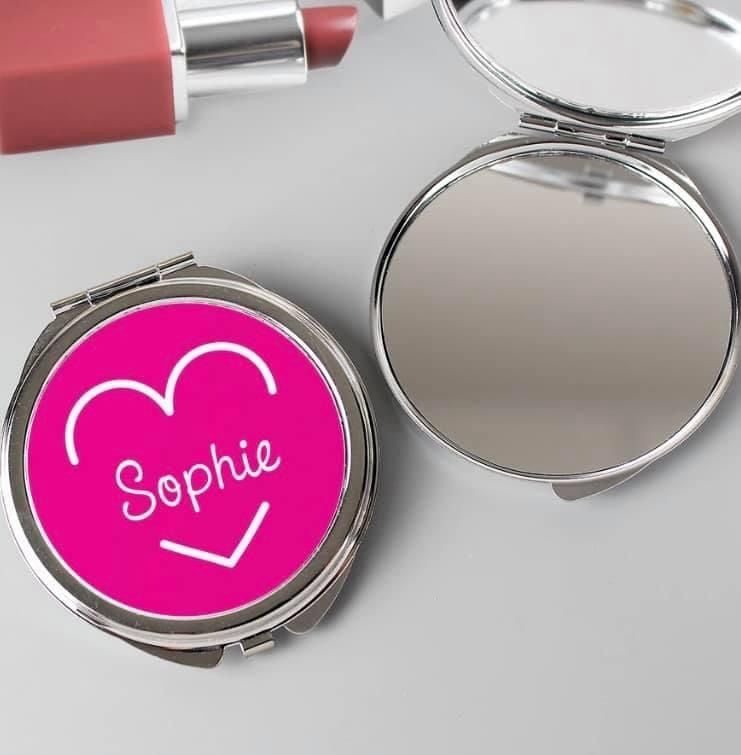
A plain compact mirror can become a personalised accessory with a small vinyl design on its outer cover. Initials, a simple flower, a butterfly outline, or a short name can work well, particularly when the design contrasts with the case colour.
For example, a white flower on a dark compact or a small gold-coloured initial on a neutral cover can create a neat finish.
Choose a compact with a smooth, flat outer surface rather than a heavily textured or fabric-covered one.
Measure the available space and position the design so it doesn’t reach the hinge, opening edge, or any part that rubs against the opposite cover when closed. Cut the vinyl, weed away the excess, and use transfer tape to position the design.
Burnish it gently before removing the transfer tape. Test the vinyl on an inconspicuous area first, especially if the compact has a painted or coated finish, because some coatings can mark or peel when adhesive is removed.
4. Personalised Luggage Tags
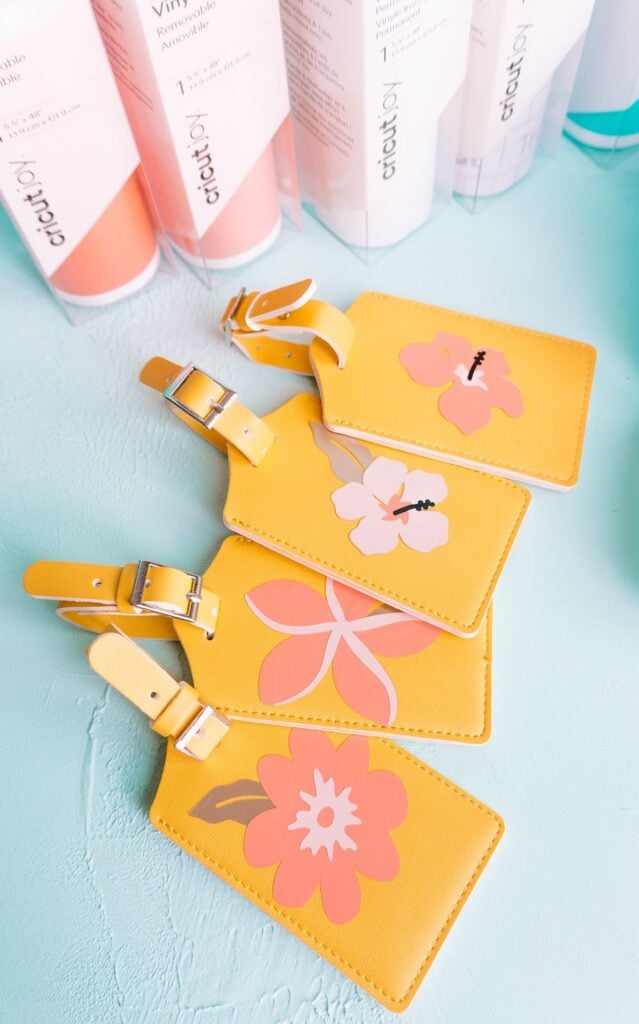
A luggage tag with a name or initials can help a teenager identify her bag when several similar bags are placed together.
Use adhesive vinyl to add lettering to a compatible blank tag. A simple name in a clear font will usually be more useful than an elaborate design that is difficult to read at a glance.
Before cutting, measure the flat area of the tag and check that the lettering will fit without touching the edges or strap opening. Choose a font with clear, well-spaced letters, particularly for names containing narrow characters such as i or l. Use a contrasting vinyl colour so the text stands out against the tag.
After applying the design, press it down carefully around the edges and allow it to adhere according to the vinyl manufacturer’s instructions.
Since luggage tags can be rubbed against other bags and handled frequently, choose a vinyl suitable for the intended surface and use. For privacy, initials or a first name may be preferable to displaying a full name and personal contact details openly.
5. Custom Hair-Accessory Storage Cards
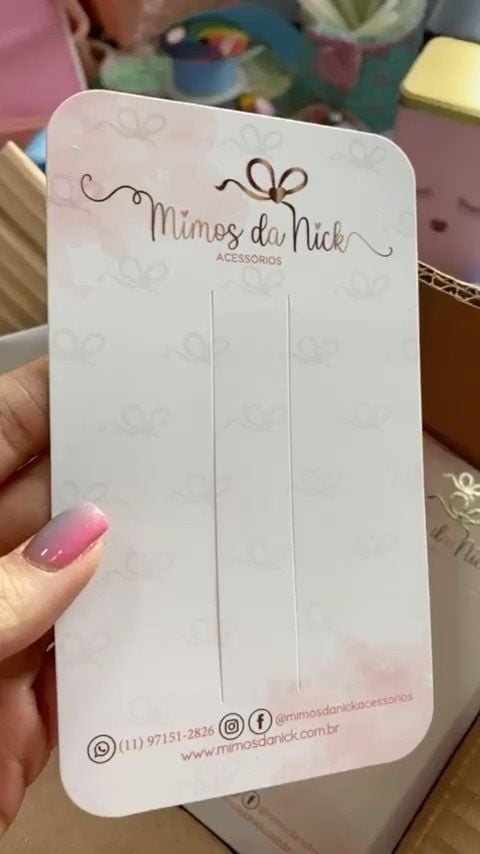
Hair clips, bows, and small accessories can become mixed together in a drawer, making it difficult to find matching pieces.
A Cricut can cut cardstock display cards with slots or openings to hold clips, while written labels can separate everyday accessories from special-occasion pieces. For example, one card could hold school hair clips and another could keep matching bows together.
Start by arranging a few actual accessories on scrap paper to decide how much space each needs. Mark where the clips will sit, leaving enough distance between openings so the cardstock doesn’t tear when accessories are removed.
Test one or two slots before cutting the complete set. If the clips are heavy or have strong springs, use thicker cardstock or attach the finished card to a sturdy backing.
You can also add a small heading using a Cricut-compatible pen or cut lettering. Store the cards in a shallow box or drawer where the accessories can be reached without bending the display.
For more ideas to try as a new Cricut user, take a look at 19 Easy Cricut Projects for Beginners.
School and Study Projects With a Practical Purpose
School supplies can become difficult to keep organised when different subjects, assignments, and revision notes are mixed together.
These Cricut projects for teen girls focus on making study materials easier to identify, sort, and use. Before decorating anything intended for classroom use, check whether the school allows personalised stationery.
6. Subject Divider Tabs for Notebooks
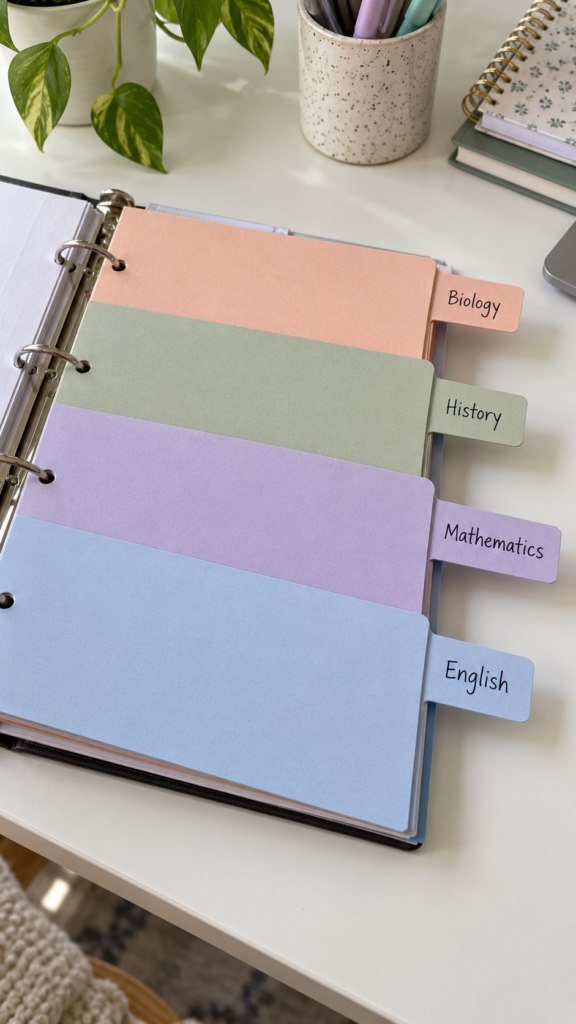
When several subjects share one notebook, finding the right notes can take time. Subject divider tabs give each section a clear label, making it easier to move between class notes, homework, and revision work.
Use your Cricut to cut tabs from cardstock, then add subject names such as Biology, History, Mathematics, or English with a compatible pen or cut lettering.
For a practical result, make the tabs wide enough to hold readable labels and leave part of each one extending beyond the edge of the paper. Arrange them in a staggered order so they don’t sit directly on top of one another.
You can attach each tab to a divider sheet or reinforce the edge with clear tape or a suitable laminating method.
Test the size against the actual notebook before cutting a full set, since ring binders, spiral notebooks, and bound journals have different page layouts.
7. Personalised Book-Annotation Tabs
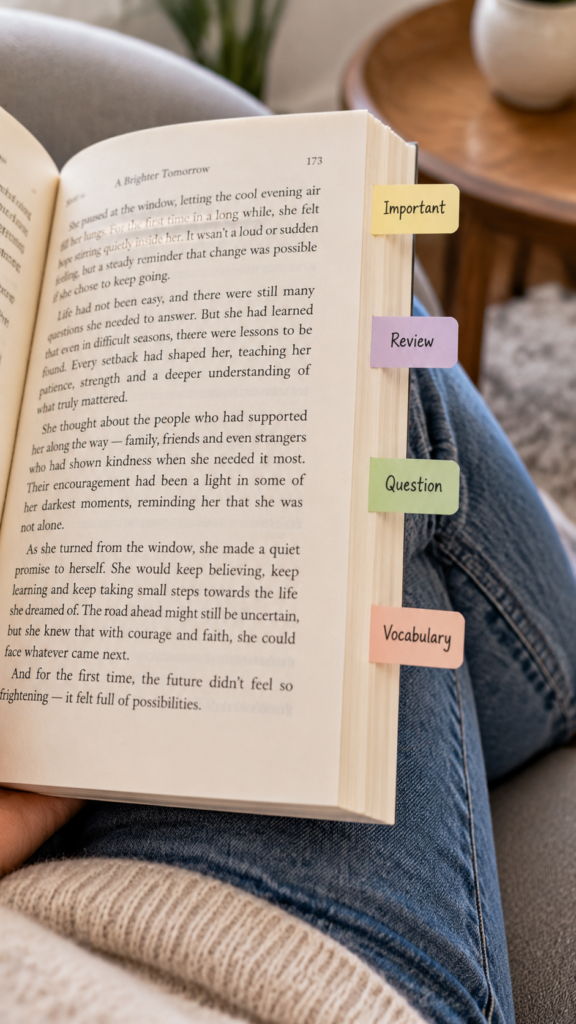
Reading assignments often involve marking passages to revisit, questions to ask, or details that may be useful in an essay.
Instead of using unrelated sticky notes, make a coordinated set of small annotation tabs labelled Important, Review, Question, and Vocabulary.
Cut the labels from cardstock or compatible writable material, keeping the wording short enough to read at a glance.
The benefit comes from using the same labels consistently. For example, a student can mark unfamiliar words while reading a novel, flag important passages for discussion, and identify sections that need another look before an exam.
Make the tabs small enough not to cover the text, and use a paper-safe adhesive or removable tab material. Avoid permanent vinyl directly on library books or borrowed textbooks, as removing it could damage the pages or cover.
8. Custom Calculator or Pencil-Case Labels
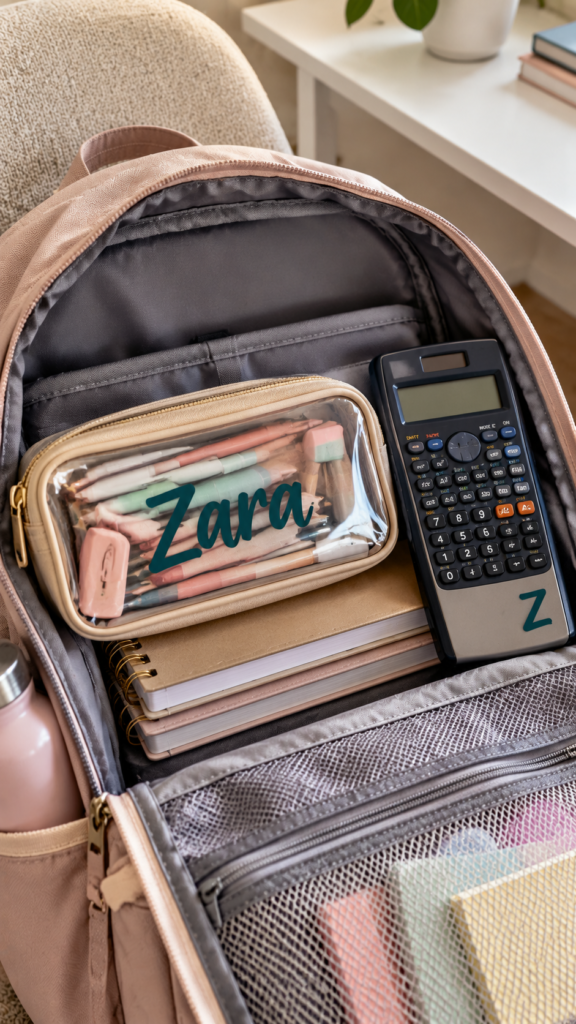
School supplies can look alike, especially when classmates use similar calculators and pencil cases. Small name labels or initials can help identify personal belongings.
Cut a simple design from adhesive vinyl and apply it to a suitable smooth area of a calculator casing or pencil case. A contrasting colour and clear lettering will make the label easier to recognise.
Measure the available space before designing. On a calculator, keep the vinyl away from the display, buttons, solar panel, battery cover, and other openings.
On a pencil case, check that the material is smooth enough for the vinyl to adhere; textured fabric and flexible coatings may not hold ordinary adhesive vinyl reliably.
For fabric pencil cases, a compatible HTV design may be more suitable, provided the material can tolerate the required heat. Always check the care label and test a small area first.
9. Revision Flashcards With Cut-Out Headers
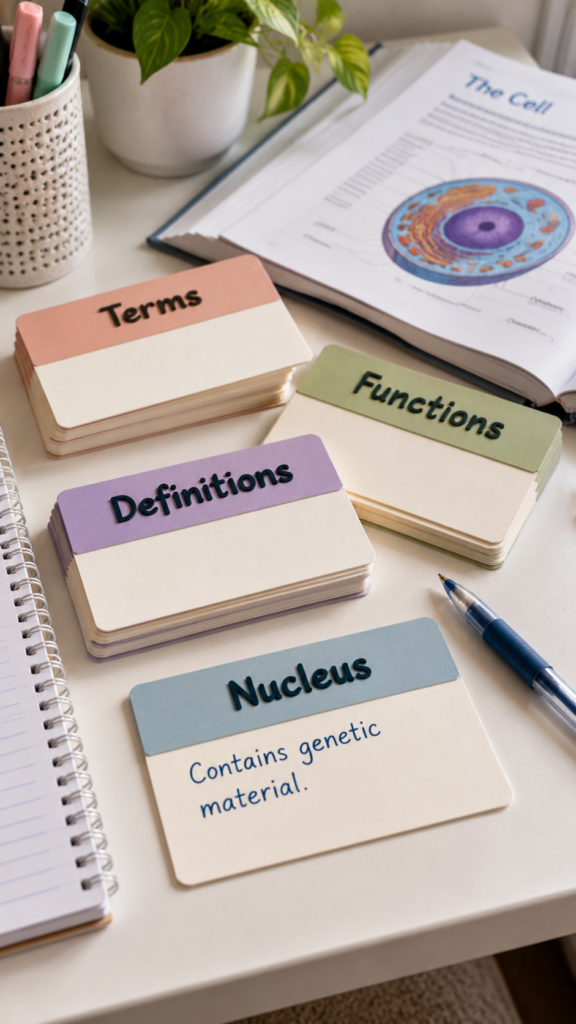
Revision flashcards are useful for practising vocabulary, definitions, formulas, and important dates without rereading an entire textbook.
A Cricut can help make a consistent set by cutting cardstock to the same size and adding headings with a compatible writing pen.
For example, a Biology set could have cards labelled Key Terms, Functions, and Definitions, while a History set could use People, Events, and Dates.
Choose a card size that leaves enough room for the information. A small card may work for a vocabulary word and its meaning, but a formula or longer explanation needs more writing space.
You can use the machine to write headings and cut the cards, then add the study information yourself.
Alternatively, create separate question-and-answer cards for active recall: put the prompt on one side and the answer on the reverse.
Check every definition, date, and formula against a reliable textbook or class material before using the cards. The Cricut helps with presentation; it does not verify the accuracy of the lesson content.
10. Personalised Reading Journal
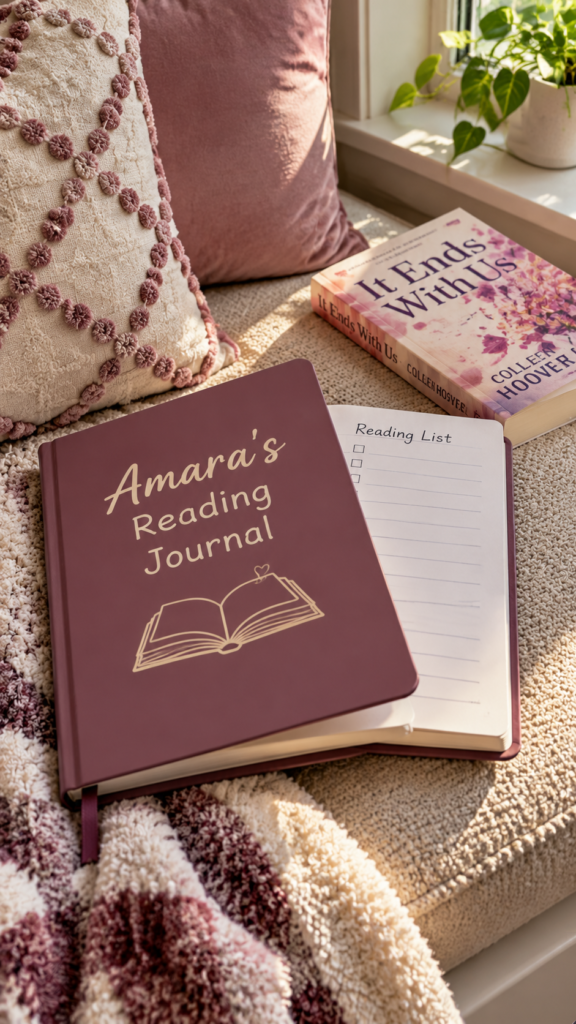
A reading journal gives a teenager one place to keep track of books, record thoughts, and remember what she wants to read next.
Personalise the cover of a plain notebook with a cut title, initials, or a small book-themed motif. Inside, create useful sections such as Reading List, Currently Reading, Favourite Quotes, and Books Completed.
The pages should be planned around how the journal will be used. A reading list needs space for book titles and authors, while a review page might include a rating, favourite character, and a short note about the story.
Avoid making every page overly decorative, because too many small sections can leave little room for writing. For the cover, measure the flat area before cutting your vinyl design and keep it clear of the spine and corners where repeated handling can cause edges to lift.
If the notebook has a textured or fabric cover, test the material first rather than assuming adhesive vinyl will stick securely.
25 Easy Cricut Projects to Make and Sell for Extra Money explores more products you could create and sell to earn extra income.
Creative Projects for Hobbies and Personal Interests
Teenagers have different interests, so these projects give them room to make something connected to an activity they already enjoy.
A music lover might need a better way to store small accessories, while someone who draws, takes photographs, plays sports, or crochets may appreciate items that help organise their supplies or display their work.
11. Custom Guitar-Pick Storage Tin
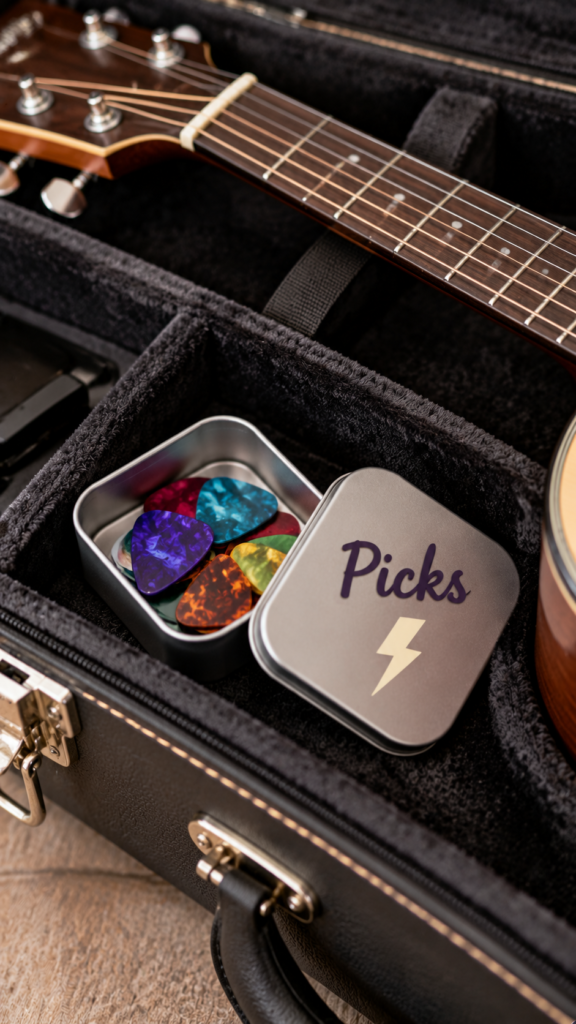
Guitar picks are small and easy to misplace, especially when they are kept loose in a school bag, instrument case, or bedroom drawer. A small tin gives them a dedicated place, and a Cricut-cut design can make it easy to identify.
Choose a tin with a smooth, flat lid and measure the available space before creating the design. Cut the teen’s initials, a simple musical symbol, or a short label from adhesive vinyl
. Keep the design on the lid rather than around the sides, where it could interfere with opening and closing.
A simple design is usually more suitable than tiny lettering because small details can be difficult to weed and may lift with regular handling.
The tin can also hold other small music accessories, such as spare strings or earplugs, provided they fit comfortably.
12. Personalised Sketchbook Cover
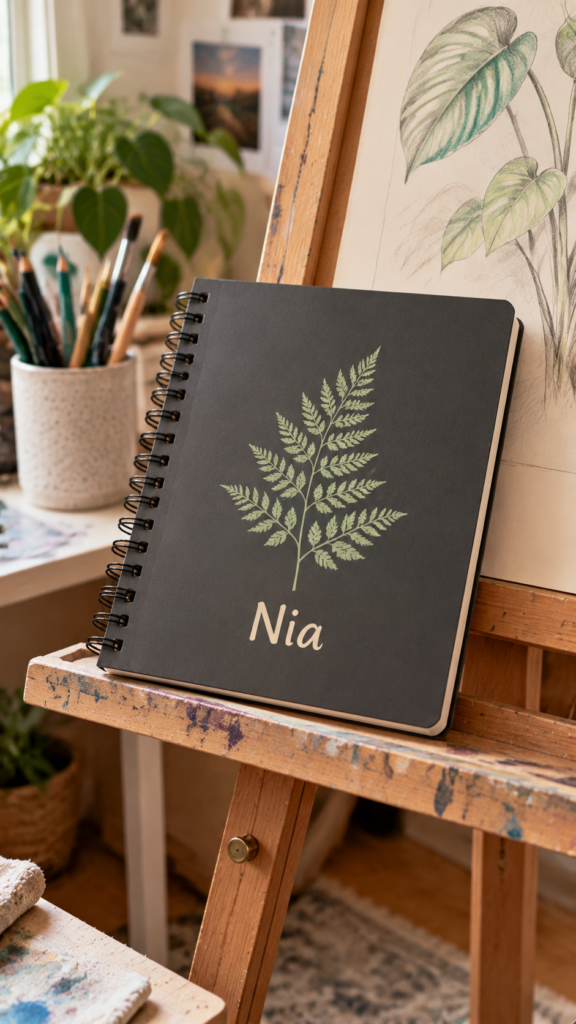
A sketchbook often becomes a collection of drawings, experiments, and unfinished ideas. Giving it a recognisable cover can help distinguish it from school notebooks and make it feel like a dedicated creative space.
Use adhesive vinyl on a smooth, compatible cover to add the artist’s name, initials, or a design connected to their interests.
For example, someone who enjoys drawing plants could use a simple leaf outline, while a teenager interested in fashion illustration might prefer a dress-form or line-art design.
The design should complement the sketchbook rather than cover most of the surface, especially if the book is handled frequently.
Before cutting, check whether the cover is smooth enough for adhesive vinyl. Fabric, textured paper, and soft-touch finishes may not hold it securely.
Test a small piece on an inconspicuous area first, and keep the design away from the spine so it does not crack or peel as the book opens.
13. DIY Photography Contact-Sheet Wall Cards
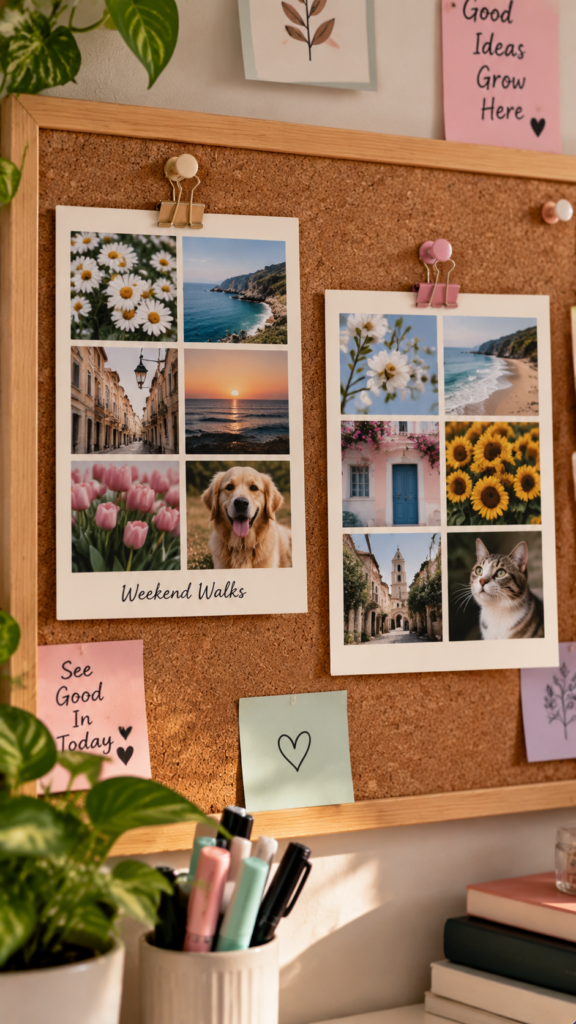
Teenagers who enjoy photography can turn their own pictures into a small display instead of leaving every image on a phone.
A contact-sheet arrangement brings several photographs together, making it easier to compare different shots from a day out, a school event, a family gathering, or a photography project.
Select a group of photographs and arrange them in a grid using Cricut Design Space or another suitable design program.
Add small captions, dates, or location labels if they help tell the story. With a compatible Cricut machine and an inkjet printer, Print Then Cut can print the photographs and cut around the prepared layout.
Check the machine’s Print Then Cut compatibility before planning this project, as not every Cricut model supports the feature.
The finished cards can be arranged on a noticeboard, placed in a photo album, or kept in a small memory folder.
Leave enough space between photographs for clean cuts, and print a test sheet before using your best images. For a wall display, use photo-safe mounting materials that will not damage the pictures.
14. Custom Sports-Bag Name Label
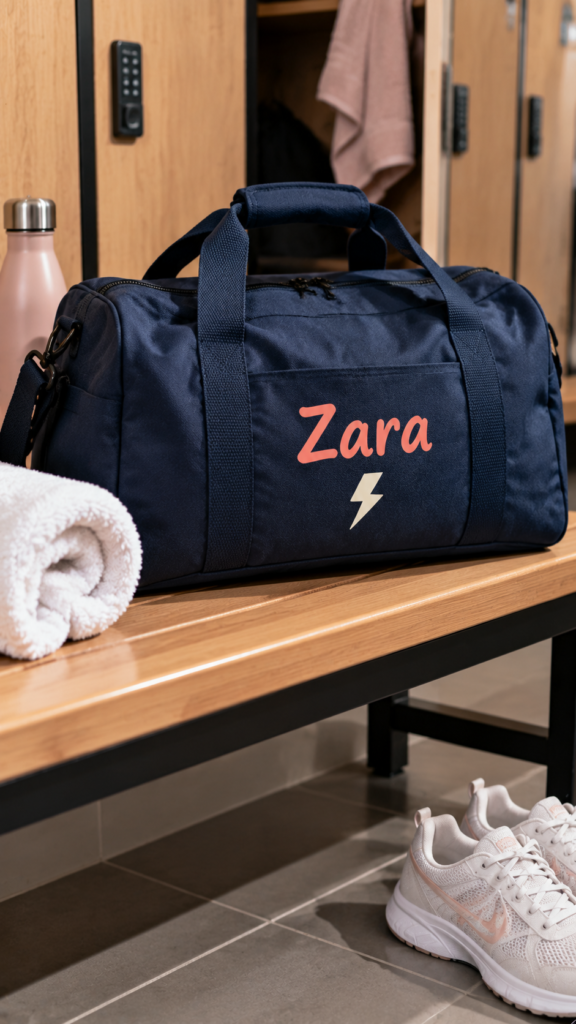
A name label helps a teenager identify their sports bag when several similar bags are kept together in a changing room, school locker area, or team practice space. It can also make it easier to recognise a bag during busy training sessions.
The material depends on the bag. For a smooth luggage-style tag or compatible plastic panel, cut a name or initials from adhesive vinyl.
For a suitable fabric bag, use iron-on vinyl only if the fabric and its care instructions allow heat application.
These materials are not interchangeable: adhesive vinyl is designed for suitable surfaces, while iron-on vinyl needs the correct heat and pressure to bond to fabric.
Keep the design large enough to read at a glance, but small enough to fit within the flat area. Avoid placing it over seams, zips, or curved sections.
If the bag is regularly washed, exposed to rain, or handled roughly, check the vinyl manufacturer’s durability and care instructions before choosing the material.
15. Personalised Crochet or Art-Supply Labels
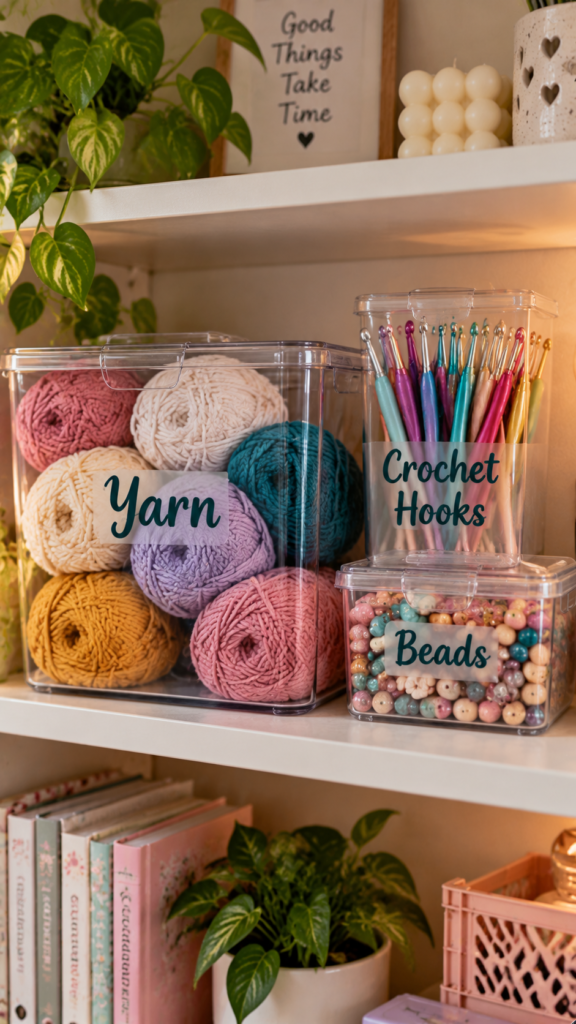
A teenager who crochets, paints, draws, or makes jewellery may keep different supplies in several pouches, boxes, or containers. Small labels can make those supplies easier to sort and find, particularly when colours, tools, or materials look similar.
Use Cricut to cut short labels such as “Crochet Hooks,” “Yarn,” “Paintbrushes,” “Markers,” or “Beads.”
Apply adhesive vinyl to smooth containers, jars, or compatible storage boxes. For fabric pouches, check whether the material is suitable for iron-on vinyl instead.
Another option is to cut cardstock labels with small holes and attach them to pouch zips or storage handles using string or a tag loop.
Choose wording that identifies what is inside without making the label crowded. For example, a yarn container could be labelled by yarn weight or colour group if the teenager regularly sorts supplies that way.
Make sure the label does not cover a clear window or take up space needed to open the pouch or container.
Vinyl is useful for a range of Cricut crafts, and 23 Cricut Projects for Beginners Using Vinyl provides more ideas to try with this material.
Small Room and Everyday Organisation Projects
These Cricut projects for teen girls focus on a practical problem: small personal items often end up mixed together in drawers, bags, and shared spaces.
Rather than adding decorations to a room, each idea uses labels or pouches to give belongings a clear place and make them easier to find.
16. Skincare and Toiletry Bag Labels
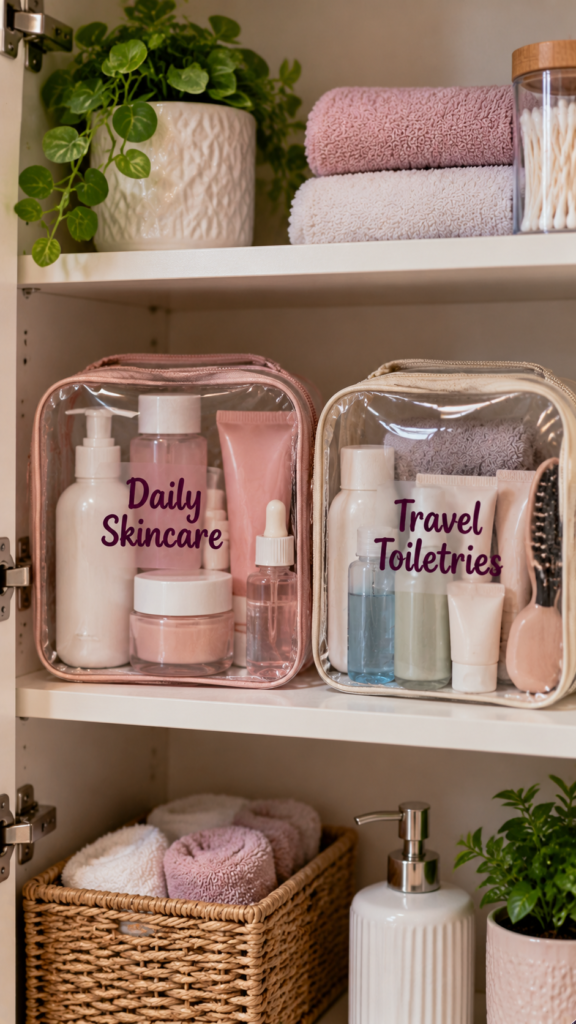
A teenager who keeps skincare, hair products, and toiletries in separate bags can use labels to avoid mixing everyday items with products packed for trips or sleepovers.
Cut short labels such as “Daily Skincare,” “Hair Accessories,” or “Travel Toiletries” from adhesive vinyl and apply them to the outside of suitable pouches.
Measure the flat area before cutting, and choose lettering that remains readable at a small size.
Smooth, coated pouch surfaces may accept adhesive vinyl, but fabric and textured materials may not hold it well. Test a small piece first rather than making a full set of labels that could peel off.
17. Drawer Category Labels
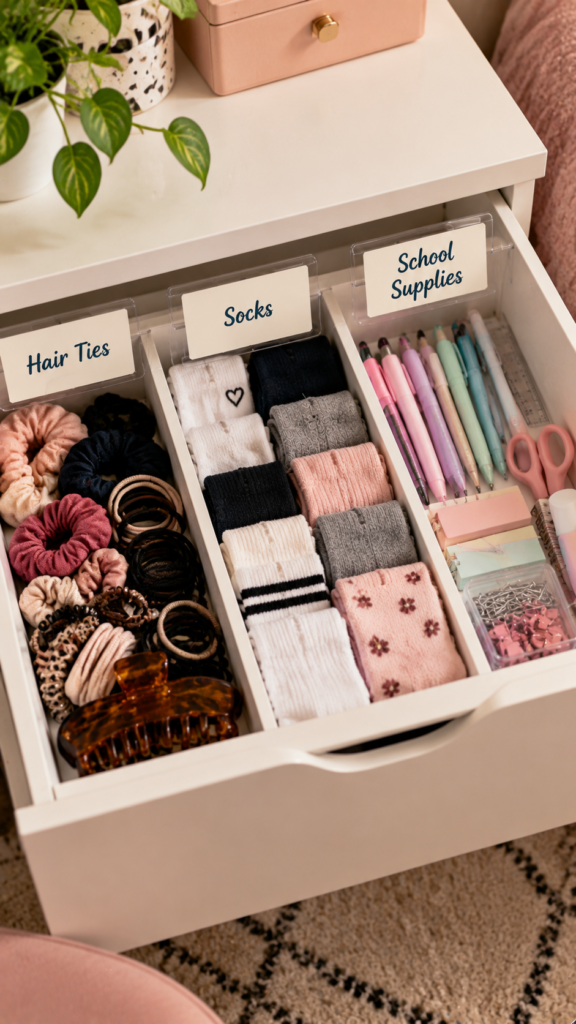
When socks, hair accessories, stationery, and other small belongings share one drawer, it can become difficult to remember where everything belongs. Small drawer labels give each section a clear purpose and make it easier to return items to the right place after use.
Cut matching labels from adhesive vinyl for smooth drawer fronts or from cardstock for removable labels that can sit inside dividers. Use specific names such as “Hair Ties,” “Socks,” or “School Supplies” instead of broad labels like “Miscellaneous.”
Keeping the lettering style and label size consistent makes the categories easier to recognise. Start with the sections that become messy most often; there is no need to label every drawer.
18. Charging-Cable Identification Tags
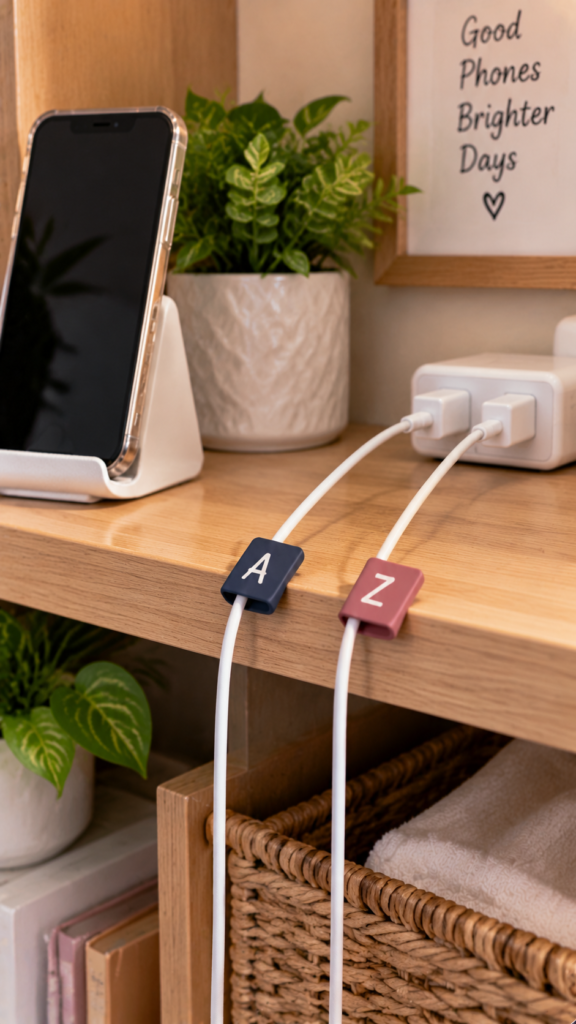
When several charging cables look alike, it is easy to pick up the wrong one, especially in a shared bedroom or family charging area. Make small identification tags using a cable-tag blank designed for this purpose, then add a short name, initial, or symbol with compatible vinyl.
Keep the design on the tag itself rather than wrapping vinyl directly around the cable.
The tag should fit securely without pressing against the connector or interfering with how the cable bends. Avoid placing materials near plugs, electrical contacts, or any area that becomes warm during use.
Check that the tag is suitable for the cable type before attaching it.
19. Jewellery-Storage Compartment Labels
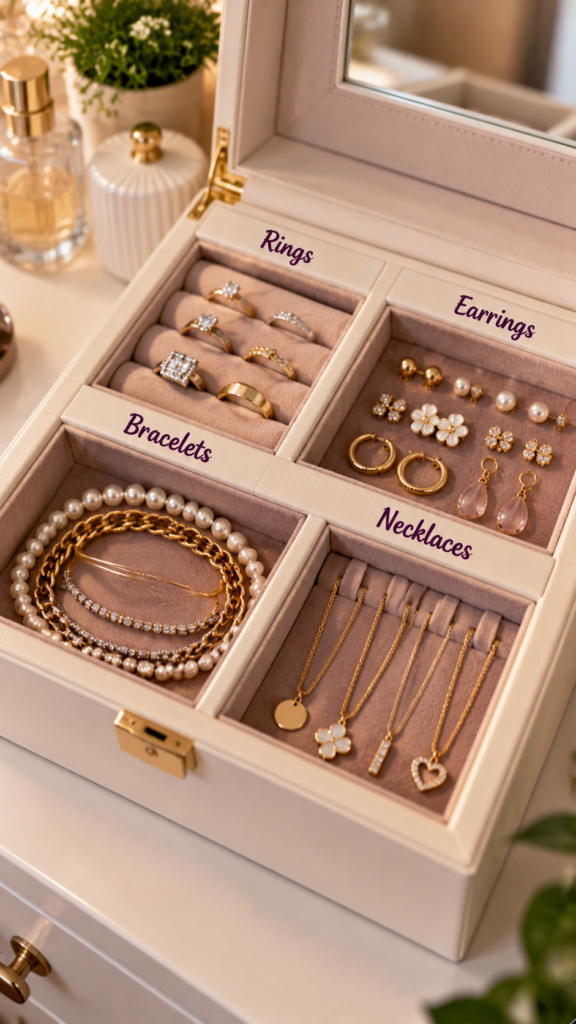
A jewellery box with several small sections can be easier to use when each space has a purpose. Label compartments for earrings, rings, bracelets, and necklaces so that small pieces are less likely to get mixed together.
For a permanent arrangement, use small adhesive-vinyl labels on smooth compartment edges. If the jewellery collection changes or the box may be reorganised, make removable cardstock labels instead. Keep labels short and place them where they will not touch the jewellery.
This is particularly useful for boxes with similar-looking compartments, where it may otherwise take time to find a matching pair of earrings or a particular bracelet.
20. Personalised Reusable Storage Pouches
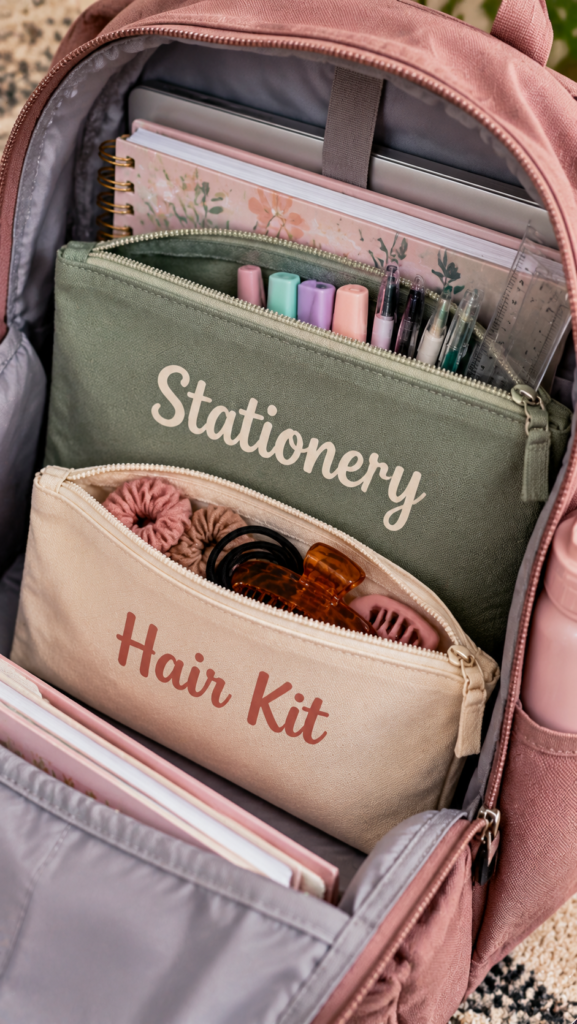
A few reusable pouches can keep small belongings together inside a school bag, handbag, or suitcase. One could hold hair ties and clips, another could carry stationery, while a third could keep travel-size toiletries in one place.
Choose plain fabric pouches that can tolerate heat application, then use iron-on vinyl to add a short label, initials, or a simple design.
Check the pouch’s care label and the HTV manufacturer’s instructions for the correct temperature, pressure, and pressing time.
Test on an inconspicuous area first, especially if the pouch has a coating or synthetic fabric that may be heat-sensitive. Keep the design simple so the pouch remains useful and easy to clean.
23 Cricut Projects for Beginners Using Vinyl introduces more ways to use vinyl in your Cricut crafts.
Thoughtful Gifts and Friendship Projects
Handmade gifts do not have to be expensive to feel personal.
These Cricut ideas use photographs, shared interests, handwritten messages, and simple cardstock details to make small presents more meaningful. They also work well for birthday gifts, friendship exchanges, and party favours.
21. Best-Friend Initial Bookmarks
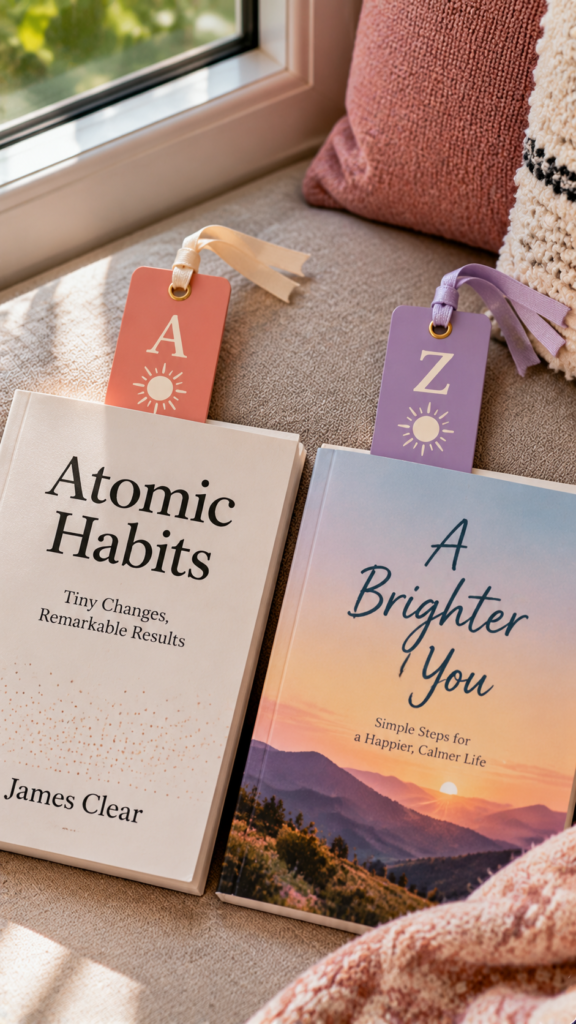
Matching bookmarks are a simple gift for two friends who enjoy reading or want a small keepsake they can both use.
Cut two bookmarks from cardstock, adding each person’s initial, a favourite colour, or a small design connected to something they enjoy together.
The designs can match without being identical; for example, each bookmark could carry the owner’s initial with the same small flower or star.
Make the bookmarks slightly wider than the ribbon or tassel you plan to attach. After cutting, punch a hole near the top, leaving enough space around it so the cardstock does not split.
Reinforce the hole with a small eyelet or an extra cardstock layer before threading the ribbon through. Choose sturdy cardstock rather than thin paper, which can bend easily inside a book.
22. Personalised Photo-Frame Inserts
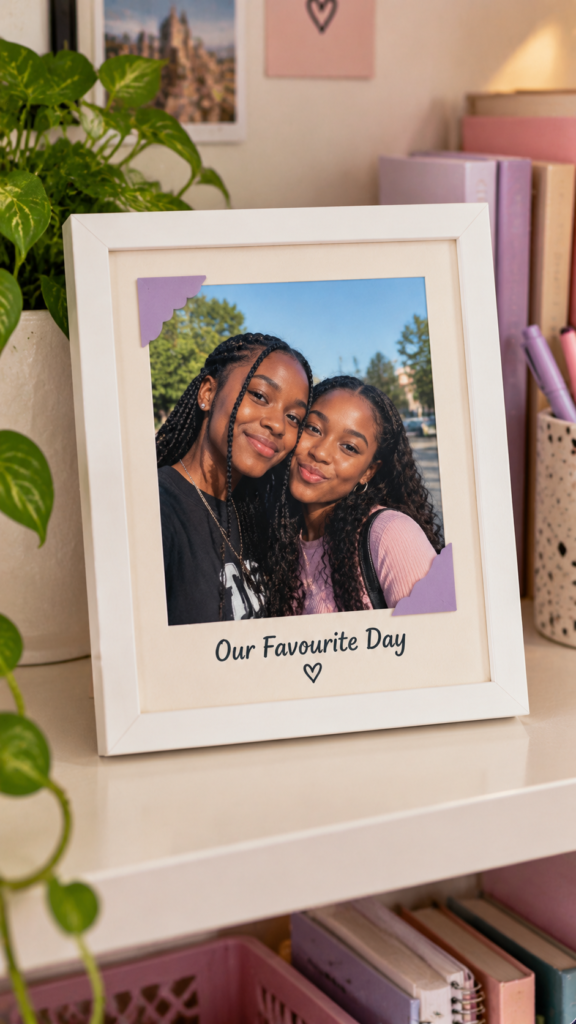
A framed photograph becomes a more considered gift when the design includes a date, a short message, or a detail connected to the memory. This could be a picture from a school event, a birthday, a trip, or a special day shared by two friends.
Measure the frame’s visible opening and the area covered by its inner mount before designing the insert. Arrange the photograph and wording so neither gets hidden behind the frame edges.
Print the photograph using a suitable printer, then use Print Then Cut if the Cricut machine supports that feature. Alternatively, cut a cardstock border or decorative shapes separately and assemble them around a printed photograph.
Use a photograph the recipient would be happy to display, and avoid adding too much wording that competes with the image.
23. Custom Gift-Box Sleeves
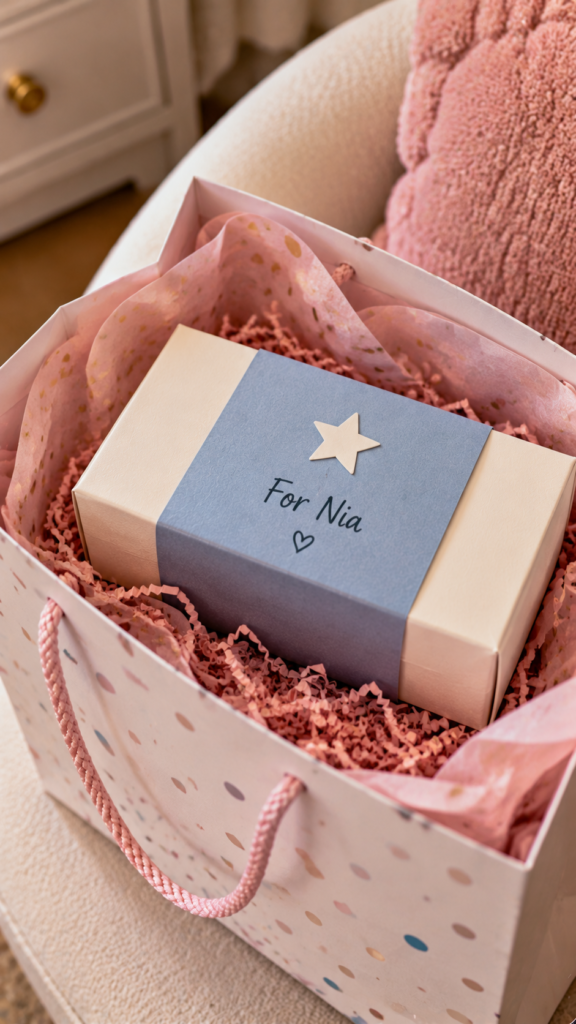
A cardstock sleeve can give a plain gift box a coordinated finish without requiring a specially decorated box. It is useful when wrapping a small present such as jewellery, a keyring, stationery, or a handmade item.
Measure the actual box’s length, width, and height before creating the sleeve. The cardstock needs to wrap around the box with enough overlap to secure the ends, while remaining loose enough to slide on and off.
Use Cricut Design Space to create the sleeve shape and score lines where the cardstock will fold. If your machine does not have a scoring tool, use a suitable manual scoring tool and ruler.
Test the measurements with scrap paper first; even a small error can make the sleeve too tight or leave it slipping off. Add the recipient’s name or a short message after confirming the fit.
24. Friendship Bracelet Message Cards
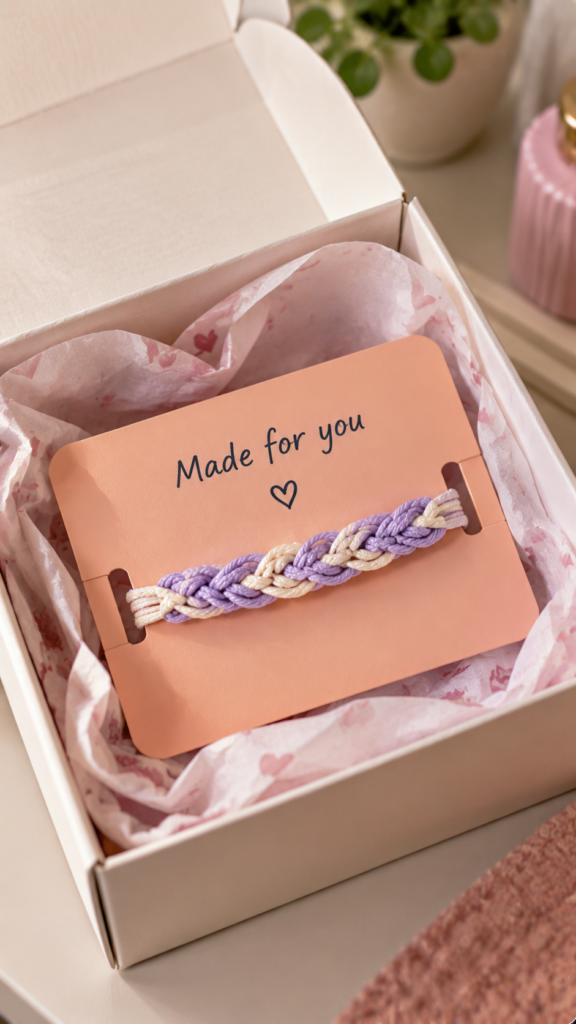
Handmade bracelets can be difficult to present neatly when they are simply placed inside a gift bag. A small display card gives the bracelet somewhere to sit and provides space for a message explaining why it was made for that friend.
Cut a rectangle or simple decorative shape from cardstock, then add two small slits or holes to hold the bracelet in place.
Include the recipient’s name or a brief message such as “Made for you” or “Thanks for being my friend.”
Position the openings according to the bracelet’s width so it stays secure without stretching the cord.
The Cricut makes the backing card and lettering; the bracelet itself can be made separately using embroidery thread, beads, or another suitable material.
25. Personalised Birthday Party Favour Tags
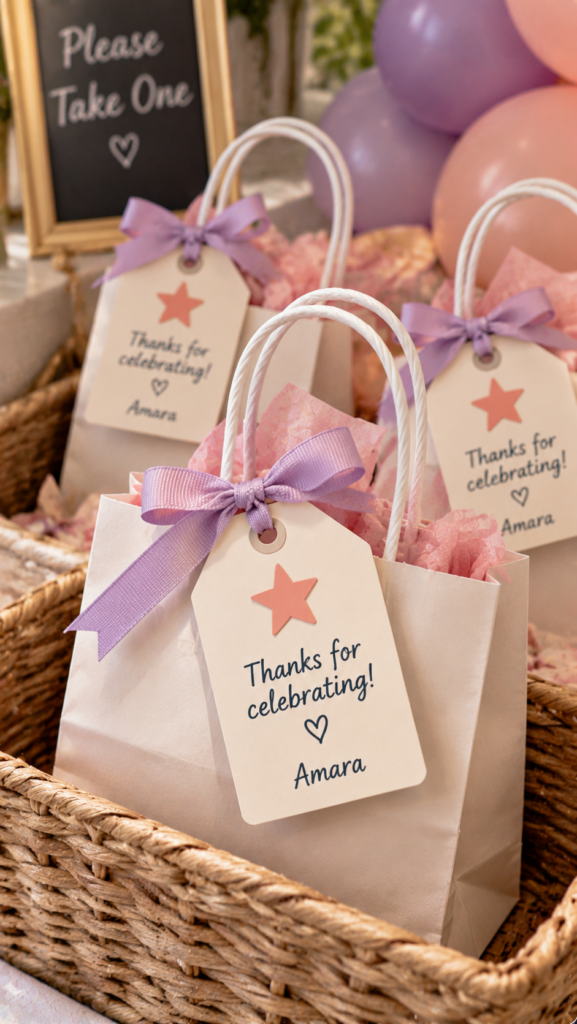
Treat bags and small party gifts can look more organised when each one has a matching tag with the birthday person’s name, celebration date, or a short thank-you message.
These tags are useful for sleepovers, school birthday celebrations, and small gatherings where several guests receive similar bags.
Create the tag shape in Cricut Design Space, then add a hole near one end for ribbon or string.
Make the hole large enough for the chosen tie to pass through, but leave a generous border around it so the cardstock does not tear when the tag is handled.
Medium-weight or heavier cardstock is generally more suitable than thin paper. Cut one sample first and attach it to a filled favour bag to check that the tag hangs properly and does not pull away from the hole.
25 Easy Cricut Projects Using Cricut Infusible Ink features projects that use Infusible Ink with compatible blanks.
Projects for Celebrations and Special Moments
Some occasions call for small details that help preserve the memory or bring a group of items together. These Cricut projects for teen girls are useful for sleepovers, concerts, graduation celebrations, and birthdays.
Most can be made with cardstock or materials the recipient already has, rather than buying a complete decoration kit.
26. Custom Sleepover Eye Masks
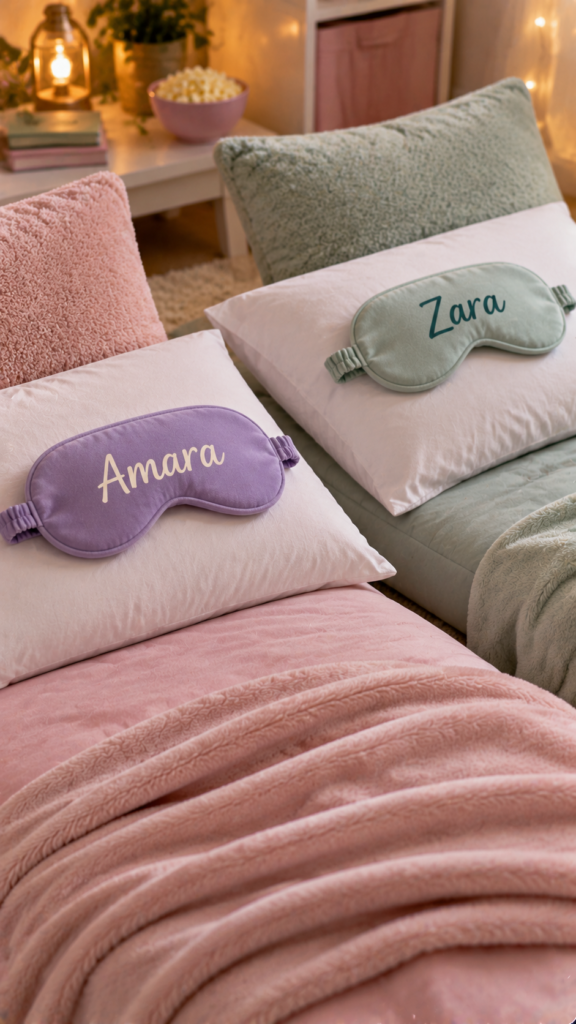
Personalised eye masks can serve as small gifts for friends attending a sleepover or as part of a birthday favour bag.
Cut each guest’s name, initials, or a simple motif from heat-transfer vinyl (HTV), then apply it to a compatible fabric eye mask.
Check the fabric label and HTV instructions before pressing because some synthetic materials cannot tolerate the required heat.
Position the design on the front section, away from the elastic and the area that rests against the eyes.
Avoid adding beads, raised decorations, or hard pieces that could press against someone’s face while sleeping. Test the design on one mask before making a matching set.
27. DIY Concert or Event Memory Tickets
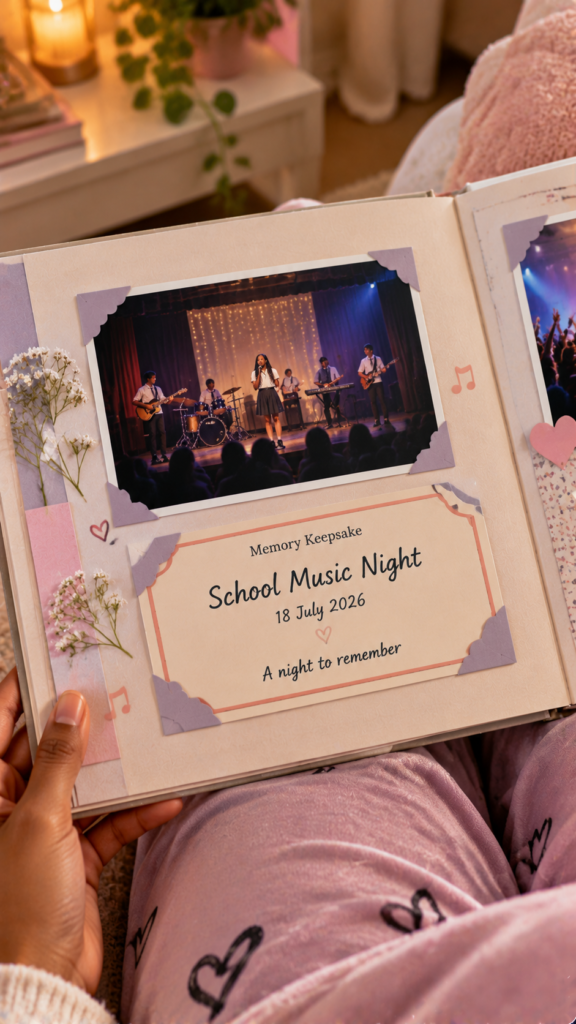
Keep the memory of a concert, school performance, sports event, or festival with a handmade ticket-style keepsake. Unlike an admission ticket, this one is designed to record the experience after the event or to accompany a gift for someone who attended.
Create a ticket shape in Cricut Design Space and add the event name, date, venue, and a short note about the occasion. Cardstock works well for this project because it gives the ticket some structure.
Use a perforated-style edge or small decorative cut-outs if you want it to resemble an old-fashioned ticket, but leave enough material around the edges so it does not tear easily.
The finished piece can go into a scrapbook, memory box, or photo album.
28. Personalised Graduation Cap Decorations

Graduation photographs often include the traditional cap and gown, so lightweight lettering or shapes can help personalise the pictures.
Cut the graduate’s name, initials, graduation year, or a short celebratory phrase from cardstock to use as a photo prop or removable display.
Measure the available space before designing, and keep the decoration light so it does not become awkward to hold or display.
If you intend to attach anything to the actual graduation cap, check the school’s or ceremony organiser’s rules first.
Some institutions restrict decorations, and anything attached must not interfere with the cap’s fit or tassel. A separate cardstock sign is a practical alternative when cap decoration is not permitted.
29. Custom Party Photo-Booth Props
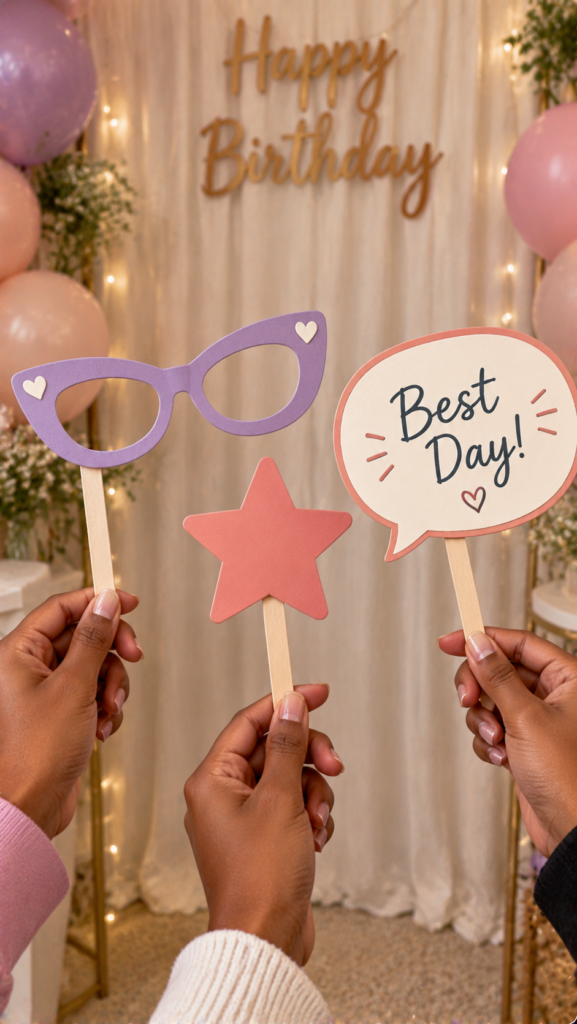
Photo-booth props give guests something to hold during birthday or sleepover pictures. Instead of buying a ready-made set, use Cricut to cut speech bubbles, stars, glasses, or shapes that match the celebration’s theme.
Choose bold shapes that remain recognisable in photographs. Cut them from sturdy cardstock, then attach each one to a wooden craft stick or another suitable handle using strong craft adhesive.
Keep the props light enough to hold comfortably, smooth any sharp corners, and make sure the stick is firmly attached before guests use them.
For a group celebration, create a few different designs so everyone does not have to hold the same prop in every photograph.
30. Personalised Memory-Box Labels
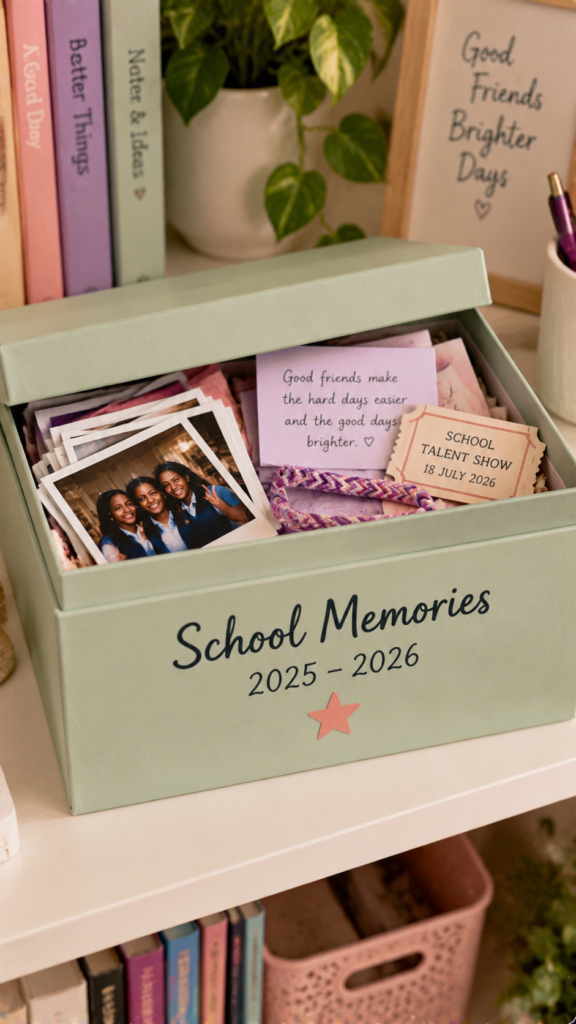
Photographs, handwritten notes, friendship bracelets, ticket stubs, and small souvenirs can accumulate over the years. A labelled memory box gives these items one place to stay together instead of leaving them scattered across drawers and folders.
Cut a label from adhesive vinyl for a smooth box, or use cardstock if you want a tag that can be tied to a handle. Add a clear title such as “School Memories,” “Concerts and Events,” or a year range.
A date or theme is useful when someone keeps more than one box, because it makes the contents easier to identify later.
Before applying vinyl, check that the box surface is clean, dry, and suitable for adhesive. Keep the label on the outside so the box can still be opened without disturbing the design.
If you enjoy making paper crafts, 27 Easy Cricut Projects Using Cardstock has more ideas for putting your cardstock to use.
How to Choose the Right Cricut Material for Each Project
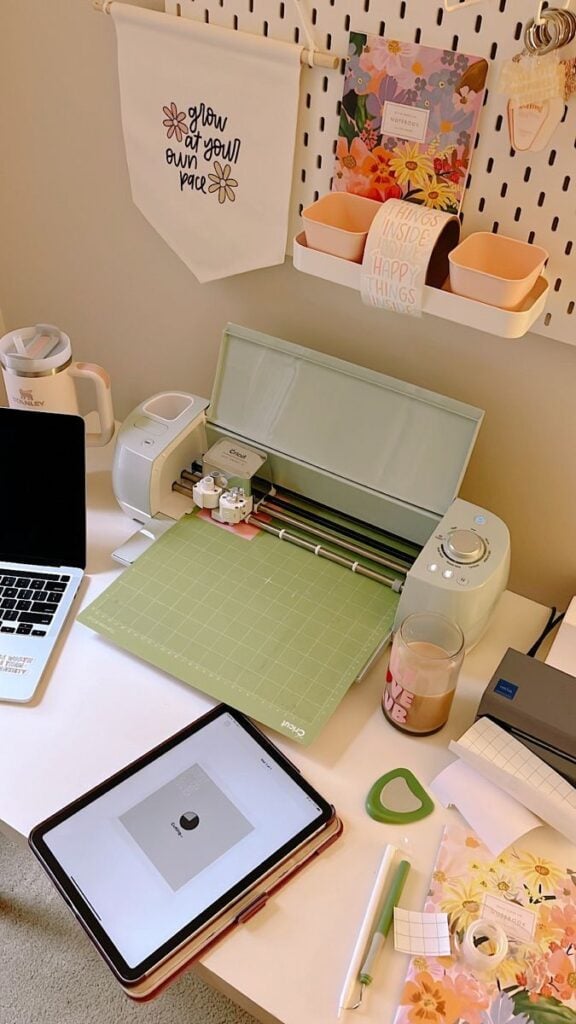
Choosing the material before cutting saves time, prevents wasted blanks, and helps the finished project hold up during use.
The important thing is to match the material to both the item and the surface you want to decorate.
- Adhesive vinyl: Use this for designs on suitable, smooth, hard surfaces such as compact mirrors, storage tins, plastic containers, and some luggage tags. Clean and dry the surface before applying it. Adhesive vinyl is not a substitute for iron-on vinyl on fabric.
- Removable vinyl: Choose this when you may want to change a label or design later, such as on a smooth storage container or temporary display. However, removable does not mean damage-proof. Paint, paper coatings, and delicate finishes can still lift when the vinyl is removed, so test a small area first.
- Heat-transfer vinyl (HTV): Use this for compatible fabric items, including some pouches and eye masks. HTV needs heat and pressure to bond, so check the fabric’s care label and follow the vinyl manufacturer’s temperature, pressing-time, and peeling instructions. Some fabrics cannot tolerate the required heat.
- Cardstock: This is suitable for bookmarks, gift tags, notebook dividers, bracelet backing cards, photo-booth props, and other paper projects. Choose the weight according to how the item will be handled. Thin cardstock may bend or tear around holes, while heavier cardstock can be harder to fold neatly.
- Printable materials: These are useful for full-colour photographs, illustrated labels, and photo keepsakes. The Print Then Cut process requires a compatible Cricut machine and printer. Check your machine’s specifications before buying printable materials or planning a project around this feature.
One useful distinction to remember: adhesive vinyl sticks to a surface, while HTV is applied to compatible fabric using heat.
They are designed for different jobs, so choosing one simply because it is available can lead to peeling, poor adhesion, or damage to the blank.
Common Mistakes to Avoid When Making Cricut Projects
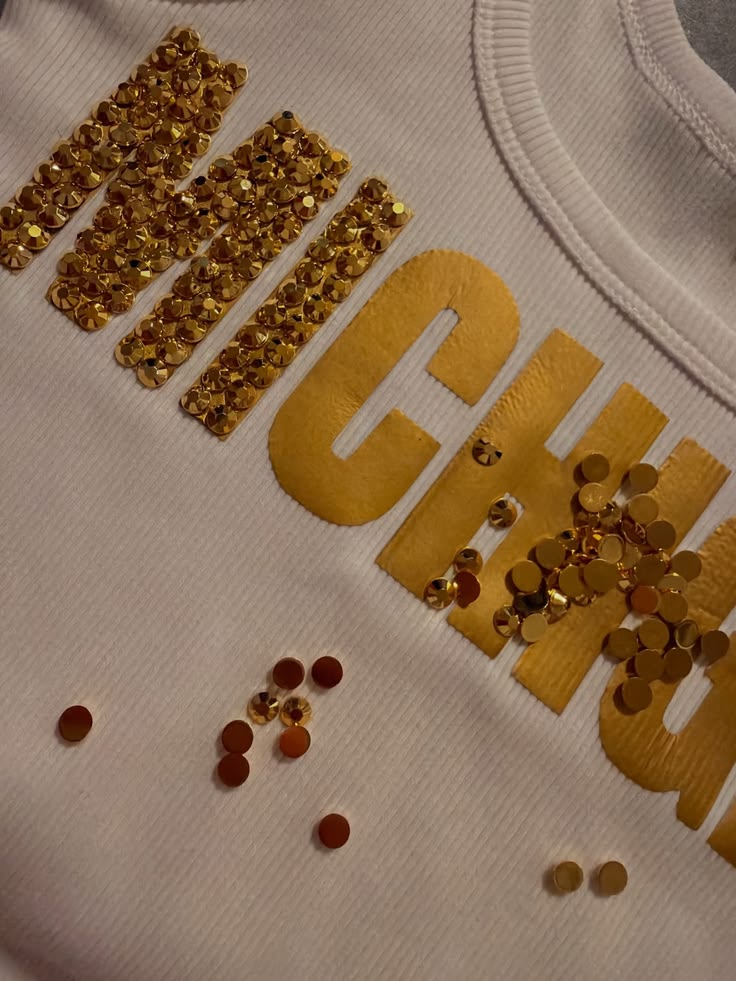
Small errors in measuring, material selection, or machine settings can spoil a project even when the design looks right on screen. A few checks before cutting can save you from having to start again.
Buying the blank before measuring it: Check the usable area, not just the item’s overall size. A compact mirror, for example, may have a curved edge or hinge that leaves less room for a design than expected. Measure the flat section and make a paper template if the shape is unusual.
Choosing lettering that is too small: Delicate fonts and tiny spaces between letters can make vinyl difficult to weed. Before cutting the full design, check its size on screen and consider how it will look on the actual item. Use simpler lettering for small surfaces such as earbud cases and jewellery compartments.
Using the wrong type of vinyl: Adhesive vinyl is intended for suitable surfaces, while HTV is made for compatible fabrics. Applying adhesive vinyl to a fabric pouch may result in poor adhesion, while using HTV on a plastic container is not the right application. Check the product label rather than relying on the word “vinyl” alone.
Forgetting to mirror HTV designs when required: Standard iron-on designs generally need to be mirrored before cutting so that the finished lettering reads correctly after application. Check the instructions for your particular material and workflow, especially when using specialty or printable iron-on products.
Applying heat without checking the fabric: High heat can damage or melt some synthetic fabrics. Read the item’s care label and the HTV manufacturer’s application guide before pressing. When the fabric is unsuitable, choose another project material rather than risking the item.
Assuming every Cricut machine has the same features: Machine models differ in cutting width, supported materials, tools, and Print Then Cut capability.
Confirm that your machine supports the feature a project needs before purchasing supplies. This is especially important for full-colour photo projects.
Skipping a test cut or sample: Material thickness, blade condition, and cut settings can affect the result. Test an unfamiliar material or detailed design on a small scrap first. For projects involving folds, holes, or fitted sleeves, make a paper sample to check the measurements before using your final cardstock.
Using protected designs without permission: Personalising an item with a teen’s initials or an original illustration is different from reproducing a band’s logo, a character, or copyrighted song lyrics.
For items intended for sale, check that you have the necessary rights or use original designs and properly licensed artwork.
A good habit is to check the blank, material, design size, and machine compatibility before pressing the cut button. That short preparation step makes the process easier and gives the finished item a better chance of being useful, not just attractive.
29 Easy Cricut Projects for Home Decor brings together more ways to use your Cricut machine to make personalised decorations for your home.
Conclusion
While these 30 Cricut projects give teen girls plenty of options to choose from, the most suitable one will depend on their interests, available materials, and the kind of item they want to make.
Some projects require only cardstock and a few basic supplies, while others need vinyl, a compatible blank, or a little more preparation.
Start with an idea that feels manageable, follow the material instructions, and adjust the design to suit the person making it. The aim is to enjoy the process and end up with something worth using, keeping, or giving to a friend.