What makes a handmade gift feel like it was chosen just for someone? These Cricut projects for beginners turn everyday items into personalised gifts worth giving.
A personalized gift doesn’t have to start with an elaborate design. Sometimes, the most interesting projects come from taking an ordinary item and changing how it looks or what it represents.
A Cricut machine makes this possible through custom lettering, illustrations and cut-out designs that can be applied to a range of suitable materials.
For beginners, the challenge is finding projects that offer room for creativity without requiring complicated techniques or specialist equipment.
These 33 Cricut projects for beginners that make great personalized gifts include ideas worth making for different people, interests and occasions, with plenty of room to put your own design ideas into practice.
Handmade presents can feel more personal when they are made with the recipient in mind. 31 Easy Cricut Projects for Gifts shares creative ideas for making thoughtful gifts with your machine.
Cricut Projects for Beginners That Make Great Personalized Gifts
1. Personalized Toiletry Bag
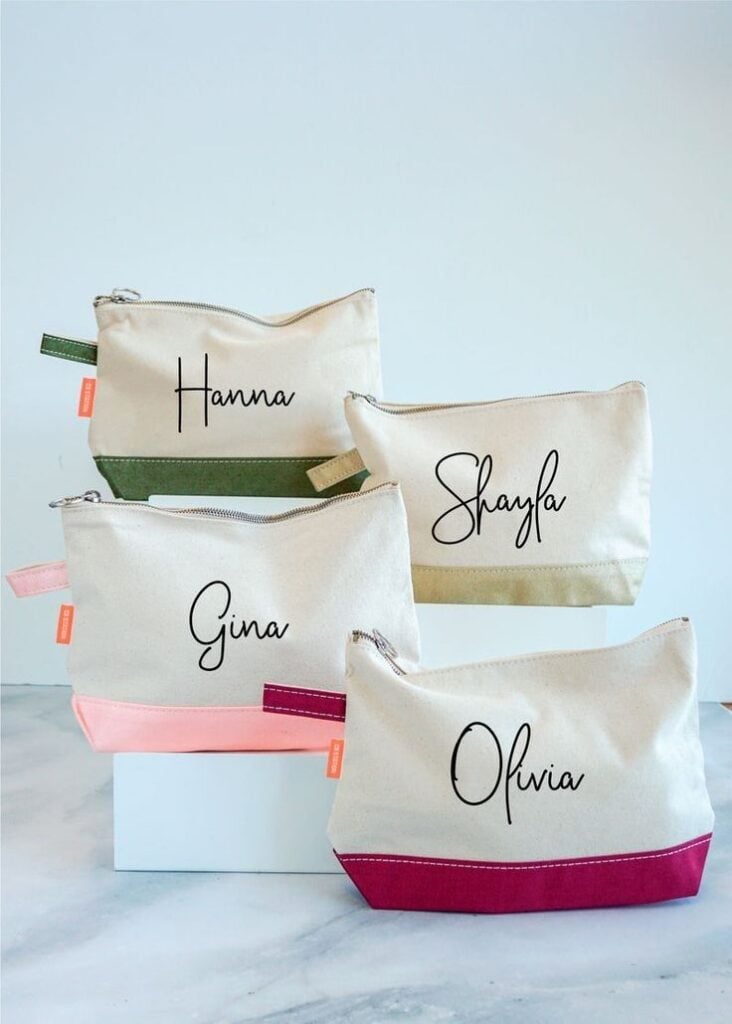
A personalized toiletry bag is a useful gift for someone who travels frequently, goes to the gym or prefers keeping their personal-care products together.
Beginners can start with a plain fabric bag and create a custom design using Cricut, rather than buying an already personalized pouch.
Choose a canvas or cotton toiletry bag with a smooth, relatively flat area for the design. In Cricut Design Space, type the recipient’s name, initials or a short phrase, then select a font that remains readable at the finished size.
Cut the design from compatible heat-transfer vinyl (HTV), remembering to mirror it before cutting. Remove the excess vinyl with a weeding tool before positioning and applying the design.
What to consider when making it:
- Bag material: Check the manufacturer’s fabric composition and heat-care instructions before choosing HTV. Cotton and some polyester-cotton fabrics may be suitable, but coated, waterproof and heat-sensitive fabrics require particular care.
- Design placement: Position the lettering on the front panel, away from the zipper, seams and areas that fold when the bag is filled.
- Application: Follow the HTV manufacturer’s recommended temperature, pressing time and protective-sheet instructions. Test on a spare piece of the same material where possible.
2. Custom Luggage Tags
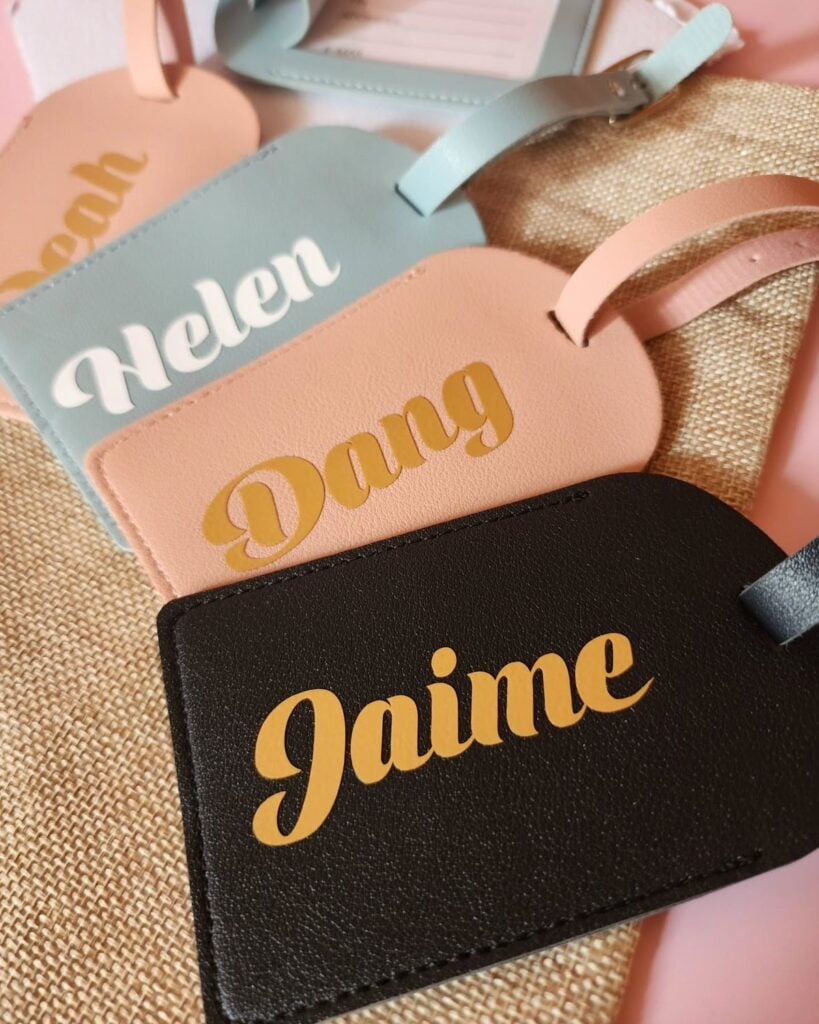
Luggage tags make useful personalized gifts for frequent travellers, students studying abroad or anyone who regularly travels with suitcases.
A simple name or set of initials can help distinguish a bag from similar-looking luggage without requiring an elaborate design.
Start with a ready-made acrylic or plastic luggage tag that has a smooth surface suitable for adhesive vinyl.
Create the recipient’s name or initials in Cricut Design Space, adding a small decorative detail such as a suitcase, airplane or country outline.
Cut the design from compatible adhesive vinyl, remove the excess with a weeding tool and use transfer tape to position it neatly on the tag.
What to consider when making it:
- Tag material: Check that the acrylic or plastic surface is suitable for adhesive vinyl. Textured finishes and certain coatings may affect how well the vinyl sticks.
- Design size: Keep the lettering large enough to read easily. Small, intricate fonts can be difficult to weed and may not remain clear on a compact tag.
- Contact information: Use the designated information insert for the traveller’s preferred contact details rather than displaying a full home address on the outside.
- Durability: Allow the adhesive to bond according to the vinyl manufacturer’s instructions before putting the tag into regular use.
3. Personalized Travel Document Wallet
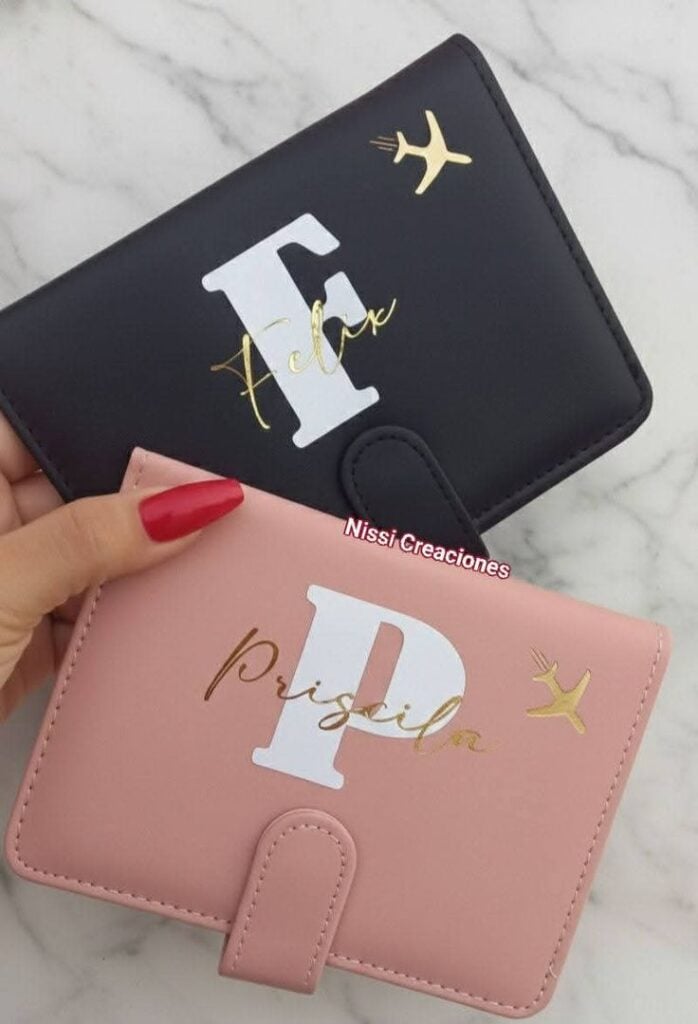
Passports, boarding passes and other travel documents are easier to keep together when they have a dedicated holder.
A personalized travel document wallet makes a suitable gift for someone who travels internationally, particularly when the design includes their initials or surname.
Choose a ready-made travel wallet with an exterior that accepts your chosen personalization method. For a beginner-friendly option, adhesive vinyl can be used on suitable smooth surfaces.
Create a monogram or short travel-related phrase in Cricut Design Space, cut it from the appropriate vinyl and transfer it onto the front cover. Keep the design simple so it does not compete with the wallet’s original finish.
What to consider when making it:
- Wallet material: Faux leather, genuine leather and coated fabrics have different finishes. Check the manufacturer’s specifications before applying vinyl or heat. Not every faux-leather wallet is suitable for HTV.
- Personalization method: Adhesive vinyl is one option for compatible smooth surfaces, while HTV should only be used when the particular wallet and its manufacturer permit heat application.
- Design placement: Position the lettering away from stitching, card slots and folding areas to reduce rubbing and lifting during everyday use.
- Finished appearance: A surname or small monogram is usually sufficient. Check the spelling and spacing before cutting, especially when making the wallet as a gift.
4. Custom Travel Packing Checklist Cards
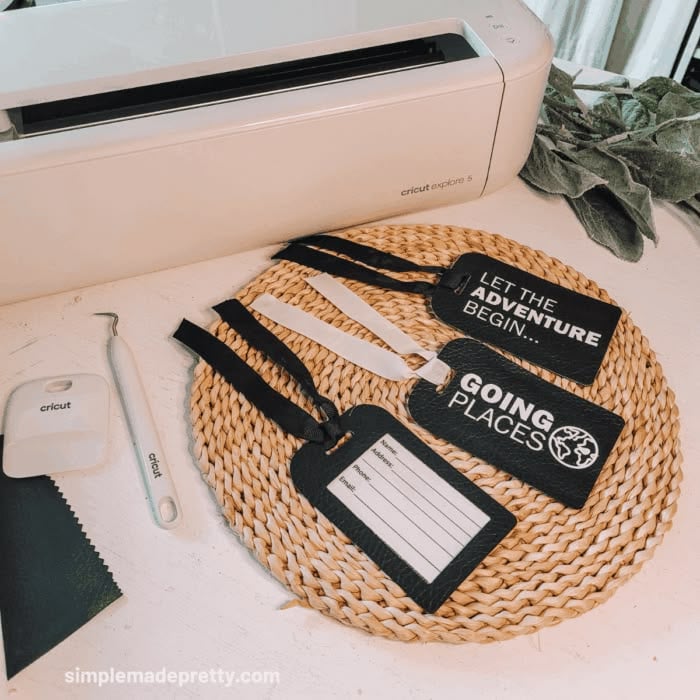
Packing for different types of trips involves remembering different items.
Someone travelling for a weekend may only need a small selection of clothing and toiletries, while a business traveller may also have work documents, electronic accessories and presentation materials to organize.
Custom travel packing checklist cards provide a practical way to keep these details in one place.
Use Cricut Design Space to create separate cardstock cards for weekend trips, business travel or family holidays. Arrange the headings and checklist items, then use a compatible Cricut pen to write the text before cutting the card shapes.
You can also add small illustrations to distinguish the different travel categories. Punch a hole in one corner of each finished card and connect them with a binder ring.
What to consider when making it:
- Cardstock selection: Choose cardstock compatible with your Cricut machine and the cutting mat being used. Test the settings before cutting the complete set.
- Writing and cutting: Select compatible Cricut pens and assign the appropriate writing and cutting operations in Design Space so the text is drawn before the card is cut.
- Reusable sections: Leave empty checkboxes that the recipient can mark with a pencil or suitable erasable pen. This makes the cards useful for more than one journey.
- Relevant categories: Include items that suit the recipient’s actual travel habits. Family travel cards, for example, may include children’s clothing and travel documents, while business travel cards may cover chargers, work equipment and presentation materials.
Teen girls may enjoy adding their own style to personalised accessories and everyday items. 30 Cute Cricut Projects for Teen Girls offers projects suited to their interests.
5. Magnetic Bookmarks
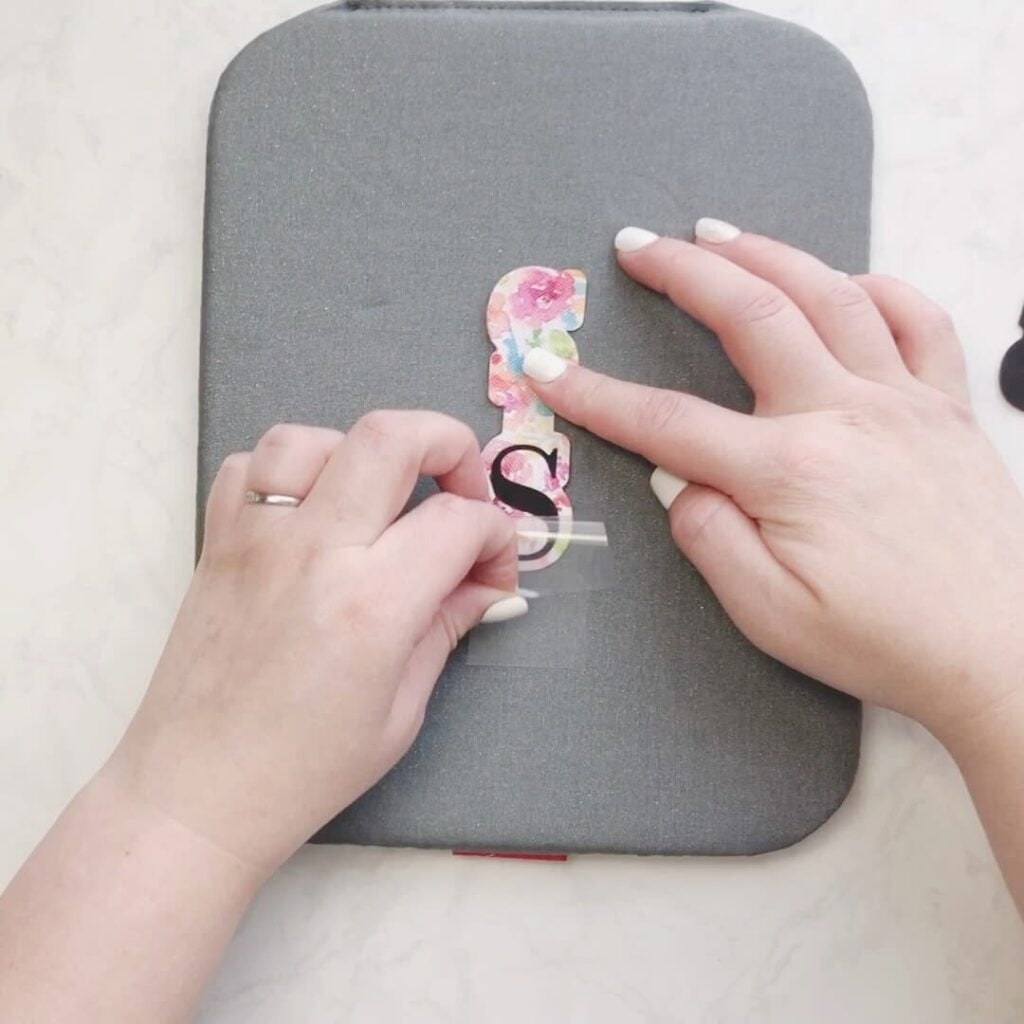
Magnetic bookmarks make lovely gifts for people who enjoy reading physical books and want to keep track of their pages without using loose paper slips.
Unlike ordinary flat bookmarks, this design folds over the edge of a page, with magnets holding both sides together.
To make one, create two matching shapes in Cricut Design Space using cardstock. You can use a rectangle with rounded corners, a small illustration or a design inspired by the recipient’s favourite book genre.
Add their name, initials or a short reading-related message before cutting. Attach suitable thin magnets between the two cardstock pieces, making sure the magnetic sides attract each other when the bookmark is folded.
This is one of the more accessible Cricut projects for beginners because it introduces basic shape cutting, text arrangement and simple assembly without requiring complicated materials.
What to consider when making it:
- Cardstock thickness: Choose cardstock sturdy enough to hold its shape but not so thick that the bookmark becomes bulky when folded over a book page.
- Magnet placement: Use small, lightweight magnets and position them so they align when the two sides meet. Check their polarity before securing them.
- Page protection: Cover or smooth any rough edges and make sure the magnets are enclosed securely so they do not scratch pages or become detached.
- Machine compatibility: Cut the cardstock with the appropriate blade and mat. Do not attempt to cut magnetic sheets unless the particular material is approved for your Cricut machine and blade.
6. Personalized Bookplates
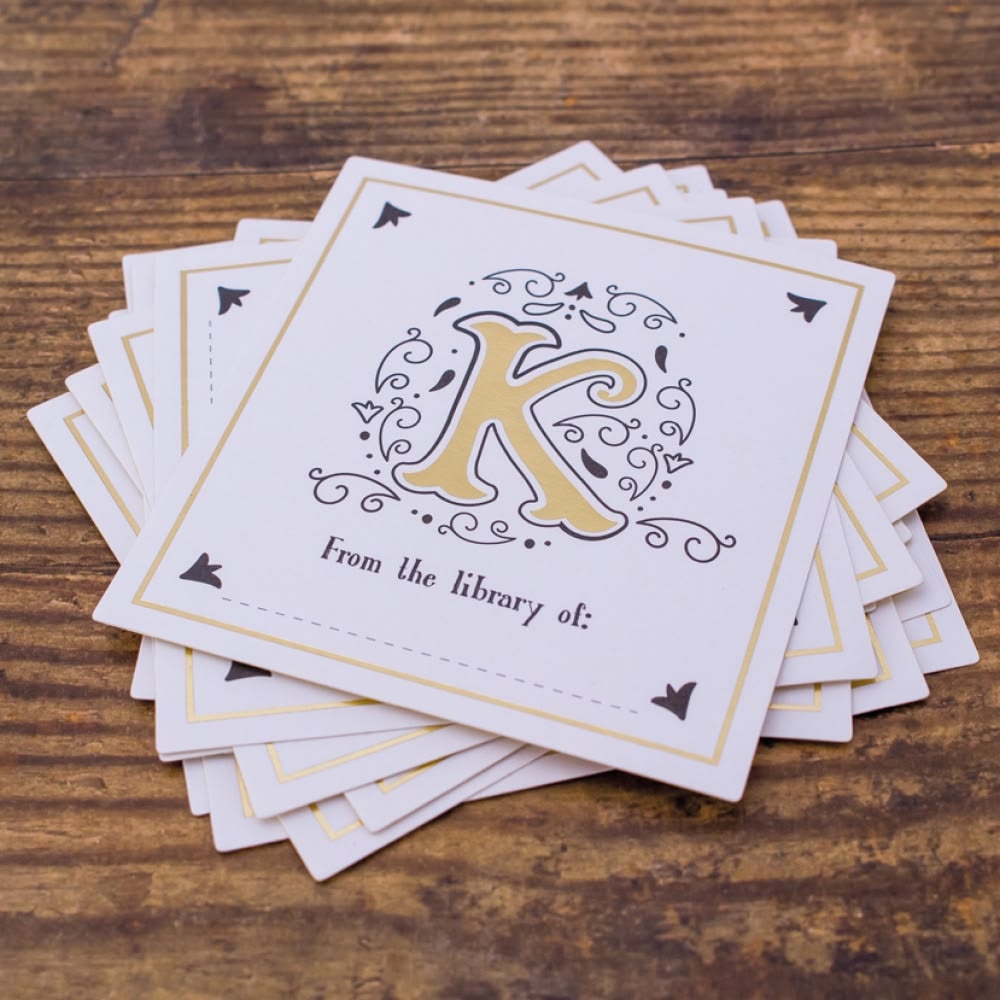
Bookplates are small labels placed inside books to identify their owner. They make a particularly suitable gift for teachers, students, book collectors and people who enjoy building personal libraries.
Instead of writing a name repeatedly inside each book, the recipient can use matching labels to mark their collection.
Create a small label in Cricut Design Space with the recipient’s name and a message such as “From the library of” or “This book belongs to.” You can add a simple book illustration, decorative border or small floral detail.
Cut the design from compatible adhesive label material or adhesive vinyl, depending on the surface and application method.
For a beginner, simple cut-out lettering and shapes are a good starting point. Printable bookplates are another option, but Print Then Cut requires a compatible Cricut machine and suitable printer setup.
What to consider when making it:
- Label size: Keep the design compact enough to fit comfortably inside a book cover without covering printed information or existing ownership details.
- Adhesive choice: Use a material with suitable adhesion for paper. Strong permanent vinyl may be difficult to remove without damaging a book cover.
- Design clarity: Choose readable fonts and avoid very small decorative lettering that may become difficult to cut or read.
- Quantity: Make a small matching set so the recipient can use the labels across several books.
7. Personalized Reading Journal Cover
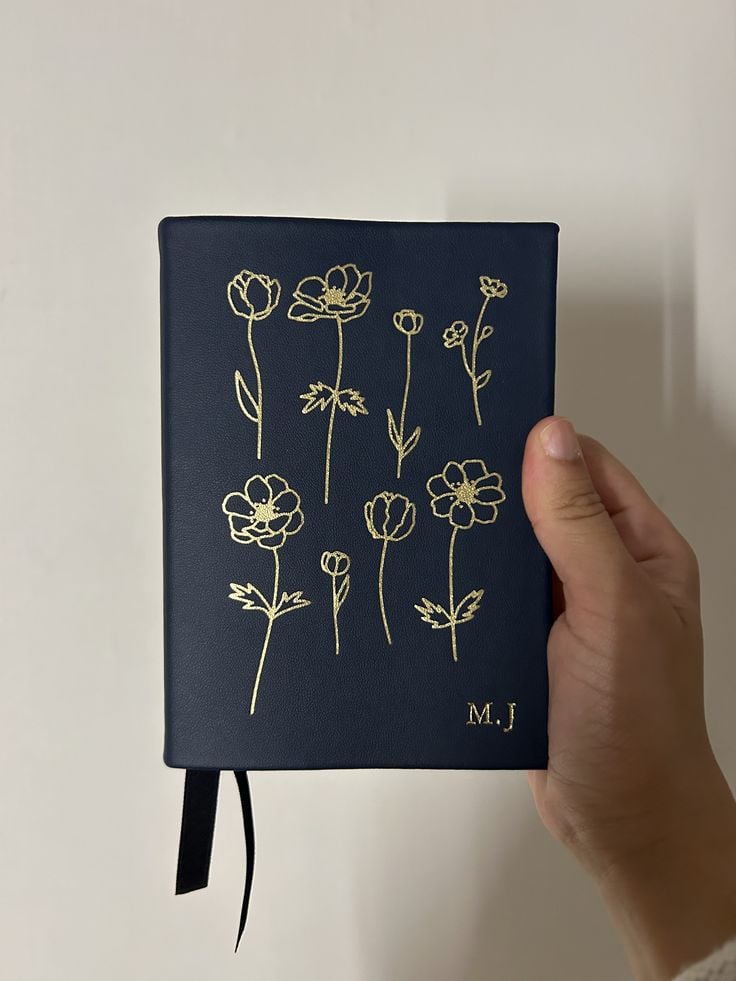
Readers who keep track of the books they finish, their favourite passages and their reading goals may appreciate a journal designed around their interests.
Personalizing the cover gives an ordinary notebook a more individual look without requiring you to make the entire journal from scratch.
Start with a ready-made journal that has a smooth cover suitable for adhesive vinyl. In Cricut Design Space, create a design featuring the recipient’s name, favourite literary genre or a short phrase connected to reading.
You could also include a small illustration of an open book, reading glasses or a stack of books. Cut the design from compatible adhesive vinyl, weed the excess and transfer it carefully onto the cover.
What to consider when making it:
- Cover finish: Adhesive vinyl generally works best on clean, smooth and non-porous surfaces. Textured fabric, soft-touch coatings and flexible covers may not hold it as well.
- Design placement: Leave space around the edges and avoid placing vinyl near the spine where repeated bending can cause it to lift.
- Font selection: Use lettering that remains readable on the actual journal size. Very thin script fonts can be difficult to weed.
- Journal contents: You can make the gift more useful by adding a few blank sections for book titles, authors, reading dates and personal ratings.
8. Personalized Library Tote Bag
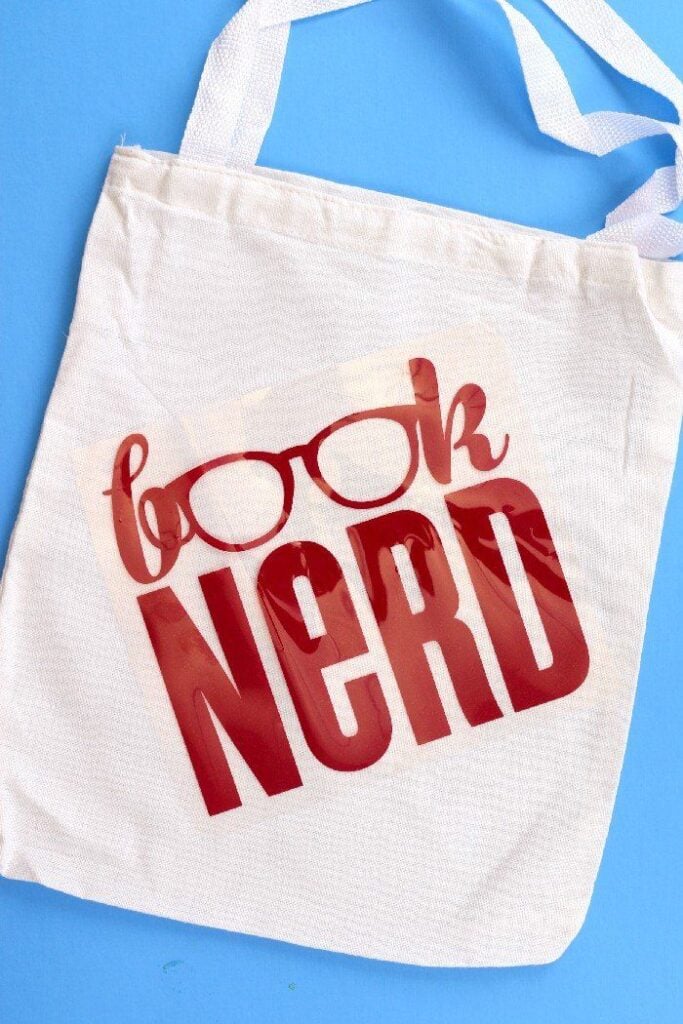
Carrying several books can become inconvenient, particularly for someone who visits a library, attends a book club or takes reading materials to work.
A personalized library tote bag gives them a dedicated bag for their books while providing space for a design connected to their reading interests.
Choose a ready-made cotton or canvas tote with a suitable flat area for decoration. Create the recipient’s name, a short literary quote or a simple book illustration in Cricut Design Space.
Cut the design from compatible heat-transfer vinyl, mirror it before cutting and remove the excess material with a weeding tool.
Position it on the tote and apply it according to the manufacturer’s heat instructions.
What to consider when making it:
- Fabric composition: Check the tote’s care label before selecting HTV. Cotton and certain cotton-blend fabrics are commonly used, but other fabrics may require different transfer materials or application settings.
- Print placement: Position the design where it will remain visible when the bag is being carried. Avoid seams and heavily folded areas.
- Design size: Consider the size of the tote and the books it will carry. A design that is too large may dominate the bag, while tiny lettering may be difficult to read.
- Care instructions: Follow the transfer material manufacturer’s washing and care recommendations so the finished design has the best chance of lasting.
Personalised signs, labels, and decorative pieces can give a room a unique touch. 29 Easy Cricut Projects for Home Decor has more ideas for decorating different spaces.
9. Teacher’s Personalized Pencil Pouch
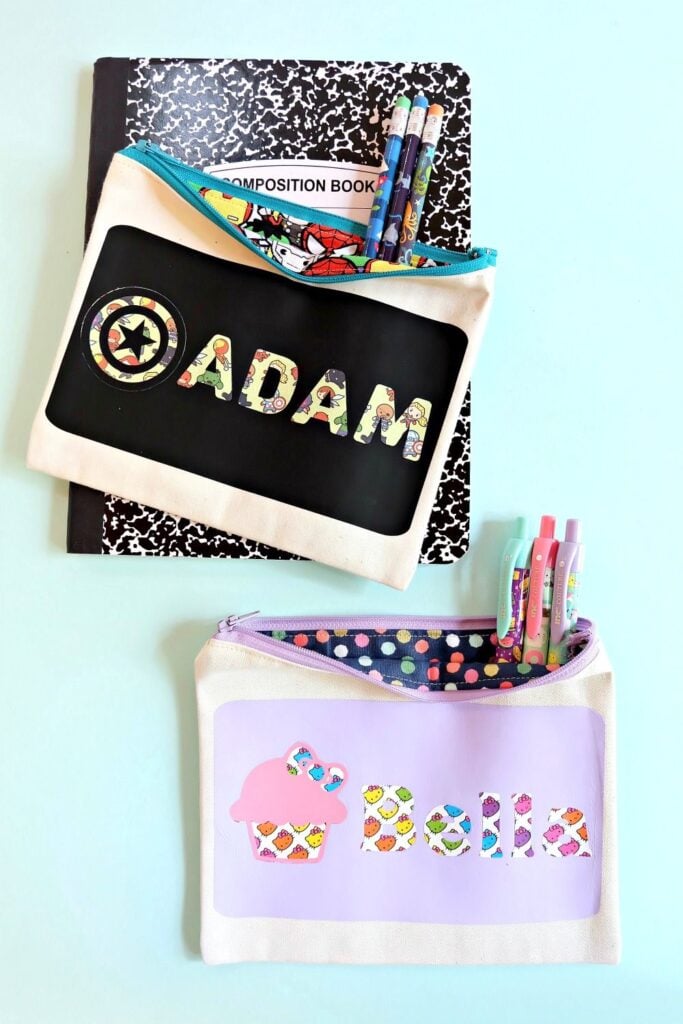
Teachers often carry pens, pencils, markers and other small classroom supplies between lessons.
A personalized pencil pouch gives them somewhere to keep these items together, and the design can reflect their subject, teaching role or classroom personality.
Start with a fabric pencil pouch that is suitable for heat-transfer vinyl. Add the teacher’s name, subject or classroom title in Cricut Design Space.
For example, a mathematics teacher might appreciate a small mathematical symbol alongside their name, while an English teacher could have a simple book or lettering design. Cut the design from HTV, mirror it and apply it following the material manufacturer’s instructions.
What to consider when making it:
- Pouch material: Check the fabric composition and heat tolerance before applying HTV. Avoid assuming that coated or waterproof pencil pouches can withstand a heat press.
- Zipper placement: Keep the design away from the zipper, seams and areas that may be obstructed when the pouch is opened.
- Lettering: Choose a clear font and keep the design relatively simple. One-colour lettering is easier to weed and position than several overlapping layers.
- Personalization: Use the teacher’s actual subject or preferred name rather than a generic classroom message.
10. Classroom Library Bin Labels
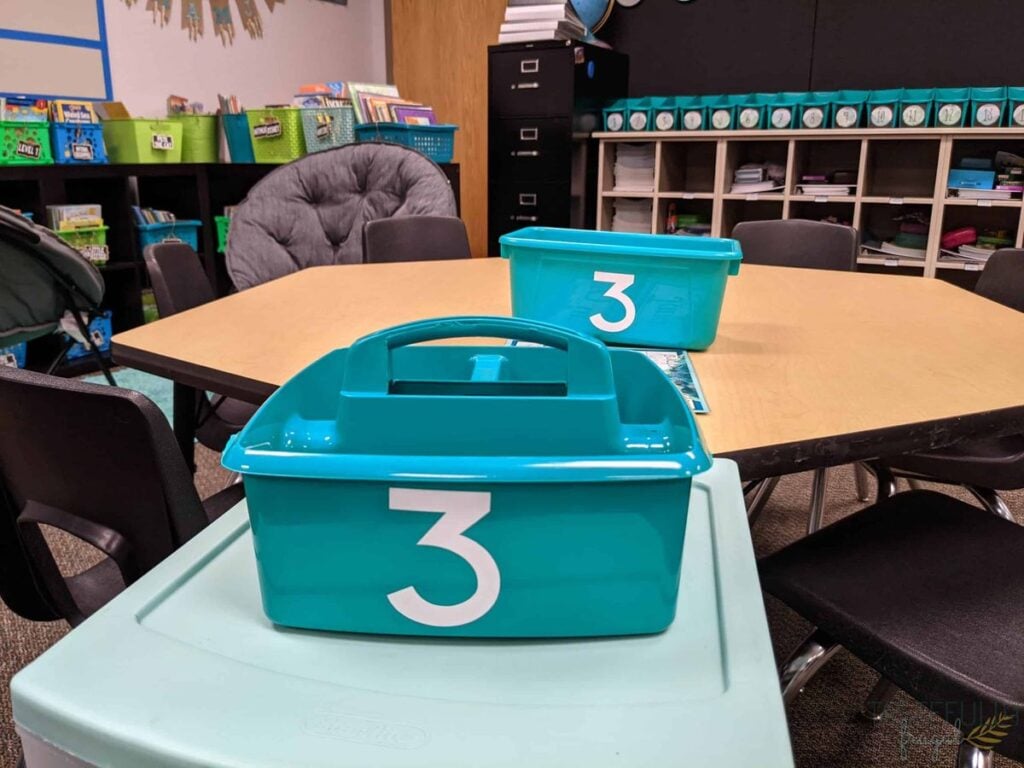
Organizing a classroom library can become difficult when books are stored in different bins without clear categories.
Personalized classroom library labels offer teachers a way to make their storage system easier for pupils to understand and use.
Use Cricut Design Space to create matching labels for categories such as picture books, science, history, poetry or reading levels.
Cut the designs from adhesive vinyl and apply them to clean, smooth storage bins. You can include simple illustrations alongside the words to help younger children recognize each category.
What to consider when making it:
- Storage surface: Adhesive vinyl is suitable for many smooth plastic bins, but test a small piece first if the surface is textured or has a special coating.
- Label readability: Use large lettering that children can recognize from a short distance. Avoid decorative fonts that make category names difficult to read.
- Teacher’s system: Ask the recipient how their books are currently organized before deciding on the categories. Reading levels, genres and subject areas serve different organizational purposes.
- Consistency: Keep the label dimensions, lettering style and general layout consistent so the bins look like one coordinated classroom set.
11. Personalized Teacher Clipboard
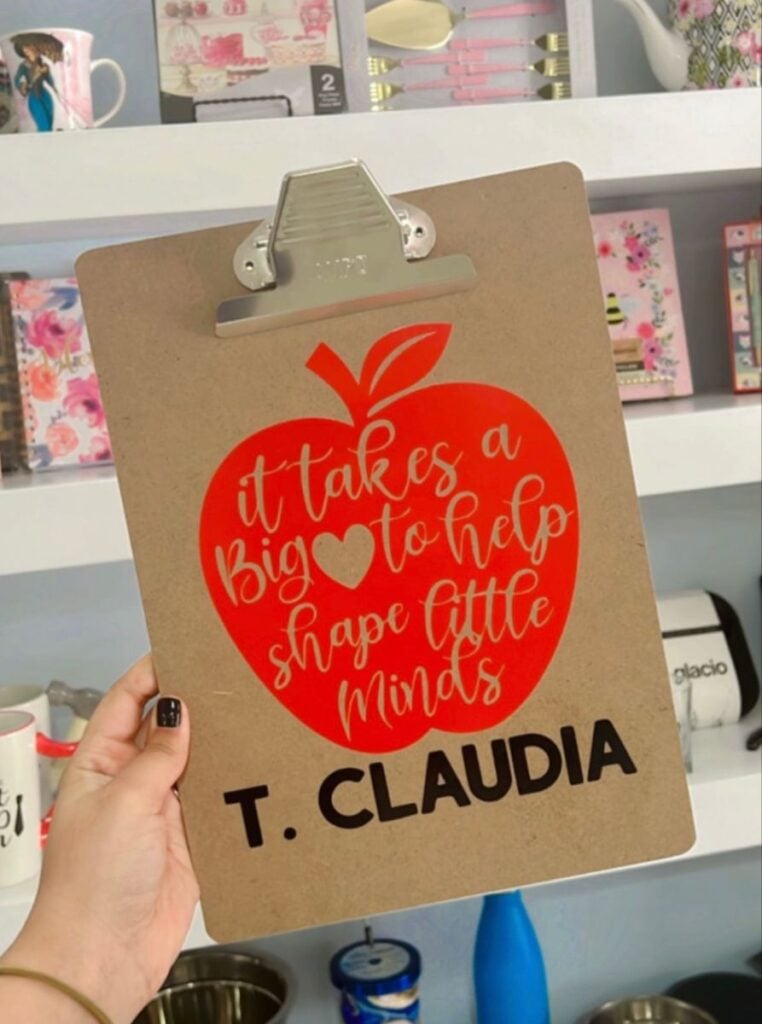
Clipboards are useful for teachers who regularly carry attendance sheets, assessment records, lesson notes and classroom checklists.
A personalized version can make an everyday teaching accessory more distinctive without interfering with its main purpose.
Choose a clipboard with a smooth surface that accepts adhesive vinyl. Create the teacher’s name, subject or a small classroom-related illustration in Cricut Design Space.
Cut the design from compatible vinyl, weed away the excess and transfer it onto the clipboard’s front surface.
What to consider when making it:
- Clipboard material: Smooth plastic, acrylic and suitably finished wood surfaces may accept adhesive vinyl. Check the finish and test adhesion before applying the complete design.
- Functional areas: Keep the design away from the metal clip, writing surface and areas where paper rests. These parts must remain accessible.
- Lettering size: Make sure the teacher’s name is readable without taking up too much of the board.
- Surface preparation: Clean the application area using a method suitable for the clipboard material and allow it to dry before applying vinyl.
12. Personalized Music Folder
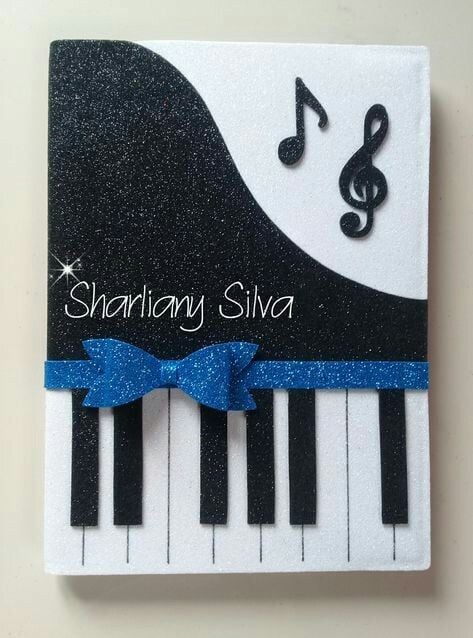
Music students, choir members and instrumentalists often carry sheet music, practice notes and performance pieces from one rehearsal to another.
A personalized music folder can help keep these papers together while making it easier to identify the owner’s folder during group rehearsals.
Choose a ready-made folder with a smooth cover suitable for adhesive vinyl. In Cricut Design Space, create a design using the musician’s name, instrument or a simple musical illustration.
For example, a violinist might have a small violin outline, while a choir member could have a musical-note design. Cut the design from compatible adhesive vinyl and transfer it onto the folder.
What to consider when making it:
- Folder finish: Check that the cover is smooth and suitable for adhesive vinyl. Some laminated or textured finishes may affect adhesion.
- Design placement: Leave the spine, pockets and opening edges clear so the folder remains easy to use.
- Musical details: Choose an illustration that matches the recipient’s actual instrument or musical interest rather than using a generic music symbol.
- Practical size: Select a folder that accommodates the sheet music sizes the recipient regularly uses, such as A4 or US Letter, depending on their location.
13. Family Recipe Tea Towel
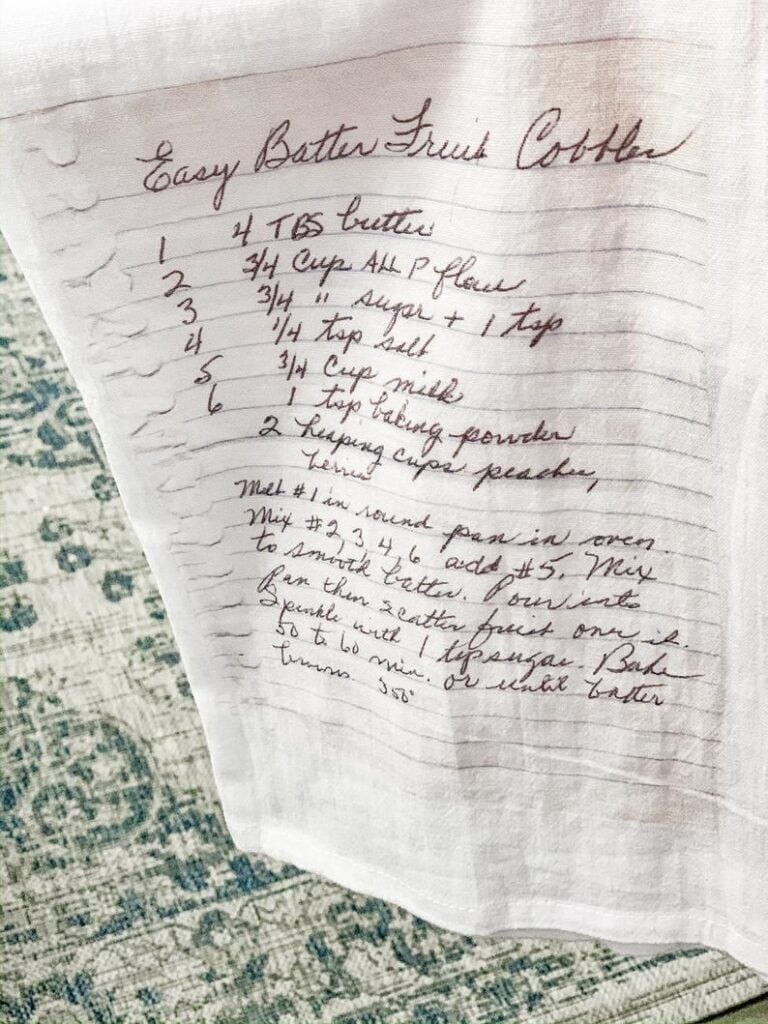
Some family recipes are remembered by the person who made them, the way they prepared them or the words they always used in the kitchen.
Printing a short recipe title or a relative’s name on a tea towel turns an ordinary kitchen item into a keepsake that carries that memory.
Use a plain cotton tea towel and heat-transfer vinyl (HTV) suitable for the fabric.
The design could read Grandma’s Sunday Bread, The Okafor Family Kitchen or simply the name of the person whose recipes are being preserved. Keep the wording short enough to read clearly when the towel is hanging or folded.
What to consider when making it:
- Check the fabric: Read the towel’s care label before applying heat. Cotton is commonly used for HTV, but blends and special finishes may require different settings.
- Arrange the design: Place the wording where it will remain visible when the towel is folded over an oven handle. Avoid positioning it too close to the edges.
- Check the spelling: Family names and recipe titles are personal details, so confirm the wording before cutting the vinyl.
- Follow the HTV instructions: Mirror the design before cutting and use the temperature, pressing time and peeling method specified by the vinyl manufacturer.
Cardstock is useful for making everything from greeting cards to paper decorations. 27 Easy Cricut Projects Using Cardstock offers projects that put this versatile material to work.
14. Personalized Cooking Apron
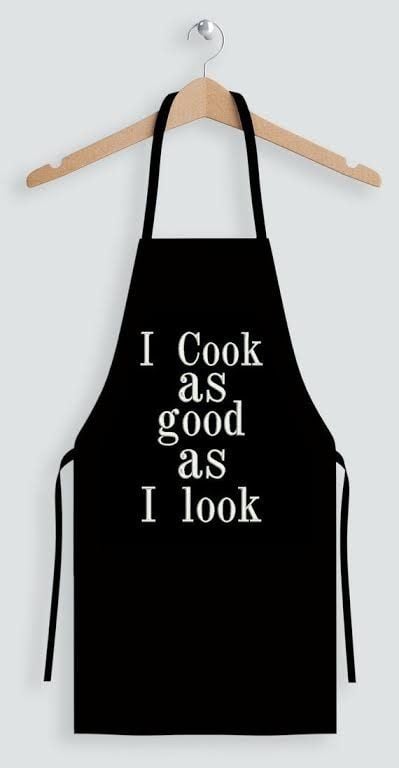
Cooking aprons make useful gifts for people who spend time preparing meals, baking or teaching others family recipes.
Personalizing one with the recipient’s name, initials or a short kitchen-related phrase gives it a more personal touch without making the apron difficult to use.
Start with a plain apron and choose an HTV product compatible with its fabric. In Cricut Design Space, create the wording and position it on the apron template or use the actual apron to estimate the size.
Keep the design on the upper chest or another flat section where it will not interfere with pockets, ties or seams.
What to consider when making it:
- Consider the apron material: Cotton, polyester and blended fabrics do not all respond to heat in the same way. Check the fabric label and HTV manufacturer’s compatibility guidance.
- Account for pockets: Position the design above or beside the pocket rather than placing it where the pocket opening could cover part of the name.
- Use a suitable design size: Large lettering may look impressive on screen but can become uncomfortable or awkward on a smaller apron.
- Test before pressing: Use a small test piece or an inconspicuous area where appropriate to check how the fabric responds to the recommended heat application.
15. Custom Recipe Binder
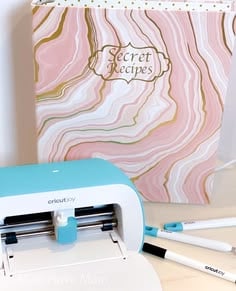
Loose recipe cards, handwritten notes and printed recipes can become difficult to organise when they are kept in different places.
A recipe binder gives someone a central place to store them, and personalised labels make it easier to find particular types of meals.
Personalize the binder cover with the recipient’s name or family name using adhesive vinyl, provided the cover has a smooth, compatible finish.
Then create divider labels for sections such as breakfast, main meals, baking, desserts and special occasions. The categories should reflect the recipes the recipient is likely to collect, rather than adding dividers that will remain empty.
What to consider when making it:
- Check the binder size: Confirm whether it uses standard or larger paper before creating printable recipe pages or divider inserts.
- Leave room for additions: Choose a binder with enough capacity for new recipes, especially when the recipient is building a family collection.
- Make the labels easy to scan: Use clear lettering and consistent placement so the categories can be identified quickly.
- Plan for handwritten recipes: Include pockets or protective sleeves where possible, so original recipe cards can be stored without punching holes in them.
16. Personalized Spice Jar Labels
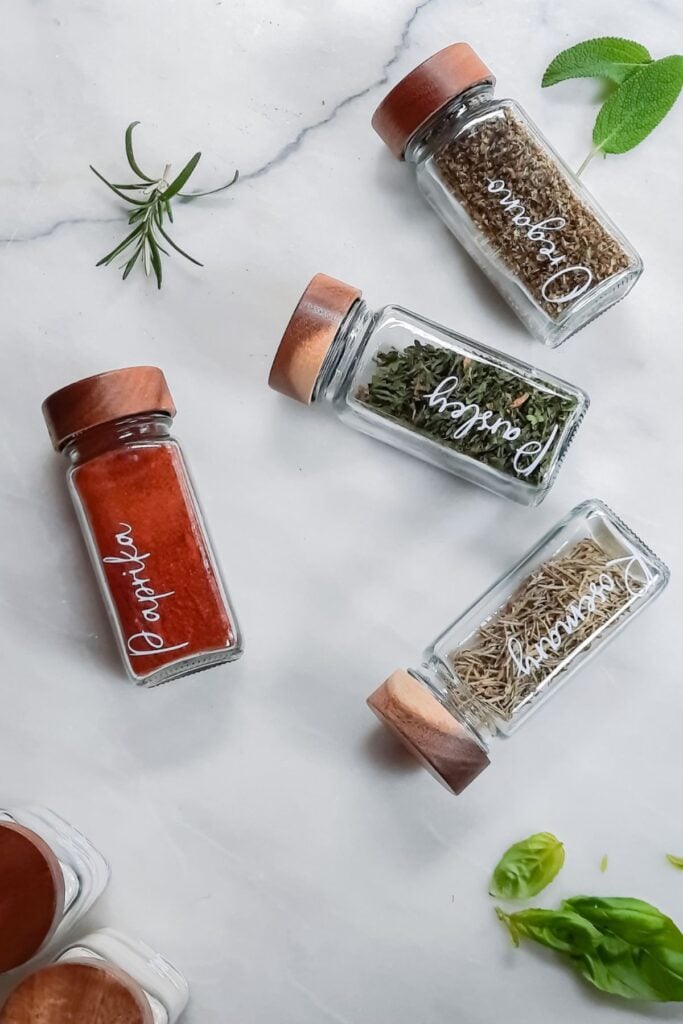
Spice jars are easier to identify when their labels are clear and consistent.
This project is particularly useful for someone who transfers spices from their original packaging into matching containers and wants to avoid confusing similar-looking ingredients.
Create the names in Cricut Design Space, using a simple font that remains legible at the size of each jar. Cut the labels from adhesive vinyl suitable for the jar surface, then apply them to clean, dry containers.
Common labels might include cinnamon, paprika, thyme, curry powder and black pepper, but the set should match the recipient’s actual spice collection.
What to consider when making it:
- Measure the label area: Round jars have limited flat space, so check the available width before choosing the lettering size.
- Use familiar names: Avoid abbreviations that the recipient may not recognise. Spell out spice names where space allows.
- Plan for similar ingredients: Make labels for spices that look alike especially easy to distinguish, such as different types of pepper or powdered seasonings.
- Check cleaning requirements: Ordinary adhesive vinyl may not withstand soaking, scrubbing or repeated washing. Confirm the material’s care guidance before promising a washable finish.
17. Custom Tea and Coffee Storage Labels
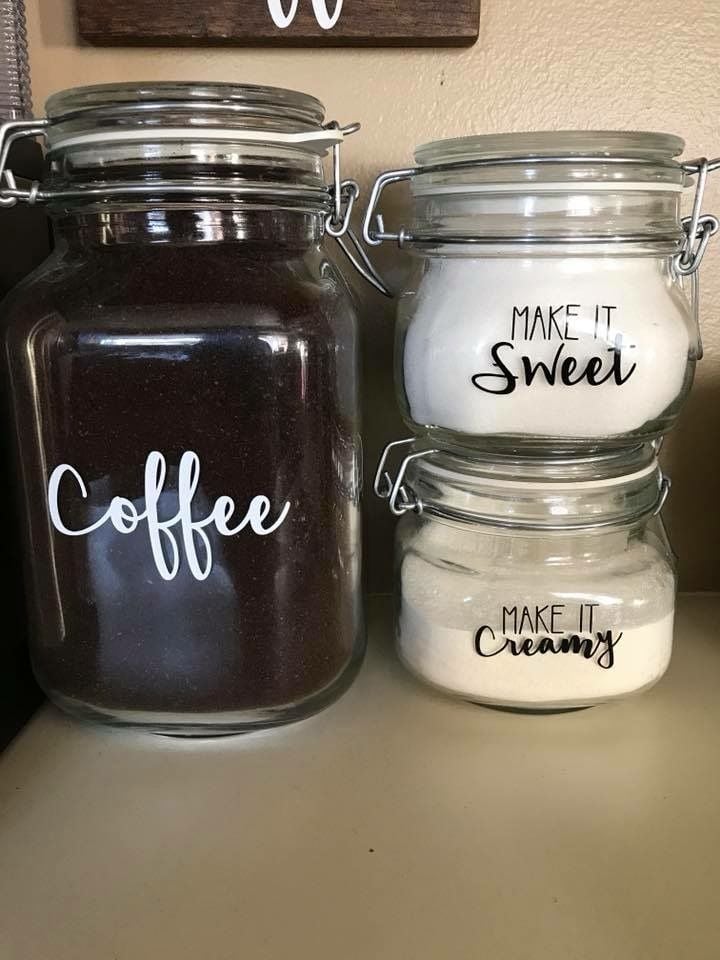
Someone who keeps tea, coffee, sugar and other drink-making supplies in separate containers may appreciate labels that make the storage area easier to organise.
The design can be kept simple, with matching lettering across the containers for a coordinated kitchen set.
Create labels for the recipient’s usual supplies, such as Black Tea, Green Tea, Coffee, Decaf and Sugar.
Cut them from suitable adhesive vinyl and apply them to clean, smooth containers. For households with several types of tea or coffee, use the full product name rather than a general label that could cause confusion.
What to consider when making it:
- Check the container finish: Vinyl adheres more reliably to suitable smooth surfaces than to rough, dusty or heavily textured ones. Test one container before cutting the complete set.
- Keep the labels useful: Include distinctions such as decaffeinated, ground coffee or coffee beans when the recipient stores more than one variety.
- Choose readable lettering: Small decorative fonts can be difficult to read on narrow jars. Simple lettering is usually more practical.
- Consider where the labels will go: Place them where they can be seen when the containers are stored on a shelf, not only when they are sitting on the counter.
Designs made with Infusible Ink can be transferred onto compatible blanks to create lasting personalised items. 25 Easy Cricut Projects Using Cricut Infusible Ink shares ideas for trying this technique.
18. Personalized Recipe Card Box
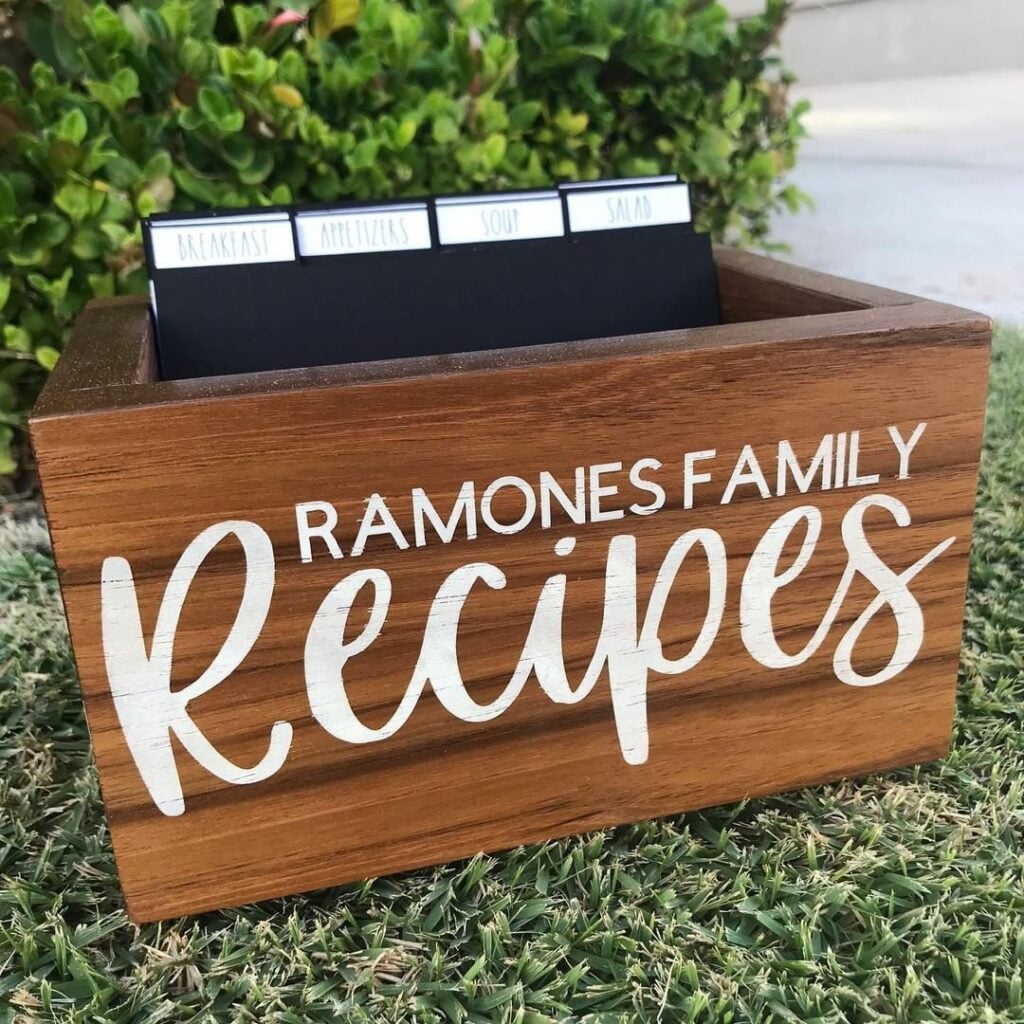
Some cooks prefer handwritten recipes because they can keep the original notes, measurements and instructions passed down by relatives.
A recipe card box helps keep those cards together, while dividers make it easier to sort them by meal type or occasion.
Personalize a ready-made wooden, plastic or other suitable recipe box with the recipient’s name or family name. The decoration method will depend on the box’s finish: adhesive vinyl may suit a smooth surface, while other materials may require a different approach.
Cut cardstock dividers with tabs labelled Family Favourites, Everyday Meals, Baking and Recipes to Try.
What to consider when making it:
- Check the card dimensions: Recipe cards come in different sizes. Measure the box before cutting dividers so they fit without bending.
- Leave space for new recipes: Avoid filling the box with too many dividers. The recipient should have room to add cards over time.
- Protect original notes: Keep older handwritten recipes in sleeves or a separate section if they are fragile or difficult to replace.
- Match the decoration to the box: A coated or textured wooden finish may not hold adhesive vinyl well. Test the surface or use a suitable alternative before decorating the entire box.
19. Custom Table Place Cards
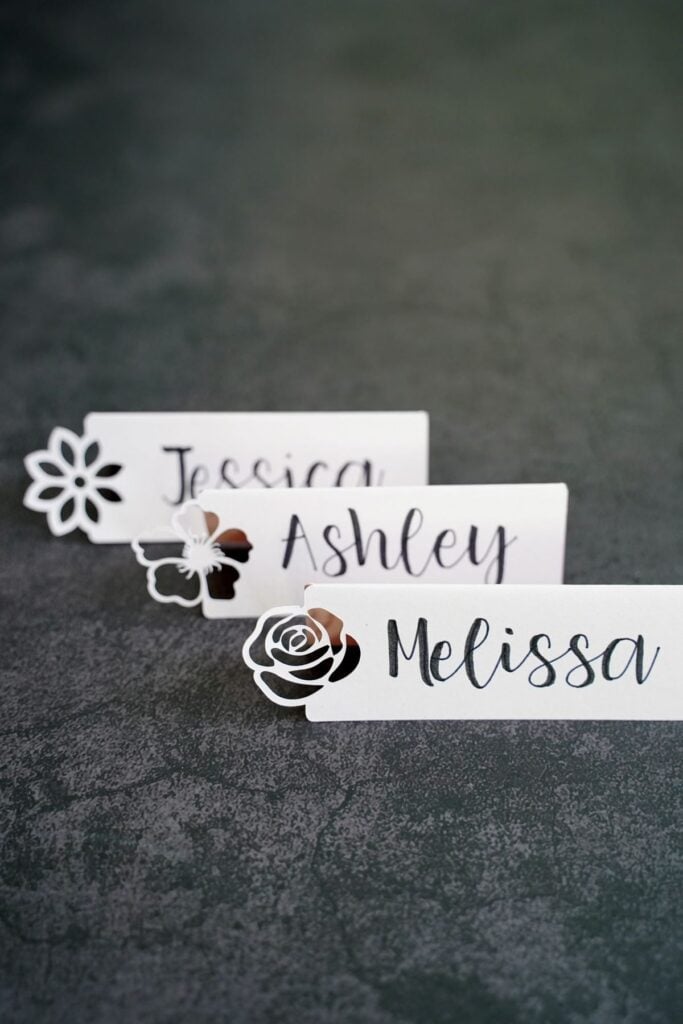
Place cards help guests find their seats at family dinners, weddings, birthdays and holiday gatherings. They are also a useful way to add a personal detail to a table without buying printed cards for every occasion.
Use cardstock to cut folded or tent-style cards, then add each guest’s name with a Cricut pen or a separate cut-vinyl design where appropriate.
Design Space allows writing and cutting operations to be combined in one project, but the text must be assigned to a compatible writing operation rather than left as an ordinary cut shape.
What to consider when making it:
- Choose the right cardstock: Very thin paper may not stand neatly, while heavy cardstock can be harder to fold cleanly. Check that the material is suitable for your machine and blade.
- Test the pen first: Use a spare piece of the same cardstock to check the writing size, spacing and ink appearance before making the full set.
- Allow enough writing space: Long names need wider cards or a smaller font. Check the longest name before settling on one layout.
- Make the fold accurately: Use a scoring tool or the appropriate scoring method for your machine and material to create a neat crease.
20. Personalized Serving Tray
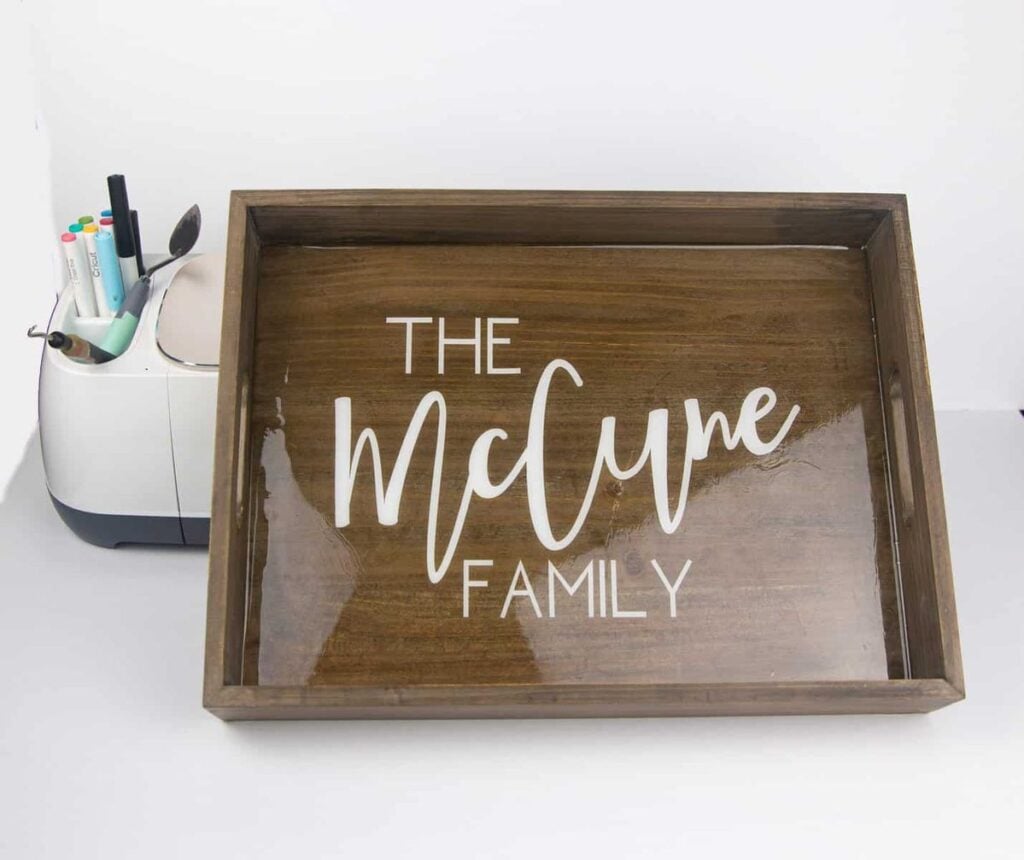
Serving trays can be personalised for someone who enjoys bringing breakfast, snacks or drinks to family and guests.
A family name, short phrase or simple decorative detail can make a plain tray feel more personal, especially when it is given as part of a housewarming or wedding gift.
Choose a tray with a smooth, compatible surface and apply adhesive vinyl to a decorative area, such as the side or a section of the base that does not come into contact with food.
Keep the design away from handles and areas where frequent gripping may cause the vinyl to lift.
What to consider when making it:
- Identify the surface material: Wood, acrylic, metal and coated surfaces may need different preparation. Check whether the vinyl is suitable for the tray’s finish.
- Keep food separate from the decoration: Ordinary craft vinyl is not automatically approved for direct food contact. Do not apply it where food will sit or be served.
- Do not promise dishwasher safety: Adhesive vinyl can lift or deteriorate with heat, water and cleaning products. Follow the manufacturer’s care instructions and recommend gentle cleaning where appropriate.
- Check the design position: Keep the wording clear of the handles and the parts of the tray that receive the most contact during use.
Vinyl opens up different possibilities for decorating and personalising everyday items. 23 Cricut Projects for Beginners Using Vinyl has more beginner-friendly projects to try.
21. Personalized Pet Bandana
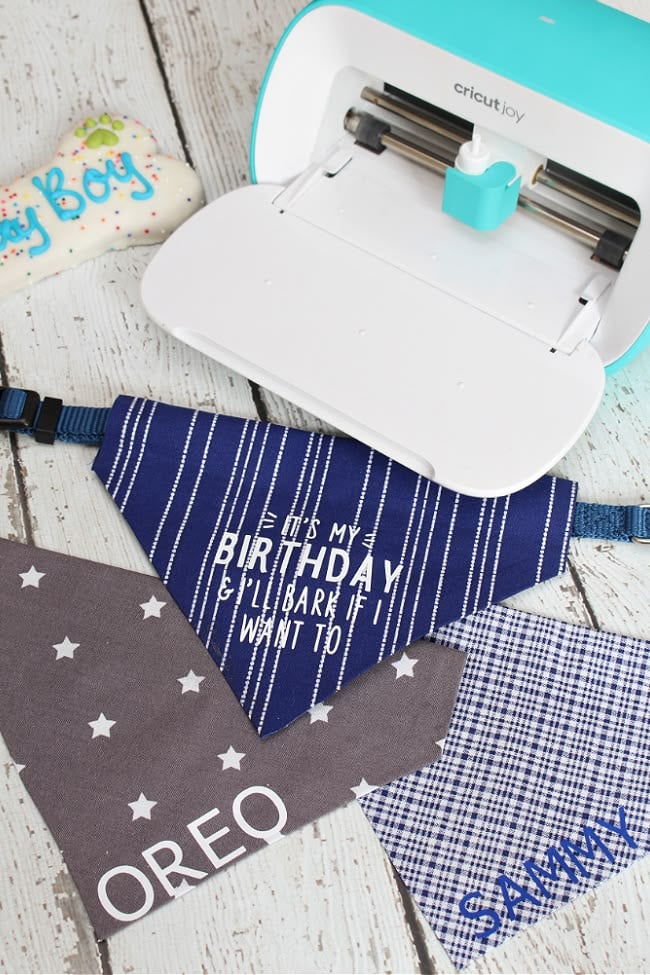
Pet bandanas make thoughtful gifts for people who enjoy dressing up their dogs for walks, photographs or special occasions.
Adding the pet’s name gives the bandana a personal touch, but the design should remain comfortable and easy to read when the fabric is folded or tied around the neck.
Use a plain bandana made from fabric that is compatible with your chosen heat-transfer vinyl (HTV).
Create a short name design in Cricut Design Space, mirror it before cutting, weed away the excess vinyl and apply it according to the manufacturer’s instructions.
Place the wording on the part of the bandana that will remain visible after tying.
What to consider when making it:
- Check the fabric first: Cotton and polyester fabrics can require different heat settings. Confirm that both the bandana and HTV can tolerate the recommended application temperature.
- Keep the design simple: Names and small paw prints are easier to read than detailed illustrations, especially on a bandana that gathers when tied.
- Think about pet safety: Use the bandana only under supervision, and remove it if the pet chews, scratches or becomes uncomfortable wearing it. Avoid loose embellishments that could detach.
- Allow the transfer to cool or peel as directed: HTV products differ in their application and peeling instructions, so follow the specific product guide rather than assuming every transfer works the same way.
22. Custom Pet Treat Jar
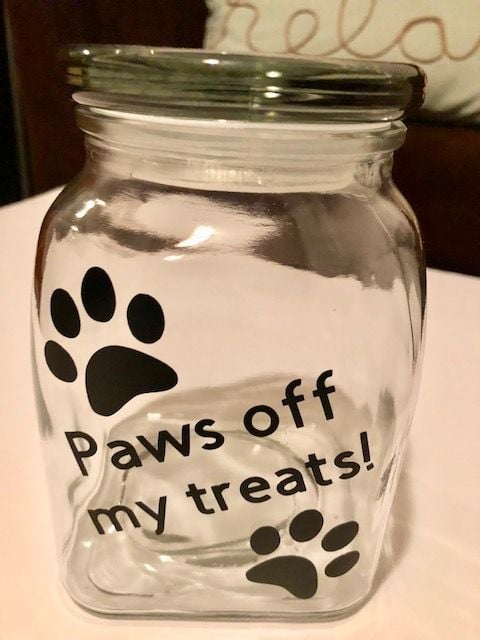
Pet owners often keep treats in a container near the feeding area, so a personalised jar can be both decorative and useful.
Add the pet’s name and a small paw-print design to help distinguish the treat container from other kitchen storage.
Choose a jar with a smooth exterior, then create the name and paw print in Design Space. Cut the design from adhesive vinyl, weed the excess and use transfer tape to position it on the outside of the jar.
This is one of the simpler Cricut projects for beginners because it uses basic shapes and lettering rather than complicated layers.
What to consider when making it:
- Choose the container carefully: Glass or smooth plastic can provide a suitable surface, but check that the vinyl manufacturer’s instructions allow use on that material.
- Keep the opening clear: Apply the decoration to the outside only. Keep vinyl away from the rim, inside of the jar and any area that may touch the treats.
- Make the name easy to read: Check the design at its actual size before cutting. Very thin lettering can be difficult to weed and may not transfer neatly.
- Consider cleaning: The jar may need to be wiped by hand. Do not assume ordinary adhesive vinyl will withstand soaking, scrubbing or dishwasher cycles.
23. Personalized Pet Feeding Mat
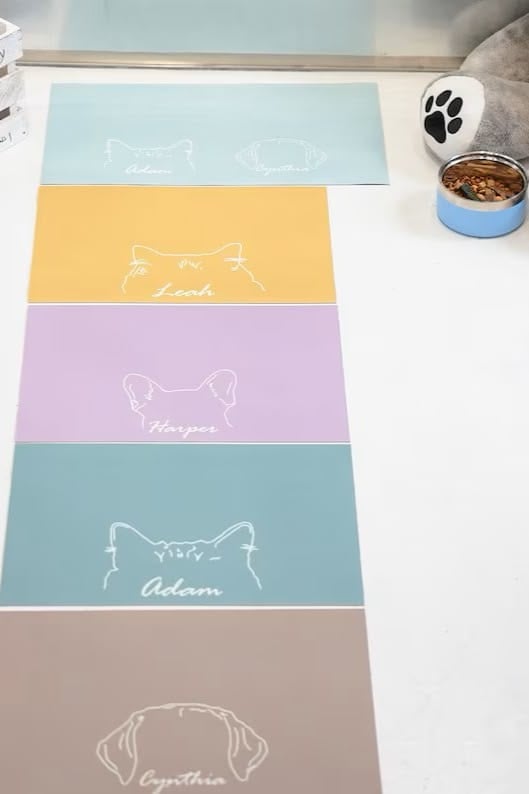
A feeding mat can help keep the area around food and water bowls neater by catching some of the spills that happen during mealtimes.
Adding the pet’s name makes it a more personal gift, particularly for someone setting up a feeding station for a new pet.
For this project, select a fabric mat specifically suitable for heat application. Create a simple name design, cut it from compatible HTV and apply it according to the material instructions.
Position the name along an exposed edge rather than directly beneath the bowls, where repeated movement and moisture may affect the transfer.
What to consider when making it:
- Check the mat’s construction: Many feeding mats have rubber, silicone, waterproof coatings or non-slip backing. These materials may not tolerate the heat required for HTV, so do not assume a mat is suitable just because its top looks like fabric.
- Keep the design away from the bowls: Constant rubbing, water and food spills can wear down the decoration.
- Check the underside: Avoid applying heat in a way that could damage a non-slip backing or waterproof layer.
- Choose a washable design: Follow the care instructions for both the mat and HTV. A decorative finish should not interfere with the mat’s intended cleaning method.
24. Pet Memorial Keepsake Box
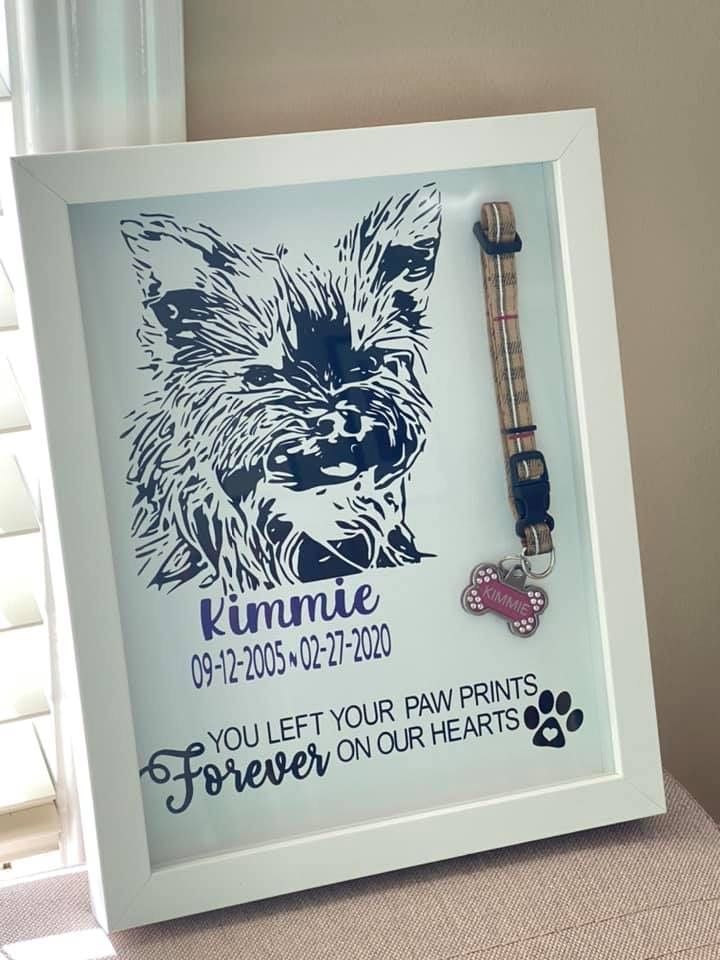
Losing a pet can leave owners with small items they want to keep, such as a collar, tag, photograph or favourite toy.
A personalised keepsake box gives those belongings a dedicated place rather than leaving them scattered around the home.
Use a ready-made box with a smooth exterior and add the pet’s name, dates or a short message using adhesive vinyl.
A small paw print can complete the design without taking attention away from the name. Among these Cricut projects for beginners, this is a good option for practising simple lettering and positioning vinyl on a finished object.
What to consider when making it:
- Measure the lid: Check the flat area available before sizing the design. Leave enough space around the edges so the lettering does not sit over the hinge or lid opening.
- Choose a suitable finish: Painted wood, coated boxes and plastic may hold vinyl differently. Test a small piece in an inconspicuous spot before applying the full design.
- Keep the wording personal: Confirm the pet’s name and dates with the owner. A short message is often more appropriate than a long quotation.
- Think about storage space: Check that the box can hold the items the recipient is likely to keep, especially a collar or larger keepsake.
25. Baby Keepsake Box
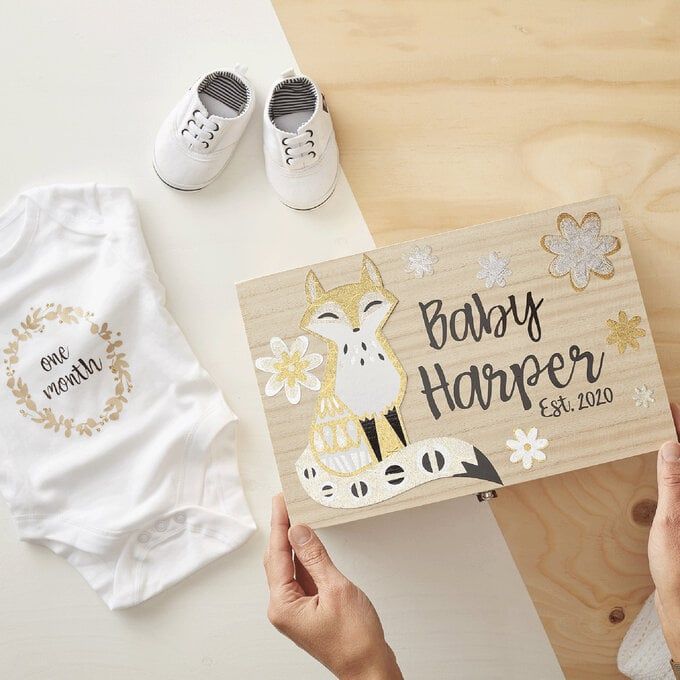
Parents often collect small reminders of a baby’s early days, including hospital bracelets, birth announcements, first photographs and cards from family members.
A keepsake box gives these items one place to be stored and makes a thoughtful gift for a new parent.
Personalize a ready-made box with the baby’s name, birth date or a short message.
Adhesive vinyl may work on a smooth lid, while a different decoration method may be more suitable for unfinished or textured surfaces. Keep the design simple so the name remains the main feature.
What to consider when making it:
- Check the box dimensions: Hospital documents, photographs and cards come in different sizes. Choose a box that can hold the items the parents are likely to save.
- Use accurate details: Confirm the spelling of the baby’s name and the date before cutting the design.
- Choose a secure lid: The box should close properly so small keepsakes do not fall out when it is moved.
- Keep it as a storage item: This is not a toy or a container for a baby to handle. Store it out of the baby’s reach, especially when it contains small objects.
26. Personalized Baby Closet Dividers
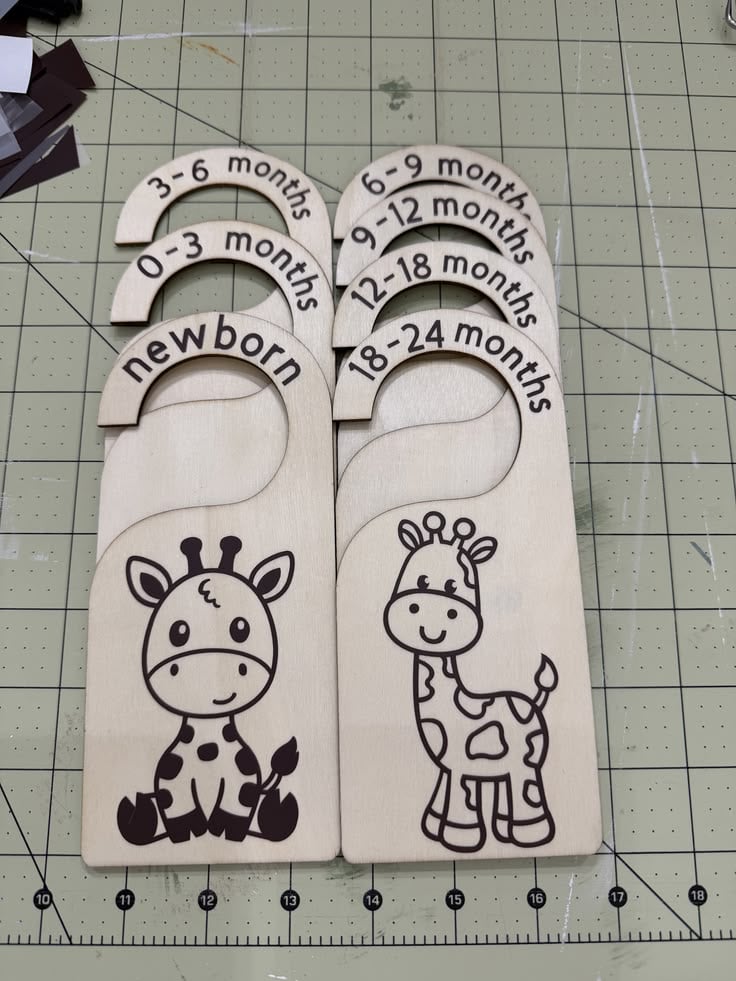
New parents may have baby clothes in several sizes before the child is born, and those clothes can become mixed together in a wardrobe or drawer.
Closet dividers help separate clothing by age or size, making it easier to find the right items as the baby grows.
Create the divider shapes in Design Space and add labels such as Newborn, 0–3 Months, 3–6 Months and 6–9 Months.
Cardstock is suitable for a simple lightweight version, while thicker materials may require a machine and blade that support them.
Check the material list for the specific Cricut model before choosing a thicker blank; Cricut’s compatibility guide lists materials and the required tools by machine.
What to consider when making it:
- Measure the wardrobe rail: The opening in each divider must fit over the rail without being so wide that the divider slips off easily.
- Use the sizes parents recognise: Clothing labels vary between brands and countries. Use age ranges, size labels or both, depending on how the parents organise the clothes.
- Make the lettering visible: Choose clear text that can be read while clothes are hanging close together.
- Check the material’s strength: Thin cardstock may bend with frequent handling. Consider a more durable compatible material if the dividers will be used for a long time.
Turning a crafting hobby into extra income starts with choosing products people may want to buy. 25 Easy Cricut Projects to Make and Sell for Extra Money shares ideas to consider for a small craft business.
27. Wedding Vow Keepsake Frame
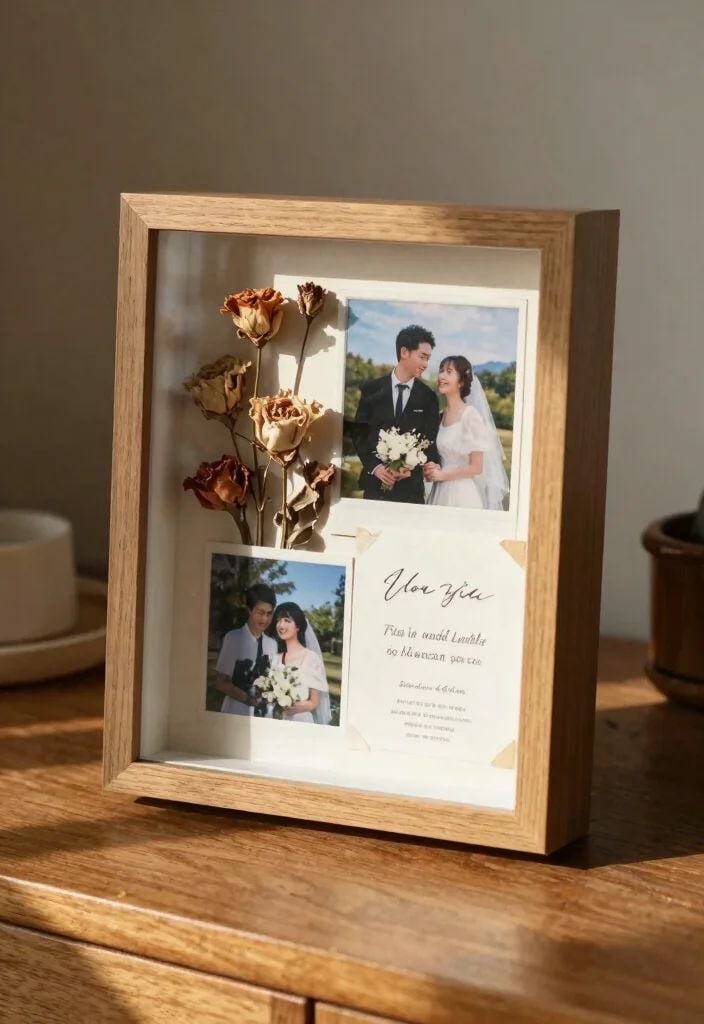
Wedding photographs are often displayed around the home, but a framed copy of a couple’s vows can preserve another part of the day that they may want to revisit.
This gift can feature their names, wedding date and a short section of the vows they exchanged.
Create the wording in Design Space and cut it from adhesive vinyl. Apply the lettering to the glass or a smooth backing surface, depending on the frame design.
Keep the text organised with the names and date at the top and the selected vow passage beneath.
What to consider when making it:
- Confirm the exact wording: Ask the couple for the correct version of their vows. Check punctuation, spelling and line breaks before cutting, especially when using a longer passage.
- Choose a readable font: Script fonts can look attractive for names, but a simpler font is easier to read for several lines of text.
- Check the frame opening: Measure the visible area inside the frame before arranging the design. Leave enough space around the edges so no words are hidden by the frame.
- Plan the placement: Applying vinyl to the glass creates a different appearance from applying it to the backing. Decide which finish you want before cutting.
28. Personalized Anniversary Keepsake Box
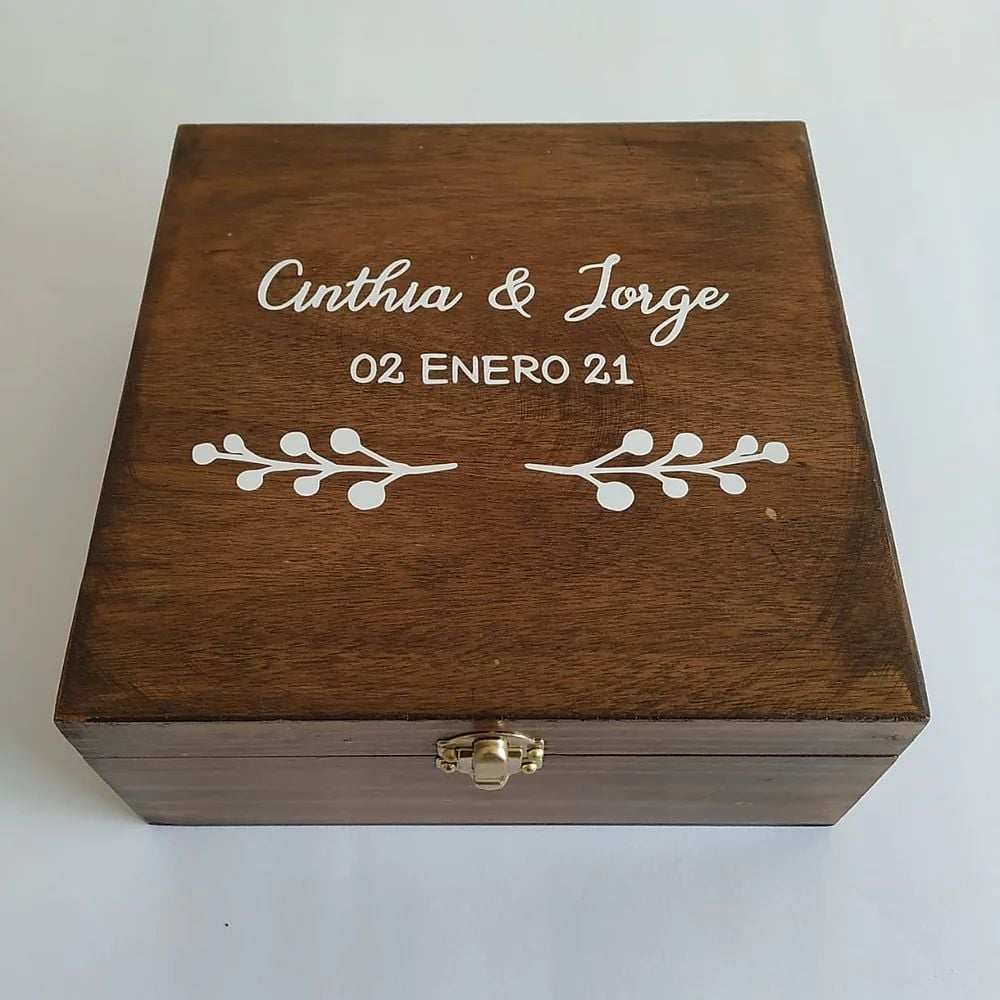
Photographs, handwritten notes, ticket stubs and small souvenirs can hold memories of a couple’s time together.
A keepsake box gives them somewhere to collect these items instead of keeping them in separate drawers or envelopes.
Personalize a ready-made box with the couple’s names, anniversary date or a short phrase that has meaning to them.
Use adhesive vinyl on a smooth, compatible surface, and leave enough room inside for the couple to add more memories over the years.
This is one of the more personal Cricut projects for beginners because the finished gift can keep serving a purpose long after the anniversary.
What to consider when making it:
- Choose a useful size: A small box may hold notes and photographs but leave little room for larger keepsakes. Consider what the couple might want to store.
- Include removable dividers: Small compartments can help separate photographs, letters and other items without making the box difficult to use.
- Keep the design timeless: Names and the anniversary date are less likely to feel outdated than a decorative phrase tied to a particular trend.
- Check the surface before applying vinyl: Unfinished, rough or heavily textured boxes may not provide a suitable surface for adhesive vinyl.
29. Graduation Money Holder Card
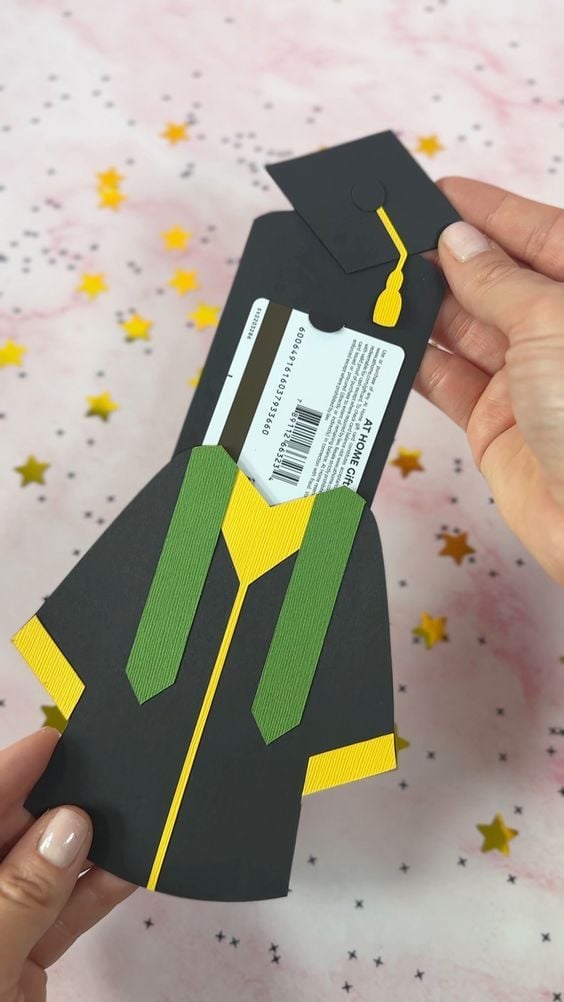
Giving money or a gift card at graduation is common in many families, but handing it over in an ordinary envelope can feel a little impersonal.
A handmade money holder card gives the gift a more thoughtful presentation while keeping the money securely in place.
Create a folded cardstock card with a pocket or slot sized for the currency or gift card. Add the graduate’s name, graduation year and a short congratulatory message using Cricut cutting and writing operations.
This project is also a useful way to practise combining lettering, scoring and cutting in Design Space.
What to consider when making it:
- Measure the actual gift: Banknotes and gift cards differ in size across countries. Measure the item before designing the pocket, and allow a little extra room for easy removal.
- Secure the pocket: Attach the sides and bottom firmly while leaving the opening accessible. Test it with a sample note or card before giving it away.
- Use suitable cardstock: Card that is too thin may not hold its shape, while very thick cardstock may be difficult to fold neatly.
- Check the finished fold: Make sure the card closes without pressing against or damaging the money inside.
30. Personalized New-Home Key Dish
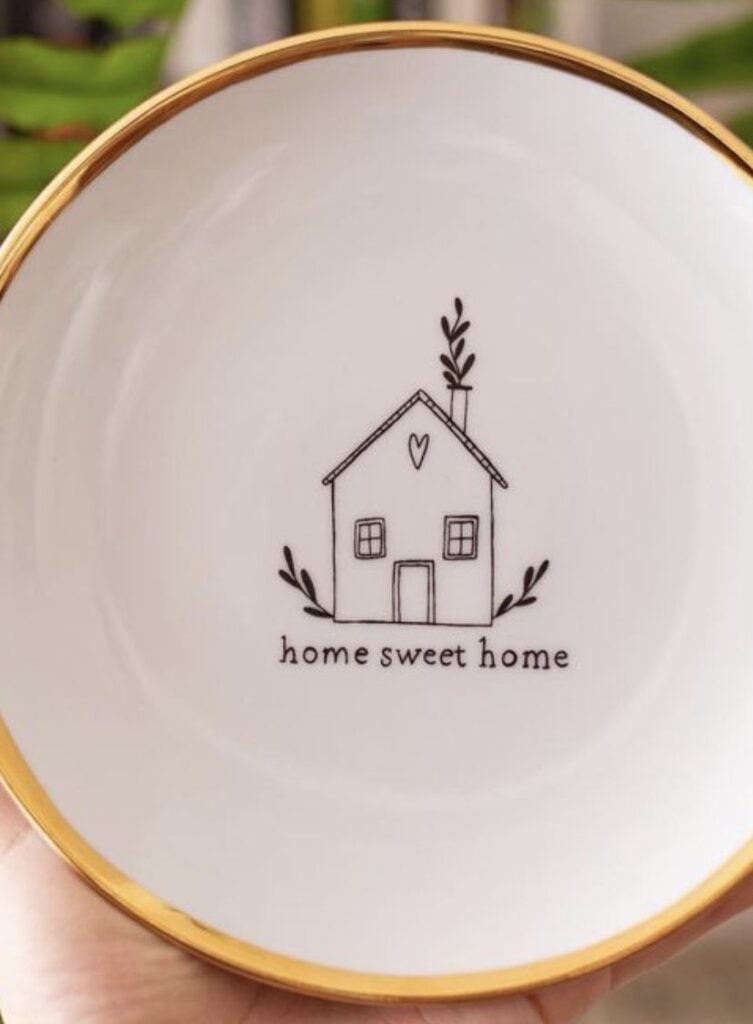
Moving into a new home often comes with small practical purchases that help make everyday routines easier.
A key dish placed near the entrance gives household members a regular place to leave their keys, and adding a surname or house-related message makes it a suitable housewarming gift.
Choose a smooth ceramic or other compatible dish and apply adhesive vinyl to a decorative area.
The wording could be a family name, initials or a short phrase such as Home Keys. Keep the design away from the areas where keys are frequently dropped or moved.
What to consider when making it:
- Check the dish’s finish: Glazed ceramic may provide a smoother surface than unfinished or textured pottery. Test vinyl adhesion before applying the complete design.
- Avoid high-friction areas: Keys can scratch and rub against the decoration, so position the lettering where it is less likely to be disturbed.
- Keep the design outside the main contact area: The dish is intended for keys, not food, and the vinyl should not be presented as suitable for food contact.
- Explain how to clean it: Recommend gentle hand-cleaning unless the vinyl and dish manufacturers confirm that another cleaning method is suitable.
31. Custom Graduation Memory Folder
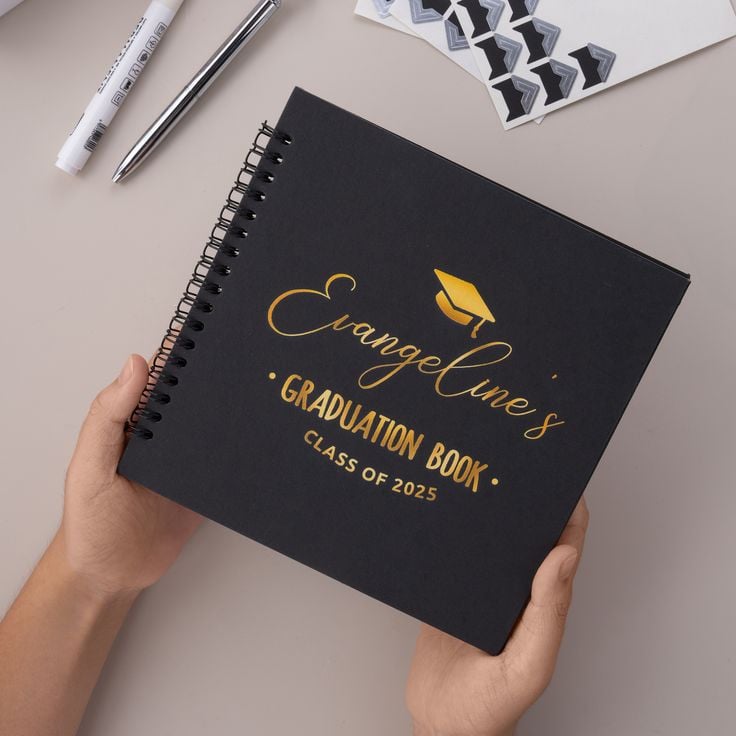
Graduation comes with several documents and personal items that are worth keeping, including certificates, photographs, congratulatory messages and programme cards.
A personalised folder gives the graduate one place to store these items after the celebration.
Use a ready-made folder with a smooth cover and decorate it with the graduate’s name, school or graduation year using suitable adhesive vinyl.
Inside, add labelled pockets or dividers for certificates, photographs and cards, provided the folder has enough space to hold them without bending the contents.
What to consider when making it:
- Check the document size: Certificates are not always the same dimensions. Measure the graduate’s documents before choosing the folder.
- Protect important papers: Use pockets or protective sleeves for certificates and photographs rather than attaching them permanently to the folder.
- Keep the cover design simple: The graduate’s name and year are usually enough. Too many decorative elements can make the cover look crowded.
- Test the vinyl: Some folder covers have a textured or coated finish that may not hold adhesive vinyl securely.
Beginners interested in making products for customers can also explore 21 Simple Cricut Projects for Beginners That Actually Sell for more project inspiration.
32. Personalized Gardening Tool Labels
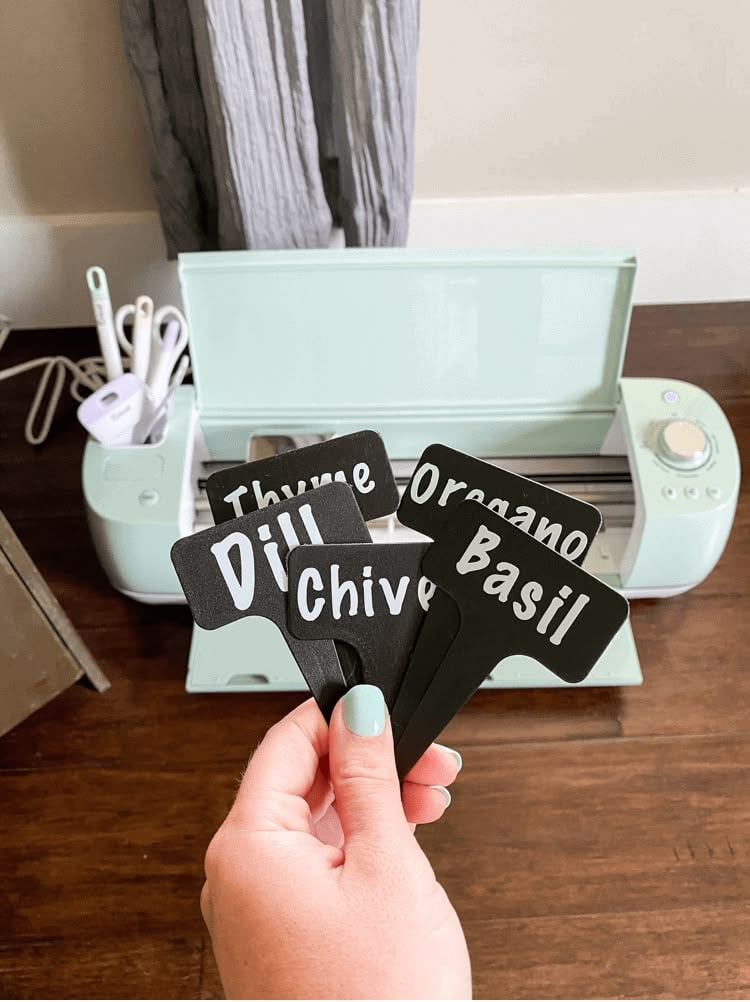
Gardeners who grow several herbs or vegetables may appreciate labels that help identify what has been planted. Personalised plant markers are particularly useful for someone who keeps different varieties of herbs in pots or grows seedlings in a small garden.
Choose blank plant markers made from a material suitable for outdoor use, then add labels such as Basil, Mint, Rosemary or the names of the recipient’s actual plants.
Cut the lettering from adhesive vinyl and apply it to the marker’s designated label area.
These Cricut projects for beginners can be made with straightforward text designs, but the choice of marker and vinyl matters more than decorative detail.
What to consider when making it:
- Choose outdoor-compatible blanks: Markers intended for indoor crafts may not withstand rain, sunlight or changes in temperature.
- Check the vinyl’s intended use: Not every adhesive vinyl is designed for prolonged outdoor exposure. Look at the manufacturer’s guidance before selecting it.
- Make the names easy to read: Use lettering large enough to identify the plant from a normal standing position.
- Allow for weather exposure: Moisture, sunlight and repeated handling can affect vinyl adhesion. Even products described as permanent may have different outdoor performance depending on the surface and conditions.
- Avoid planting labels that mislead: Confirm the plant names and spellings, particularly when preparing a set for someone who grows several varieties of the same herb.
33. Personalized Family Game-Night Scorebook
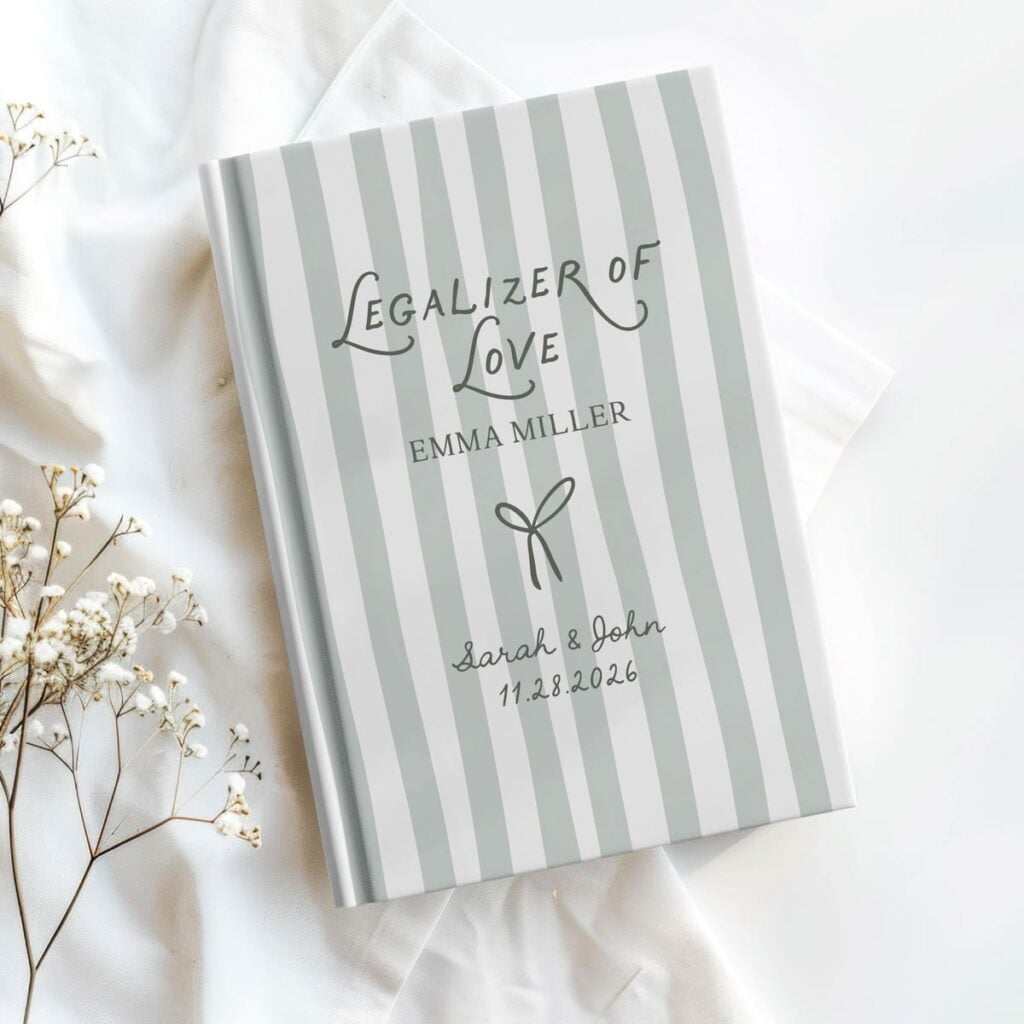
Families who regularly play board games, card games or quiz games may enjoy keeping a record of their scores and memorable wins.
A personalised scorebook gives them a simple place to record the results instead of relying on loose paper that can easily get misplaced.
Start with a ready-made notebook or scorebook and add the family name or a phrase associated with their game nights using adhesive vinyl on a suitable cover.
Inside, include pages for the game name, date, players, scores and winner. You can create a few simple printed or handwritten page layouts to make the notebook more useful.
What to consider when making it:
- Think about the games they play: Some games use individual scores, while others are played in teams. Make the recording pages flexible enough for the family’s usual games.
- Leave room for different numbers of players: A layout that only accommodates four people may not work for a larger family gathering.
- Include the date and game name: These details help the family look back at previous results and remember which game was played.
- Check the notebook cover: Smooth covers are generally easier to decorate with adhesive vinyl than rough or fabric-covered ones. Test the surface before applying the full design.
Machine compatibility note: Cricut machines do not all cut the same materials or use the same tools.
Check the material and tool requirements for your particular model in Cricut’s official material compatibility guide before choosing thicker blanks or specialty materials.
Practising with straightforward designs is a useful way to become familiar with your Cricut machine. 22 Easy Cricut Projects for Beginners You Can Make at Home offers ideas to get started.
Not Every Cricut Machine Can Make Every Project
One mistake beginners can make is buying materials for a project before checking whether their Cricut machine can handle them.
Cricut models differ in their cutting capabilities, supported materials and available tools.
A project that works on one machine may require a different blade, an additional tool or a completely different machine on another.
Here are some important differences to check before starting:
- Specialty blades and tools: Materials such as thick leather, chipboard and certain craft boards may require specific blades or tools.
For example, the Knife Blade is supported by selected Cricut Maker machines, not every Cricut model. Check both the material requirements and the tool compatibility for your machine. - Smart Materials: These materials are designed for matless cutting on compatible machines.
They are not automatically suitable for every Cricut machine, and some projects may still require a cutting mat depending on the model and material. - Printable stickers: Print Then Cut involves printing a design with a separate inkjet printer and then using a compatible Cricut machine to detect the printed registration marks and cut around the design.
Check your machine’s Print Then Cut support, printable material requirements and printer compatibility before buying sticker paper. - Engraving and specialty operations: Engraving, debossing, scoring and other specialty techniques require compatible machines and the appropriate tools.
Having the tool does not necessarily mean it will work with every Cricut model.
Before purchasing blanks, vinyl, blades or specialty materials, check Cricut’s official machine compatibility and material guide.
Also confirm that the particular material is suitable for the project. This simple check can prevent buying supplies that your machine cannot use or discovering halfway through a project that an essential tool is missing.
How to Make a Cricut Gift Feel Personal Without Overcomplicating the Design
Personalisation is not about putting as many names, dates and decorative details as possible on one gift.
The most meaningful Cricut projects for beginners often have one detail that reminds the recipient why the gift was made for them.
Before opening Design Space, think about what the person would recognise, use or appreciate. That gives the design a clear direction and helps you avoid adding decoration just to fill empty space.
-
Use details that mean something to the recipient
A family surname, initials, an important date or a phrase the recipient often uses can make an ordinary item feel more personal.
For example, a recipe binder could carry the family name, while a wedding keepsake box could display the couple’s names and wedding date.
Choose details that have a genuine connection to the recipient. Confirm spellings and dates before cutting, particularly when the design includes names or wording supplied by someone else. A small mistake can mean wasting material or having to remake the gift.
-
Connect the design to something the person enjoys
Personalisation can reflect an interest rather than simply display someone’s name. A reader might appreciate a bookmark featuring a favourite book genre, while a gardening enthusiast may prefer plant markers labelled with herbs they grow.
A teacher could receive a pencil pouch with their classroom subject or a short phrase related to their work.
Think about the recipient’s actual interests rather than relying on general symbols.
For example, a person who grows mint, basil and rosemary would get more use from those specific plant labels than from a generic set of flower decorations.
-
Start with something the recipient will use
The blank you choose matters just as much as the design. A personalised apron may suit someone who cooks regularly, while a luggage tag could be useful to someone who travels.
Choosing an item that fits the recipient’s routine gives the gift a purpose beyond looking attractive.
Consider how the item will be used before deciding where to place the design.
A name on a toiletry bag should remain visible when the bag is packed, while lettering on a serving tray should stay away from food-contact areas.
Also check that the blank is compatible with the vinyl, heat or other application method you plan to use.
-
Make the design easy to read
Adding several fonts, illustrations and decorative elements can make a small design difficult to understand. Start with the main detail, such as a name or short message, then add one complementary element only when it improves the design.
For example, a pet’s name with a small paw print may be enough for a treat jar. A graduation folder may only need the graduate’s name and year.
Check the design at its actual size in Design Space before cutting; lettering that looks clear on a large computer screen may become too small or difficult to weed on the finished item.
The aim is to make the recipient recognise the thought behind the gift without making the design crowded. A carefully chosen name, interest or useful detail will often say more than a collection of decorations.
Anyone still learning the basics can find more projects to practise with in 19 Easy Cricut Projects for Beginners.
Conclusion
Before cutting your first design, take one last look at the finished project on your screen.
Will the name fit? Is the lettering clear? Have you selected the right material for your Cricut model? Those small checks can save material and prevent disappointing results.
With these details sorted, you’re ready to put your machine to work. Choose one of these Cricut projects for beginners and give yourself the chance to create something worth gifting.