Can you turn affordable supplies into products worth selling? Find Cricut projects you can make for under $5.
You do not need an expensive blank or a large supply budget to create something people are willing to pay for.
With a Cricut machine, even a small amount of cardstock, vinyl or other affordable material can become a finished product with a clear purpose and a potential buyer.
The real opportunity lies in choosing what to make: an inexpensive craft is not automatically a profitable product, especially when production time and other costs are overlooked.
These Cricut projects you can make for under $5 and sell for more take a different approach to low-cost crafting.
The ideas include useful everyday items, specialised accessories and small gift products that customers can buy for themselves or others.
Each one gives you a starting point for considering materials, potential buyers and how to turn a modest supply budget into a product worth selling.
The $5 target covers materials per finished item or set, not labour, equipment or other business expenses.
Want to make personalised products customers will love? These 21 Personalized Cricut Items People Actually Buy offer ideas worth considering.
Cricut projects you can make for under $5
1. Seed Packet Sleeves
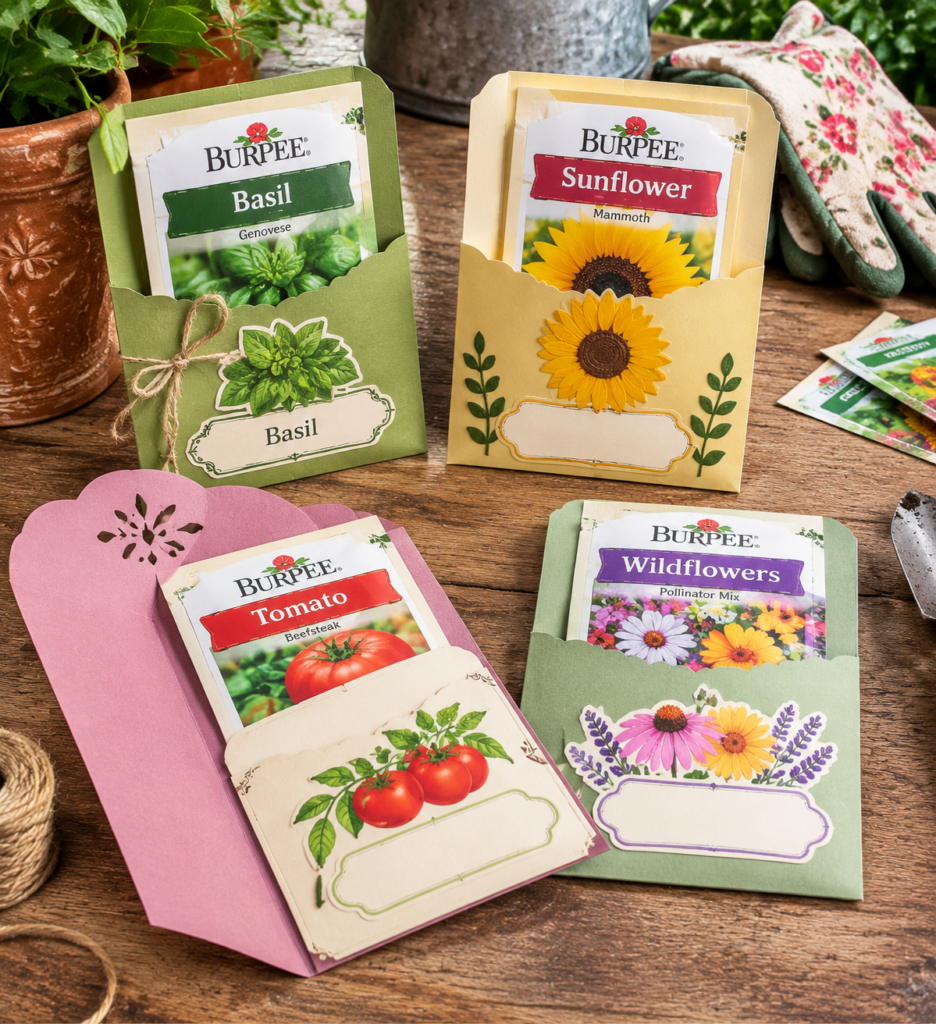
Seed packet sleeves are decorative paper covers designed to hold commercially packaged seed packets.
They give ordinary seed packets a more attractive presentation, making them suitable for gardening gifts, seed exchanges and community planting events.
Cut the sleeve shape from lightweight cardstock with your Cricut, then score and fold it to create a pocket that holds the seed packet.
Add the recipient’s name, plant illustrations or a short growing message to make each sleeve more personal.
Offer them individually or in coordinated sets for herb gardens, flower patches or vegetable growers.
Before producing a batch, check the dimensions of the seed packets you intend to accommodate and make a sample to test the fit.
Keep the original seed packet and its labelling intact rather than transferring seeds into your own packaging, as seed labels carry important product information and may be subject to local labelling requirements.
Choosing products with better earning potential matters. See these 27 Cricut Projects With High Profit Margins for ideas to consider.
2. Seed-Starting Calendar Wheels
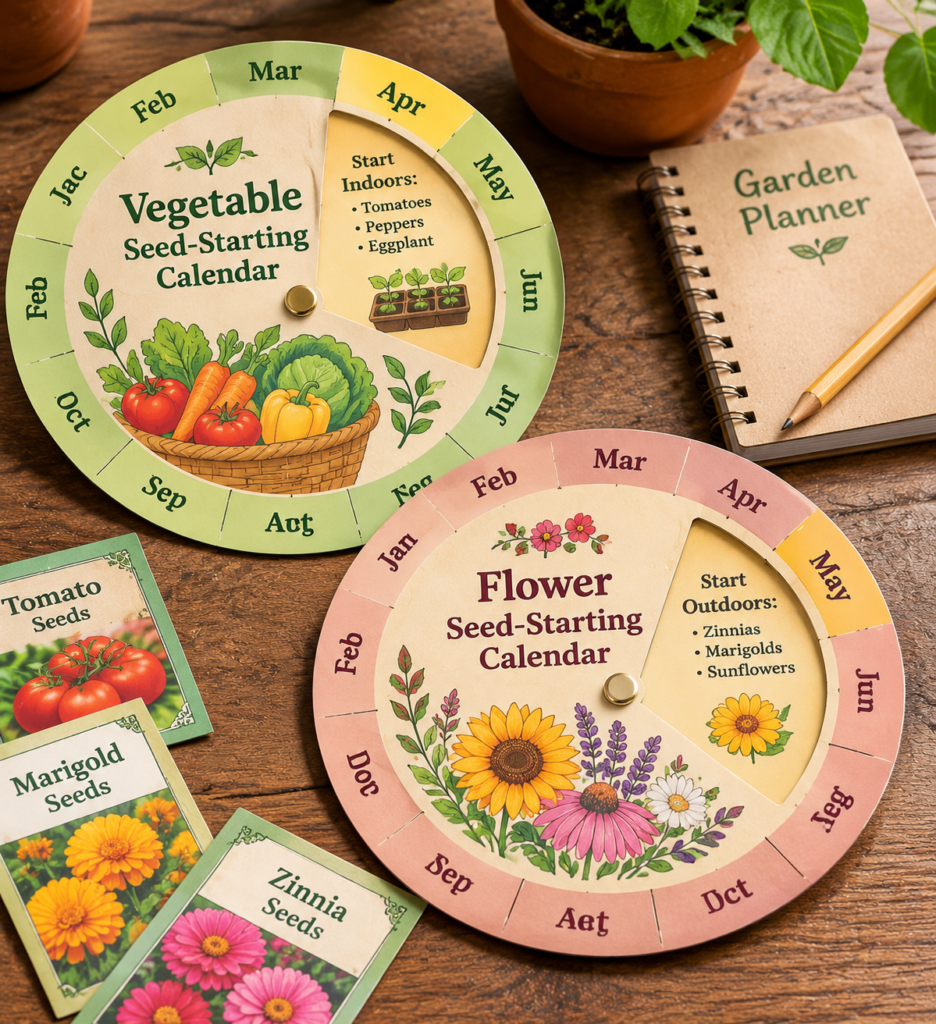
Seed-starting calendar wheels are rotating paper guides that help gardeners work out when to sow seeds and plan for later transplanting.
Each wheel can have a rotating section with planting information or blank spaces where the user records dates for specific crops.
Use your Cricut to cut the circular pieces from cardstock, add the crop names and date sections, then join the layers with a paper fastener so the wheel can turn. You could make separate versions for vegetables, herbs and flowers.
Since planting times depend on the crop, local climate and growing conditions, avoid printing one fixed sowing calendar and presenting it as suitable everywhere.
A customisable version gives buyers room to use their own local planting information.
New to selling your Cricut creations? Start with these 23 Easy Cricut Crafts To Sell For Beginners.
3. Garden Row Marker Sets
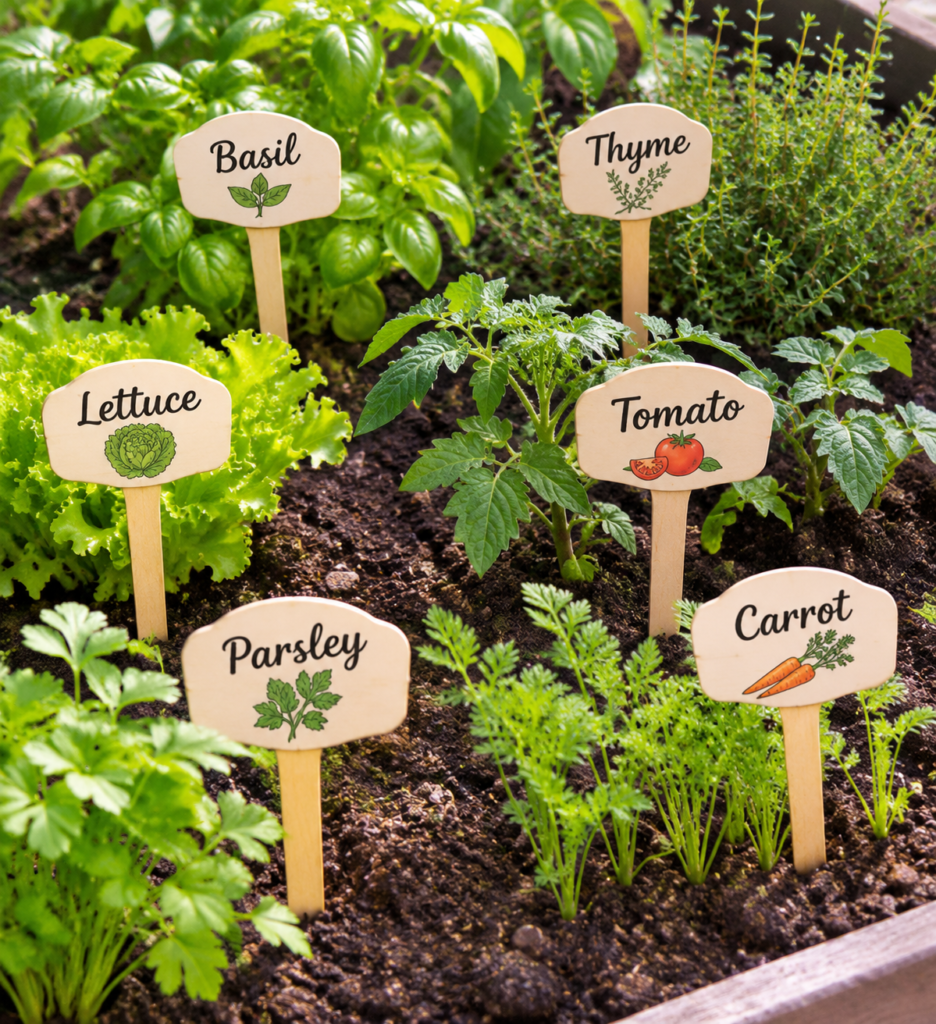
Garden row markers help growers identify what they have planted without relying on memory or handwritten notes that may become difficult to read.
Make a set using wooden craft sticks or suitable blank plant markers, then cut the crop names from outdoor-suitable vinyl with your Cricut.
You could offer separate collections for herbs, salad vegetables and common garden crops.
Keep the lettering large enough to read when the markers are placed in soil, and test the vinyl on the chosen marker material before making several sets.
Ordinary indoor vinyl may not hold up well to prolonged rain, sunlight and watering, so check the manufacturer’s outdoor-use guidance before advertising the markers as weather-resistant.
Getting ready for a craft fair? These 20 Cricut Products to Sell at Craft Fairs can help you plan your product table.
4. Plant-Swap Identification Stakes
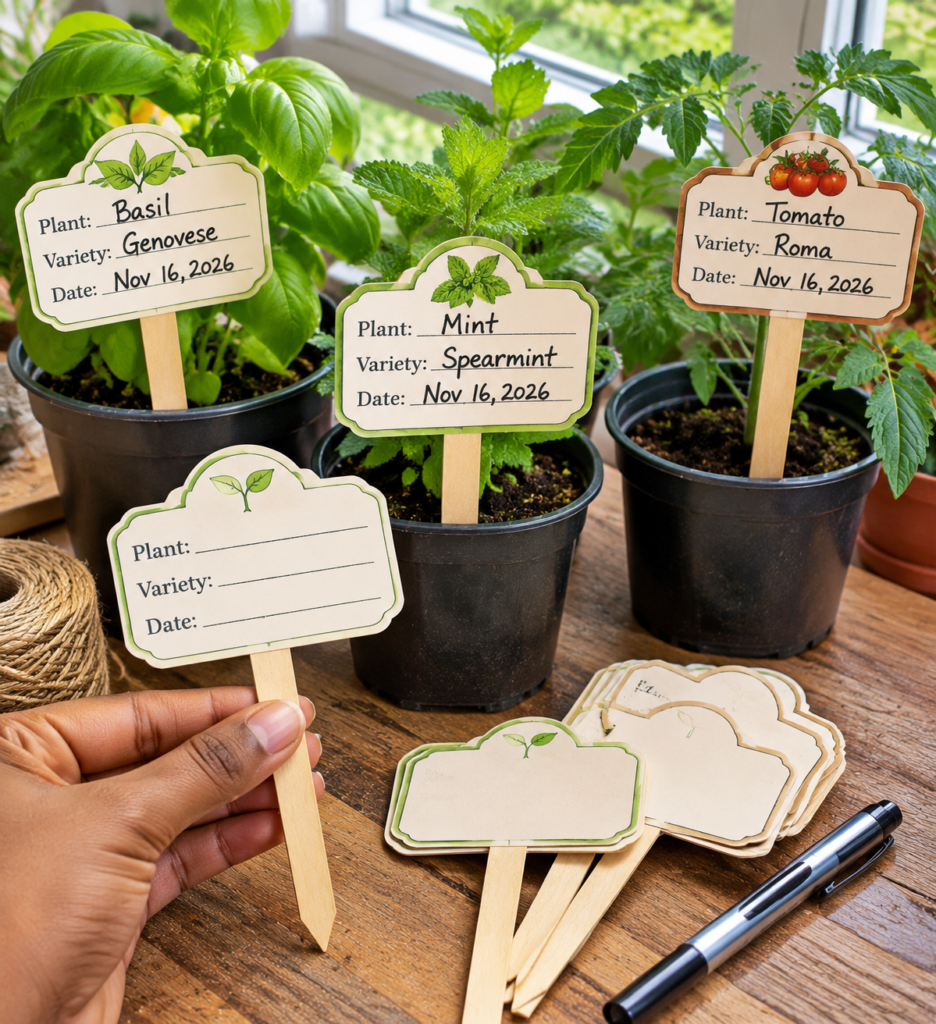
Give plant exchangers a simple way to label cuttings, seedlings and young plants with identification stakes.
Each stake can have spaces for the plant name, variety and propagation date, helping recipients remember what they have taken home and when it was started.
Cut the stake shapes from suitable plastic or other durable material that your Cricut model can handle.
Alternatively, make the labels from cardstock for temporary indoor plant swaps. Leave a clear writing area and pair the stakes with a compatible permanent pen.
A set with several blank labels may be more useful than preprinted designs because plant names and varieties differ between swaps.
You don’t need expensive supplies to get started. See these 29 Cricut Projects for Beginners Using Dollar Store Items.
5. Herb-Drying Bundle Tags
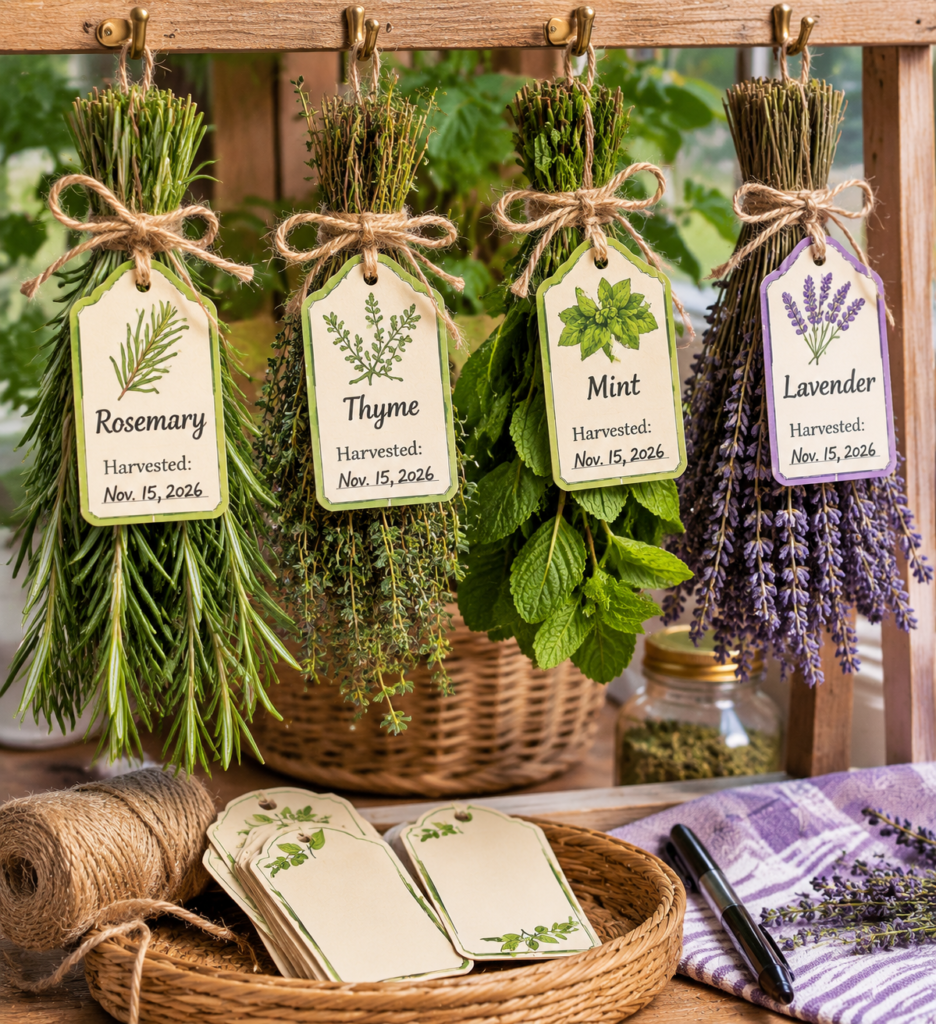
Herb-drying bundle tags are small labels attached to tied bunches of herbs during drying and storage.
They help identify each herb and record the harvest date, which is particularly useful when someone is drying several varieties at once.
Cut the tags from cardstock, add a small hole for string and include spaces for the herb name and date.
You can create different designs for rosemary, mint, thyme, basil and other commonly dried herbs, or sell a blank set that buyers can personalise.
Keep the tags attached to the outside of the bundles rather than placing ordinary cardstock in direct contact with damp herbs.
This is a simple product to package in small quantities for home gardeners and people who preserve herbs from their own gardens.
Prefer making products at home? These 35 Profitable Cricut Projects You Can Make From Home offer plenty of ideas to explore.
6. Harvest Basket Labels
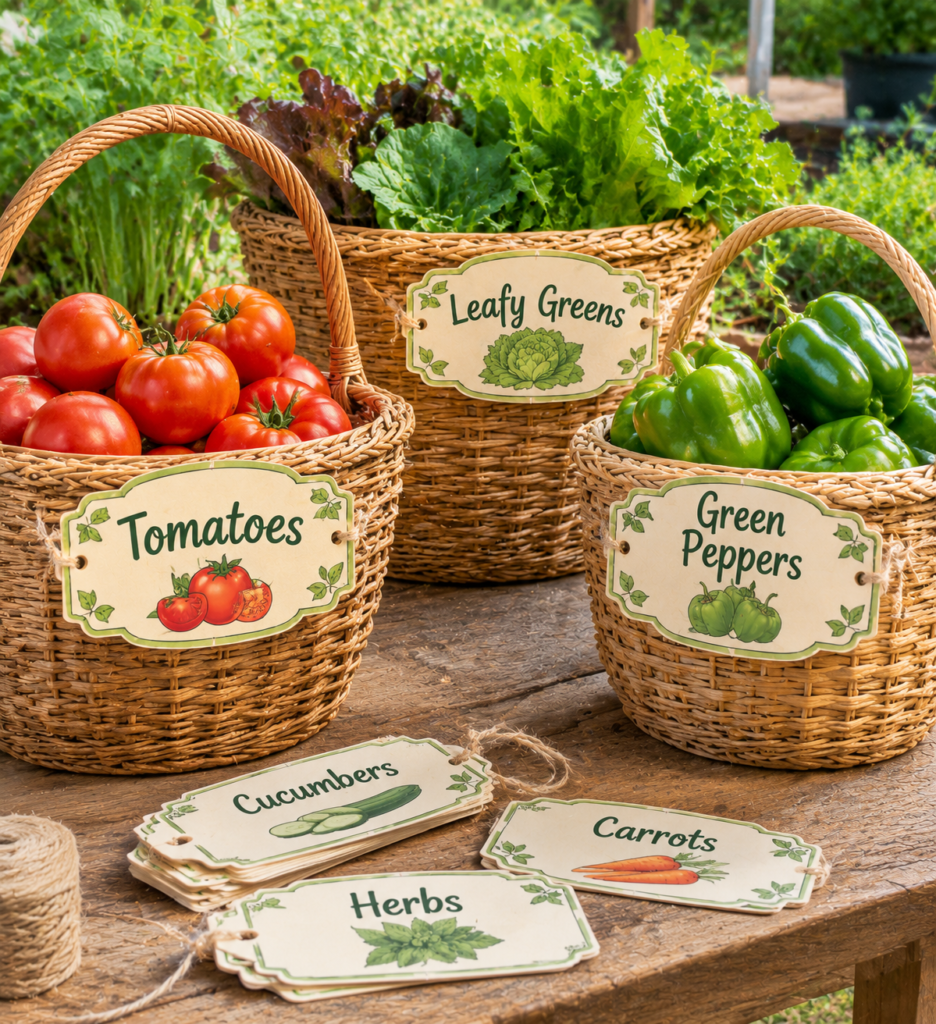
Produce sellers and home gardeners can use these labels to identify the contents of harvest baskets, particularly when displaying several varieties of fruit, vegetables or herbs.
Make the labels with crop names, variety details or simple illustrations, then apply them to compatible reusable basket surfaces using suitable vinyl.
For a more flexible product, create interchangeable labels that can be removed when the basket holds different produce.
Test the vinyl on the actual basket material and check how it responds to moisture, cleaning and repeated handling.
You could sell them as themed sets for vegetable growers, farmers’ market stalls and small produce businesses.
Want to focus on products with proven buyer appeal? Take a look at these 33 Cricut Projects That Actually Sell Well.
7. Seasonal Window-Cling Sets
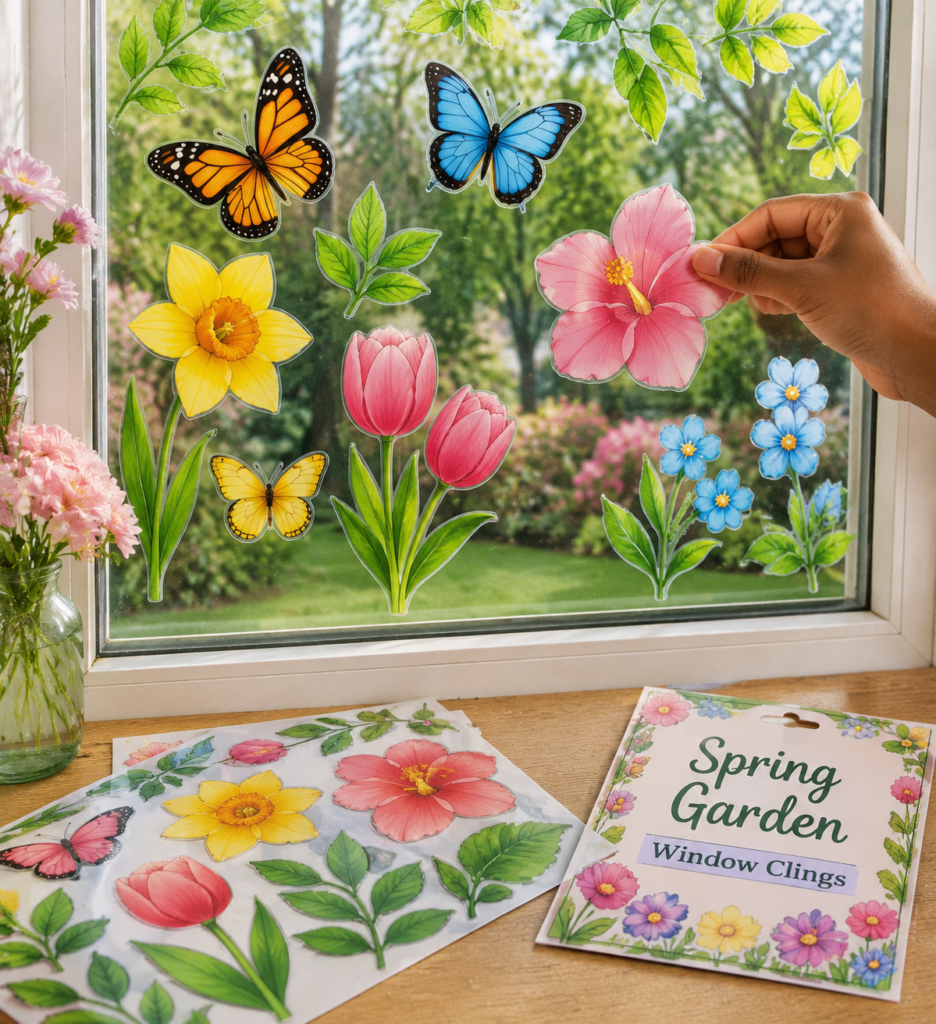
Seasonal window-cling sets offer customers an easy way to change window decorations without applying permanent adhesive designs.
Create collections featuring leaves and acorns for autumn, flowers for spring, or festive shapes for holiday displays.
Use window-cling material specifically designed to adhere to smooth glass through static or surface contact, rather than ordinary adhesive vinyl.
Your Cricut can cut the individual shapes, allowing you to arrange several designs on one sheet for convenient storage and reuse.
Package each collection with a backing sheet and simple application instructions. Test the material on clean glass to confirm that the pieces cling properly and can be removed without leaving adhesive residue.
Thinking about selling through an online shop? These 33 Best Cricut Projects to Make and Sell Online can help you choose what to create.
8. Freezer Meal Date Labels
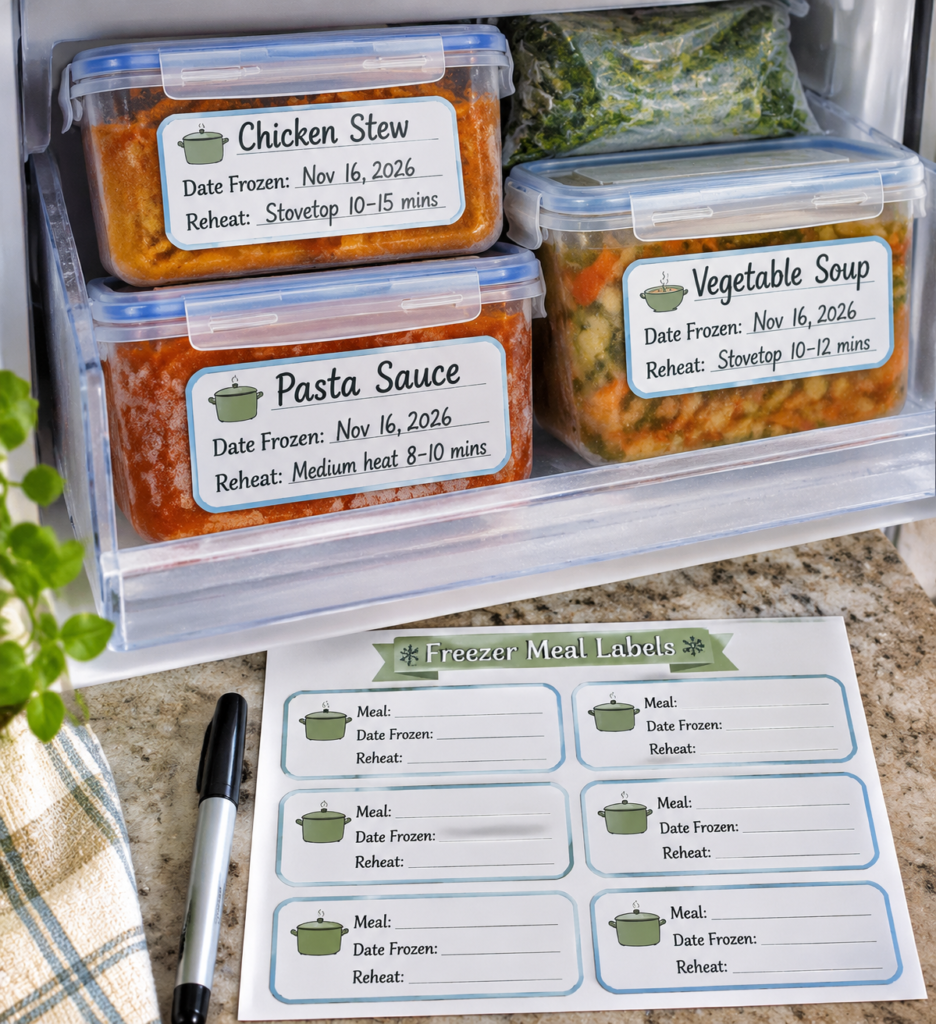
Freezer meal labels help households identify prepared meals without opening containers to check what is inside.
A useful design should have enough room for the meal name, date frozen and, where appropriate, reheating instructions.
Cut the labels from freezer-compatible adhesive material, or make separate tags that can be attached to suitable containers.
The important detail is how the labels perform in cold storage. Ordinary sticker paper and some adhesives may peel or become difficult to write on when exposed to moisture and freezing temperatures.
Test your chosen material on the actual container before producing a batch. These Cricut projects you can make for under $5 and sell for more could be offered as meal-prep label sets for busy households and people who batch-cook.
Looking to earn extra money from your crafting time? Try these 31 Easy Cricut Projects to Make and Sell for Extra Money.
9. Pantry Rotation Dots
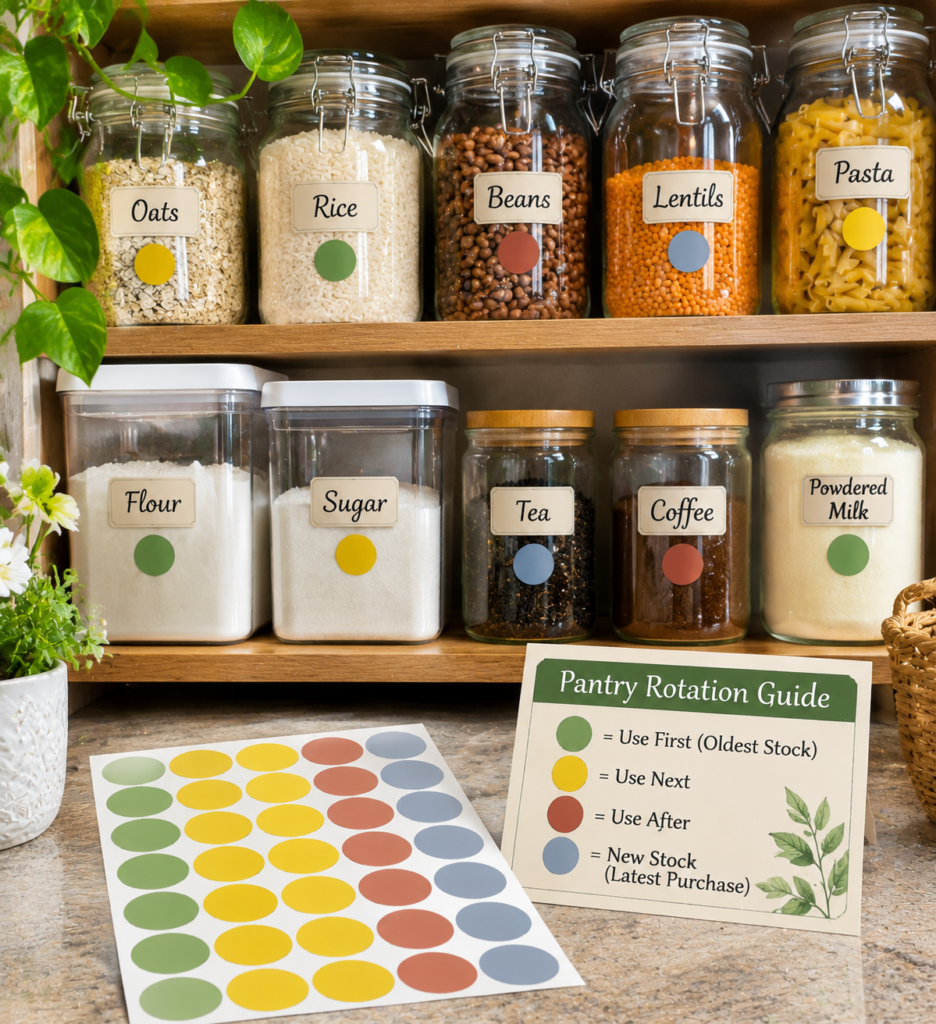
A simple colour system can make pantry organisation easier, particularly in households that store several opened packets, jars and containers.
Pantry rotation dots are small coloured stickers that help users mark when an item was opened or identify which products should be used first.
Rather than making large decorative labels, use your Cricut to cut small circles in different colours and package them with a simple colour-reference card.
You could include blank dots for customers who prefer to write dates directly on them.
Make the purpose clear: these stickers support stock organisation; they do not establish whether food is safe to eat or replace expiry dates and proper food-storage guidance.
Tired of everyday clutter? These 27 Easy Cricut Projects for Organizing Your Home offer creative ways to organise your space.
10. Moving-Box Room Labels
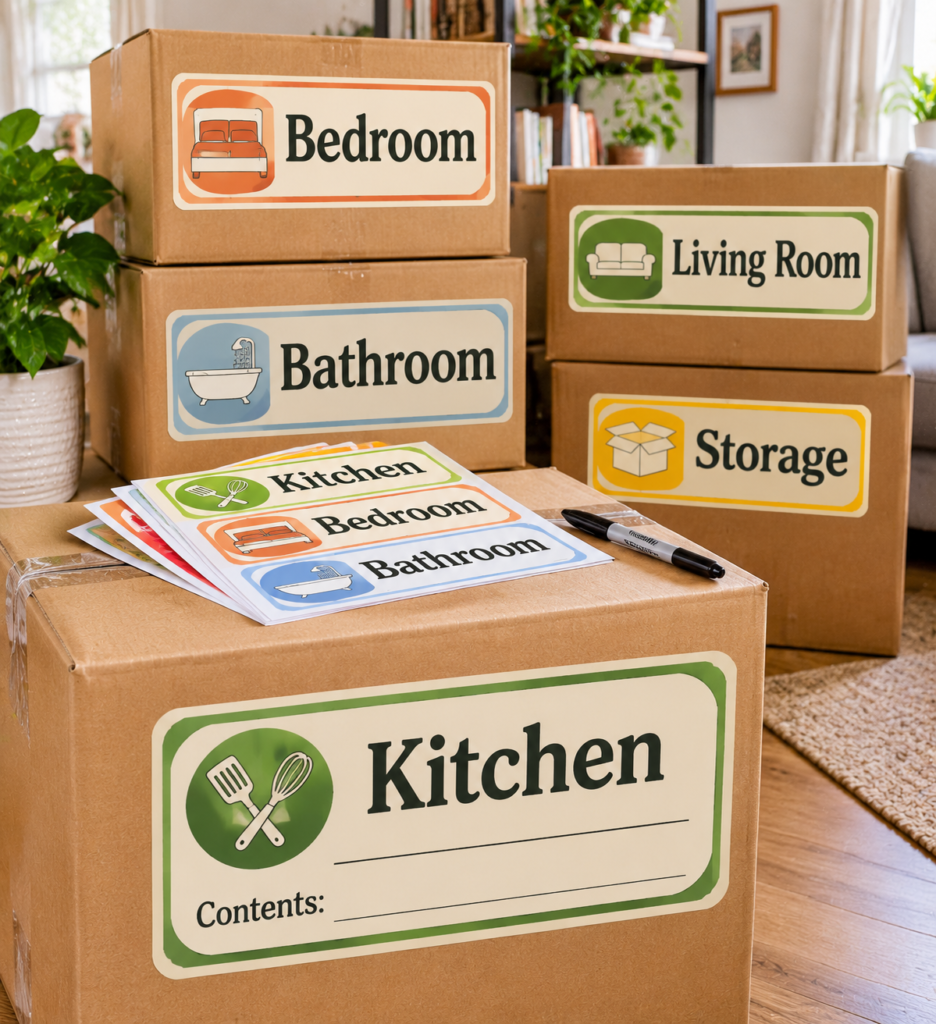
When people move house, identifying which room each box belongs to can save time during unloading and unpacking.
This product is a set of large, easy-to-read labels marked with room names such as kitchen, bedroom, bathroom, living room and storage.
The selling opportunity is in making the labels visible from a distance. Use contrasting colours, bold lettering and a consistent size so movers can recognise them quickly when boxes are stacked.
You can cut the designs from adhesive label material or make peel-and-stick sheets, depending on the intended surface.
Offer a complete household set rather than only individual labels, and include blank labels for rooms or storage areas not covered by the standard categories.
Give your kitchen a personal touch with these 25 Easy Cricut Projects for Your Kitchen.
11. Storage-Bin Category Labels
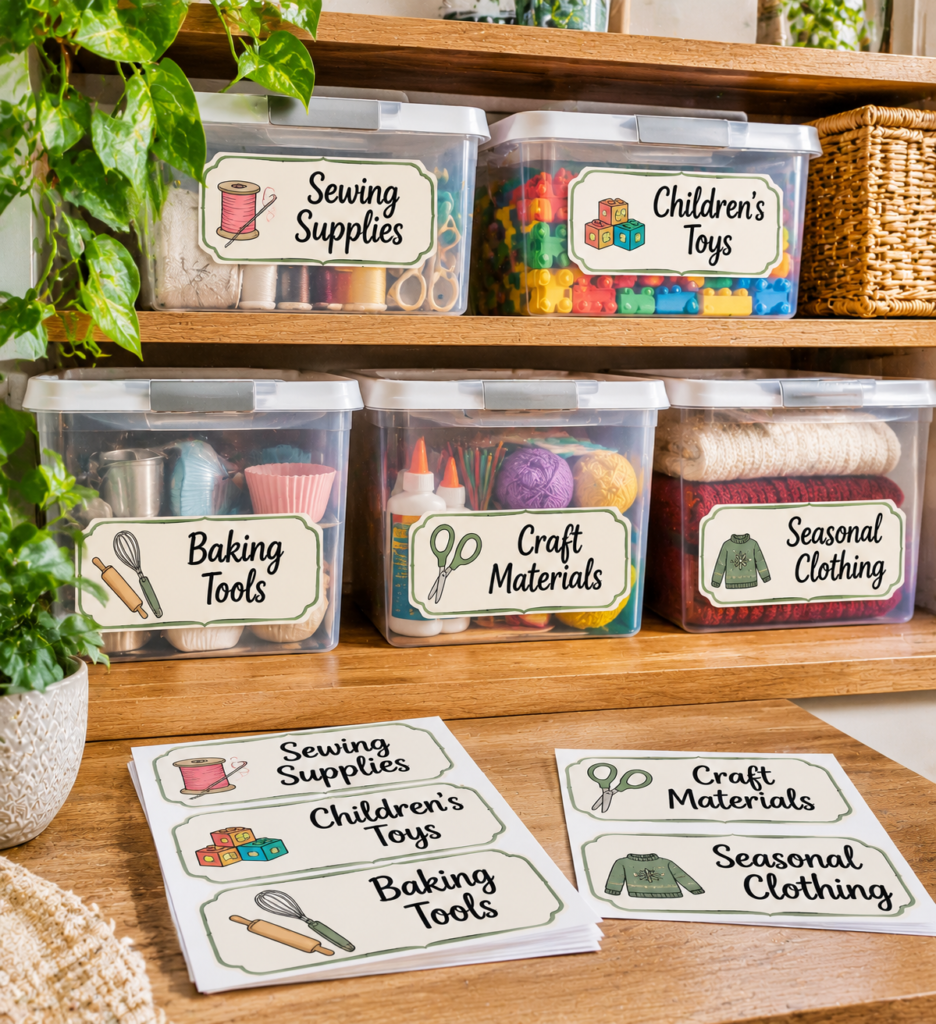
A storage-bin label set can help people find items without having to open several containers.
Instead of offering one general collection, create focused packs for particular storage needs: sewing supplies, children’s toys, baking equipment, seasonal clothing or workshop tools.
This is where customisation can add value. Buyers may want labels that match their existing storage system, use particular wording or fit small containers.
Measure common label spaces before creating standard sizes, and provide the dimensions in your product listing.
For a small-material-cost product, coordinated designs cut from vinyl or suitable adhesive label material can be sold in themed packs.
These are Cricut projects you can make for under $5 and sell for more when the set offers clear organisation rather than just decorative lettering.
Have leftover vinyl or cardstock? Put those pieces to use with these 23 Cricut Projects You Can Make with Scrap Materials.
12. Cable Identification Flags
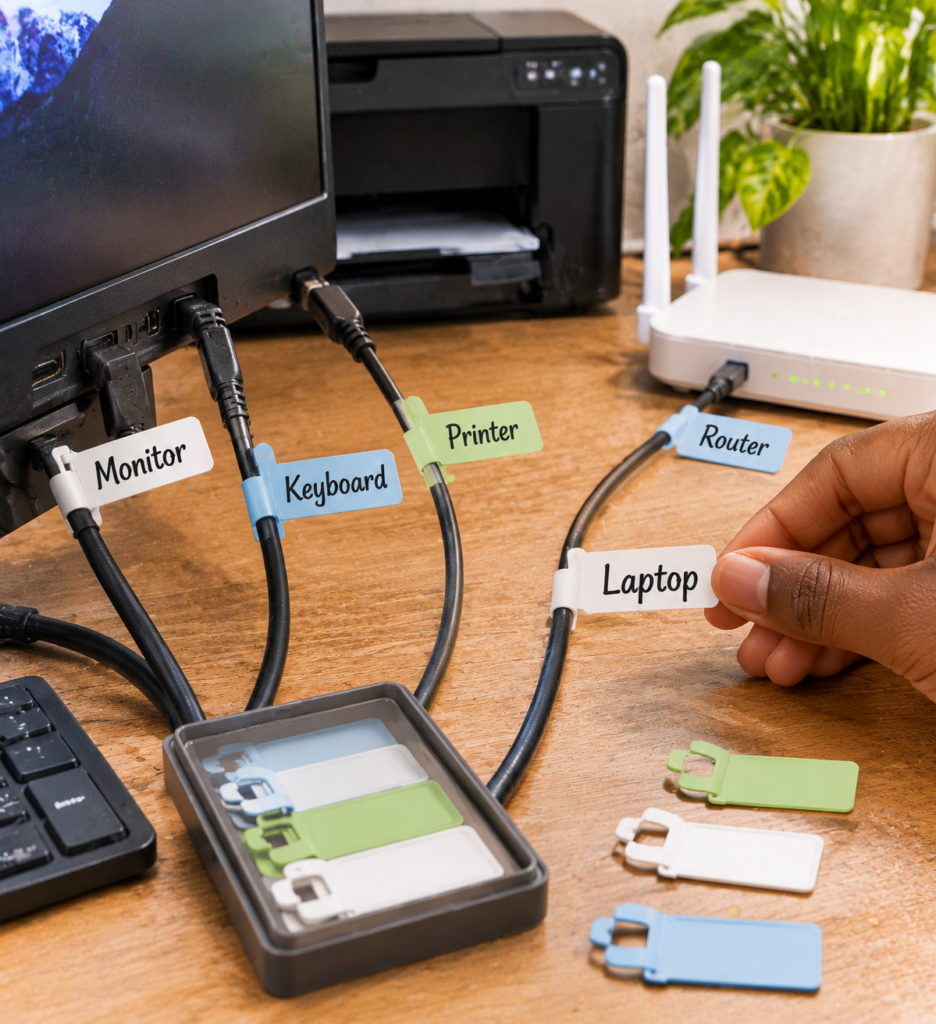
Have you ever unplugged a cable and then struggled to remember which device it belongs to? Cable identification flags address this small but familiar problem.
They are narrow labels designed to wrap around a cable or attach to a separate cable tag, leaving a visible area for names such as monitor, printer, router or phone charger.
Make the labels with short, readable text and enough space to distinguish similar devices. You can cut them from suitable adhesive material or produce them as inserts for reusable cable-tag holders.
Avoid applying unsuitable vinyl directly to cables, particularly where they become warm, bend frequently or have manufacturer instructions against adhesive coverings.
A set for home offices, gaming setups or workstations gives the product a clearly defined audience.
Planning a celebration? These 20 Easy Cricut Projects for Birthdays and Parties can add a personal touch to the occasion.
13. Luggage Insert Identification Cards
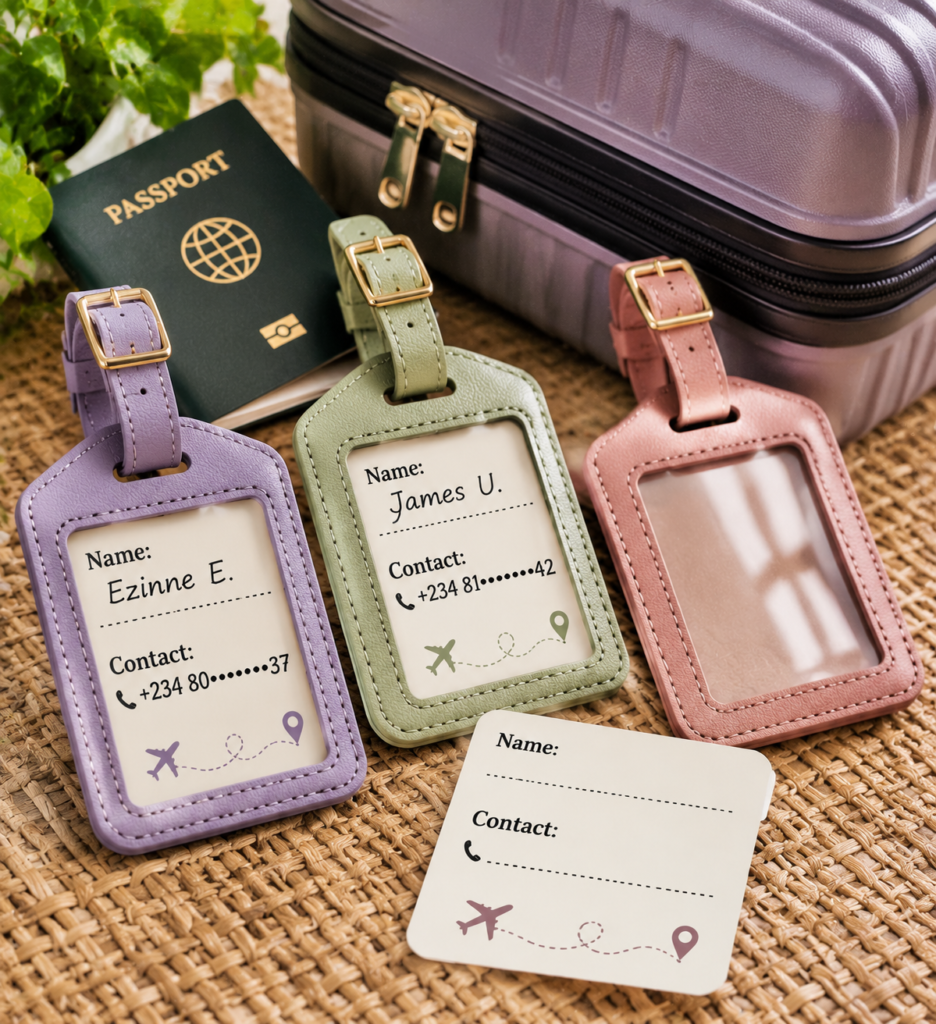
Instead of printing personal details directly onto a luggage tag, travellers can use replaceable identification inserts.
These small cards fit inside compatible luggage tags and can be changed whenever the traveller uses a different bag or wants to update their contact information.
Cut the inserts from sturdy cardstock and design them with clearly marked spaces for a name and a preferred contact method.
Make several designs for different tag sizes, but state the exact dimensions so customers know what will fit.
Keep the information fields limited; travellers do not need to display their full home address publicly. This product could also be sold in small multipacks for families who travel with several bags.
Handmade presents feel more personal. Find your next idea among these 31 Easy Cricut Projects for Gifts.
14. Pet-Sitter Instruction Cards
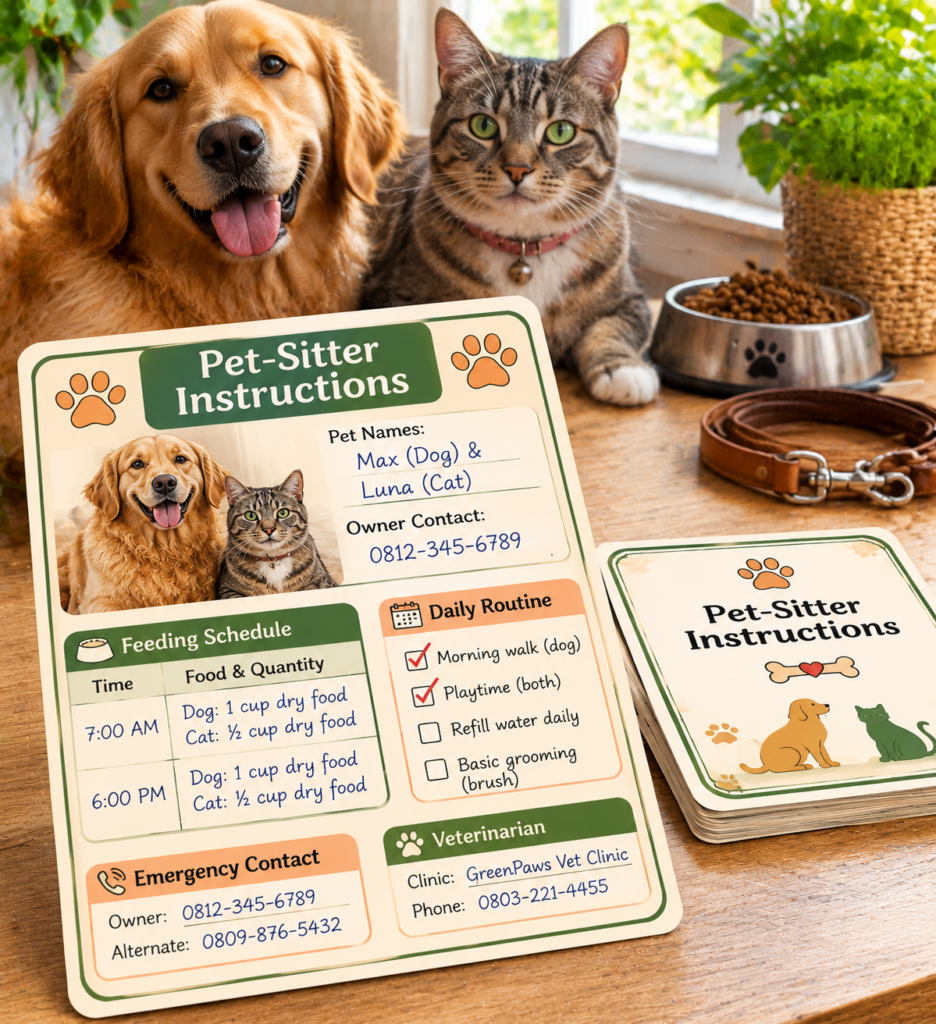
A pet-sitter instruction card gives owners one place to record the information someone needs when caring for their animal.
The layout matters more than decorative detail: include spaces for feeding amounts and times, medication instructions supplied by the owner, daily routines, the veterinarian’s contact details and an emergency contact.
Your Cricut can cut the cards and add headings or decorative elements, while the main information can be handwritten.
Consider making separate layouts for dogs, cats and other household pets, since their care routines differ. Sell them as reusable cards with a wipe-clean sleeve or as a small printed-and-cut stationery set.
Make it clear that owners must provide accurate, individual care instructions; the card itself does not provide veterinary guidance.
Shopping for a creative teen can be tricky. These 30 Cute Cricut Projects for Teen Girls offer fun ideas to make or gift.
15. Plant-Sitter Instruction Cards
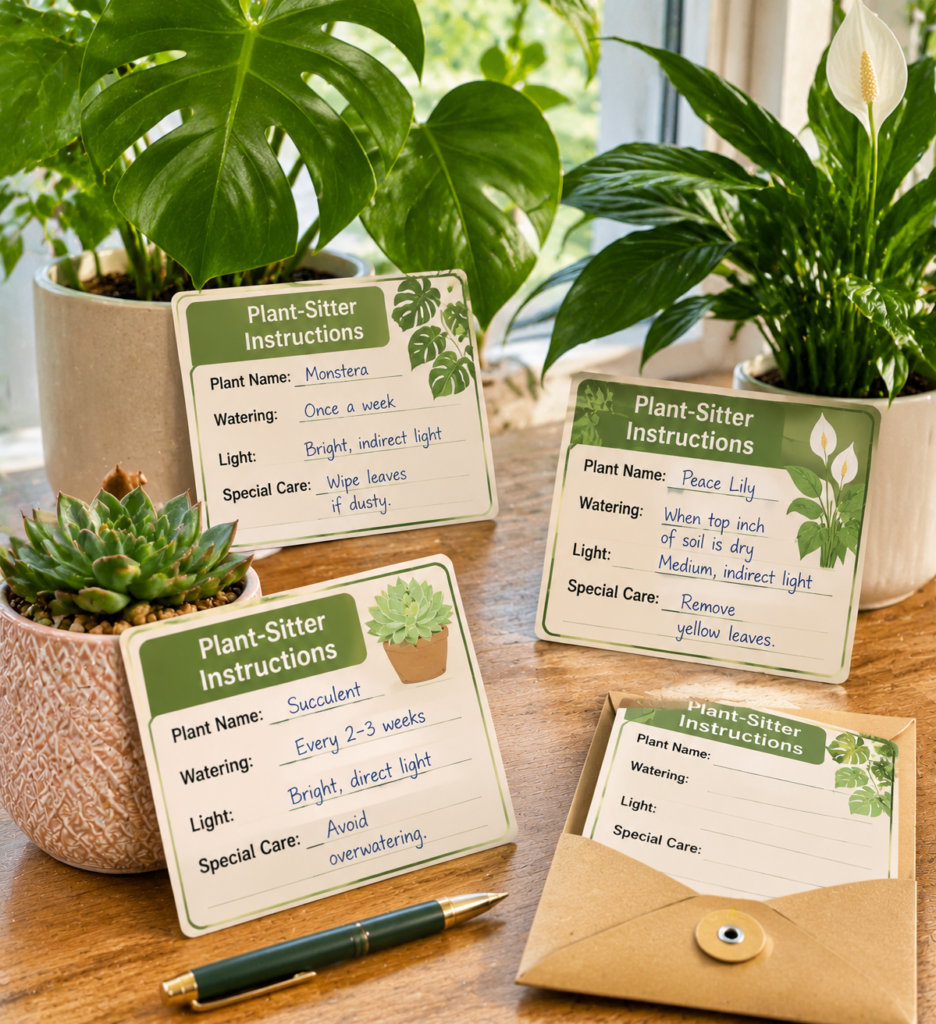
Plant owners who travel may leave several plants in someone’s care, each with different watering and light requirements.
A plant-sitter card helps prevent confusion by giving the caretaker a separate record for each plant or group of plants.
Design the card with fields for the plant name, watering instructions, preferred light conditions and any special care notes.
A small illustration or plant icon can make different cards easier to recognise, but leave enough writing space for specific instructions.
You could package several cards with a simple storage ring or envelope so the owner can keep them together.
Unlike a generic plant-care chart, this product allows customers to record the actual needs of their own plants, which gives it a more useful purpose.
Want to personalise your living space? Take a look at these 29 Easy Cricut Projects for Home Decor.
16. Personalised Bookplate Sticker Sheets
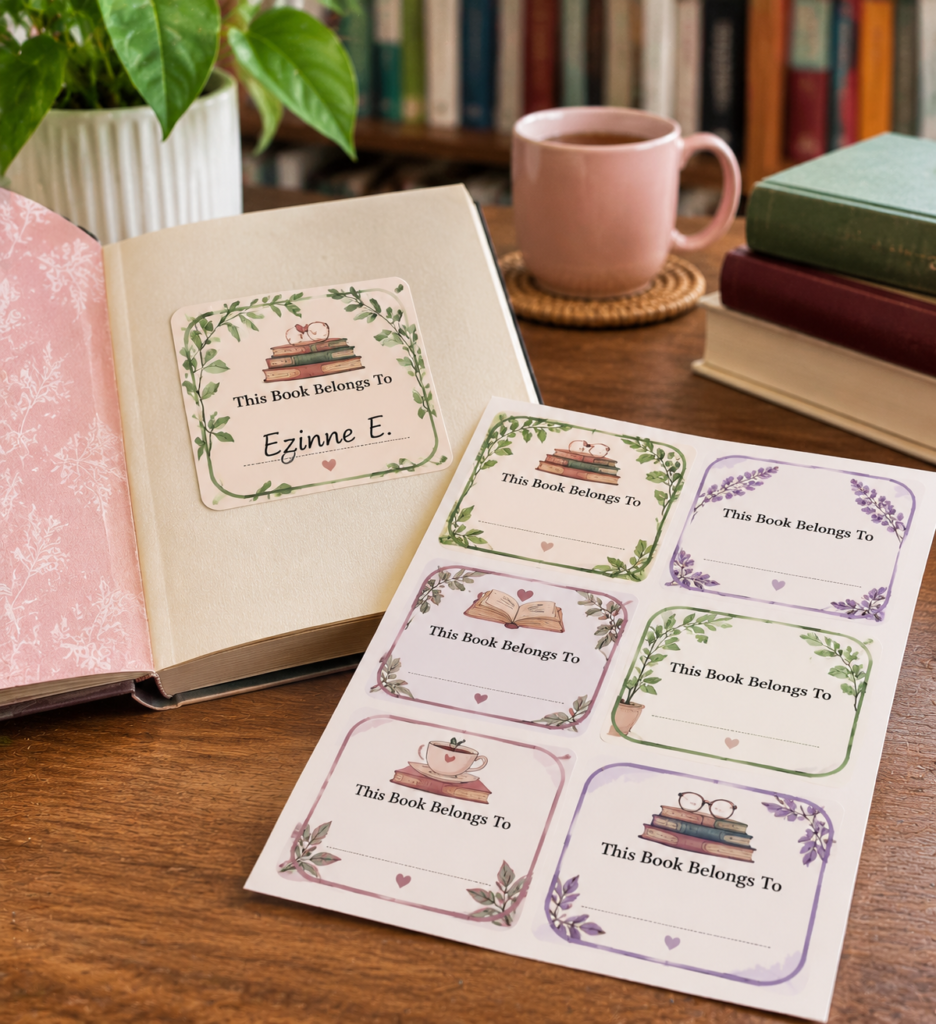
A book collection can feel more personal when each book carries its owner’s name. Personalised bookplate stickers make this possible with small labels designed to be placed inside book covers.
Create designs with names, literary illustrations, decorative borders or wording such as “This book belongs to.” Readers, book clubs and gift buyers are potential customers.
For coloured illustrations and detailed backgrounds, use Print Then Cut with a compatible Cricut machine and printer.
The original Cricut Joy does not support this feature, so check your machine before purchasing printable sticker paper.
Simple designs can also be cut from adhesive vinyl. Arrange several labels on one sheet to make the pack more economical to produce.
Cardstock can do more than you might expect. See these 27 Easy Cricut Projects Using Cardstock for ideas to try.
17. Junk-Journal Pocket Kits
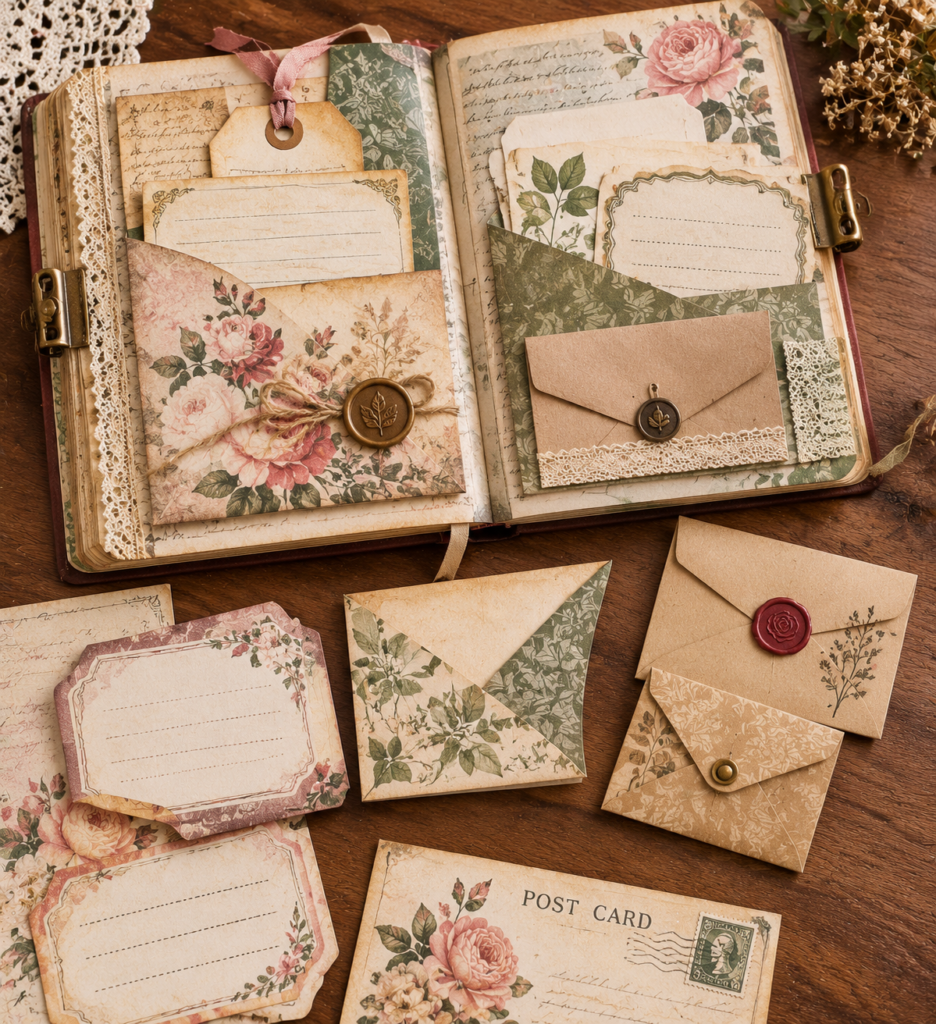
Loose photographs, tickets, handwritten notes and keepsakes often need somewhere to go in a junk journal.
A pocket kit gives journal makers ready-cut pieces for storing these items without designing every insert themselves.
Include a mixture of envelope pockets, corner pockets, tuck spots and small journaling cards. Choose coordinating papers so the pieces work together, and add a simple assembly guide for customers unfamiliar with folding paper pockets.
Travel memories, vintage correspondence and nature collections offer distinct themes for different kits.
Among Cricut projects you can make for under $5 and sell for more, this idea has the advantage of allowing several coordinated pieces to be cut from a small quantity of paper.
Curious about what you can make with Infusible Ink? These 25 Easy Cricut Projects Using Cricut Infusible Ink show you what’s possible.
18. Scrapbook Title-Strip Packs
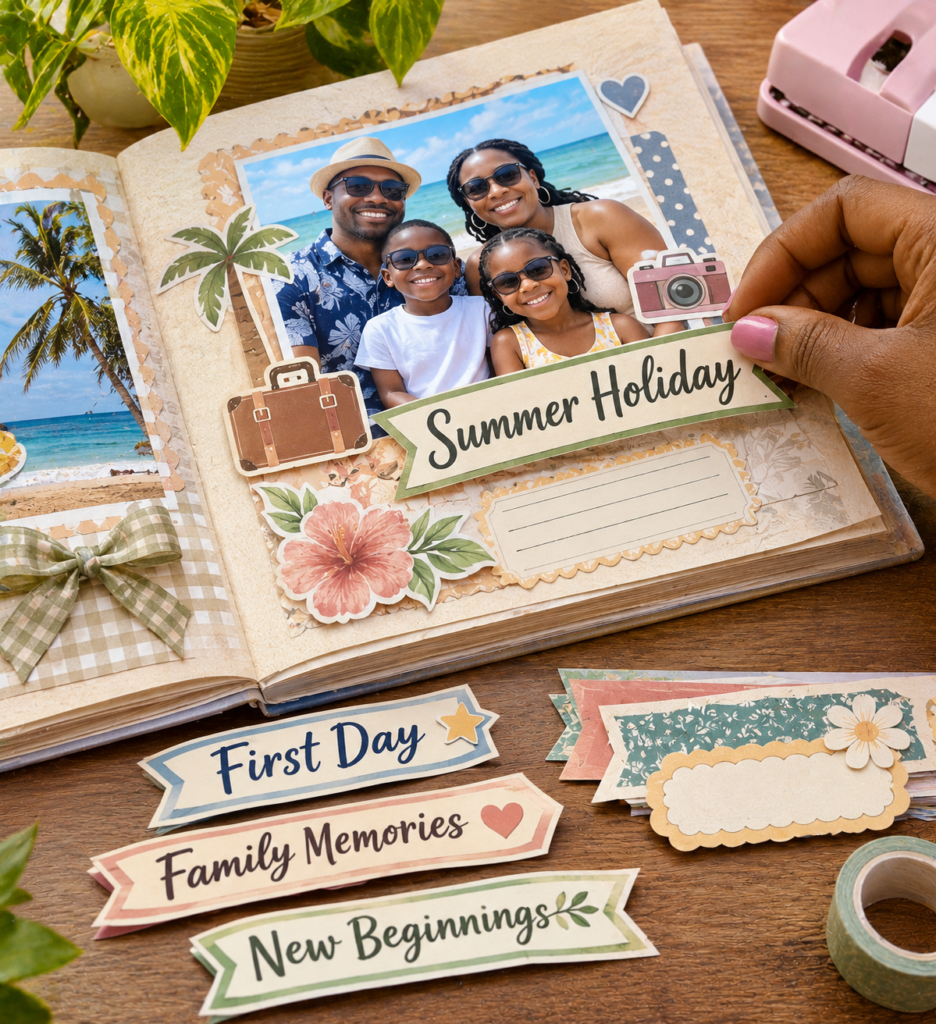
A scrapbook page about a family holiday, a child’s first school day or a special celebration needs a heading that captures the memory.
Instead of making scrapbookers cut individual letters, offer ready-to-use title strips with relevant phrases.
Organise the packs by occasion rather than mixing unrelated wording.
For example, a school-memory pack could include “First Day,” “School Memories” and “New Beginnings.” Cut the phrases from cardstock in a consistent font and offer different lengths to suit various page layouts.
Avoid very thin lettering that tears during weeding or becomes difficult to attach. The value is in providing coordinated wording that customers can use immediately.
Have vinyl on hand? Put it to use with these 23 Cricut Projects for Beginners Using Vinyl.
19. Card-Making Sentiment Die-Cut Packs
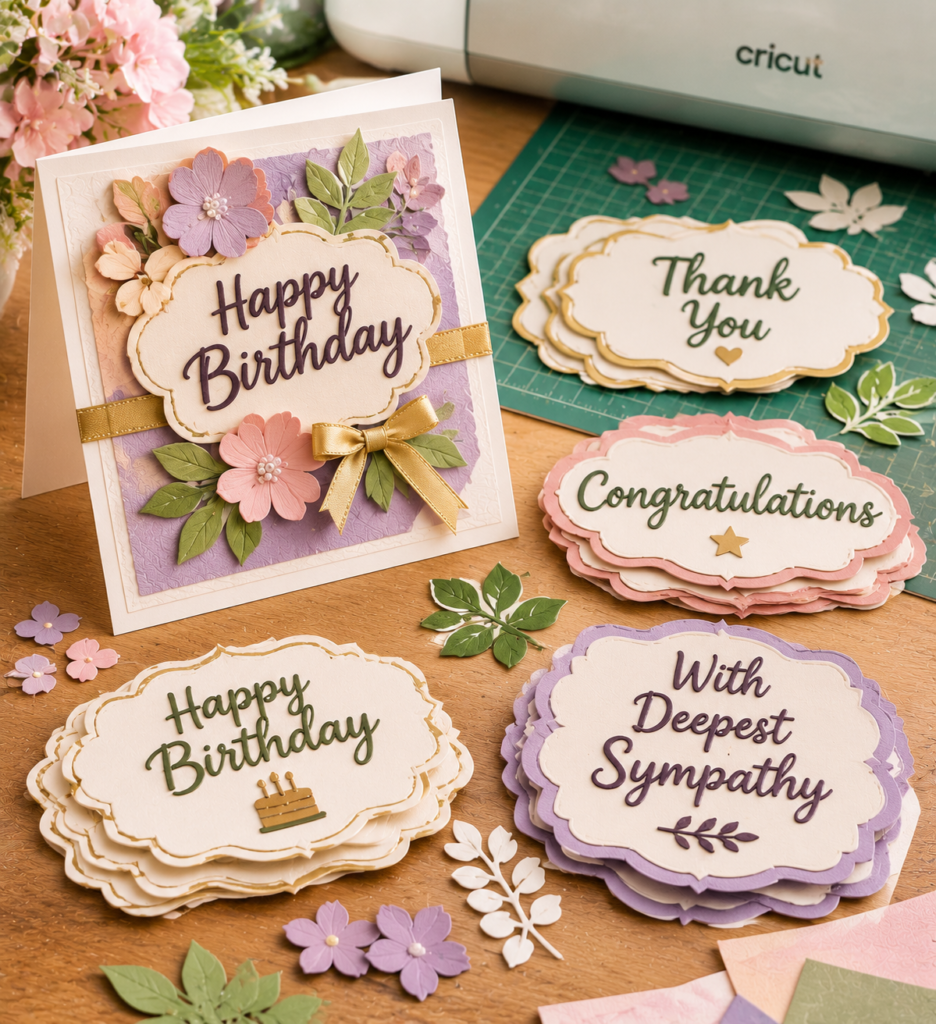
Not every card maker wants to spend time cutting individual greetings for every project.
Ready-made sentiment die-cuts provide words and short phrases that can be attached to card fronts, gift tags and handmade stationery.
Build separate collections for birthdays, thank-you cards, congratulations, sympathy and seasonal occasions.
Use cardstock that holds its shape and choose lettering that remains easy to remove from the cutting mat. You can also include a few decorative shapes that complement the wording.
Keep the sentiments original or ensure you have the necessary commercial rights to use any purchased designs and fonts.
Want more ways to turn crafting into income? These 25 Easy Cricut Projects to Make and Sell for Extra Money are worth a closer look.
20. Watercolour Stencils
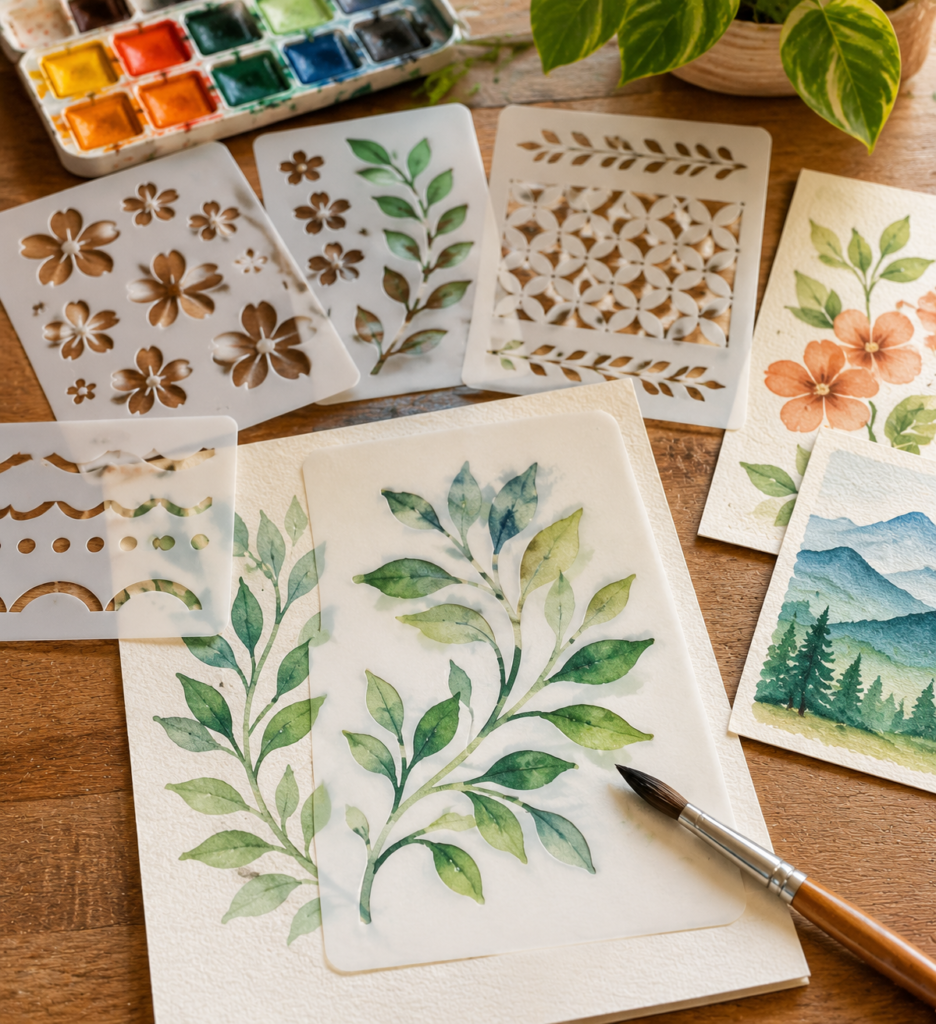
Clean borders, repeated leaves and geometric patterns can be difficult to reproduce consistently by hand. Watercolour stencils give artists a guide for adding repeated shapes and decorative details to their paintings.
Cut simple patterns from suitable stencil film, paying attention to the small connecting sections that prevent loose pieces from falling out.
A design with too many delicate details may tear during use or allow paint to seep underneath. Test the stencil with watercolour on spare paper before offering it as reusable.
Also check that the material can be cleaned without losing its shape or adhesive properties.
This is one of the more specialised Cricut projects you can make for under $5 and sell for more, particularly when you offer designs aimed at specific painting techniques.
Simple designs can still attract buyers. Get ideas from these 21 Simple Cricut Projects for Beginners That Actually Sell.
21. Travel-Journal Pocket Inserts
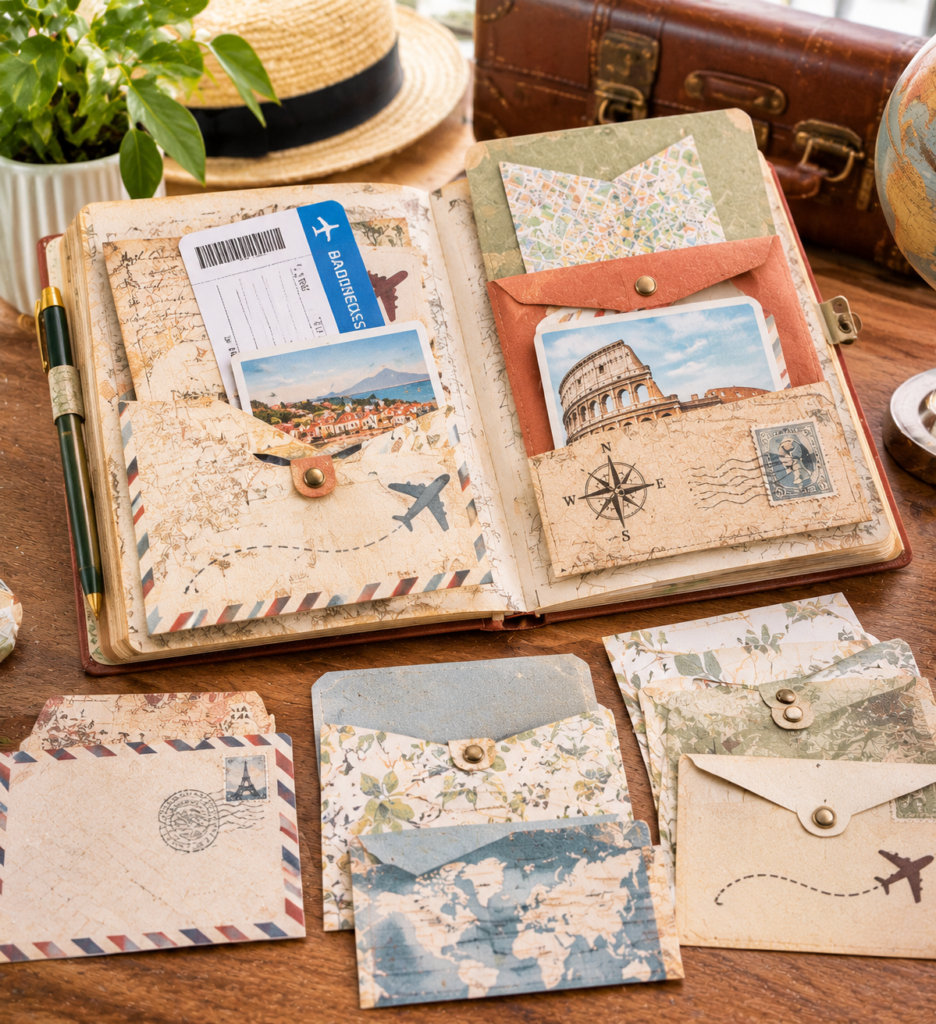
Tickets, postcards, receipts and small maps can make a travel journal difficult to organise when there is nowhere to store them.
Paper pocket inserts give travellers a way to keep these keepsakes together while leaving them accessible.
Design folded pockets with attachment tabs that can be glued or secured to journal pages. Offer different sizes for small tickets and larger postcards, and state the finished measurements in the product description.
Lightweight cardstock helps prevent the journal from becoming unnecessarily bulky.
A themed collection for holidays, road trips or city breaks can make the inserts more appealing to people who enjoy documenting their travels.
Looking for something manageable to make at home? These 22 Easy Cricut Projects for Beginners You Can Make at Home are a good place to start.
22. Gift-Wrap Belly Bands
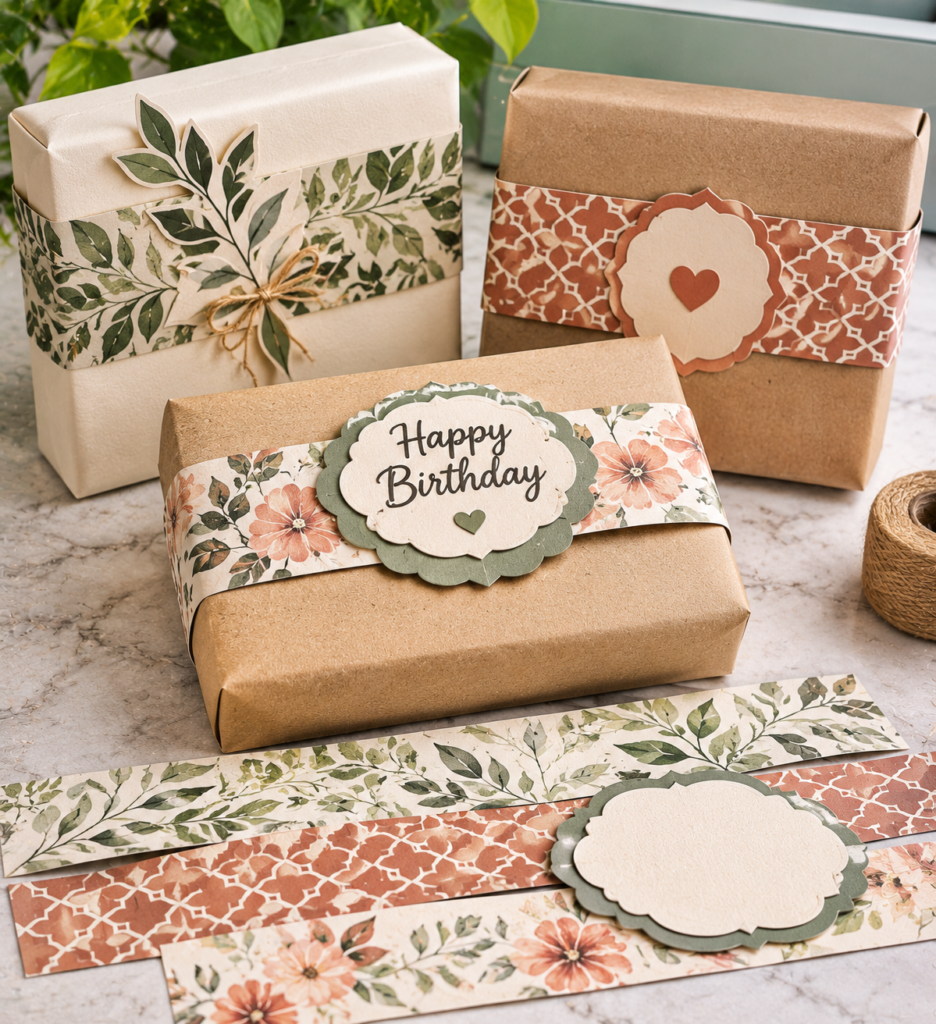
A plain gift box can look more finished with a decorative paper strip wrapped around it.
This is the purpose of a gift-wrap belly band: it holds the presentation together and adds a design detail without requiring elaborate wrapping or a large ribbon.
Cut the bands from patterned cardstock and leave enough length for the ends to overlap at the back.
You can add names, short messages or seasonal motifs for birthdays, weddings and holiday gifts. Since boxes come in different sizes, offer clearly labelled dimensions or made-to-measure options.
Small businesses that package stationery, handmade soaps or other lightweight products may also be interested in coordinated branded bands.
Just getting familiar with your machine? Build your confidence with these 19 Easy Cricut Projects for Beginners.
23. Gift-Card Presentation Sleeves
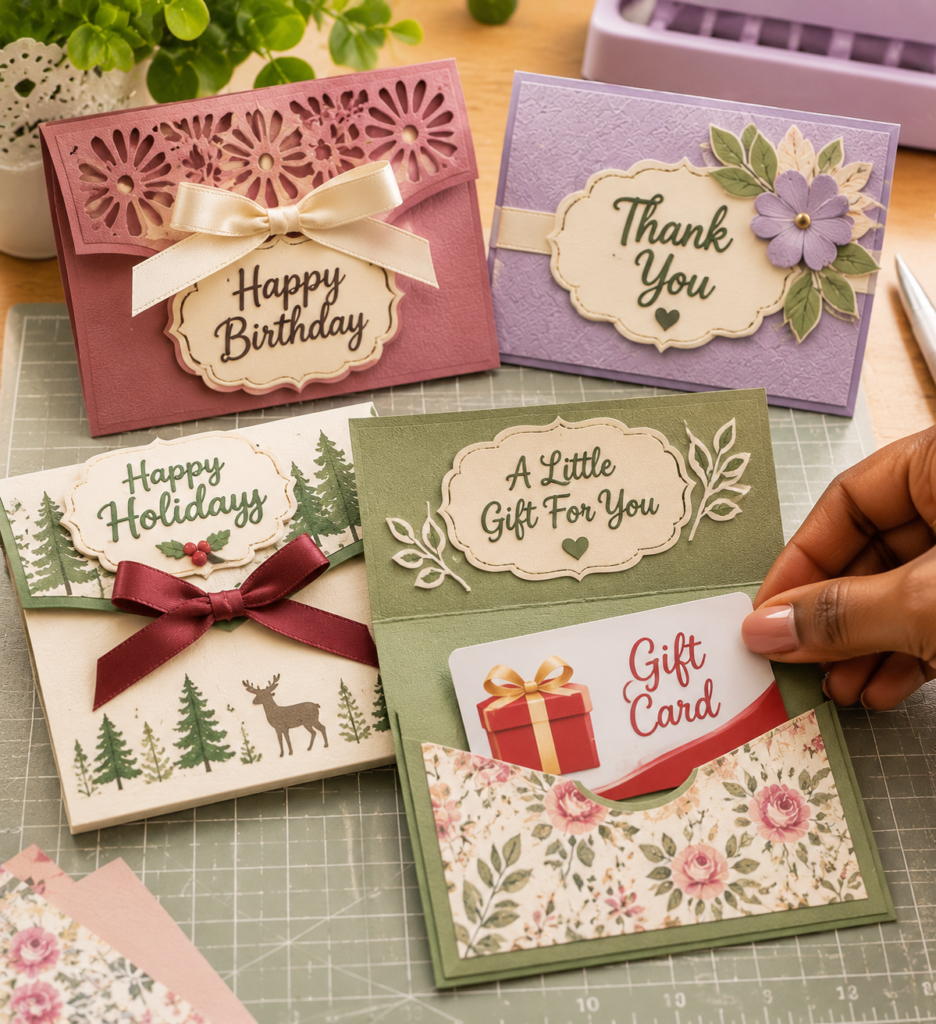
A gift card is convenient, but giving it in its original plastic or paper packaging may not provide the presentation some buyers want.
A folded cardstock sleeve turns it into a small gift with room for a greeting or personal message.
Create a pocket that holds the card securely while allowing it to slide out without tearing the paper. Standard gift cards are commonly credit-card sized, but packaging dimensions can differ, so test the sleeve with the actual card before producing a batch.
You could offer birthday, thank-you and holiday designs, or sell blank sleeves that buyers can personalise themselves.
Personalised gifts don’t have to be complicated. Find inspiration in these 33 Cricut Projects for Beginners That Make Great Personalized Gifts.
24. Yarn Colourway Sample Cards
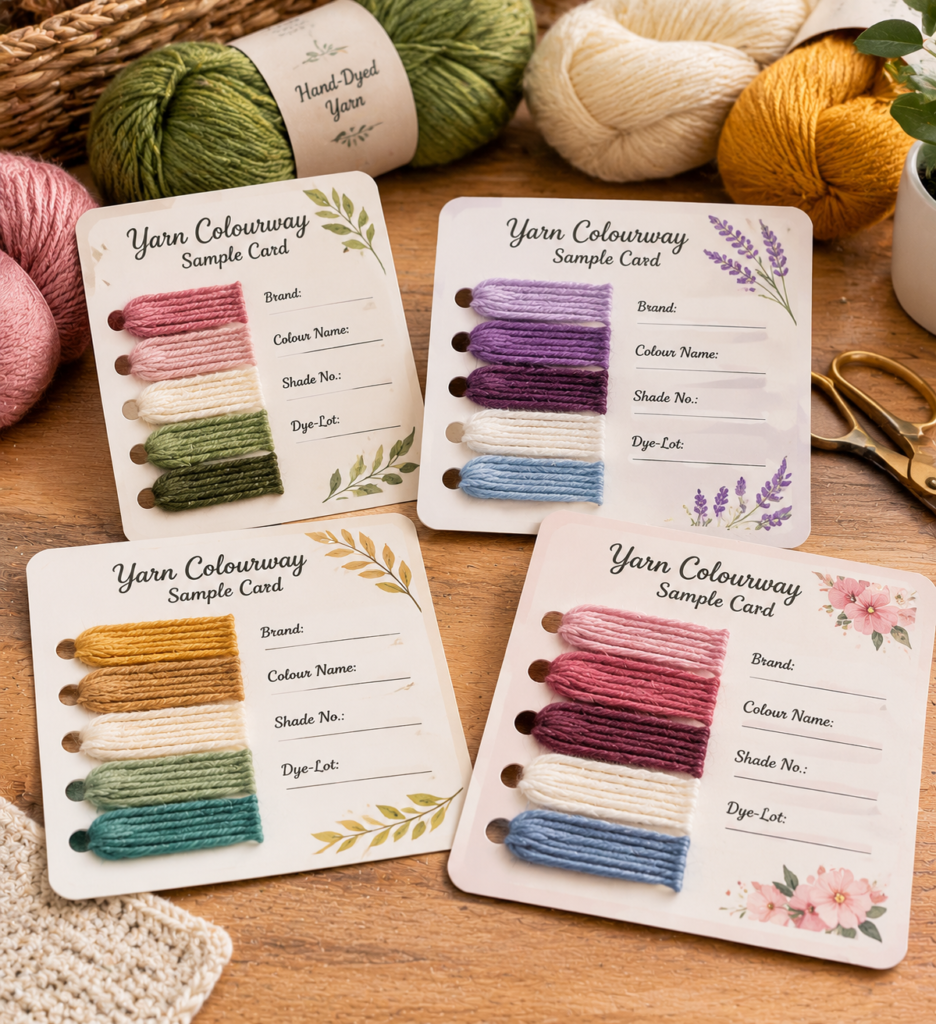
Independent yarn sellers and fibre enthusiasts sometimes need to show customers what different yarn shades look like without displaying an entire skein for every colour.
Yarn sample cards solve this by holding short strands that can be compared side by side.
Cut sturdy cards with evenly spaced holes or slots for attaching the yarn. Leave room for the brand, colour name, shade number and fibre details.
Including a dye-lot field is particularly useful because the same yarn colour can vary slightly between production batches.
Use cardstock strong enough to support the strands without bending, and offer blank cards for makers who want to create their own sample collections.
Need activities to keep children creatively occupied? These 35 Easy Cricut Projects for Kids offer ideas to make together.
25. Crochet Project Progress Trackers
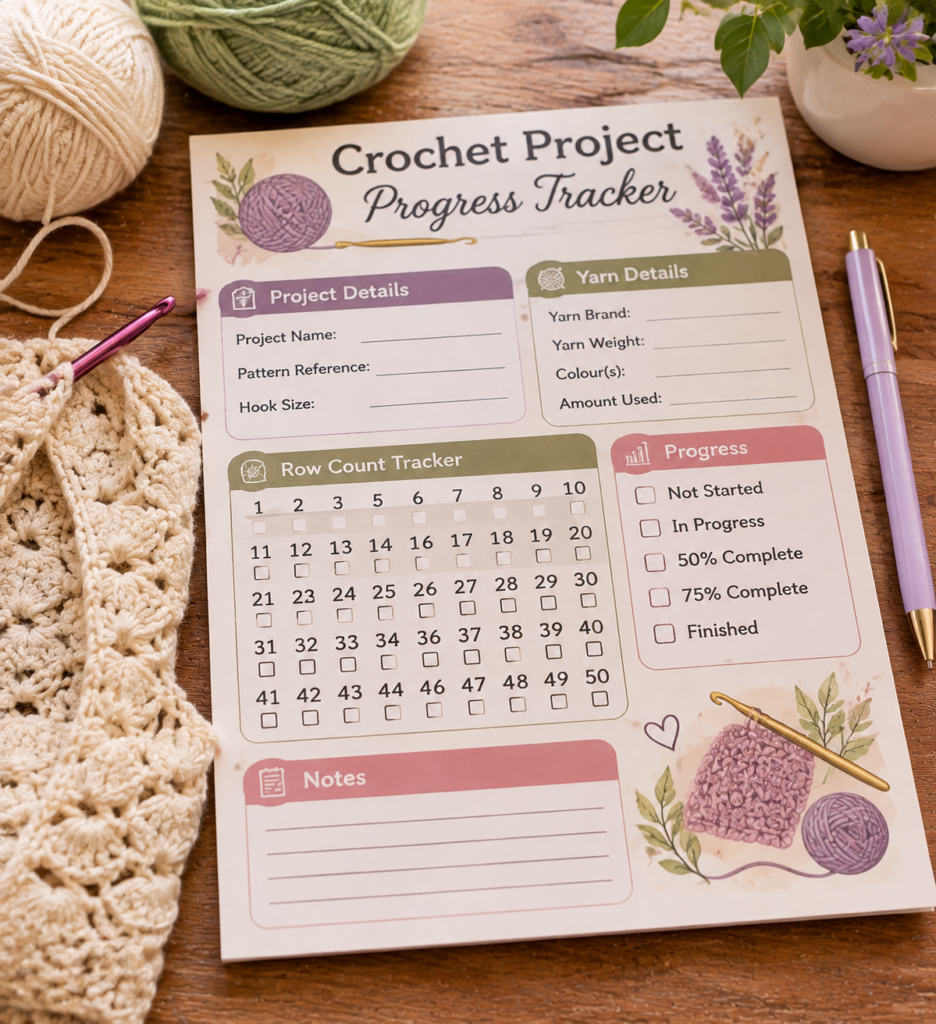
Keeping track of rows, rounds, yarn choices and hook sizes becomes important when a crocheter has several projects in progress.
A dedicated tracker gives makers a place to record these details instead of searching through loose notes or trying to remember where they stopped.
Design a compact sheet with a row-counting grid, project name, pattern reference, hook size and yarn information.
You can include a notes area for recording pattern adjustments, which is useful when someone plans to make the same item again.
Sell the trackers as refill sheets or small bound sets. Keep the writing spaces generous enough for ordinary handwriting; a crowded layout may look attractive but be difficult to use.
Getting ready for the festive season? These 31 Easy Cricut Projects for Christmas can help with your holiday crafting.
26. Knitting Row-Counter Wheels
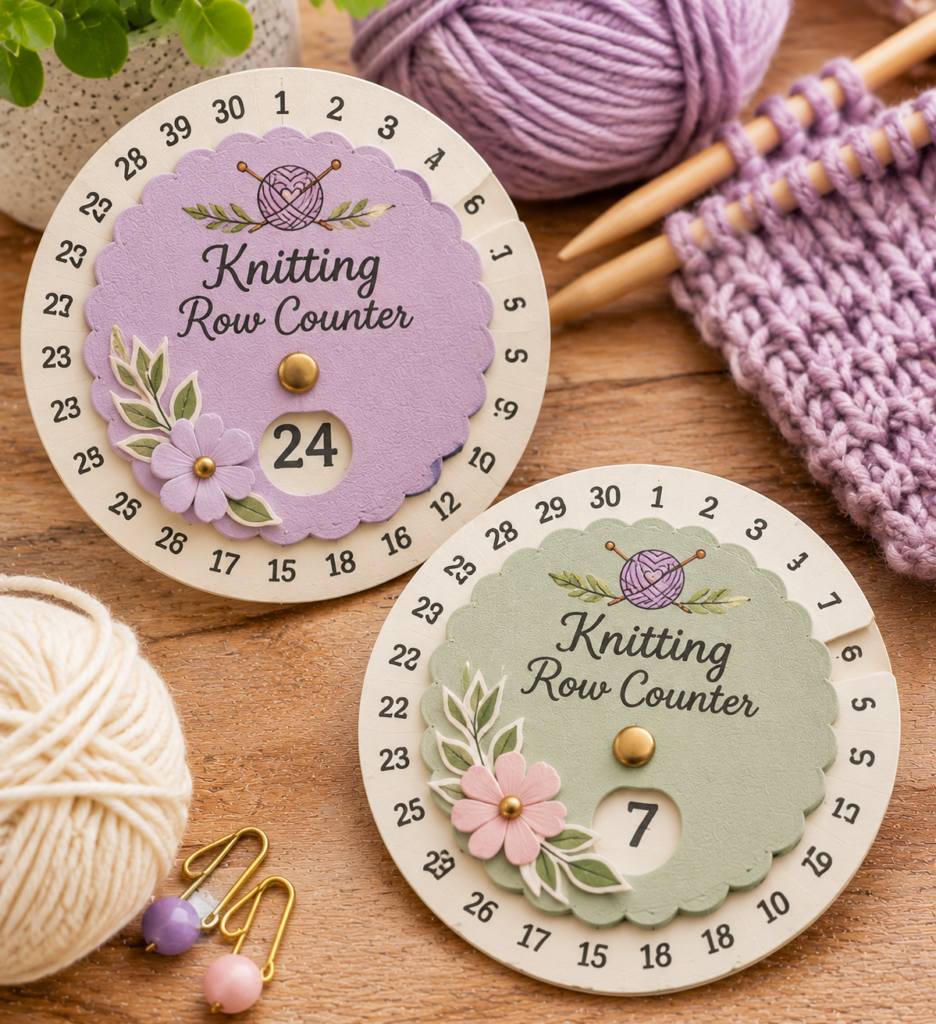
For knitters who prefer a physical counting aid, a rotating row-counter wheel offers an alternative to tally marks or phone applications.
The user turns the wheel after completing a row, using a small window or pointer to identify the current number.
The construction needs careful testing. Cut two circular layers, create the viewing window and join the pieces with a paper fastener that allows the top layer to rotate.
Make sure the numbers align with the window and that the wheel does not move accidentally when handled.
Keep the lettering large enough to read while knitting. A decorative finish can make the product attractive, but reliable movement and clear numbering are what make it useful.
No heat press? You can still make plenty of projects. See these 21 Cricut Projects for Beginners Without a Heat Press.
27. Dollhouse Wallpaper Sample Packs
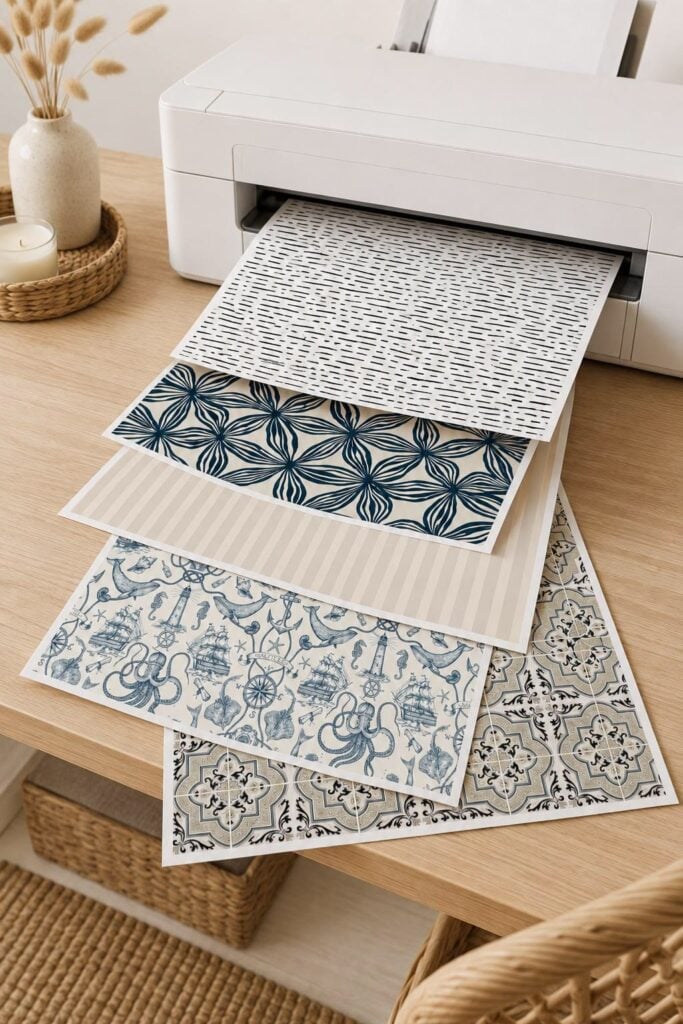
Miniature rooms need wallpaper that looks believable at a much smaller scale than ordinary interiors.
A pattern with large flowers or wide stripes may overwhelm a dollhouse wall, even when the same design looks attractive at full size.
Prepare small wallpaper samples in different patterns and colours so collectors can compare options before decorating a room.
Use your Cricut to cut consistent rectangles, and label each sample with its dimensions. You can group the designs into collections for bedrooms, kitchens, vintage interiors or children’s rooms.
Be clear about the intended dollhouse scale or actual sample measurements because miniature collectors often work to specific dimensions.
28. Miniature Shop-Sign Sets
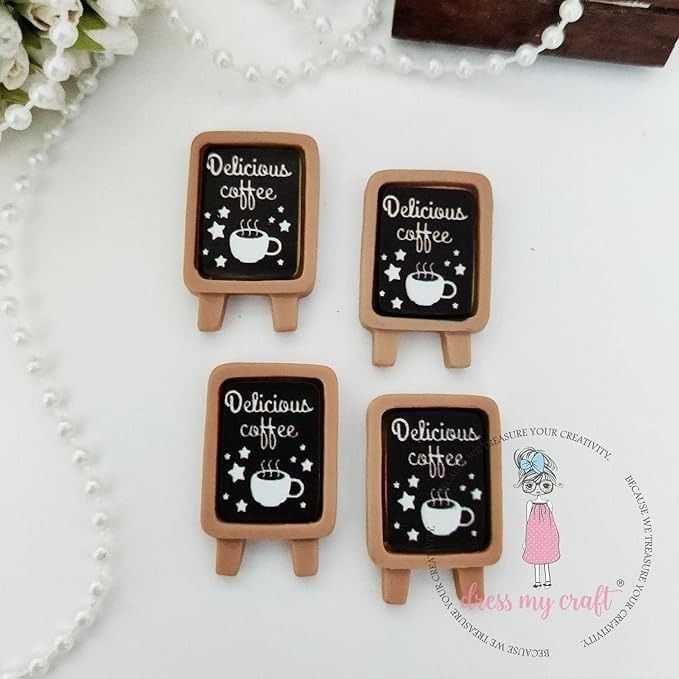
A dollhouse bakery, bookshop or flower stall needs signs that match the scale of its surroundings.
Miniature shop-sign sets can include hanging signs, small price boards, counter labels and directional notices to make these scenes look more complete.
Use cardstock or another compatible thin material for the sign bases, then cut lettering and decorative details with your Cricut.
The challenge is keeping the text readable after cutting. Test the lettering at its actual finished size because fine fonts and tiny spaces may disappear or become difficult to weed.
Offer collections for particular miniature businesses and include the measurements so collectors can judge whether the pieces will fit their displays.
29. Miniature Paper Packaging Sets
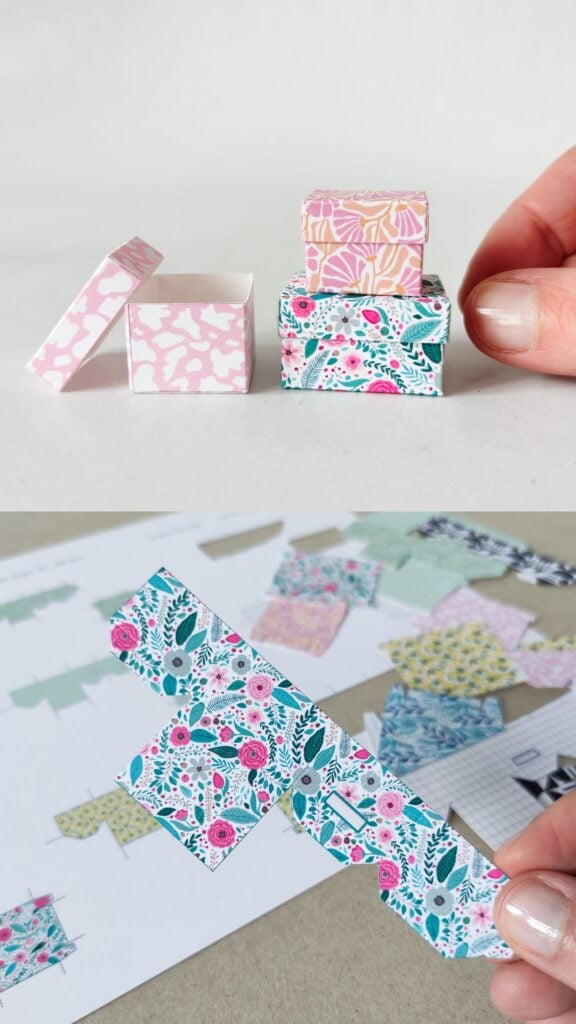
A miniature grocery shop or bakery display looks more convincing when it includes tiny shopping bags, cartons and folded boxes.
These paper packaging sets give dollhouse collectors small accessories to furnish their scenes without having to design every piece from scratch.
Create templates with fold lines and tabs that can be assembled into miniature bags, pastry boxes and product cartons. Use lightweight paper that folds cleanly, and check that the tabs are large enough to glue at the intended scale.
You can include matching labels to create a coordinated miniature shop collection. Describe the pieces as decorative dollhouse accessories, not functional packaging for real food or retail products.
Staring at your Cricut machine without an idea? These 30 Cricut Projects to Make When You Don’t Know What to Make can get your creativity moving.
What the $5 Material Budget Should Include
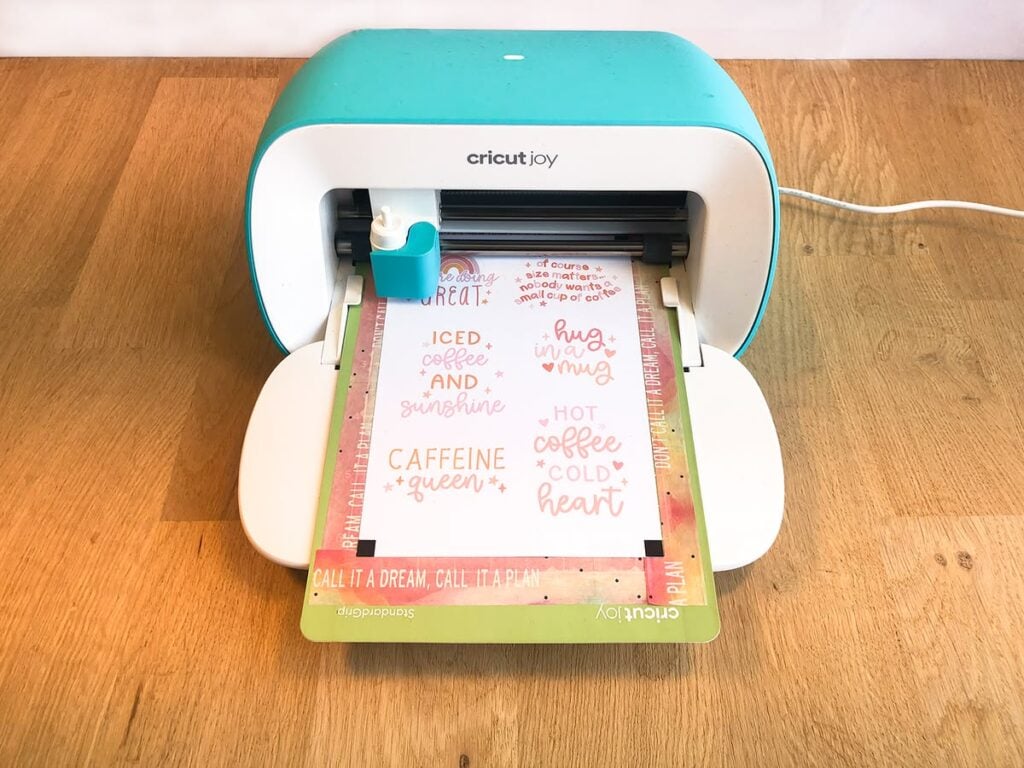
Before making stock, calculate whether each idea genuinely qualifies as one of the Cricut projects you can make for under $5.
- Work out the cost per item. Divide the material cost by the number of usable pieces, allowing for offcuts and failed cuts.
- Count every component. Include vinyl, cardstock, adhesive, string, fasteners, blank tags and packaging.
- Separate business expenses. Equipment, tools, labour, electricity, shipping and selling fees are outside the $5 material budget.
- Cost the finished product. Include backing cards, sleeves or other extras needed to make the item ready for sale.
- Check the actual yield. Consider design size, spacing and material waste before estimating how many pieces one sheet or pack can produce.
Cricut and Material Limitations to Check Before Making Products
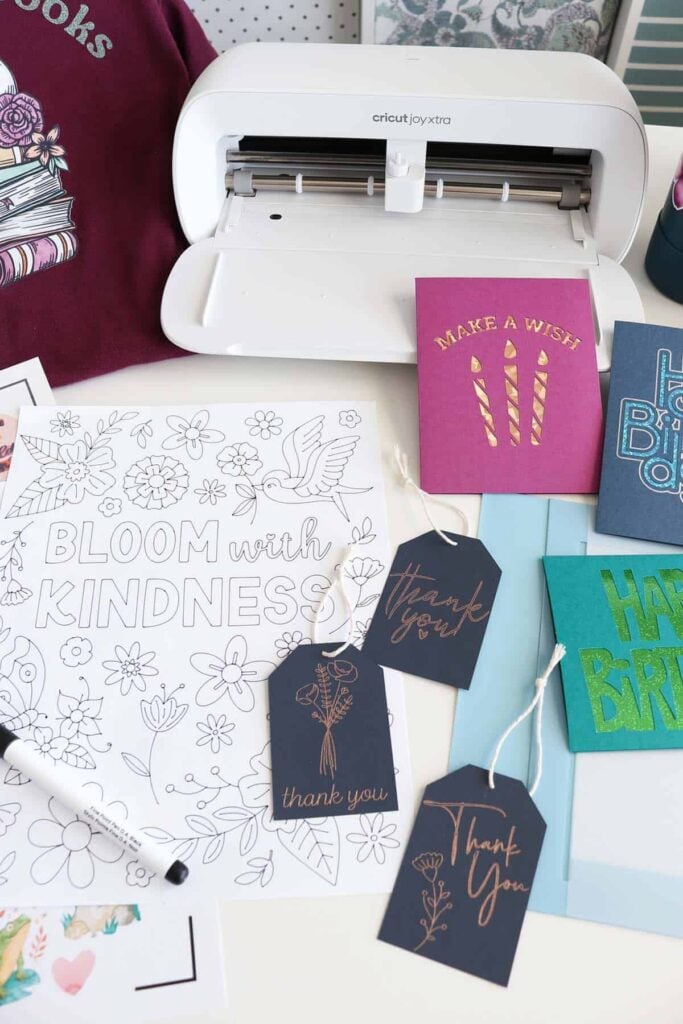
Cricut machines do not all have the same cutting capabilities, and choosing the wrong material can waste supplies or affect the finished product.
Keep these points in mind when making Cricut projects you can make for under $5.
- Confirm machine compatibility. Material settings and cutting capabilities vary by Cricut model, blade and tool. A material supported by one machine may not work with another.
- Check Print Then Cut support. This feature requires a compatible Cricut machine, printer and printable material. The original Cricut Joy does not support Print Then Cut.
- Make a test cut. Test unfamiliar materials before producing a full batch, as thickness, texture and cutting behaviour can affect the result.
- Choose the correct vinyl. Removable adhesive vinyl and window cling are different materials. Use window-cling material for reusable window decorations.
- Match durability to the product’s use. Indoor paper labels may not withstand freezer conditions, outdoor exposure or moisture.
- Check commercial-use permissions. Review the licensing terms for fonts, graphics and purchased cut files before selling products made with them.
Planning some spooky-season crafting? Find ideas in these 33 Easy Cricut Projects for Halloween.
How to Price a Product That Costs Less Than $5 to Make
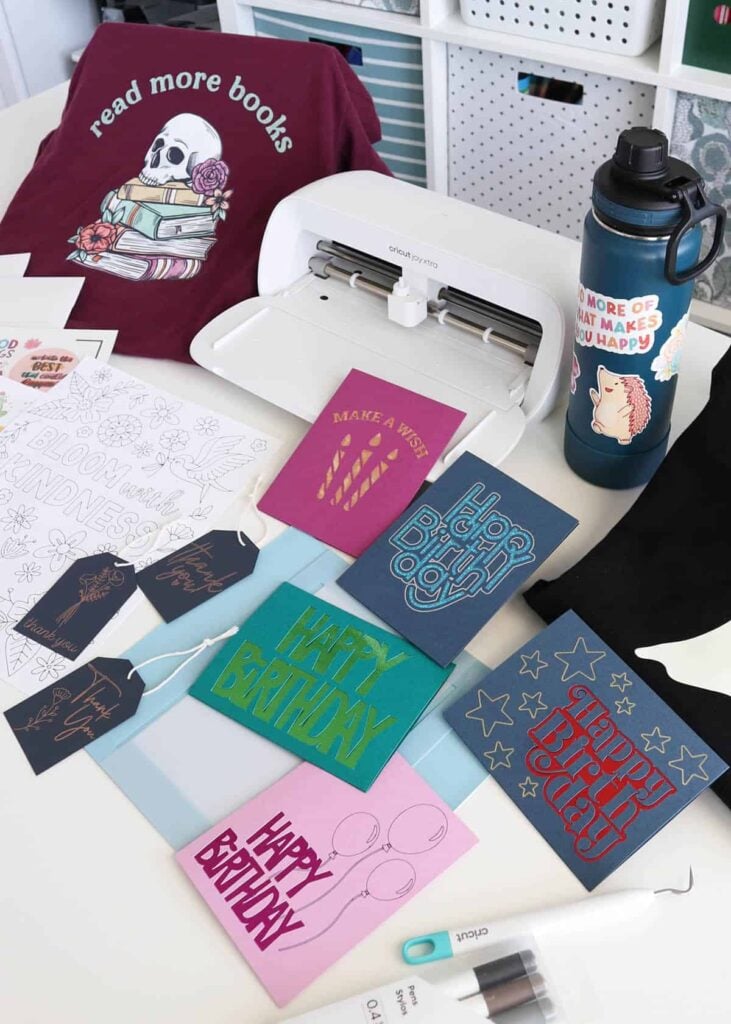
Low material cost does not automatically mean high profit. The selling price must account for the work involved in turning inexpensive supplies into a finished Cricut product.
- Start with the full material cost. Add up everything used to complete one item or set, including small components and packaging.
- Put a value on your time. Account for designing, cutting, weeding, assembling, quality checks and packing. A product that takes 40 minutes to finish needs a different price from one that takes five minutes.
- Account for selling expenses. Include marketplace and payment-processing fees, as well as a reasonable share of business overheads.
- Research comparable products. Look at items serving the same customer and purpose. Similar materials do not necessarily mean similar value, so consider personalisation, finish, usefulness and presentation.
- Use bundles with a clear purpose. Group related small items, such as garden markers or journal accessories, when buyers can use them together. Price the complete set after accounting for the extra materials, packaging and assembly time.
Conclusion
Making Cricut projects you can make for under $5 is a good starting point for a small craft business, but the material cost is only part of the picture.
A product needs a clear purpose, an interested buyer and a price that covers the work and expenses involved.
Choose one idea from this list, make a small test batch and calculate its actual cost before buying supplies in larger quantities.
Start with what you can produce well, refine the design and build your product range as you learn what customers want. Which project will you try first?
This post talked on: Cricut Projects You Can Make For Under $5 And Sell For More .