See how Cricut home decor projects can give plain walls, furniture and everyday accessories a more refined look with creative handmade details.
Ever noticed how a simple decorative detail can make an ordinary room look as though it has been professionally styled? The secret is often in the materials, textures and finishing rather than the price tag.
With the right designs, Cricut home decor projects can turn basic materials into beautiful wall displays, refined fabric accents and decorative pieces that give a room more character.
Supposedly you want to update your own space or make home accessories customers would be happy to buy, these ideas written here show creative ways to achieve an expensive-looking finish without the designer price.
Personalised details can turn simple products into memorable gifts. See these 21 Personalized Cricut Items People Actually Buy for more ideas.
Cricut Home Decor Projects That Look Polished
1. Oversized Layered Botanical Wall Art
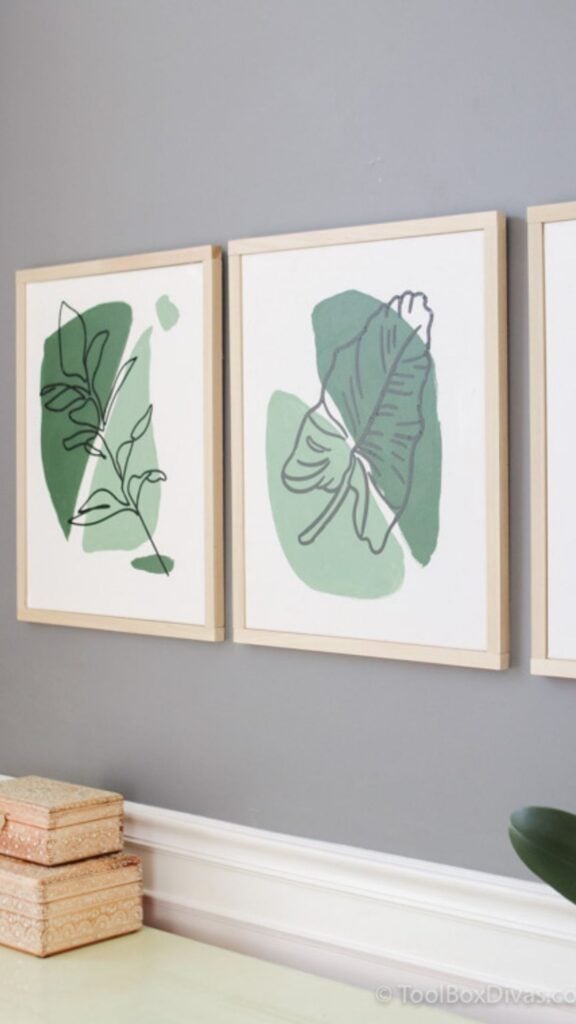
Give a plain wall a more artistic finish with oversized layered botanical wall art made from individually cut paper leaves, stems and petals.
Rather than placing the shapes flat against a backing, arrange them at different heights using small foam spacers or carefully positioned adhesive.
This creates shadows and dimension, making the finished composition look more like a piece of paper sculpture than an ordinary paper decoration.
Use heavyweight cardstock in complementary shades of green, cream, beige or muted earth tones. You can also introduce subtle variations in paper texture to give the leaves more visual interest.
For a polished result, avoid overcrowding the design. Allow some breathing room between the botanical elements so each shape remains visible.
A design consideration: Oversized artwork requires more planning than a regular paper cutout.
Measure the intended frame or display area before designing, and divide the composition into manageable sections.
Your Cricut cuts the individual elements, which you then assemble on a larger backing board. A deep frame or shadow box is particularly suitable because it accommodates the raised layers without pressing them flat.
Selling opportunity: Offer different botanical arrangements and frame sizes to suit living rooms, bedrooms and home offices. Customers may appreciate having a choice of colour palettes and dimensions to complement their existing interiors.
Christmas is a busy season for handmade gifts and decorations. Find products to create in these 30 Cricut Projects to Make and Sell for Christmas.
2. Faux Architectural Wall Panel Stencils
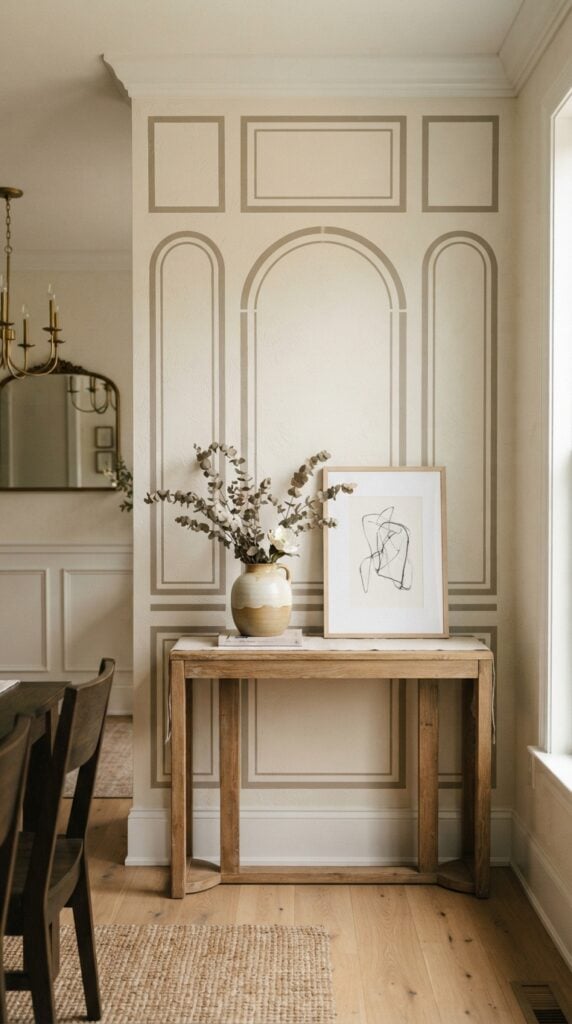
Plain walls can take on the appearance of decorative architectural panelling with carefully designed painted patterns.
Use your Cricut machine to cut repeating geometric shapes, arched outlines or ornamental details from suitable stencil material, then apply paint through the stencil to create the effect of traditional wall panelling.
This is a painted decorative treatment, not actual raised wood or plaster moulding, but it can introduce architectural interest without installing additional features.
When making this Cricut home decor project, measure the wall and plan how the pattern will repeat across the available space. Keep the stencil sections manageable so they are easier to position, particularly around corners and existing fixtures.
Test the stencil on a small area first and apply paint in thin layers with a suitable stencil brush or roller to reduce seepage beneath the edges.
For the homeowner: Choose a pattern that complements the room’s proportions, furniture and existing wall colours rather than overwhelming the space.
Selling opportunity: Offer reusable stencil sets in different patterns and dimensions, with positioning instructions for customers undertaking small room makeovers.
Want to make products without spending much on materials? These 29 Cricut Projects You Can Make For Under $5 And Sell For More are worth a look.
3. Textured Fabric Wall Hangings
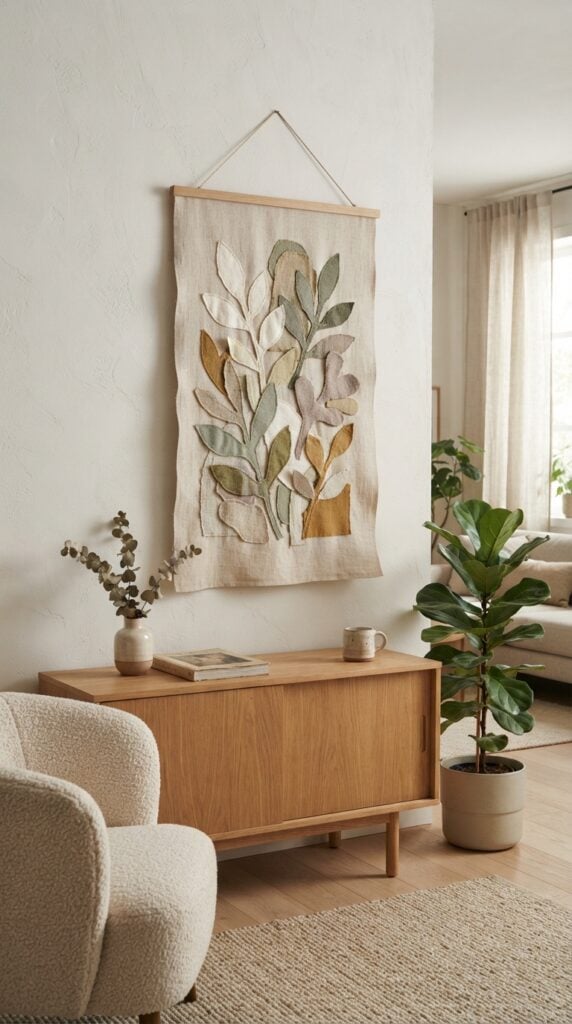
A textile wall hanging offers a different alternative to conventional framed prints, particularly when it combines contrasting fabrics and carefully arranged shapes.
Use your Cricut to cut botanical forms, abstract designs or geometric pieces from suitable felt or fabric, then arrange them on a canvas or fabric backing.
Combining different textures and complementary shades gives the composition depth without requiring an elaborate design.
Fabric selection and machine compatibility are important when making these Cricut home decor projects.
A compatible Cricut Maker with a Rotary Blade can cut suitable unbonded fabrics, while bonded fabric follows a different cutting process using an appropriate blade.
Check the machine and material requirements before starting, and secure the fabric properly to prevent shifting during cutting. Leave enough space between the shapes when assembling the hanging so the individual details remain visible. A wooden dowel or suitable hanging bar can provide a neat finish.
For the homeowner: Look for a design with securely attached fabric pieces, neat edges and colours that complement the room.
Selling opportunity: Create botanical, abstract and neutral textile collections in different sizes for bedrooms, living rooms and reading corners.
Choosing products with better profit potential matters. Get ideas from these 27 Cricut Projects With High Profit Margins.
4. Frosted Glass Window Privacy Panels
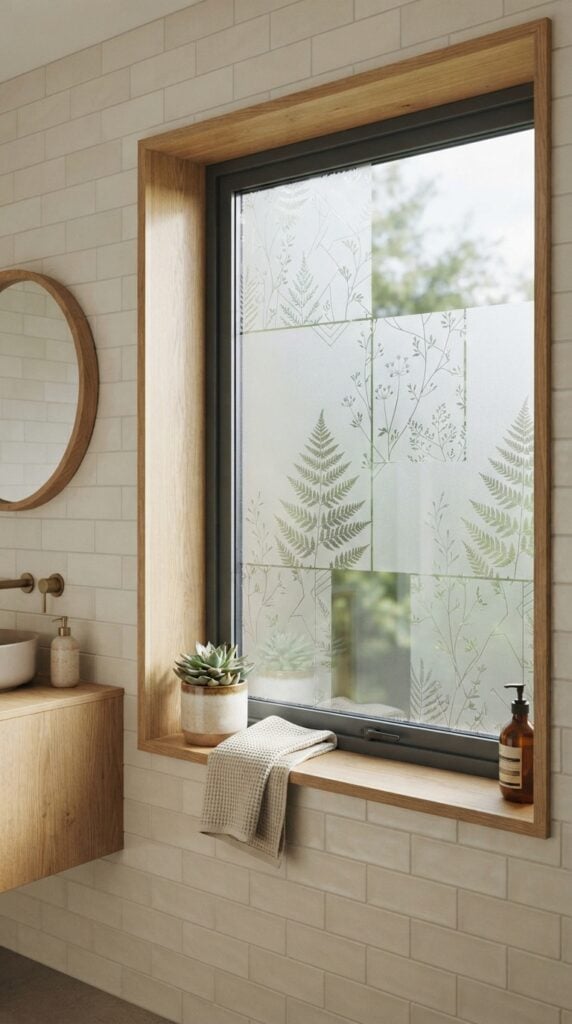
Glass partitions and bathroom windows can bring natural light into a room while offering little privacy. Decorative frosted-effect window film provides an alternative to covering the entire glass surface with curtains or opaque materials.
Cricut can cut the film into geometric patterns, botanical shapes or decorative borders that can be arranged to suit the dimensions of the window.
Measure the glass before designing the pattern, paying attention to the areas that need greater coverage and those that should remain clear.
Use adhesive window film specifically intended for glass applications and check its compatibility with the surface.
Clean and dry the glass thoroughly before applying the cut design, then use a suitable scraper to smooth the film and remove trapped air. Larger panels may be easier to decorate in sections, provided the pattern is aligned carefully.
For the homeowner: Consider the film’s opacity and coverage before choosing a design.
Frosted-effect film can obscure views while allowing diffused light through, but it does not automatically provide complete privacy in every lighting condition or replace security glazing.
Selling opportunity: Offer custom-width decorative film designs for bathroom windows, home offices and interior glass partitions, making the coverage and privacy limitations clear to buyers.
New to selling your Cricut creations? These 23 Easy Cricut Crafts To Sell For Beginners can help you find your first products.
5. Decorative Fabric Cushion Covers with Appliqué
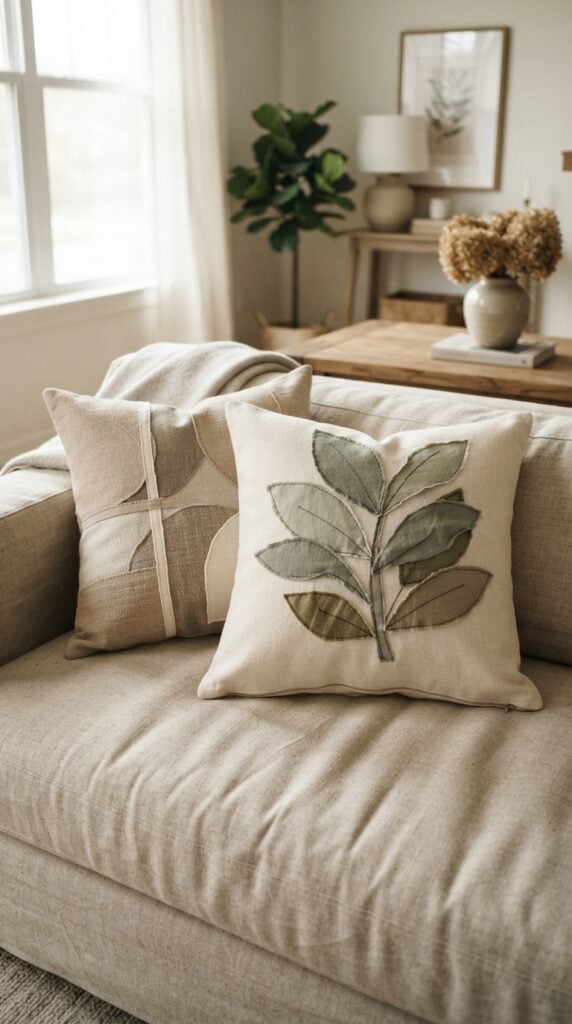
A cushion cover with a thoughtfully arranged botanical motif or abstract pattern can become a noticeable part of a room’s styling.
Rather than relying on a small name or quotation in the centre, use your Cricut to cut larger fabric shapes, decorative borders or overlapping forms that give the textile a more distinctive appearance.
An off-centre arrangement or a pattern following one edge can look particularly attractive when balanced against the plain areas of the fabric.
Choose a cushion fabric and decorative material that are compatible with the application method. Suitable bonded fabric can be cut for appliqué, while compatible heat-transfer vinyl can be used for designs applied with a suitable heat press.
These materials are not interchangeable: ordinary adhesive vinyl is not a substitute for heat-transfer material on a washable cushion cover.
Follow the manufacturer’s cutting and pressing instructions, mirror heat-transfer designs where required, and test the application on a spare fabric piece first.
For the homeowner: Removable cushion covers offer the advantage of easier replacement and cleaning according to the fabric and decoration care instructions. Check the stitching, closure and fabric quality alongside the decorative design.
Selling opportunity: Turn these Cricut home decor projects into coordinated cushion collections, offering complementary patterns and standard cover sizes.
Preparing for a market day? These 20 Cricut Products to Sell at Craft Fairs can help you plan your display.
6. Stencilled Furniture Drawer Fronts
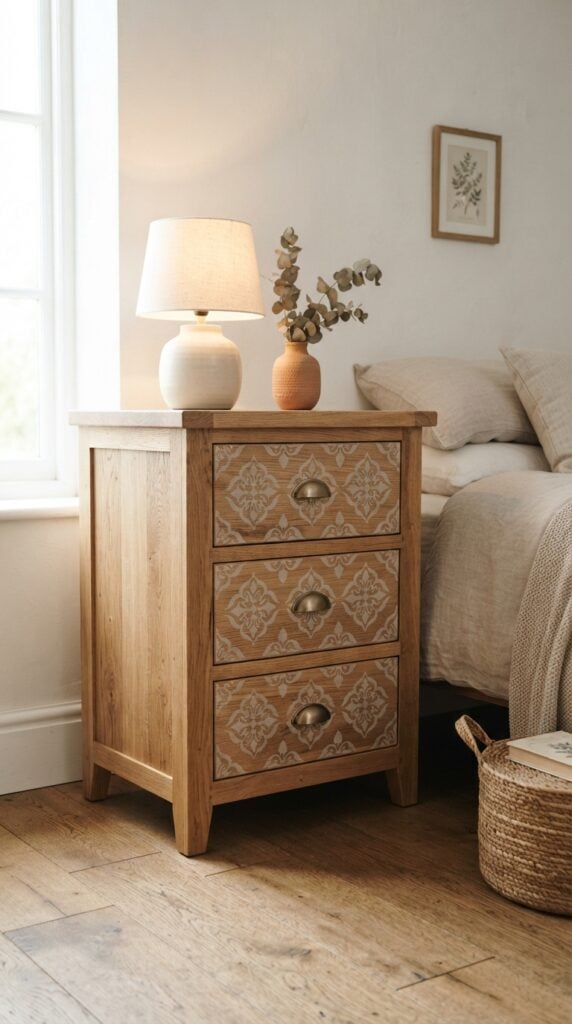
A bedside table or cabinet with plain drawer fronts can gain a different appearance through a small, well-positioned painted pattern.
Geometric repeats, ornamental details and delicate botanical motifs are possibilities when you use a Cricut machine to cut a reusable stencil.
The aim is to introduce detail that complements the furniture rather than cover every available surface with decoration.
Start by measuring each drawer front and deciding where the design should sit. Clean the furniture and prepare the surface according to the paint manufacturer’s instructions, paying attention to any loose or failing finish.
Choose stencil material suitable for the surface and secure it in position before applying compatible paint in light layers.
Too much paint can seep beneath the stencil and blur the design, so test the application on a spare surface first. Allow the paint to dry and cure as directed before using the drawers regularly.
For the homeowner: This technique offers a way to refresh suitable existing furniture without replacing the entire piece. Consider patterns that complement the furniture’s shape and hardware.
Selling opportunity: Offer reusable Cricut stencil sets with different patterns and measurements for customers who enjoy furniture upcycling.
You can create appealing crafts without expensive supplies. Try these 29 Cricut Projects for Beginners Using Dollar Store Items.
7. Layered Paper Sculptures for Alcoves and Shelves
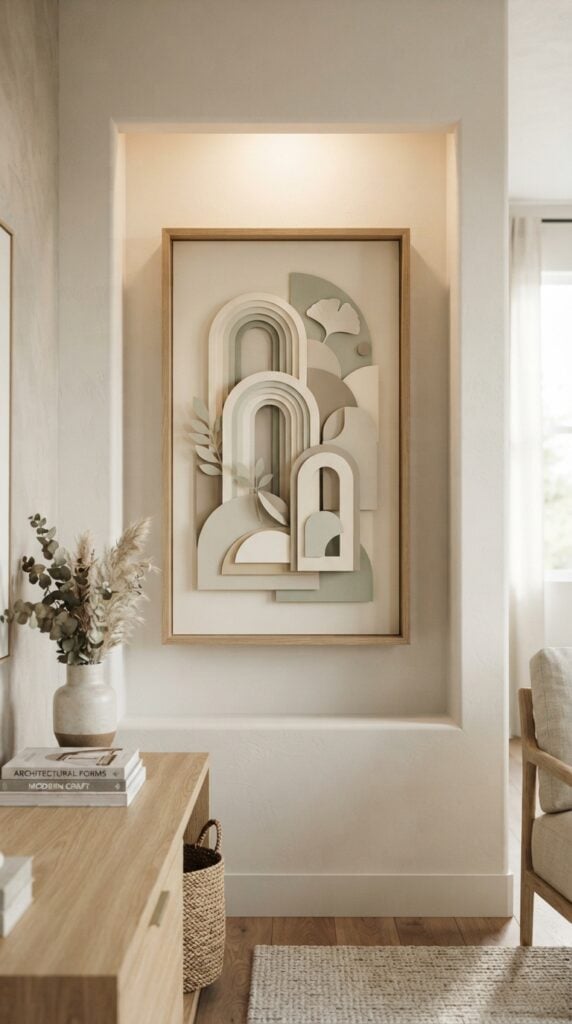
An empty alcove or shelf can become a display feature with a dimensional paper composition made from architectural arches, botanical forms, abstract shapes or layered landscape silhouettes.
Instead of attaching every cutout directly to one sheet, arrange selected pieces at different depths using small foam spacers or carefully positioned paper supports. The resulting shadows give the artwork a sculptural quality that a flat paper arrangement would not have.
For these Cricut home decor projects, choose cardstock that is firm enough to retain its shape and test intricate designs before cutting the full composition.
Plan the arrangement around the dimensions of the intended backing board, shelf or display frame, and decide which elements should sit in front of the others.
Apply adhesive sparingly to avoid visible marks and ensure the raised sections are properly supported. A deep frame or shadow box can protect the artwork while providing room for its layers.
For the homeowner: These sculptures offer an alternative to conventional framed prints, particularly when the design complements the room’s existing colours and furnishings. Check that the raised layers are secure and protected from moisture and prolonged direct sunlight.
Selling opportunity: Sell finished paper sculptures in different themes and sizes, or offer flat-packed kits containing pre-cut shapes and assembly instructions for customers who prefer to put their own artwork together.
Prefer making products from home? These 35 Profitable Cricut Projects You Can Make From Home offer ideas to build on.
8. Decorative Mirror Corner Overlays
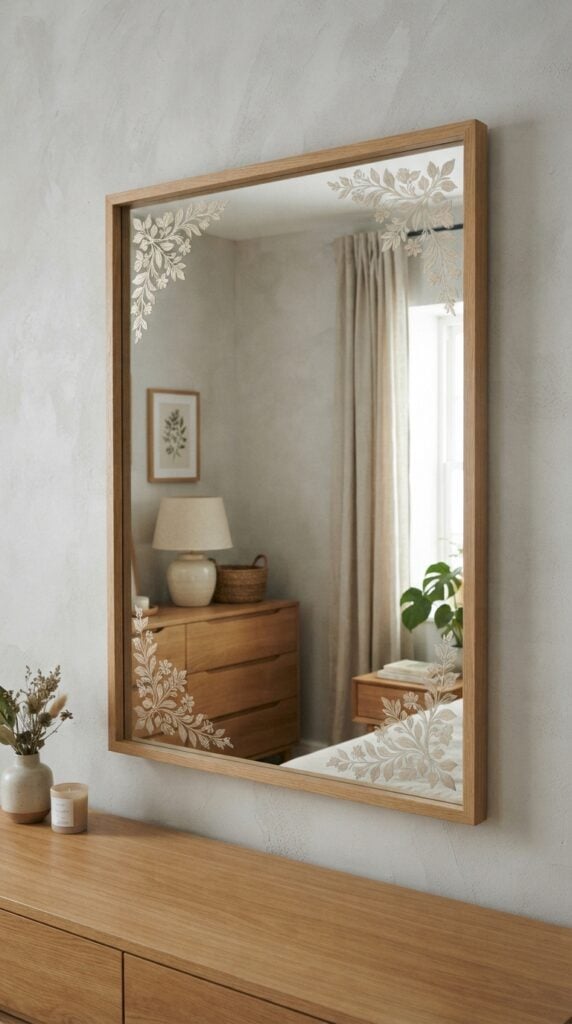
The frame is not the only part of a mirror that can carry decorative detail. Carefully cut ornamental shapes placed around its corners can give a plain mirror a more distinctive appearance without replacing the existing frame.
Use your Cricut to cut suitable adhesive film into curved flourishes, botanical details or geometric accents, then position the pieces symmetrically on the mirror surface.
Keeping the decoration near the edges leaves most of the reflective area unobstructed.
When designing these Cricut home decor projects, consider the mirror’s shape before deciding on the pattern.
Four matching corner details may suit a rectangular mirror, while an arched design may require shapes that follow its curved outline. Measure the available space and cut a sample first to check the scale.
Use adhesive film specifically suitable for glass or mirror applications, and follow its application instructions to avoid bubbles and uneven edges.
For the homeowner: Choose a design that complements the existing frame and surrounding furniture. Remember that adhesive overlays create a surface decoration; they do not reproduce the appearance of genuine bevelled glass, sandblasted patterns or etched mirror finishes.
Selling opportunity: Offer coordinated corner designs for rectangular, square and arched mirrors, with different ornamental styles and dimensions.
Wondering which Cricut creations attract buyers? Take a look at these 33 Cricut Projects That Actually Sell Well.
9. Custom Fabric Lampshade Accents
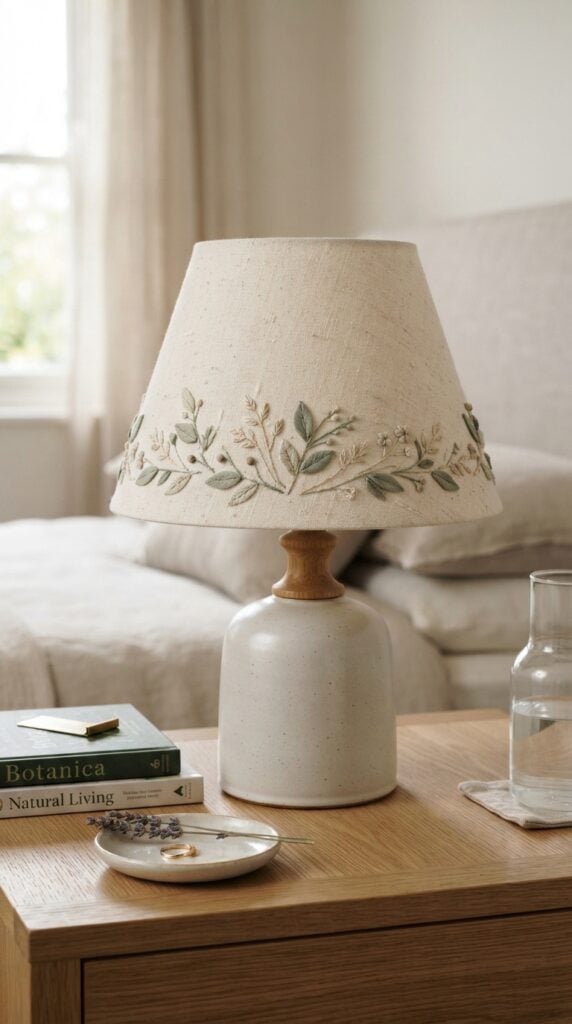
Fabric lampshades can introduce colour and pattern to a room, but decorating them with Cricut-cut designs requires careful attention to material safety.
A compatible heat-transfer design might appear suitable for a fabric shade, but compatibility with ordinary clothing fabric does not establish that the material is safe for use on a lampshade.
The shade’s construction, operating temperature and manufacturer’s instructions must all be considered before attempting any modification.
Before including this among your Cricut home decor projects, check whether the lampshade manufacturer permits additional decoration and whether the proposed material and application method are approved for that specific shade.
Do not apply ordinary adhesive vinyl or untested heat-transfer products to a shade that may become hot. Decorations must not interfere with ventilation, required bulb clearances or electrical safety.
For the homeowner: A decorative shade should retain its intended lighting performance and safety features; an attractive pattern is not worth compromising safe operation.
Selling opportunity: Offer bespoke lampshade decoration only where the base shade, material and application method have confirmed compatibility.
Where this cannot be established, consider making decorative fabric panels for non-electrical displays instead.
Want to sell beyond your local area? These 33 Best Cricut Projects to Make and Sell Online can help you choose products for an online shop.
10. Decorative Table Runners with Cut Fabric Designs
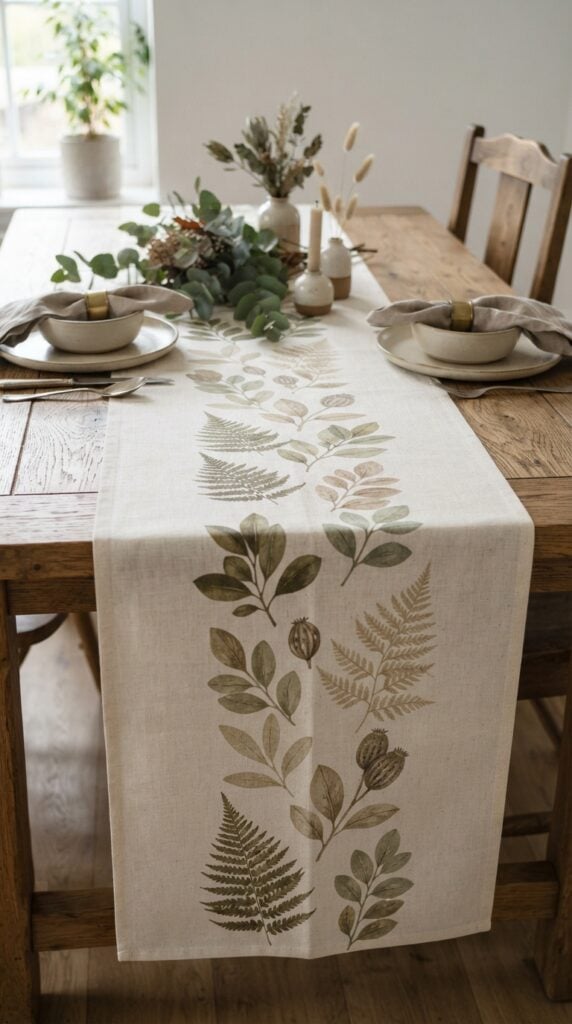
A repeated botanical pattern or carefully spaced geometric design can give a plain table runner a more distinctive finish.
Use your Cricut to cut compatible heat-transfer designs and arrange them along the length of a suitable fabric runner.
Rather than placing the motifs wherever they fit, plan their positions so the pattern looks balanced when the runner is spread across a dining table.
Measure the fabric before designing the cut file, then calculate the spacing between each repeated element. Consider the runner’s width, length and drape when choosing the size of the motifs.
A pattern that looks attractive on a computer screen may become crowded once applied to the fabric. Follow the heat-transfer manufacturer’s instructions for temperature, pressure and pressing time, and check the fabric’s washing requirements before choosing your materials.
For the homeowner: Consider whether the runner will be used for everyday dining or occasional decoration.
Fabric quality, ease of care and resistance to regular washing matter just as much as the pattern.
Selling opportunity: Create table runners in different lengths and designs for everyday dining, celebrations and seasonal styling. Offer matching designs for placemats where practical, and include fabric composition and care instructions with each product.
Looking for more ways to earn from your machine? These 31 Easy Cricut Projects to Make and Sell for Extra Money offer more possibilities.
11. Faux Marquetry Decorative Trays
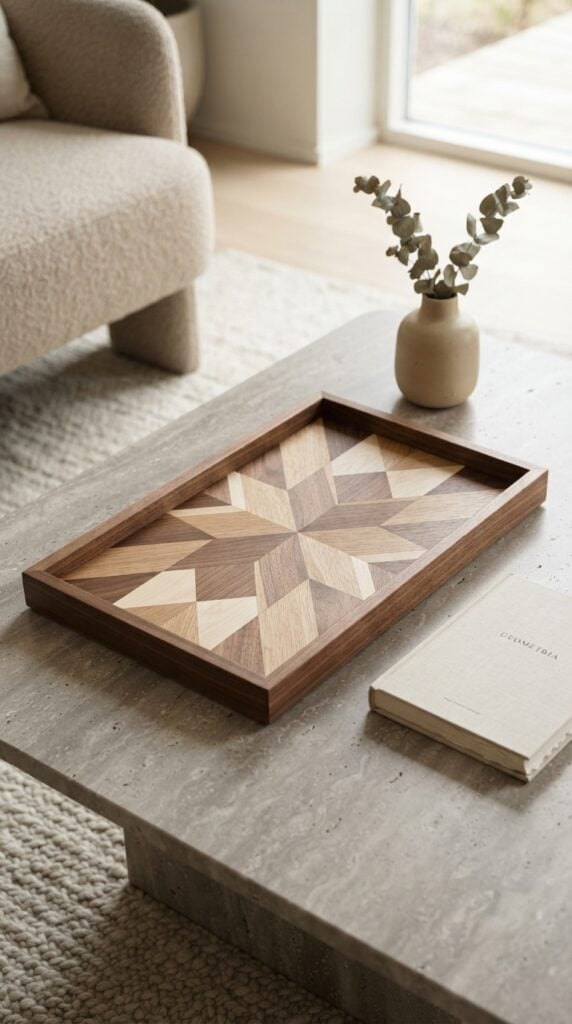
Geometric inlay patterns can give a plain decorative tray the appearance of a carefully detailed furniture finish. Traditional marquetry involves arranging and fitting pieces of veneer into a decorative surface.
With a Cricut, you can create an interpretation of this technique by cutting compatible thin wood veneer or suitable decorative materials into shapes such as diamonds, triangles and contrasting borders.
The pieces are then arranged on a suitable tray to create an inlay-inspired design.
Material compatibility is particularly important for this project.
Check the veneer thickness and the cutting requirements of your specific Cricut machine before attempting the design, as not every veneer can be cut successfully.
Arrange the shapes on a measured template before attaching them, paying attention to the joins so that gaps and uneven edges do not interrupt the pattern.
Select an adhesive and protective finish suitable for the materials and the tray’s intended use.
For the homeowner: A well-finished geometric tray can serve as a decorative accessory on a coffee table, console or dressing table.
Check that the surface is smooth, the decorative pieces are secure and the finish is appropriate for its intended use. Do not assume a decorative coating is food-safe.
Selling opportunity: Offer coordinated tray collections featuring different geometric patterns, wood-inspired tones and sizes for tabletop styling.
Make everyday spaces easier to manage with these 27 Easy Cricut Projects for Organizing Your Home.
12. Decorative Tile Stencil Panels
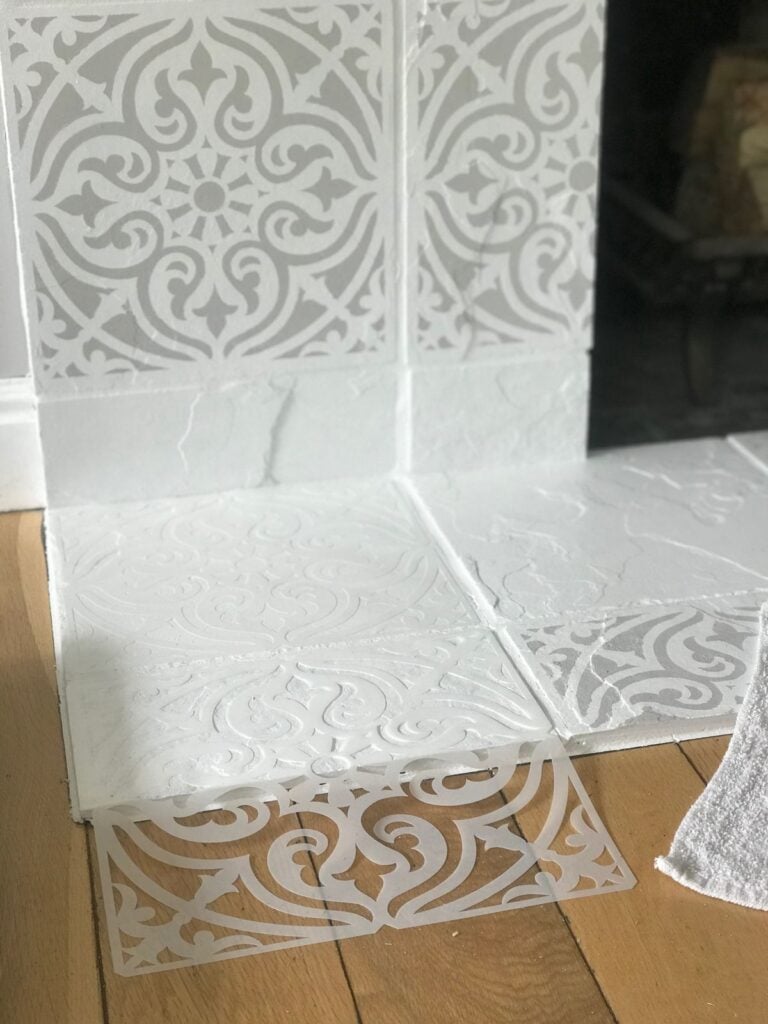
A repeated painted pattern can give plain tiles a different appearance without replacing the entire tiled surface.
Use your Cricut to cut a stencil featuring geometric motifs, ornamental details or symmetrical patterns, then apply a suitable coating to compatible tiles or tile-like surfaces.
This approach is particularly useful for smaller decorative areas where a repeated design can create a coordinated finish.
The quality of the result depends heavily on surface preparation and paint selection. Clean the tiles thoroughly, remove grease and allow them to dry before positioning the stencil.
Choose a coating specifically formulated for the tile material and the conditions in which it will be used.
Apply it according to the manufacturer’s instructions, including the recommended curing time and any sealing requirements. Test a small, inconspicuous section first to check adhesion and the finished appearance.
For the homeowner: Painted tile treatments are not equivalent to factory-glazed ceramic tiles. Their resistance to moisture, abrasion and cleaning depends on the coating system, so consider these limitations before using them in bathrooms, kitchens or other high-wear areas.
Selling opportunity: Create reusable tile stencil packs with coordinated patterns and repeat measurements for customers refreshing suitable tiled surfaces or undertaking decorative makeovers.
From useful labels to personalised accessories, these 25 Easy Cricut Projects for Your Kitchen bring creativity into the kitchen.
13. Layered Window Transom Decorations
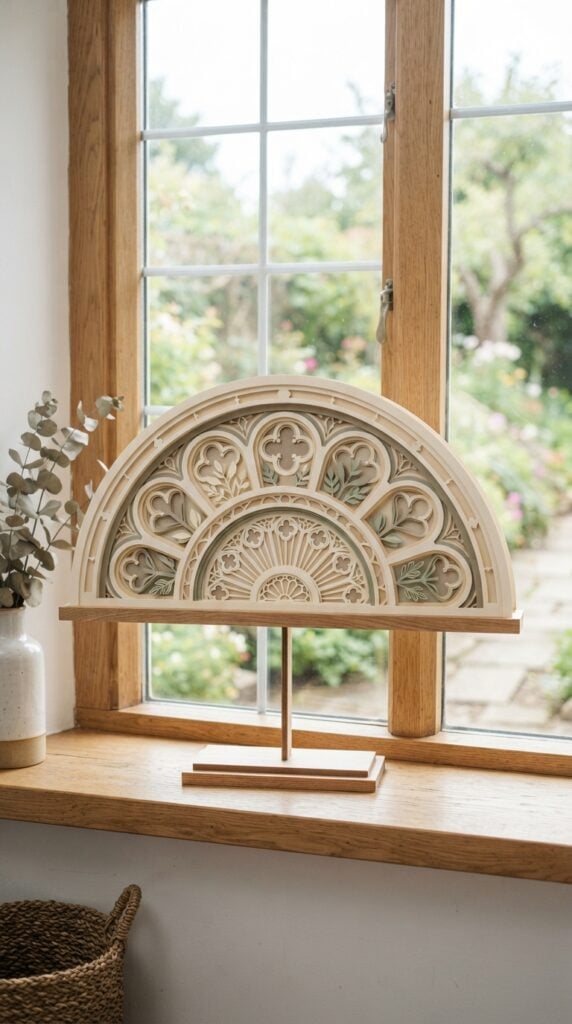
Traditional transom windows often feature arches, fan-shaped details and symmetrical divisions that add character to a room.
You can borrow these architectural shapes to create a decorative window display using layered cardstock or another suitable lightweight material.
Cut the individual sections with your Cricut, then assemble them on a backing to form an arch, fan pattern or ornamental design.
The finished piece can stand independently in front of a window, provided it is properly supported and does not obstruct the window’s operation.
One important design decision is the size of the display. Measure the available window area before creating the cut file, and divide the pattern into sections that fit your machine’s cutting area.
Layering contrasting colours or adding space between selected pieces can create depth without making the decoration unnecessarily heavy.
For the homeowner: This offers a way to introduce the appearance of traditional transom detailing without altering the actual window. It remains a decorative display, not structural glazing or a replacement for fitted window grilles.
Selling opportunity: Make custom-sized freestanding window decorations in different arch shapes, colours and patterns for homeowners who appreciate traditional architectural details.
Have leftover vinyl or cardstock? Put those pieces to use with these 23 Cricut Projects You Can Make with Scrap Materials.
14. Fabric-Covered Decorative Storage Boxes with Patterned Panels
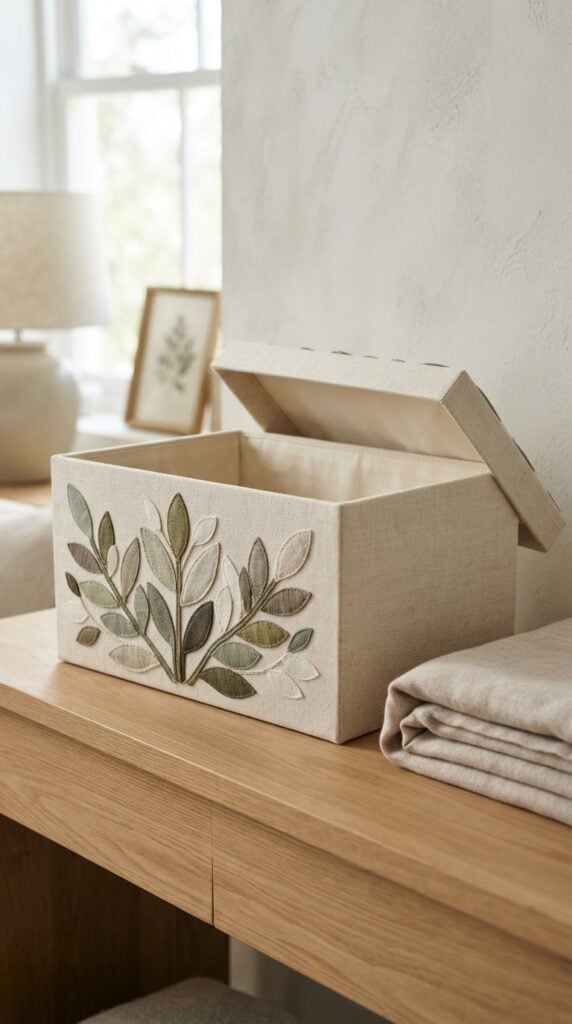
A plain storage box can become part of a room’s decorative scheme when its exterior is covered with neatly finished fabric panels.
Choose a sturdy box with a firm lid and enough structural strength for its intended contents. Your Cricut can cut fabric appliqué shapes or compatible iron-on details to create a patterned finish, while the main fabric covering gives the box a more coordinated appearance.
The challenge is achieving clean edges, particularly around the corners, lid and base.
Measure each surface separately, allow enough material for folding or overlapping, and plan how the fabric will meet at the corners before attaching it.
Test the fabric and any iron-on material together to confirm that they can withstand the recommended application method. A well-planned layout also helps prevent patterns from appearing misaligned where the panels meet.
For the homeowner: These Cricut home decor projects can provide attractive storage for accessories, stationery, guest-room essentials or dressing-table items.
The box should be strong enough for its contents; decorative covering will not make a flimsy carton suitable for heavy storage.
Selling opportunity: Offer coordinated boxes in different sizes for dressing tables, guest rooms and home offices, with matching patterns or personalised labels.
Planning another celebration? These 20 Easy Cricut Projects for Birthdays and Parties offer more ways to personalise the occasion.
15. Decorative Wall Medallion Stencils
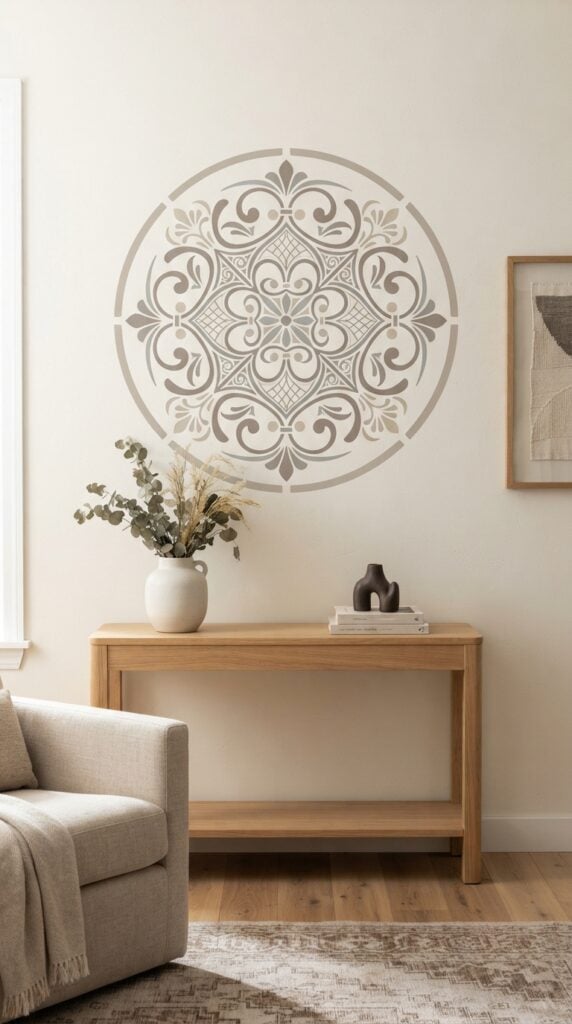
A decorative wall medallion creates a focal point through its shape and symmetry rather than relying on words or lettering.
Use your Cricut to cut an ornamental stencil featuring floral details, curved lines, geometric sections or traditional motifs.
The design can be painted directly onto a suitable wall or onto a separate backing board that can be displayed as wall art.
Scale is what determines whether the finished medallion looks intentional or out of place. A large design may suit the space above a console table or bed, while a smaller one could work as an independent accent.
Measure the available wall area, identify the centre point and use light guide marks to position the stencil accurately. For a repeating or multi-layered design, check that each section aligns before applying paint.
For the homeowner: A medallion can introduce architectural character without the expense or permanence of installing an actual plaster ornament. Choose a size and colour that relate to the furniture and other features around it.
Selling opportunity: Develop reusable ornamental stencil collections in traditional, floral and contemporary styles, with different sizes for furniture backdrops and standalone wall accents.
A handmade present can make a lasting impression. Find your next idea in these 31 Easy Cricut Projects for Gifts.
16. Faux Stone Decorative Vase Makeovers
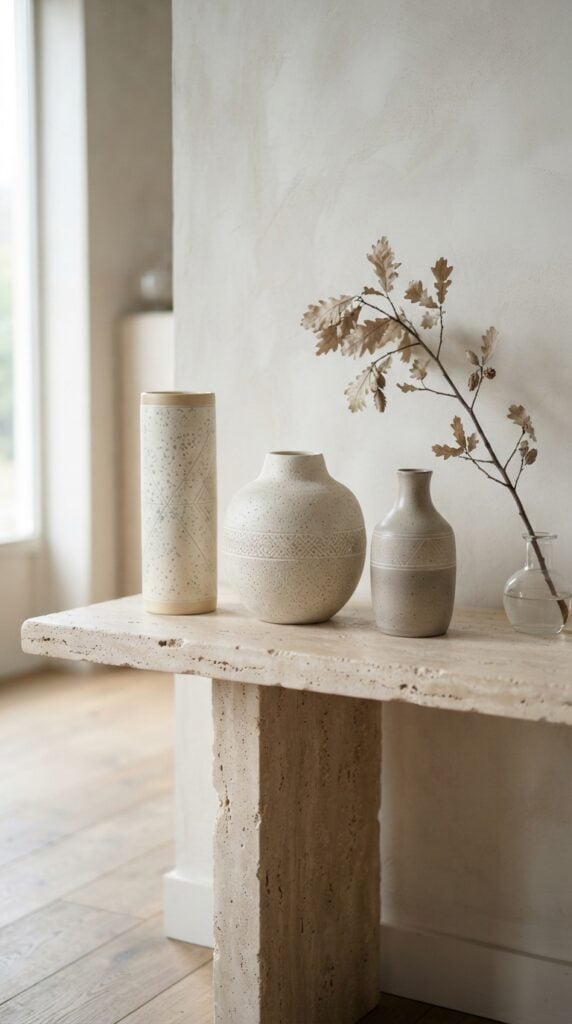
A decorative vase does not need to be made from natural stone to carry a stone-inspired pattern.
With a suitable vase, compatible paint and a Cricut-cut stencil, you can create restrained lines, speckles or geometric markings that suggest the appearance of stone.
The aim is to produce a considered decorative finish rather than cover the entire vase in a pattern that competes with its shape.
Start by identifying the vase’s surface material because paint adhesion varies between glass, ceramic, plastic and other finishes.
Clean and prepare the surface according to the paint manufacturer’s instructions, then test the coating on a small area before applying the stencil.
Use paint and finishing products intended for that particular surface, allowing the recommended drying and curing times.
For the homeowner: These Cricut home decor projects can refresh vases used for dried flowers, artificial stems or shelf displays.
A painted stone effect is still a decorative coating, not actual stone or ceramic construction, and it is not automatically waterproof or suitable for holding water or food.
Selling opportunity: Create coordinated decorative vase sets in complementary colours and patterns, clearly describing the base material and care requirements.
Need a creative gift for a teenage girl? These 30 Cute Cricut Projects for Teen Girls offer plenty of inspiration.
17. Decorative Bedside Table Surface Inlays
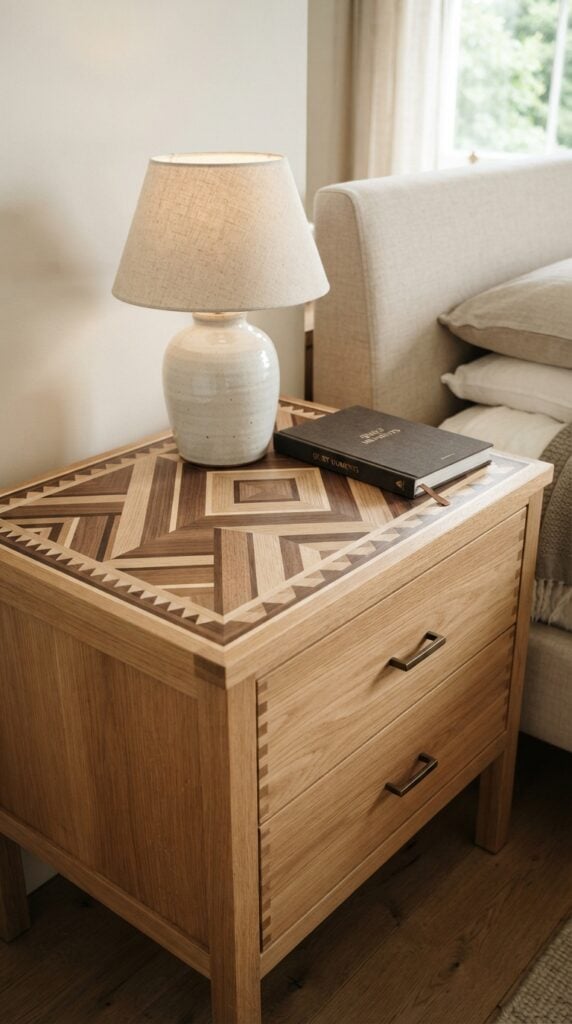
A geometric pattern on a bedside table can introduce the look of detailed furniture inlay without requiring traditional woodworking.
Cut compatible thin veneer or another suitable decorative surface material into shapes such as diamonds, narrow borders or repeating geometric sections.
Arrange the pieces on a measured furniture top to create an inlay-inspired design, then attach and finish them using products suitable for both the material and the furniture surface.
Accurate measurement and alignment are essential here. Check the tabletop dimensions, mark the centre and establish a layout before cutting the individual pieces.
The thickness and cutting requirements of veneer vary, so confirm that your particular Cricut machine can handle the material rather than assuming all veneer is suitable.
Prepare the surface properly, use an appropriate adhesive and apply a compatible protective finish.
For the homeowner: This treatment can give a simple bedside table a more distinctive appearance, but a Cricut-made surface design should not be presented as equivalent to a durable, traditional solid-wood inlay.
Its resistance to scratches, moisture and everyday use depends on the materials and finish selected.
Selling opportunity: Offer bespoke geometric designs for small furniture makeovers, or apply compatible decorative treatments to suitable bedside tables as finished products.
Give plain spaces a personal touch with these 29 Easy Cricut Projects for Home Decor.
18. Custom Fabric Lampshade-Style Wall Panels
Patterned fabric can make an interesting wall display, especially when its arrangement borrows the proportions and decorative borders associated with traditional lampshades.
Instead of modifying an electrical lampshade, create a framed textile panel using a stretched piece of fabric decorated with Cricut-cut appliqué, repeated motifs or a carefully arranged border.
This gives you room to experiment with textile patterns while avoiding the heat and electrical considerations involved in altering a working light fitting.
The finished appearance depends on how well the fabric is stretched and supported.
Choose a firm backing or frame, measure the visible fabric area and position the design before attaching the decorative pieces. Keep the fabric evenly tensioned so it does not sag, wrinkle or pull the pattern out of alignment.
For the homeowner: A fabric wall panel can introduce softness and pattern to a bedroom, reading corner or sitting room without requiring a new light fixture.
Coordinate its fabric and colours with nearby cushions, curtains or upholstery for a connected look.
Selling opportunity: Produce matching textile panels in different sizes, with coordinated patterns for bedrooms, reading spaces and sitting areas.
Cardstock can become much more than greeting cards. See these 27 Easy Cricut Projects Using Cardstock for creative ideas.
19. Decorative Book Cover Displays
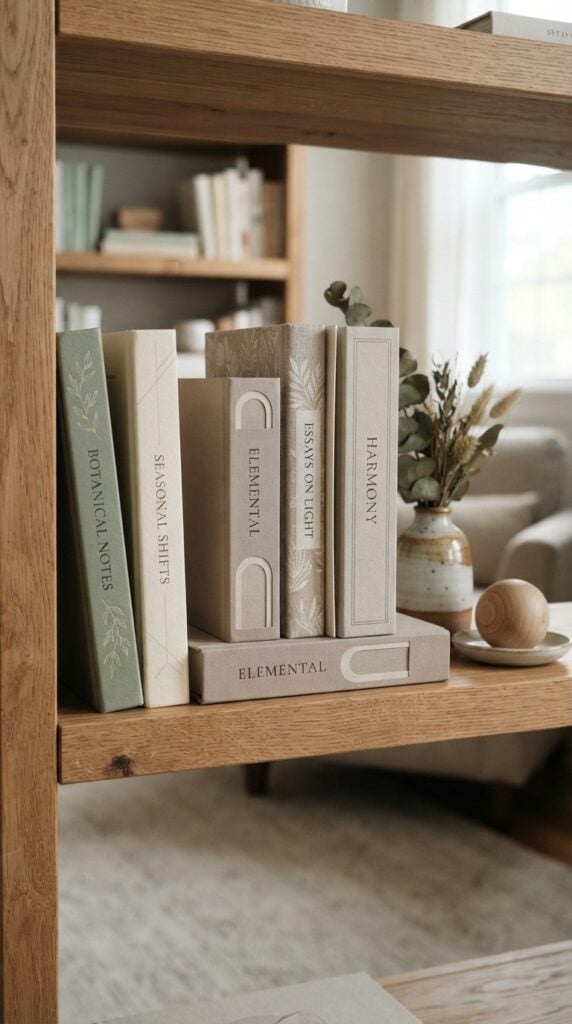
Books arranged on a shelf or coffee table can contribute to a room’s colour scheme, but mismatched covers may not suit the look someone wants to create.
For a decorative display, use your Cricut to cut suitable paper or fabric coverings that coordinate across a collection of books.
You can introduce simple borders, geometric details, initials or restrained botanical motifs while keeping the design consistent across the set.
Begin by measuring each book individually because their heights, widths and spine thicknesses may differ.
Allow enough material for the front, back and spine, and test the cover on an inexpensive book before preparing the full collection.
Removable covers are a sensible choice when working with books that someone may want to read or preserve. Avoid applying permanent adhesive or cutting into valuable, borrowed or collectible books.
For the homeowner: Decorative covers can bring visual order to open shelving and coffee-table displays, but the books should remain identifiable and accessible where they are intended to be read.
Selling opportunity: Create coordinated decorative cover sets for customers styling shelves, home offices or display tables. Make it clear whether the covers are removable and whether the books themselves are included.
Have Infusible Ink but aren’t sure what to make? These 25 Easy Cricut Projects Using Cricut Infusible Ink can give you a starting point.
20. Layered Paper Botanical Ceiling Decorations
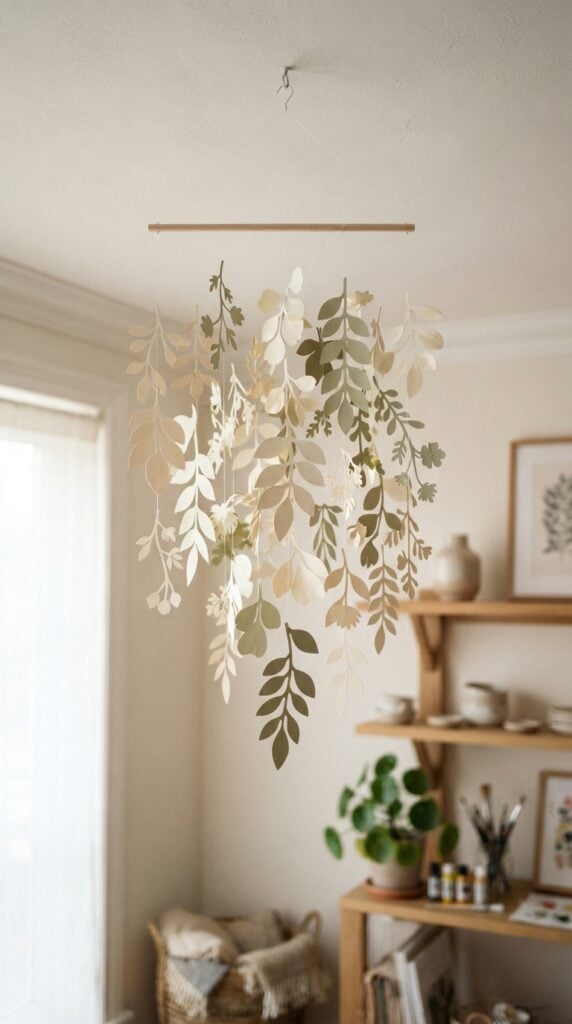
Paper leaves, petals and other botanical shapes can be assembled into lightweight suspended decorations for a room or creative display.
Use your Cricut to cut the individual shapes from suitable lightweight cardstock, then layer and arrange them to create a hanging botanical composition.
Varying the sizes and angles of the pieces can make the display look more natural than arranging every shape at the same height and spacing.
Planning the hanging arrangement is just as important as designing the cut files. Decide how many pieces are needed, how they will be grouped and where the suspension points will sit before assembling everything.
Keep the finished decoration lightweight and use secure hanging methods appropriate for the ceiling or support surface.
Paper must be kept away from light fittings, bulbs, heat sources, ceiling fans and anything else that could create a fire or entanglement hazard.
For the homeowner: These Cricut home decor projects can add a decorative feature to a bedroom or creative space, but the display needs a safe location and secure support. It should never hang where it could interfere with lighting, ventilation or normal movement around the room.
Selling opportunity: Offer lightweight botanical hanging sets in coordinated colours and different arrangements, with clear dimensions and installation guidance.
Just bought a Cricut? Start with these 22 Easy Cricut Projects for Beginners You Can Make at Home.
21. Decorative Fabric Headboard Panels
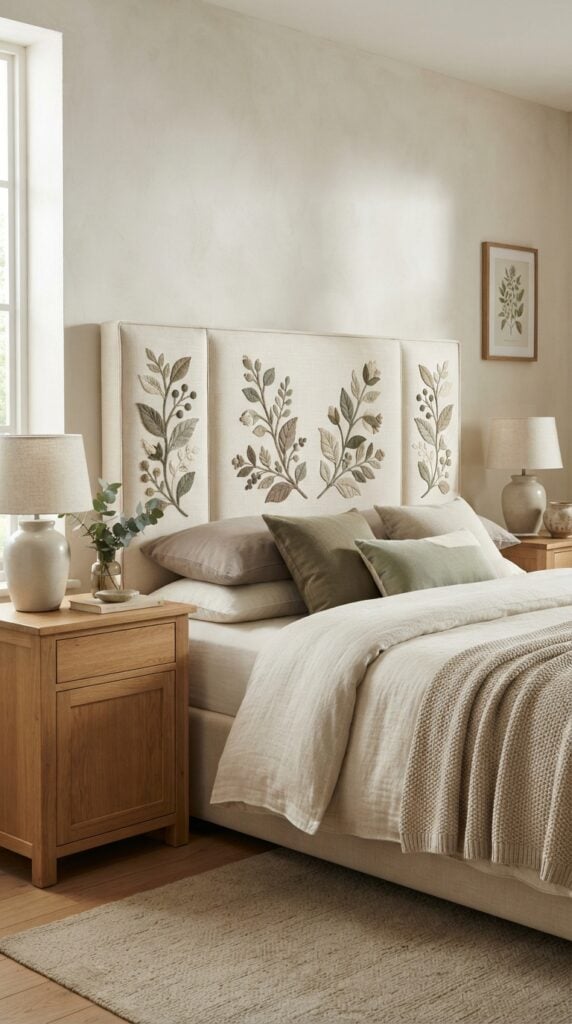
A fabric headboard panel can provide a large surface for a coordinated decorative pattern.
Rather than attempting to cut or construct the upholstered headboard itself, use your Cricut to prepare fabric appliqué shapes or compatible iron-on details for an existing fabric-covered panel.
Botanical motifs, symmetrical borders and understated geometric arrangements can all work, depending on the bedroom’s style and the available surface area.
Start by measuring the visible headboard section and planning the design around its proportions.
A pattern that is too small may disappear across a wide panel, while oversized motifs can make a narrow headboard look crowded.
Check that the chosen fabric and decorative material are compatible with each other and follow the manufacturer’s application instructions. Also consider how the panel will be cleaned and whether the decoration can withstand the expected handling.
For the homeowner: A decorative fabric treatment can refresh the appearance of an existing headboard, but it does not provide the padding, support or upholstery construction needed to make one.
Those structural elements must already be present in the headboard.
Selling opportunity: Provide custom fabric decoration for suitable existing headboards, or incorporate Cricut-cut details into finished bedroom panels made with appropriate upholstery materials and construction.
Want to make thoughtful presents with names and custom details? These 33 Cricut Projects for Beginners That Make Great Personalized Gifts offer plenty of ideas.
What Makes These Cricut Home Decor Projects Look More Expensive?
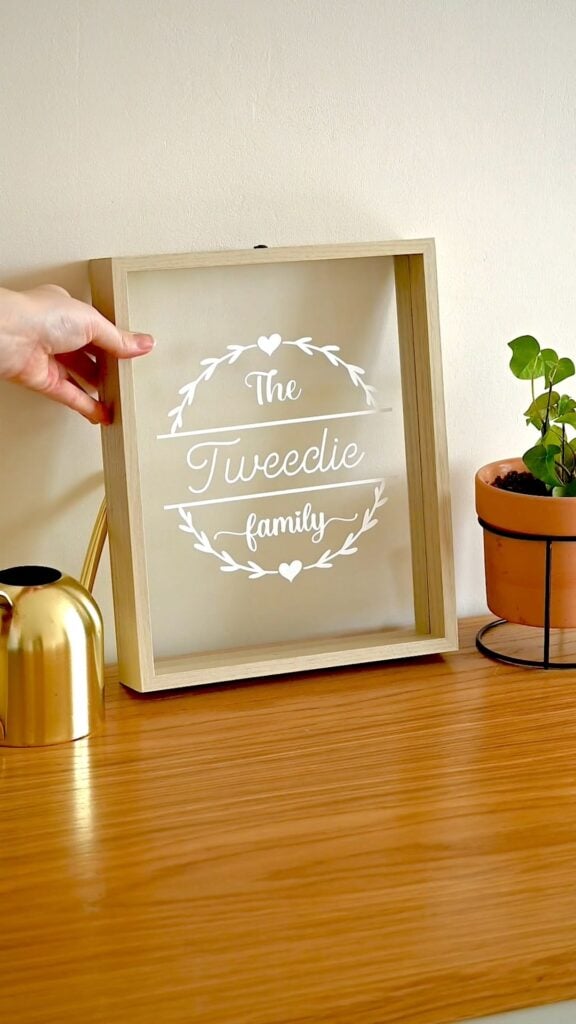
Two projects can use similar materials and still produce very different results. The difference often comes down to how well the design is planned, how the materials work together and how carefully the finished piece is assembled.
When creating Cricut home decor projects, the goal should not simply be to add more decoration. It is to make deliberate choices that give each piece a polished, considered appearance.
-
Material Selection
The materials you choose have a direct effect on the finished result. Heavyweight cardstock, for example, holds its shape better than thin paper when creating layered wall art or decorative displays.
Suitable fabric gives textile projects a more substantial finish, while compatible wood veneer can introduce natural grain and texture to furniture-inspired designs. The quality of the base object matters too.
A well-made tray, sturdy storage box or properly finished backing board gives your decoration a better foundation than a weak or poorly constructed item.
Before cutting, check that the material suits both your Cricut machine and the intended project. A material that looks attractive but bends, frays, tears or fails to adhere properly can undermine the entire design.
-
Scale and Proportion
Size affects how a decorative piece relates to the space around it. Several small motifs scattered across a large wall may look disconnected, while one carefully arranged composition can create a stronger focal point.
This does not mean every project needs to be oversized. The design simply needs to suit the furniture, wall, window or surface where it will be displayed.
Measure the available space before creating your design in Cricut Design Space. Consider the height, width and surrounding objects, then adjust the size of the individual elements so they work together.
For layered artwork, furniture panels and wall medallions, a well-balanced arrangement often looks more intentional than adding extra shapes without a clear layout.
-
Texture and Depth
A flat design can be attractive, but introducing texture and depth gives the eye more to notice. Layered cardstock, fabric appliqué, contrasting veneer shapes and carefully applied painted details can create this effect in different ways.
Foam spacers, for instance, can lift selected paper elements from a backing board, while overlapping fabric shapes can add dimension to a textile panel.
The technique should suit the material. Too many layers can make a design bulky, and excessive decoration can distract from the main pattern. Choose one or two details that give the project character rather than adding texture everywhere.
-
Colour Coordination
Colour can make a simple design look carefully planned or leave it feeling cluttered. Neutral shades, muted tones and restrained contrasts are useful starting points because they allow the shape and texture of a project to stand out.
Metallic accents can also introduce a refined detail, particularly when used sparingly alongside complementary colours.
Before cutting, lay out your colour choices together. Consider the room where the finished piece will be used, including the furniture, wall colour and other accessories.
A coordinated palette usually creates a more unified result than combining several unrelated colours simply because they are available.
-
Finishing
Small imperfections become noticeable on decorative pieces, especially when they are displayed close to eye level. Uneven cuts, exposed adhesive, frayed fabric edges, poorly aligned layers and paint marks can make an otherwise good design look unfinished.
Take time to trim excess material, align repeated shapes and conceal adhesive where possible.
Fold or finish fabric corners neatly, remove stencil residue where appropriate and allow paint to dry and cure according to the manufacturer’s instructions.
Where a protective coating is needed, choose one compatible with the material and the item’s intended use. A clear coating should never be assumed to make a surface waterproof, scratch-resistant or food-safe without the relevant product specifications.
-
Presentation
The way a finished project is displayed can influence how people perceive its quality.
A layered paper design may look more complete with a suitable backing board and frame, while a decorative wall panel needs appropriate hanging hardware for its weight and construction.
For products intended for sale, clean packaging, protected corners and clear care instructions also show that attention has been given beyond the decoration itself.
Photography deserves similar care. Use good lighting, keep the background uncluttered and show the item at a realistic scale. Include close-up photographs where texture, layering or fine details are important.
For larger pieces, a photograph showing the product in a furnished setting can help buyers understand its size and how it might look in a room.
The 2026 retail trend report from Craft Industry Alliance highlights interest in textured materials, vintage-inspired details, layered interiors and artisan-style finishes.
Such directions can provide inspiration when developing new designs, but a trend does not guarantee demand. The quality, usefulness, price and appeal of the finished product still matter.
Can’t decide what to make next? These 30 Cricut Projects to Make When You Don’t Know What to Make might spark your next idea.
Cricut Supplies and Tools Worth Having for These Projects
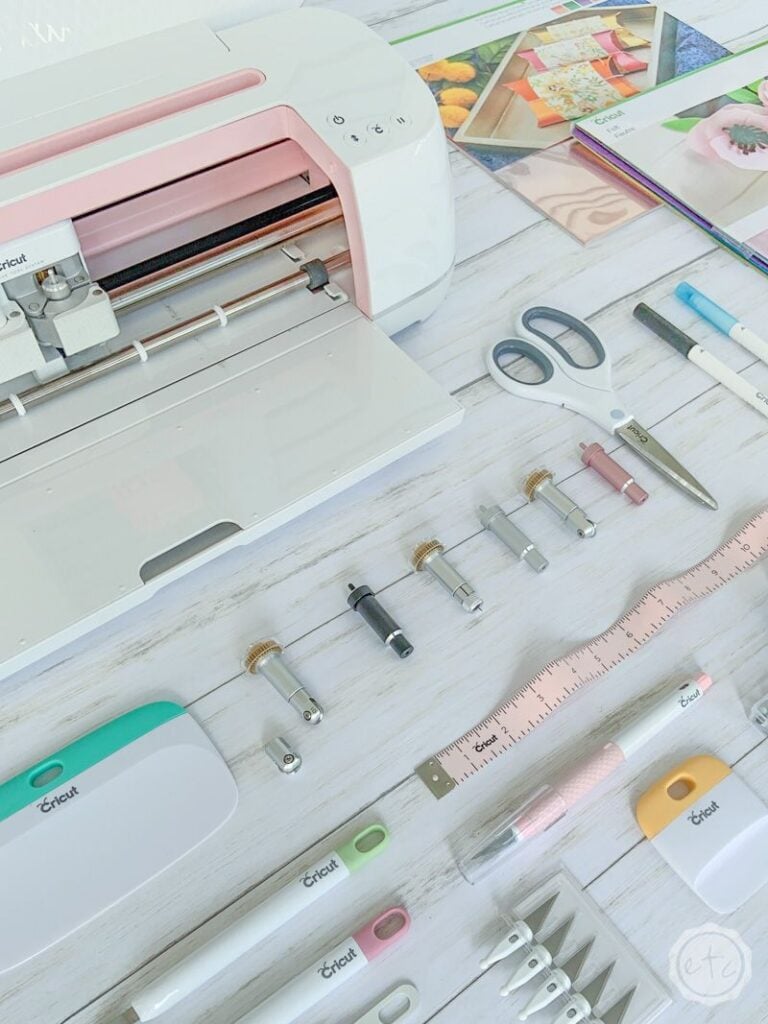
The right supplies make it easier to cut accurately, assemble neatly and achieve a professional finish.
You do not need every tool for all 21 Cricut home decor projects; choose equipment based on the materials and techniques involved.
- Cricut cutting machine: Choose a model that supports the materials and cutting techniques you intend to use. Check machine compatibility before purchasing specialty materials.
- StandardGrip and FabricGrip mats: StandardGrip mats suit many common paper and vinyl materials, while FabricGrip mats are designed for compatible fabric-cutting projects.
- Fine-Point Blade and replacement blades: Useful for everyday cuts involving suitable cardstock, vinyl and other compatible materials.
- Rotary Blade: For fabric projects on compatible Cricut Maker machines.
- Weeding tools and scraper: Help remove unwanted vinyl or stencil material and keep cutting mats clean.
- Transfer tape: Makes it easier to position suitable adhesive vinyl designs on smooth surfaces.
- Stencil material and application tools: For creating reusable or single-use stencils for suitable walls, furniture and decorative surfaces.
- Quality cardstock and specialty paper: Choose appropriate weights and finishes for layered artwork, window displays and paper decorations.
- Compatible iron-on vinyl: For fabric appliqué and decorative details where the fabric and application method are suitable.
- EasyPress or suitable heat press: Helps apply compatible heat-transfer materials using controlled temperature and pressure.
- Brayer: Helps secure suitable materials evenly to the cutting mat.
- Fabric scissors and measuring tools: Useful for trimming fabric, measuring surfaces and planning accurate layouts.
- Paintbrushes and stencil brushes: For applying suitable paints to walls, tiles, furniture and decorative objects.
- Compatible paints and finishing products: Select these according to the surface, intended use and manufacturer’s instructions.
Before adding supplies to your shopping list, check your machine’s capabilities and the material manufacturer’s recommendations.
Some projects require only a cutting mat and basic tools, while others need additional equipment for fabric application, painting or finishing.
Simple designs can still attract paying customers. Check out these 21 Simple Cricut Projects for Beginners That Actually Sell.
Conclusion
A home décor collection does not have to come from a furniture showroom to feel thoughtfully put together. With the right Cricut techniques, even an ordinary object can become a distinctive part of a room.
The real opportunity with these Cricut home decor projects is to develop designs that reflect different tastes, solve everyday decorating needs and give handmade work its own character.
Which idea caught your attention? Choose one, make it your own and see what you can create.