Give your kitchen a personal touch with these easy Cricut projects for your kitchen.
The kitchen is one of the busiest spaces in a home, with different tools, accessories and supplies used throughout the day.
From measuring ingredients and preparing meals to baking and serving food, many of these activities involve items that can be customised to suit individual preferences.
A Cricut machine offers a way to add lettering, measurements and decorative designs to suitable kitchen accessories, as well as cut materials for making useful kitchen items from scratch.
However, not every material is suitable for kitchen use, particularly where heat, moisture and direct food contact are involved. Choosing the right project and materials is just as important as getting the design right.
Small leftover pieces of cardstock, vinyl and other materials can be put to use in personalised presents. Readers can find more gift-making inspiration in 31 Easy Cricut Projects for Gifts.
Cooking and Baking Reference Projects
1. Kitchen Measurement Conversion Board
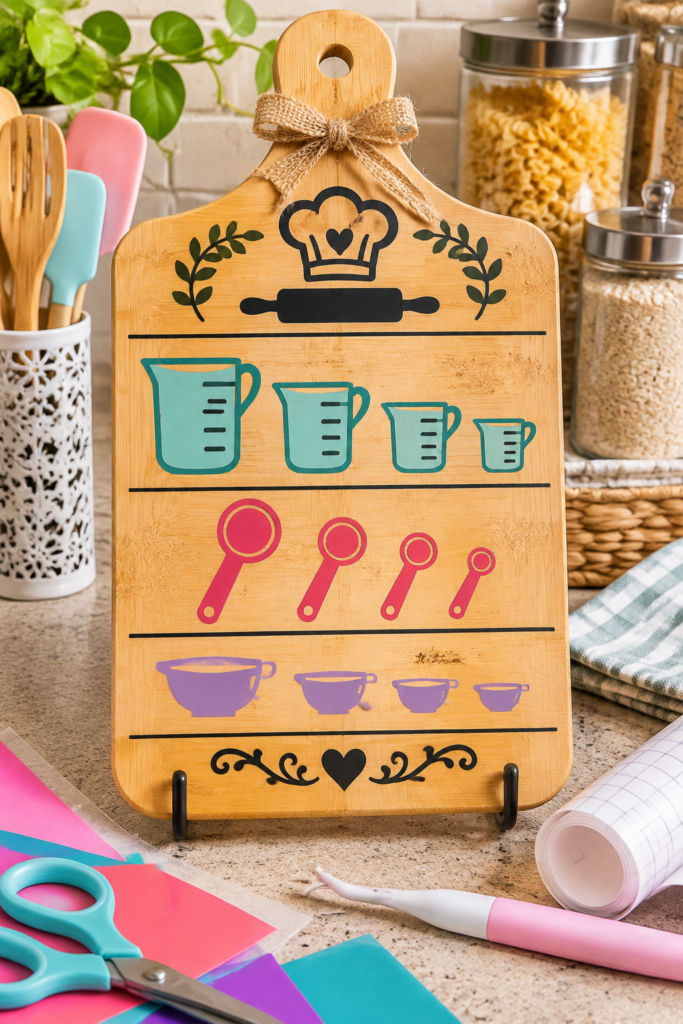
A kitchen measurement conversion board is a useful reference when following recipes that use different measuring systems. For example, you may come across a recipe that lists liquid ingredients in millilitres but gives smaller quantities in teaspoons or tablespoons.
Rather than stopping to look up each conversion, you can keep the common equivalents displayed on a board within easy reach while cooking or baking.
To make one, use your Cricut machine to cut the headings, numbers and measurement symbols from permanent adhesive vinyl.
Apply the design to a smooth wooden board, acrylic board or another suitable display surface. Arrange the information into separate sections for teaspoons, tablespoons, cups and millilitres so you can find each measurement easily.
Pay attention to the measurement system when putting your design together. This is particularly important when using recipes from different countries. A US customary cup is approximately 240 ml, while a metric cup is 250 ml.
These measurements are close but not identical, so identify which cup measurement your board uses to avoid confusion when following a recipe.
Materials: Cricut machine, permanent adhesive vinyl, transfer tape, smooth wooden or acrylic board, weeding tool and scraper.
One important distinction to include on the board is that volume and weight are not interchangeable.
Cups and spoons measure volume, while grams measure weight. A cup of flour, for instance, does not weigh the same as a cup of sugar.
When a recipe specifies grams, use a kitchen scale rather than relying on a volume conversion chart.
2. Oven Temperature Conversion Chart
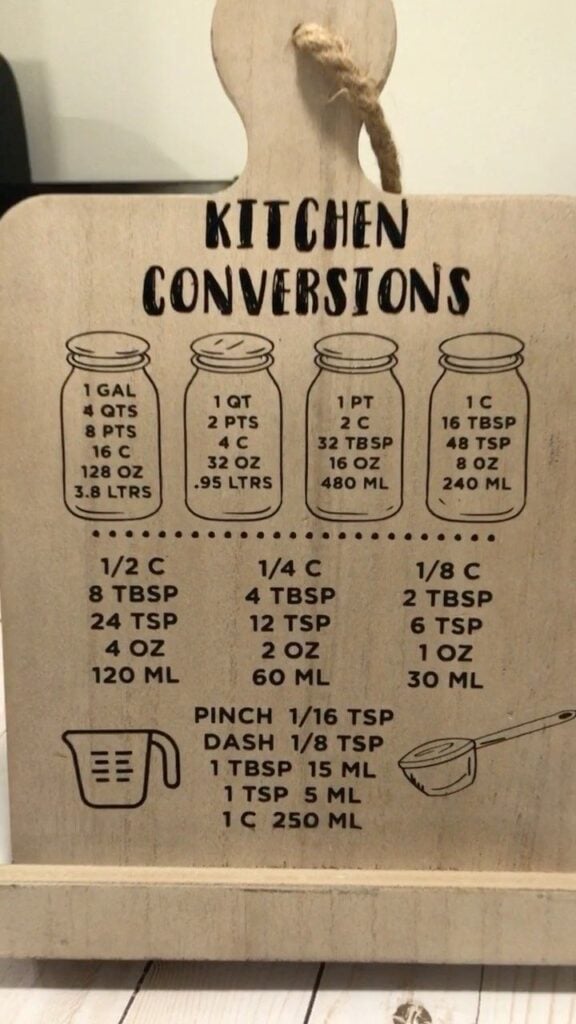
When following baking recipes from different countries, you may notice that oven temperatures are written in different formats.
One recipe might specify 180°C, another might say 350°F, while a British recipe may use Gas Mark 4. An oven temperature conversion chart gives you a convenient way to compare these settings without having to calculate each one.
You can make this project using your Cricut machine, permanent adhesive vinyl and a smooth wooden or acrylic board.
Cut the temperature headings, numbers and degree symbols, then arrange them in columns for Celsius, Fahrenheit and Gas Mark. Keep the figures properly aligned so you can follow a row across the chart when checking a recipe.
Here are some common conventional oven temperature equivalents to include:
| Celsius | Fahrenheit | Gas Mark |
| 140°C | 275°F | 1 |
| 150°C | 300°F | 2 |
| 160°C | 325°F | 3 |
| 180°C | 350°F | 4 |
| 190°C | 375°F | 5 |
| 200°C | 400°F | 6 |
| 220°C | 425°F | 7 |
| 230°C | 450°F | 8 |
| 240°C | 475°F | 9 |
These are commonly used recipe equivalents, with some rounding. For example, 180°C converts mathematically to approximately 356°F, but baking references commonly round this to 350°F.
Gas Mark equivalents are also approximate rather than exact mathematical conversions.
One detail worth adding is the difference between conventional and fan-assisted ovens. A fan oven generally requires a lower temperature than a conventional oven for the same recipe.
A commonly used adjustment is about 20°C, although you should follow the recipe or oven manufacturer’s instructions where available.
Keep this information separate from the main conversion table so readers do not mistake fan temperatures for conventional settings.
Materials: Cricut machine, permanent adhesive vinyl, transfer tape, smooth wooden or acrylic board, weeding tool and scraper.
Place the finished chart somewhere convenient for reference, but away from the oven’s heat and steam. This keeps the vinyl from being exposed to conditions that could affect its adhesion.
Scrap materials are useful for testing colours and creating small accessories that suit different personal styles. More ideas for that age group appear in 30 Cute Cricut Projects for Teen Girls.
3. Baking Pan Size Reference Cards
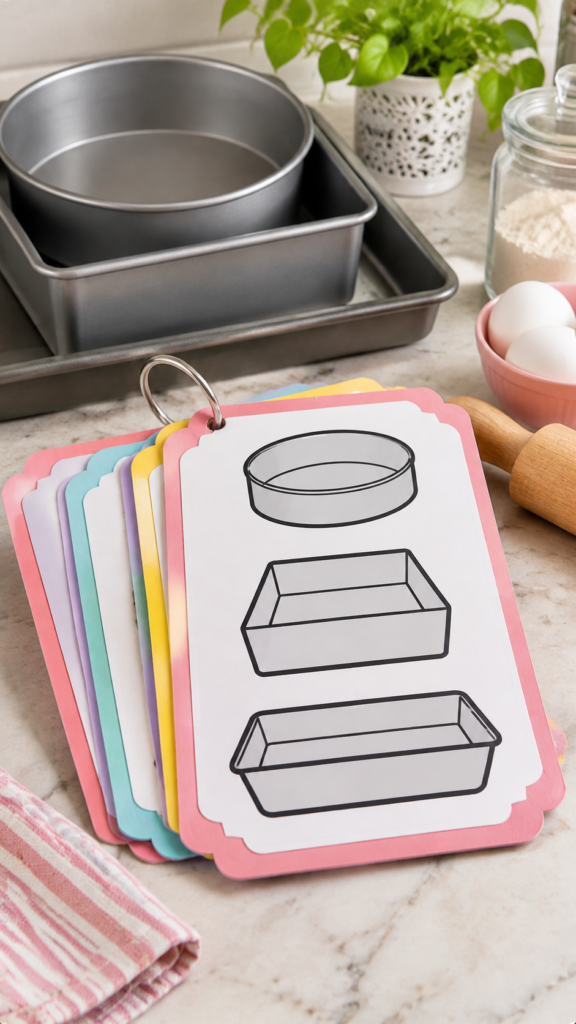
Have you ever started preparing a cake or brownie recipe only to realise that the pan size specified is different from the one in your cupboard?
A set of baking pan reference cards can help you compare common pan dimensions before choosing an alternative.
For this project, use your Cricut machine to cut cardstock into individual cards. Add the pan type, dimensions in inches and centimetres, and a simple outline showing the shape of each pan.
You can include common sizes such as an 8-inch (20 cm) square pan, a 9-inch (23 cm) round pan and a 9 x 13-inch (23 x 33 cm) rectangular pan. Add a small note indicating whether the measurement refers to the diameter or the length and width.
The useful part of this project is that the cards can teach you more than the names and dimensions of baking pans.
Pan size affects how deeply batter sits in the pan, which can change baking time and the finished result.
For example, an 8-inch square pan and a 9-inch round pan have approximately the same base area, making them a possible alternative in some recipes. However, you should also consider the pan depth and the amount of batter before making the switch.
Materials: Cricut machine, cardstock, cutting mat, fine-point blade, ruler, marker and binder rings or a small card holder.
You can keep the finished cards in your recipe binder or with your baking supplies. Include a reminder to check the recipe’s recommended pan depth and not assume that pans with similar dimensions will always produce the same baking results.
4. Ingredient Substitution Flip Cards
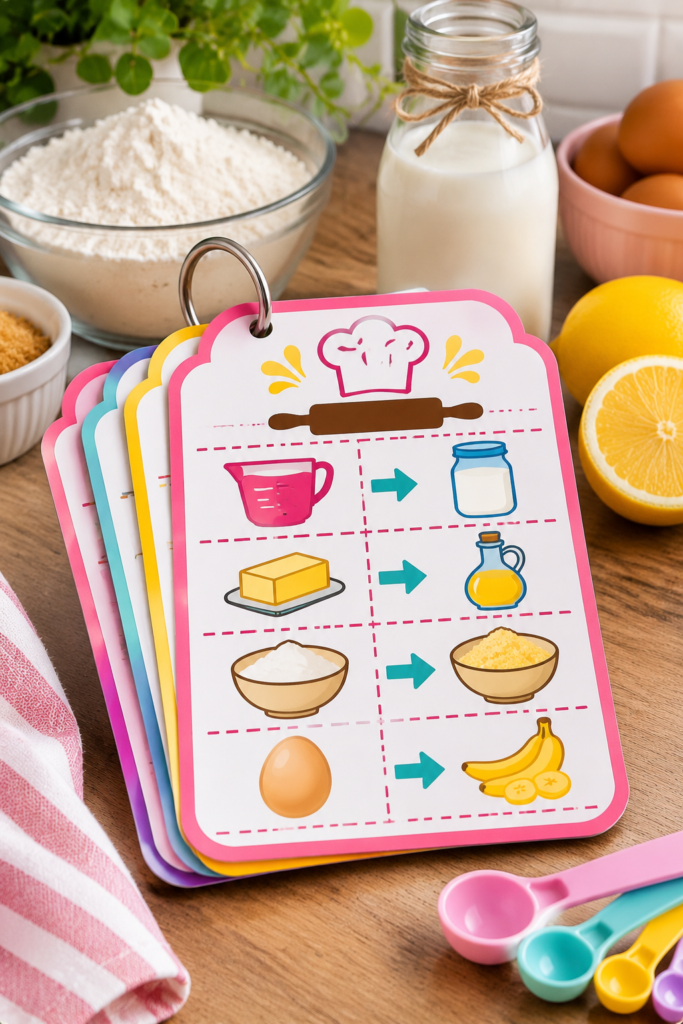
Running out of an ingredient halfway through a baking recipe can be frustrating, especially when you are unsure whether another ingredient will give you the same result.
Ingredient substitution flip cards provide a handy place to record tested alternatives for commonly used baking ingredients.
To make them, cut small rectangles from cardstock using your Cricut machine. Use the writing or cutting function to add ingredient names, quantities and substitution instructions.
Punch a hole through one corner of each card and connect them with a binder ring so you can flip through the collection when needed.
You could include references such as:
- Buttermilk: For 1 cup, combine 1 tablespoon of lemon juice or vinegar with enough milk to make 1 cup. Allow it to stand for about 10 minutes before using.
- Self-raising flour: Combine 1 cup of all-purpose flour with 1½ teaspoons of baking powder and ¼ teaspoon of salt to make a commonly used homemade equivalent.
- Cake flour: Record a suitable alternative, such as replacing 2 tablespoons of all-purpose flour in 1 cup with 2 tablespoons of cornstarch. Sift the mixture thoroughly.
These substitutions are useful, but they do not always produce identical results.
For example, a milk-and-acid mixture can provide acidity in place of buttermilk, but it does not have exactly the same thickness. Similarly, homemade self-raising flour may behave differently depending on the protein content of the flour used.
Materials: Cricut machine, cardstock, fine-point blade, writing pen (if using a compatible machine), hole punch and binder ring.
Keep each card focused on one ingredient, with the original quantity and replacement quantity clearly stated. This makes the information easier to follow when you are already busy preparing a recipe.
Leftover cardstock and vinyl can also become labels, decorative accents and other small household projects. See 29 Easy Cricut Projects for Home Decor for additional inspiration.
5. Recipe Binder Index Dividers
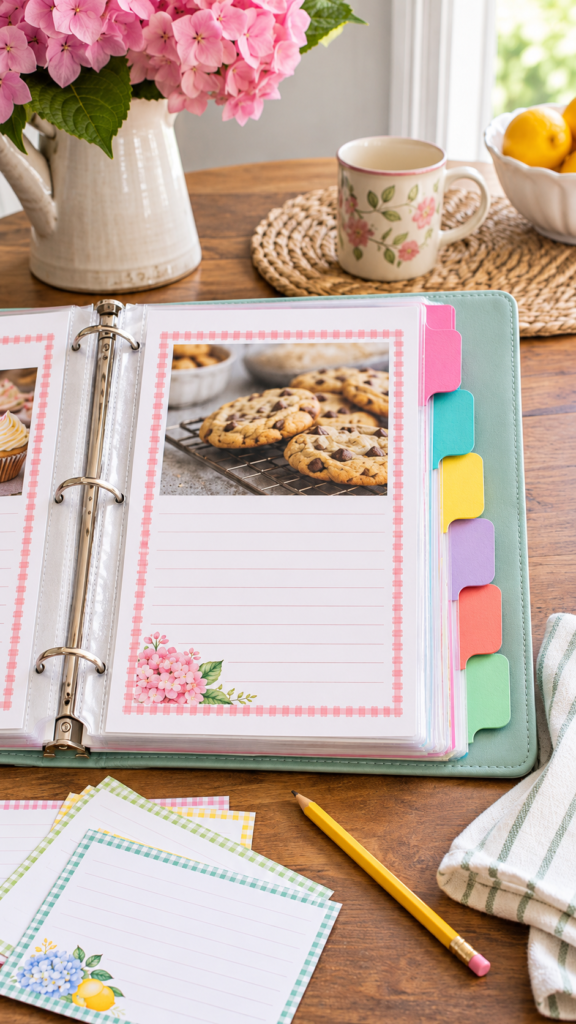
A recipe collection can become difficult to navigate when everything is kept together without clear sections.
You might have cake recipes mixed with bread instructions, soup recipes between breakfast ideas or handwritten family recipes tucked between printed pages.
Recipe binder index dividers give you a way to arrange these recipes so you can find the one you want without going through the entire collection.
For this project, use your Cricut machine to cut cardstock into divider sheets with extended tabs along one edge.
Add category names such as breakfast, bread, soups, main dishes, desserts, sauces and drinks using vinyl lettering or a compatible writing pen. You can also use different cardstock colours to distinguish the sections, making the binder easier to navigate.
Before cutting, measure the inside dimensions of your binder and the paper or plastic sleeves you intend to use.
This helps you choose divider sizes that fit without catching on the binder rings or extending too far beyond the pages. You can also make the tabs slightly staggered so each category remains visible when the binder is closed.
Materials: Cricut machine, cardstock, cutting mat, fine-point blade, permanent adhesive vinyl or compatible writing pen, and a binder.
For a more durable finish, you can place the dividers inside suitable protective sleeves. This is particularly useful for recipe collections that are frequently handled during cooking.
6. Personalised Cookbook Page Holder
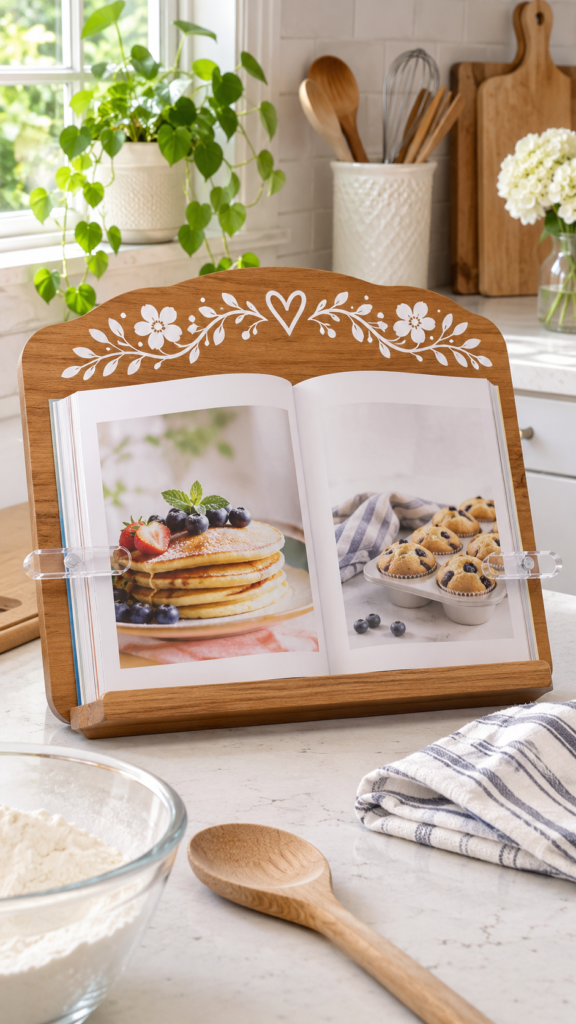
Following a recipe while preparing food can be awkward when your cookbook keeps closing or the pages will not stay open.
A cookbook page holder provides a simple way to keep the selected page in position while you measure ingredients and work through the instructions.
For this project, start with a plain wooden or acrylic cookbook holder. Use your Cricut machine to cut a personalised name, short inscription or small cooking-themed design from permanent adhesive vinyl.
Apply the design to a suitable smooth, non-food-contact exterior area of the holder. You could personalise it with a family name, a baker’s name or a simple inscription such as Family Recipes.
Pay attention to the construction of the holder before choosing your design.
The front ledge should be deep enough to support the bottom of the cookbook, while the back support should hold it at a comfortable reading angle.
A page-weight bar or adjustable page clips can also be useful for keeping thicker cookbooks open, particularly when the pages are stiff.
Materials: Plain wooden or acrylic cookbook holder, Cricut machine, permanent adhesive vinyl, transfer tape, weeding tool and scraper.
Keep the personalised design away from moving parts and the areas that support the book.
Also, follow the holder manufacturer’s cleaning instructions rather than assuming that the vinyl-decorated surface can be soaked or placed in a dishwasher.
Cardstock offcuts are particularly handy for small paper designs, tags and embellishments. Readers who want to make more with this material can browse 27 Easy Cricut Projects Using Cardstock.
Food Preparation and Storage Helpers
7. Freezer Batch Identification Tags
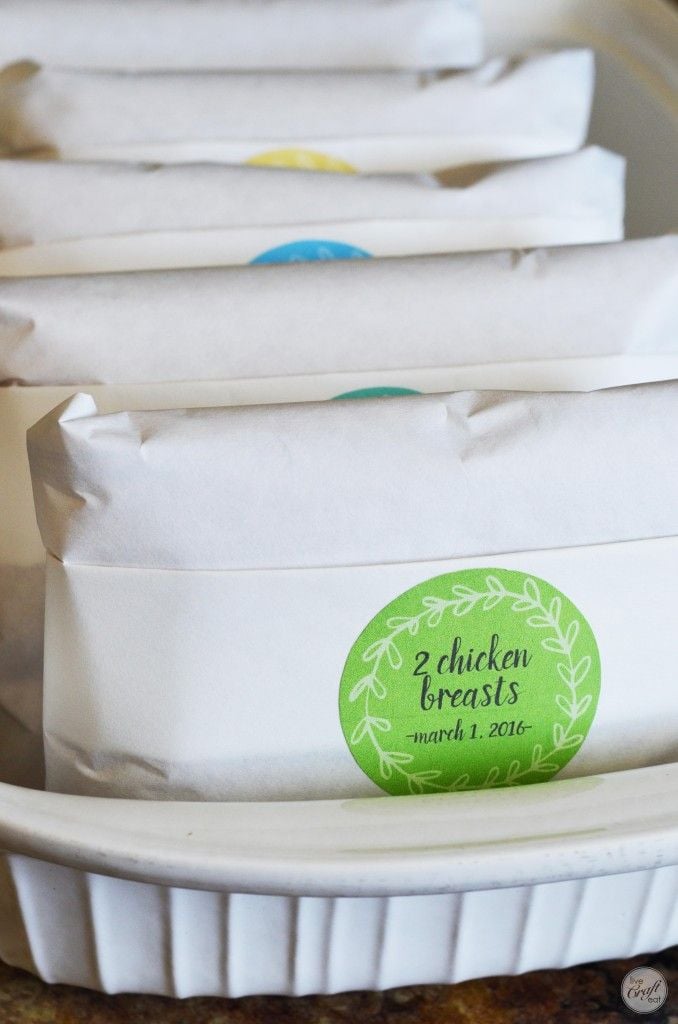
When you freeze homemade stock, sauces or prepared ingredients, it is easy to forget what is in each container, especially when several batches look alike.
Freezer batch identification tags provide a simple way to record what you have stored and when you prepared it. This is particularly useful when you cook in larger quantities and divide food into several portions for later use.
For this project, use your Cricut machine to cut tag shapes from suitable durable material. Add spaces for the food name, preparation date and, where necessary, the batch number.
You can attach the tags to freezer baskets or use them as inserts in suitable tag holders attached to containers. Avoid placing tags where they could interfere with the lid, seal or proper closure of the container.
A useful detail to include is the freezing date, rather than relying on a general label such as “soup” or “chicken stock.” When you prepare several batches at different times, the date helps you identify which one was stored first.
You can also record the portion size, particularly when freezing stock in different quantities for soups, sauces and other recipes.
Materials: Cricut machine, suitable durable tag material, cardstock for protected inserts, cutting mat, fine-point blade, hole punch, binder rings or tag holders, and a compatible writing pen.
For tags that will be handled around a freezer, choose a material that can withstand moisture and cold conditions.
Ordinary cardstock should be protected from condensation, as it can become soft or damaged. Alternatively, use removable freezer labels directly on containers when a hanging tag is not practical.
8. Leftover Date Clips
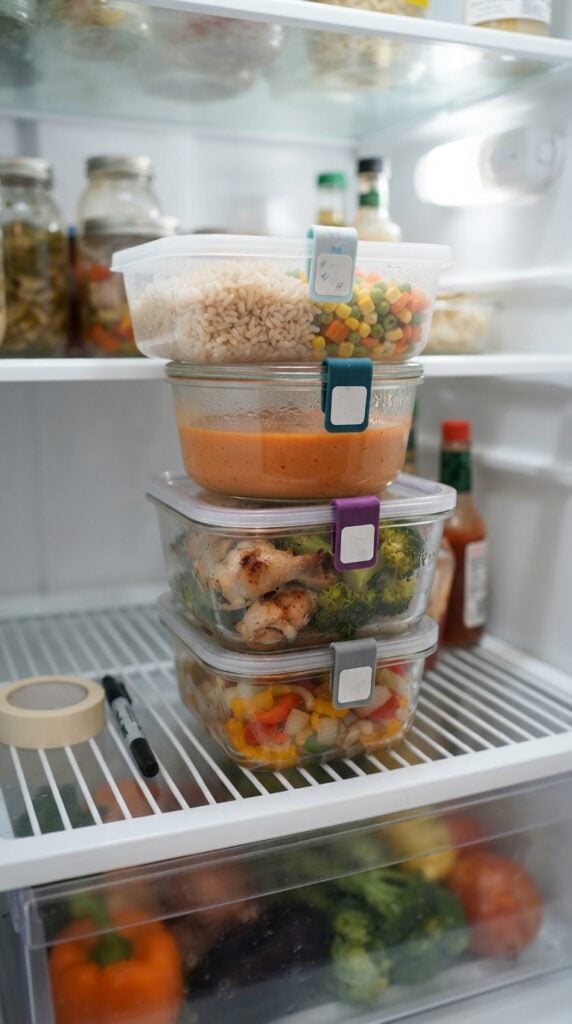
Leftovers are often transferred into different containers after a meal, and once they are placed in the refrigerator, it can become difficult to remember when they were prepared.
Personalised leftover date clips offer another way to identify stored food, particularly when you use containers that do not have writable surfaces.
Start with reusable clips that have a suitable flat area for attaching a small label or insert.
Your Cricut machine can cut the insert shapes and lettering, while a compatible writable surface provides space to record the food name and date. You could make separate inserts for soups, cooked vegetables, rice, sauces and other commonly stored leftovers.
For repeated use, choose a wipe-clean material that is compatible with your machine and a suitable dry-erase marker. Check that the marker can be removed without leaving residue, and keep the clips on the outside of the storage container rather than allowing them to come into contact with food.
Materials: Reusable clips, Cricut machine, compatible writable material, cutting mat, transfer tape where required, and dry-erase markers.
One important point to remember is that a date clip is an identification aid, not a food-safety test. Recording when leftovers were prepared helps you keep track of storage time, but it does not tell you whether food is safe to eat.
Cooked leftovers should be refrigerated promptly, kept at a safe refrigerator temperature of 4°C (40°F) or below, and generally used within three to four days according to USDA guidance.
Infusible Ink scraps may be suitable for smaller compatible designs, provided the pieces are in good condition and large enough for the project. More project ideas are covered in 25 Easy Cricut Projects Using Cricut Infusible Ink.
9. Freezer Inventory Reference Cards
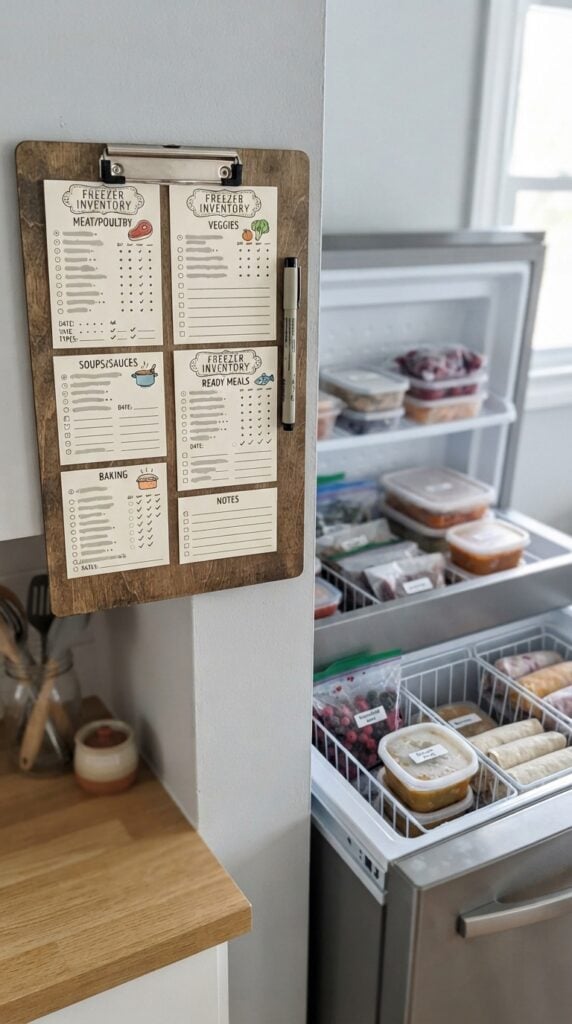
If you use your freezer to store different ingredients and prepared meals, keeping an inventory can help you remember what is available before buying or preparing more food.
This is particularly useful when items are spread across different drawers, baskets or shelves. Instead of writing directly on every container, you can use a set of freezer inventory cards to record what is stored in each section.
Use your Cricut machine to cut cardstock into small cards and add headings such as Food Item, Quantity, Freezer Section and Date Stored. You can make a separate card for each basket or drawer, depending on how your freezer is arranged.
For example, one card might list frozen vegetables, another could record stocks and sauces, while a third keeps track of prepared meals.
You can place the cards in a small holder attached to the outside of the freezer or keep them together on a nearby clipboard. When you remove an item, update its quantity or cross it off the list.
When you add a new batch, record its name, portion count and storage date.
Materials: Cricut machine, cardstock, cutting mat, fine-point blade, compatible writing pen, card holder or clipboard, and protective sleeves.
For easier updating, make the cards reusable by placing them inside dry-erase sleeves or choosing a compatible wipe-clean material. Remember that the inventory is a record of what is stored, not a food-safety guide.
Continue to label individual containers with their contents and freezing dates so you can identify each portion even when it is removed from its basket.
10. Fermentation Batch Neck Tags
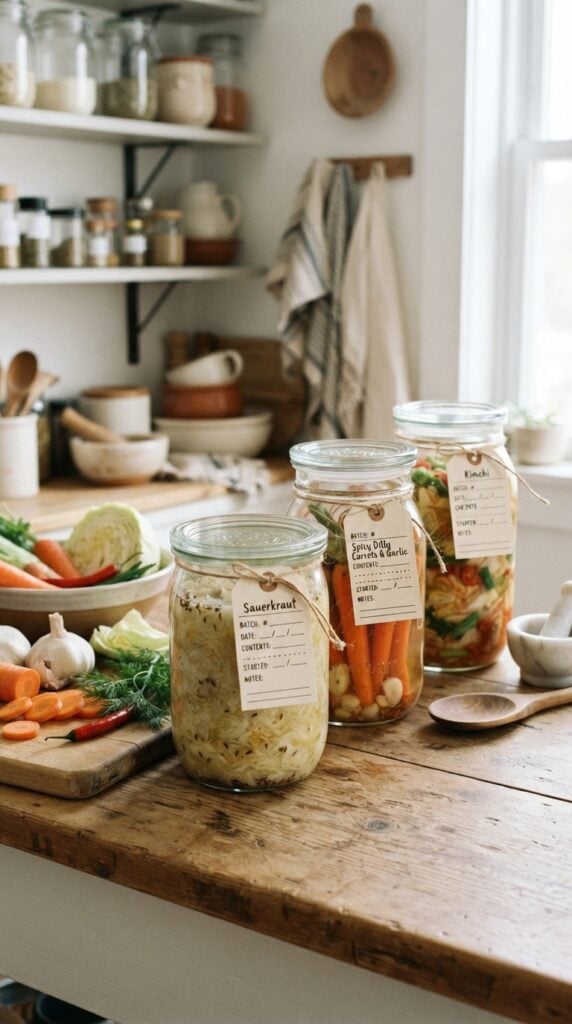
When making fermented foods such as sauerkraut, kimchi or fermented vegetables, keeping track of individual batches can be useful, particularly when you prepare them on different dates or experiment with different ingredients.
A fermentation batch neck tag gives you a place to record the information associated with each jar without writing directly on the glass.
For this project, cut small hanging tags from cardstock or another suitable material using your Cricut machine. Add spaces for the name of the ferment, preparation date, ingredients and batch number.
You can also include a small space for recording the salt percentage, which is useful when following a fermentation recipe that specifies a particular salt-to-vegetable ratio.
Make a hole near the top of each tag and attach it loosely around the outside neck of the jar using string or a small tag ring.
Position it so that it does not interfere with the lid, fermentation lock or any other part of the jar’s closure. The tag should remain outside the container and must not touch the brine or food.
Materials: Cricut machine, cardstock or suitable durable tag material, cutting mat, fine-point blade, compatible writing pen, hole punch and food-safe-independent external tag string or rings.
One important detail is that the tag records the batch information; it does not control the fermentation process. Vegetables must remain submerged beneath the brine, and the jar needs an appropriate arrangement for managing the carbon dioxide produced during fermentation.
An airlock can allow gas to escape while limiting oxygen exposure. Follow a tested fermentation recipe for the salt quantity, preparation method and fermentation conditions.
Small vinyl remnants can be useful for lettering, labels and simple decorative details. 23 Cricut Projects for Beginners Using Vinyl offers more ways to use this material.
11. Sourdough Starter Feeding Tracker
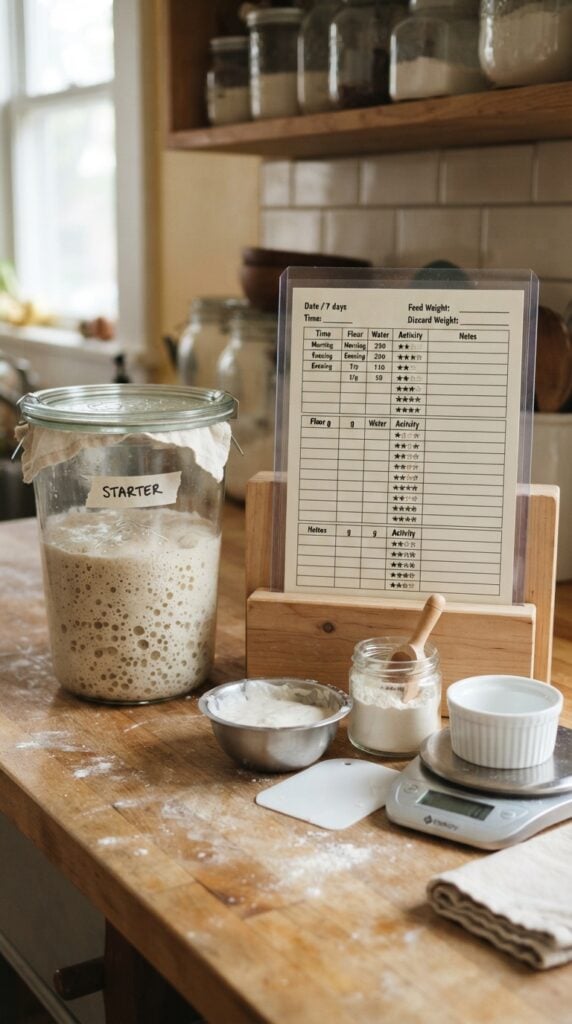
Maintaining a sourdough starter involves more than remembering to feed it. You also have to keep track of the quantities of starter, flour and water used, particularly when following a specific feeding routine.
A sourdough starter feeding tracker gives you a convenient place to record these details and observe how your starter responds over time.
To make one, use your Cricut machine to cut a small tracker card from cardstock. Include spaces for the date and time of feeding, the amount of starter retained, the flour and water added, and observations such as bubbling, rising and falling.
You can place the card inside a protective sleeve and keep it beside your starter jar, or attach it to a nearby kitchen board.
For example, a feeding record could show that you retained 50 g of starter and added 50 g of flour and 50 g of water. This is a 1:1:1 feeding ratio by weight.
Recording the quantities is useful because sourdough feeding ratios affect how quickly a starter becomes active and reaches its peak. Measuring by weight also gives more consistent results than using cups, since flour and water have different densities.
Materials: Cricut machine, cardstock, cutting mat, fine-point blade, compatible writing pen and a protective sleeve or small display holder.
You can also include a section for noting the temperature of the room or whether the starter is kept at room temperature or refrigerated. These details matter because feeding frequency and fermentation activity vary with storage conditions.
A starter kept at room temperature generally requires more frequent feeding than one stored in the refrigerator. The tracker should therefore record your actual routine rather than prescribe one feeding schedule for everyone.
Birthday decorations and party details are another good place to use small pieces of suitable craft materials, especially for tags, labels and paper accents. See 20 Easy Cricut Projects for Birthdays and Parties for more celebration projects.
12. Herb Drying Identification Tags
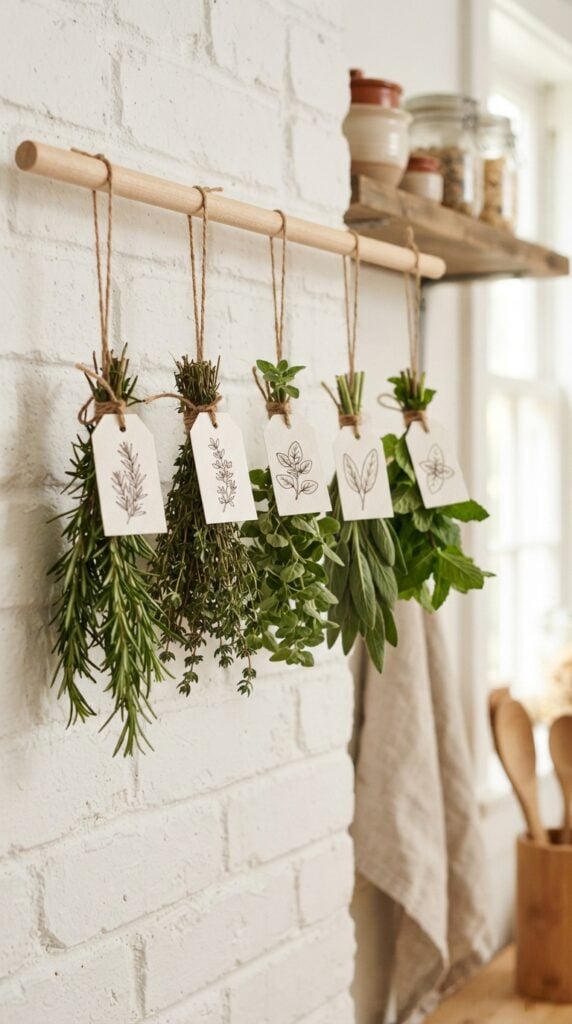
Drying herbs at home often involves preparing several varieties at the same time. Once the herbs are separated into small bundles or placed on drying racks, it can become difficult to identify them, particularly when their leaves look similar.
Herb drying identification tags help you keep each variety clearly labelled throughout the drying process.
Use your Cricut machine to cut small tags from cardstock or another suitable material. Add the herb name and the date drying began.
You could make separate tags for rosemary, thyme, oregano, mint and other herbs commonly used in your kitchen. Attach each tag to the outside of the drying bundle or rack without allowing it to touch the herbs.
The date is useful for keeping a record, but it should not be used as the only indication that the herbs are ready for storage.
Drying time varies depending on the herb, leaf size, humidity and drying method.
According to Oregon State University Extension, properly dried herb leaves should crumble easily between your fingers, while stems should become brittle and break when bent.
Materials: Cricut machine, cardstock or suitable durable tag material, cutting mat, fine-point blade, compatible writing pen, hole punch and string.
Once the herbs are sufficiently dry, remove the leaves from their stems where appropriate and store them in airtight containers in a cool, dark and dry location
You can make a second set of Cricut-cut labels for the storage jars, carrying the herb name and drying date forward from the original tags.
This helps you identify what you have stored without confusing the date the herbs were harvested with the date they were dried.
Crafting with offcuts can also help makers test a product before buying materials in larger quantities. Readers considering a small craft business can explore 25 Easy Cricut Projects to Make and Sell for Extra Money.
13. Produce Storage Reference Cards
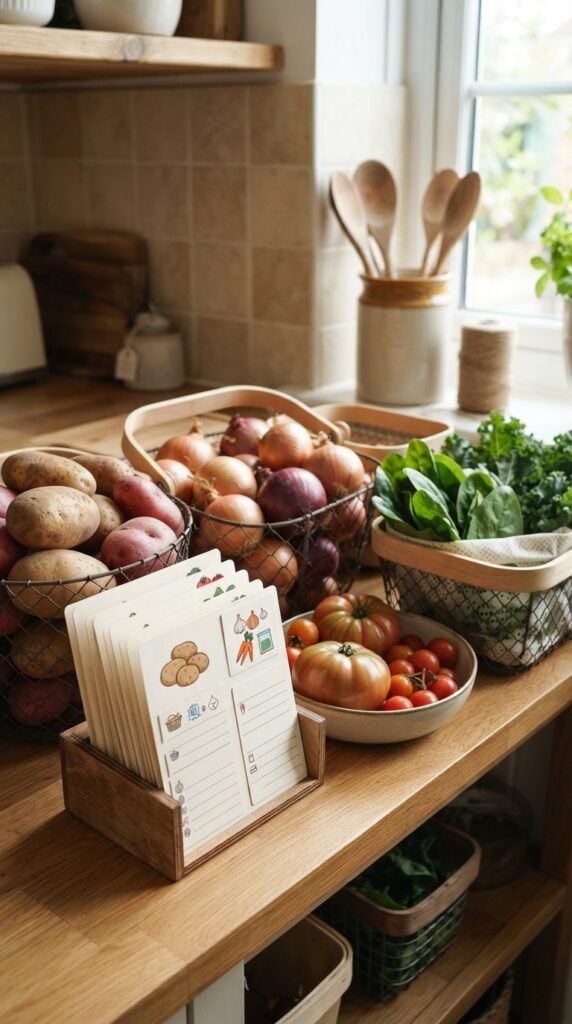
Different fruits and vegetables have different storage requirements, so keeping them all in the same place can affect their quality.
Potatoes, dry onions, leafy greens and tomatoes, for example, do not all benefit from the same storage conditions. Produce storage reference cards give you a way to keep basic storage guidance close to where you sort and store fresh ingredients.
For this project, use your Cricut machine to cut small cardstock cards and add the names of common produce items, together with their recommended storage locations.
You can include simple illustrations to help distinguish the items and arrange the cards in a small reference holder near your food storage area.
Some useful examples to include are:
- Potatoes: Store in a cool, dry, dark and well-ventilated place rather than in the refrigerator.
- Dry onions: Keep in a cool, dry and ventilated storage area.
- Leafy greens: Refrigerate them to help maintain freshness, following the storage instructions for the particular vegetable.
- Tomatoes: Keep unripe tomatoes at room temperature until they ripen. Refrigeration can affect their texture and flavour.
These are general storage considerations, not instructions that apply identically to every variety or condition.
The USDA’s produce storage guidance, for example, advises keeping potatoes and dry onions out of the refrigerator and explains that produce storage conditions can affect quality and freshness.
Materials: Cricut machine, cardstock, cutting mat, fine-point blade, compatible writing pen, small card holder and protective sleeves.
A useful addition is a small section on each card for noting whether the produce should be kept refrigerated or in dry storage.
You can also include a reminder to separate certain fruits from vegetables because some fruits release ethylene gas, which can speed up ripening and deterioration in ethylene-sensitive produce.
This is particularly relevant when storing apples, bananas and other ethylene-producing fruits near vegetables.
Small projects can be a sensible starting point when testing which handmade products attract buyers. 21 Simple Cricut Projects for Beginners That Actually Sell shares more ideas to consider.
Kitchen Organisation and Household Routines
14. Kitchen Drawer Tool Layout
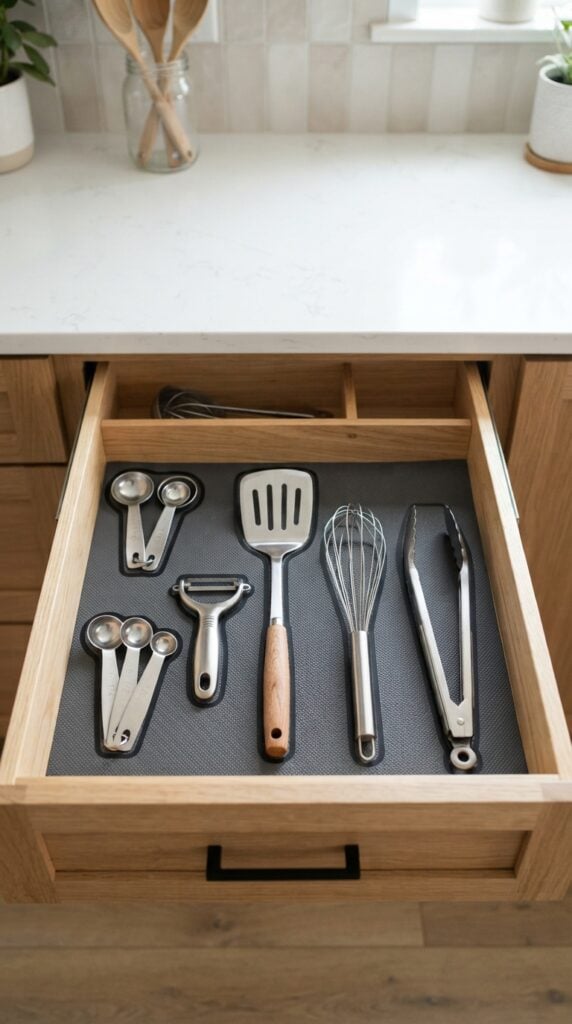
Kitchen drawers often hold a mixture of cooking utensils, measuring spoons, peelers, spatulas and other small tools.
When several items share the same drawer, it can become difficult to return everything to its proper place, especially when the drawer contains more utensils than its organiser can comfortably accommodate.
For this project, create a personalised drawer layout using removable vinyl outlines. First, arrange your utensils inside the drawer and decide where each item should sit.
Measure the available space, then use your Cricut machine to cut simple outlines that match the shapes of your frequently used tools.
Apply the designs to a suitable smooth drawer liner rather than directly to the drawer if you want to remove or rearrange them later.
An important detail is to measure the actual utensils before cutting. A spatula with a wide handle, for example, will require a different outline from a narrow measuring spoon.
Leave enough space between the outlines so you can lift each utensil out without disturbing the others.
Also, check that the drawer liner lies flat and does not prevent the drawer from opening and closing properly.
Materials: Cricut machine, removable adhesive vinyl, compatible cutting mat, transfer tape, ruler, suitable drawer liner and weeding tool.
15. Kitchen Recycling Sorting Stencils
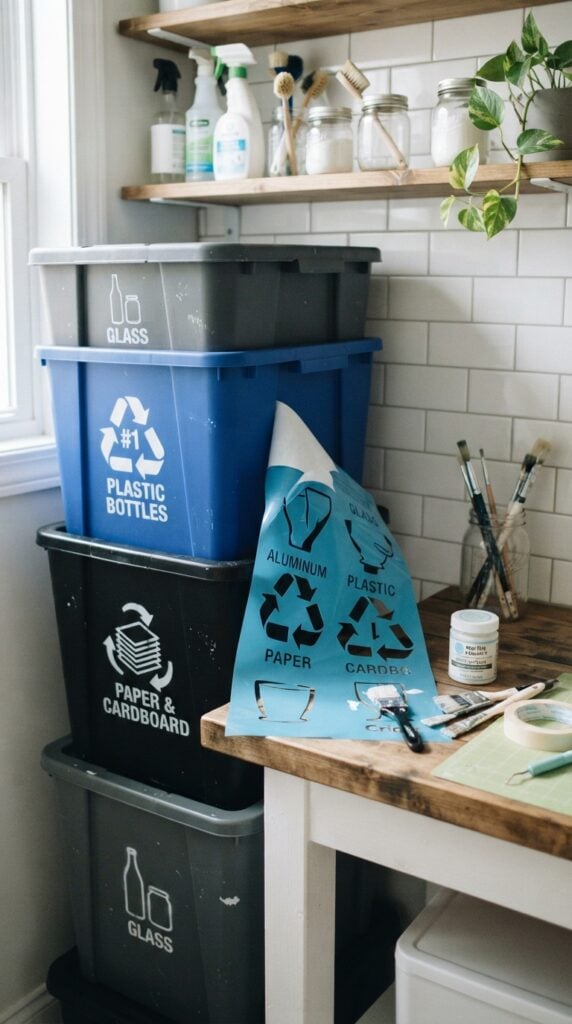
Recycling bins can become confusing when a household separates several types of waste.
Paper, glass, metal, plastic and general waste may require different containers, and the accepted materials can vary depending on the local waste collection service.
Stencils can help you identify each bin clearly without relying on small handwritten labels.
Use your Cricut machine to cut large lettering and simple symbols from suitable reusable stencil material.
You could create separate designs for paper, plastic, glass and general waste, then use the stencils with compatible paint on suitable bin surfaces.
Before painting, clean the surface and check that the paint adheres to the bin’s material. Allow it to dry according to the manufacturer’s instructions.
Be careful with the wording on the stencils. Not every plastic container, glass item or paper product belongs in a recycling bin. Some collection services accept only particular plastics, while others have separate arrangements for glass, metal and cardboard.
Check the rules provided by your local waste collection service before deciding which categories to include. This makes the labels useful rather than giving your household incorrect recycling instructions.
Materials: Cricut machine, reusable stencil material, compatible cutting mat, suitable paint, paint applicator and stencil adhesive where required.
Beginners can practise cutting and assembling smaller designs before moving on to more involved projects. 22 Easy Cricut Projects for Beginners You Can Make at Home provides additional project inspiration.
16. Compost Caddy Identification Design
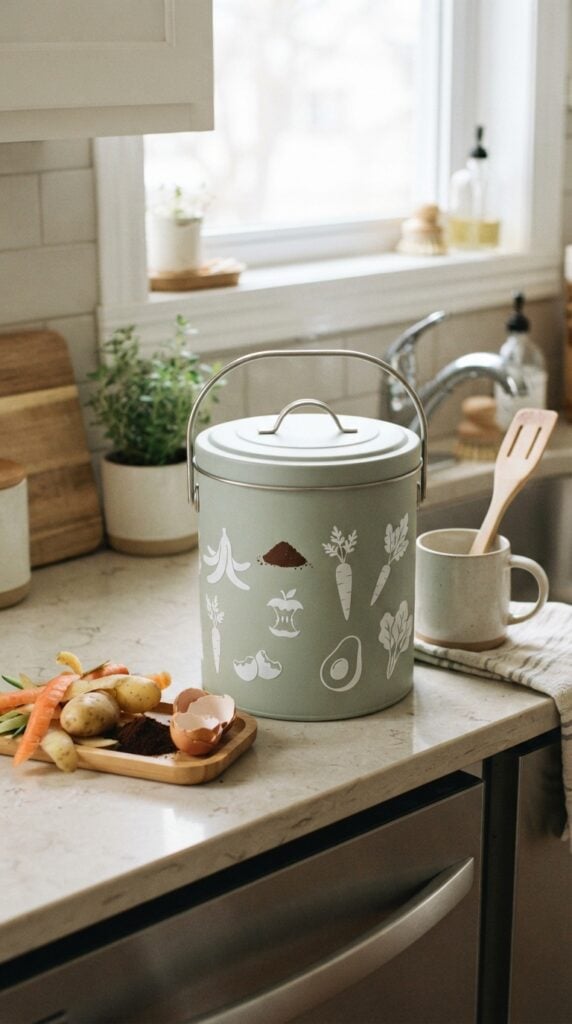
A kitchen compost caddy gives you a place to collect suitable food scraps before transferring them to an outdoor compost bin or a collection point.
However, what you can put inside depends on the composting method or collection service you use.
Some systems accept fruit and vegetable peelings, coffee grounds and eggshells, while others also accept cooked food, meat or dairy products.
You can personalise a plain compost caddy using your Cricut machine and permanent adhesive vinyl. Cut a clear heading such as Food Scraps or Kitchen Compost, then add small illustrations of the types of waste accepted by your composting system.
Apply the design to a suitable smooth exterior surface, away from the inside of the container where food scraps collect.
Before choosing the illustrations, check the instructions for your composting service or system. For example, a household compost pile may have different accepted materials from a council food-waste collection scheme.
Including meat, dairy or cooked food on your design when your particular system does not accept them could cause confusion.
Materials: Cricut machine, permanent adhesive vinyl, transfer tape, suitable compost caddy, weeding tool and scraper.
Choose a caddy with a removable inner container or a smooth surface that you can clean easily.
Food scraps can produce moisture and odours, so the container needs regular emptying and washing. The vinyl design should help identify the caddy without getting in the way of cleaning.
17. Kitchen Cleaning Caddy Identification Tags
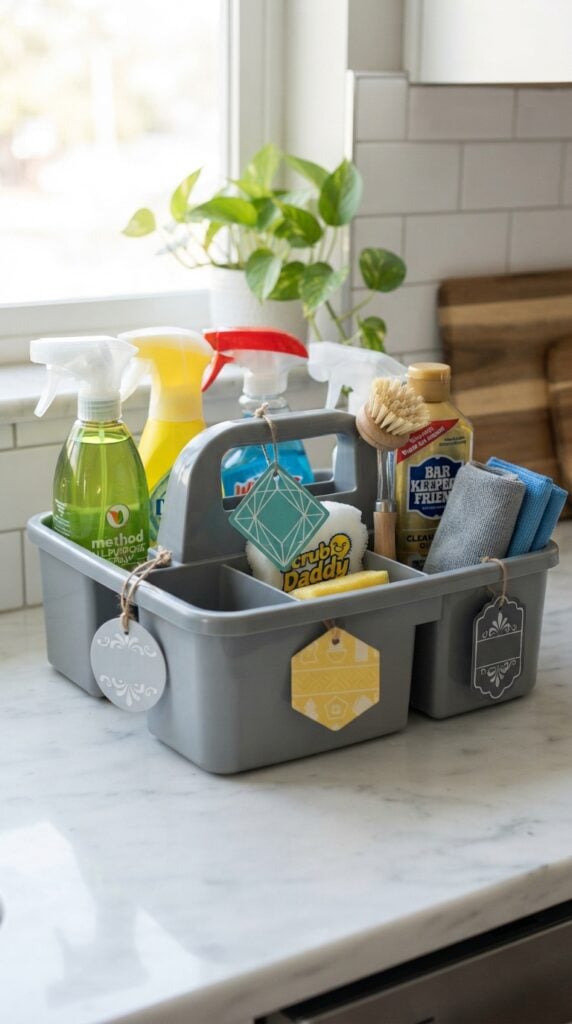
When you keep several cleaning products in one kitchen caddy, it is easy to pick up the wrong bottle, particularly when different products have similar packaging.
Identification tags can help distinguish the supplies you keep together, such as dishwashing liquid, surface cleaner, washing-up sponges and cleaning cloths.
For this project, use your Cricut machine to cut small tags from suitable durable material. Add clear product descriptions rather than relying only on decorative symbols.
For example, you could make separate tags for Dishwashing Supplies, Surface Cleaning and Cleaning Cloths. Attach them to the caddy compartments, storage pouches or handles without covering the original product labels.
One important safety consideration is to keep cleaning products in their original containers. Do not transfer chemicals into unlabelled bottles or use decorative tags as substitutes for the manufacturer’s instructions, hazard warnings or directions for use.
Also, keep incompatible cleaning products separate. For example, never mix bleach with ammonia-based cleaners or acidic products because dangerous gases can form.
Materials: Cricut machine, durable tag blanks, permanent adhesive vinyl or compatible writing material, transfer tape, hole punch and suitable tag rings.
You can use different shapes or colours to distinguish the sections, but keep the wording clear enough for everyone in the household to understand.
This is particularly useful when several people share responsibility for cleaning the kitchen.
Using leftover supplies for simple designs is also a useful way to practise basic machine settings and material handling. More beginner projects can be found in 19 Easy Cricut Projects for Beginners.
18. Kitchen Sink Washing Routine Board
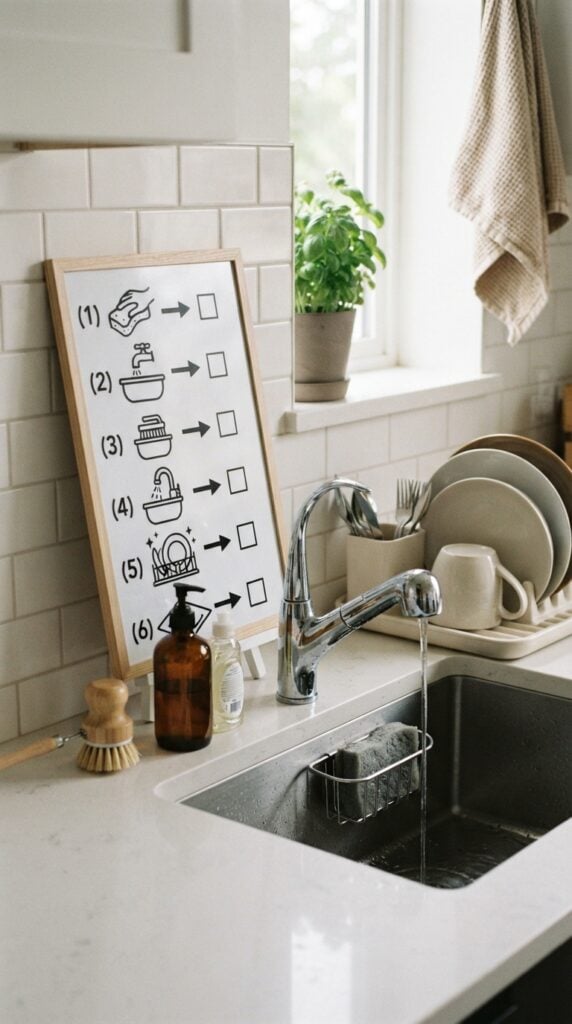
In a shared kitchen, washing dishes can involve several steps, especially when one person washes while another rinses and puts items away.
A small routine board can show the agreed order of tasks and help household members understand how to leave the sink area after use.
For this project, create a compact board with a reusable writing surface. Use your Cricut machine to cut the headings and permanent design elements from compatible vinyl. You can then add a few practical steps, such as:
- Remove leftover food from plates and cookware.
- Separate items that require soaking.
- Wash with dishwashing detergent and clean water.
- Rinse according to the detergent instructions.
- Allow items to air-dry or dry with a clean cloth.
- Return dry items to their storage places.
The board should reflect how your household washes dishes rather than prescribe one method for every kitchen.
For example, someone who uses a dishwasher may want a separate reminder to scrape food from plates and load dishwasher-safe items according to the appliance instructions.
Materials: Cricut machine, suitable dry-erase board or compatible writable surface, permanent adhesive vinyl, transfer tape and dry-erase marker.
Keep the board near the sink but away from direct splashes and areas where cleaning products or hot cookware could damage it.
You can also leave a small space for household members to write down items that require special attention, such as a pan that needs soaking.
19. Appliance Accessory Storage Tags
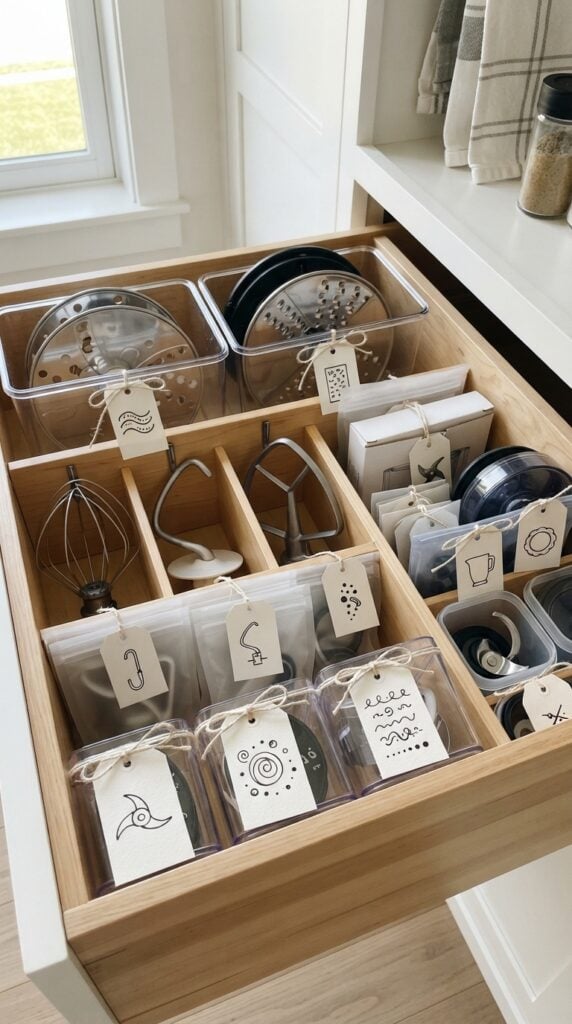
Kitchen appliances often come with several detachable parts that serve different purposes.
A food processor, for example, may have different blades and discs for slicing, shredding or chopping, while a stand mixer can have separate attachments for mixing, whisking and kneading.
When these accessories are stored together, it can become difficult to identify the correct part or remember which appliance it belongs to.
You can make storage tags with your Cricut machine by cutting small labels from durable cardstock or suitable tag material.
Add the appliance name and the accessory it identifies, then attach each tag to the outside of its storage pouch, box or organiser compartment.
For example, a food processor storage box could have separate tags for its slicing disc, shredding disc and chopping blade. A stand mixer organiser could have labels for its whisk, dough hook and flat beater.
Where an accessory has a specific model requirement, include the compatible appliance model so you do not accidentally use a part that does not fit.
Materials: Cricut machine, durable tag material, cardstock for protected inserts, cutting mat, compatible writing pen, hole punch and tag rings.
Keep sharp blades in their protective covers or designated compartments rather than attaching tags directly to them. It is also worth checking the appliance manual before storing attachments together, as some parts require particular handling or storage conditions.
Small offcuts can add names, initials or decorative details to handmade presents. Readers who enjoy personalised projects can also visit 33 Cricut Projects for Beginners That Make Great Personalized Gifts.
20. Kitchen Measuring Tool Reference Holder
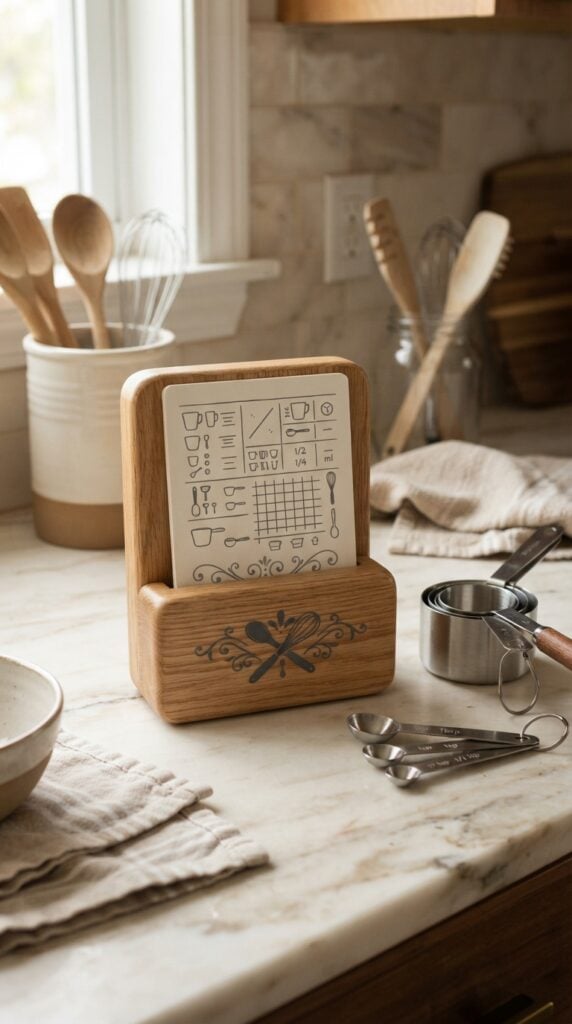
Measuring cups and spoons are useful for following recipes, but it can be inconvenient to search through a drawer whenever you want to check an equivalent measurement.
A small reference holder gives you somewhere to keep a printed conversion card alongside your measuring tools.
Start with a small wooden or acrylic card holder. Use your Cricut machine to personalise its exterior with a simple inscription such as Kitchen Measurements or Baking Reference.
Cut a separate card from cardstock and print or write common measuring equivalents on it. Keeping the information on a removable card means you can replace or update it without cutting a new vinyl design.
You could include the relationship between teaspoons, tablespoons and millilitres, alongside a note identifying whether your cup measurements follow the US customary or metric system. This distinction matters because a US cup is approximately 240 ml, while a metric cup is 250 ml.
Materials: Wooden or acrylic card holder, Cricut machine, permanent adhesive vinyl, transfer tape, cardstock, weeding tool and scraper.
Place the holder near your measuring cups and spoons, but away from water splashes and cooking heat.
Unlike a conversion board attached permanently to a wall, this holder allows you to remove the card when you want to check a measurement more closely or update the information.
Children can use suitable leftover craft materials for supervised paper projects and simple creative activities. 35 Easy Cricut Projects for Kids has more ideas to try together.
Personalised Kitchen Accessories and Useful Finishing Touches
21. Personalised Wooden Recipe Stand
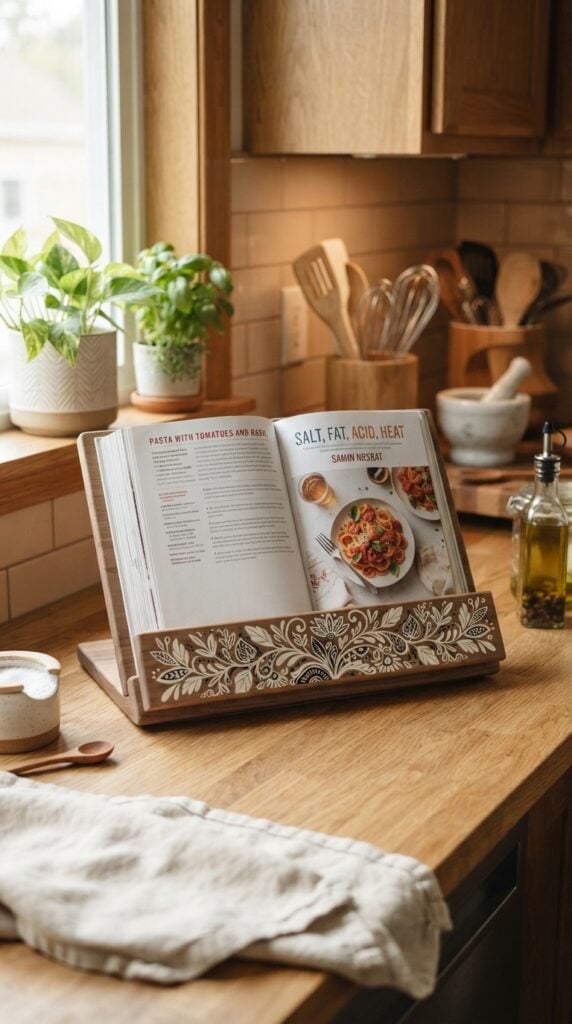
A personalised wooden recipe stand is a useful addition to a kitchen, especially when you prefer following a printed recipe while preparing a meal.
Rather than leaving a recipe book or card flat on the counter, the stand keeps it upright and easier to read.
You can use a Cricut machine to add a family name, a short cooking-related inscription or a simple botanical design that complements the wood.
Start with a plain wooden recipe stand that has a smooth, finished exterior. Create your design in Cricut Design Space, then cut it from permanent adhesive vinyl using the appropriate machine settings.
Weed the excess vinyl, apply transfer tape and position the design on the front or another suitable exterior area. Avoid placing vinyl where it could interfere with the stand’s support, moving parts or cleaning.
22. Custom Kitchen Tray Design
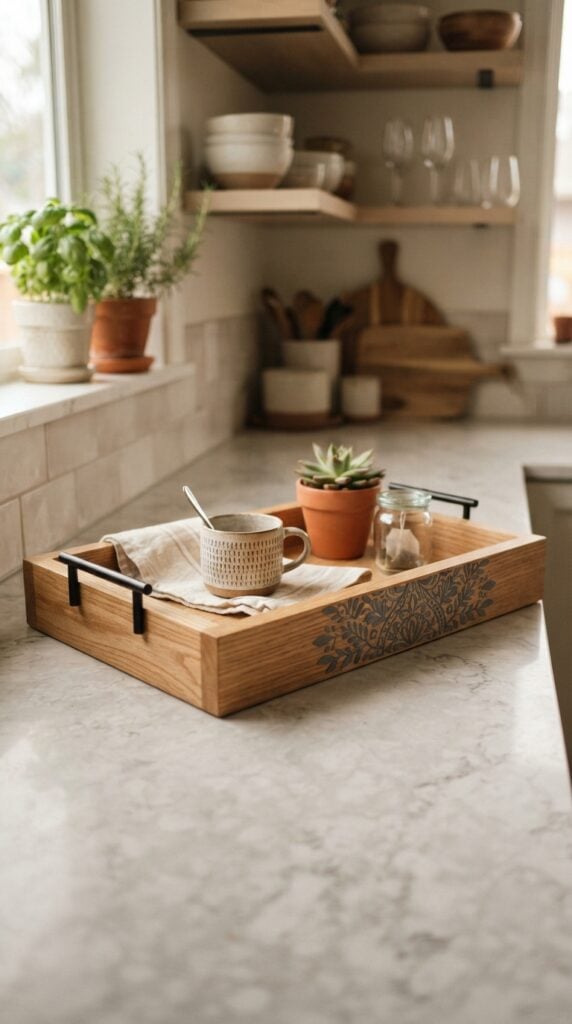
Personalising a serving tray is another way to make DIY kitchen projects with Cricut more individual. A plain tray can carry a family name, a short inscription or a decorative pattern that makes it suitable for serving guests or carrying drinks between rooms.
Measure the tray before creating the design so the lettering and decorative elements fit without crowding the surface.
Cut the design from permanent adhesive vinyl and apply it to a suitable non-food-contact area, such as the exterior sides or underside.
Do not place ordinary adhesive vinyl on the surface where food, cups or serving items will rest. Check the tray manufacturer’s care instructions too, as vinyl decoration may affect how you clean or wash it.
23. Custom Baking Stencils for Dessert Decoration
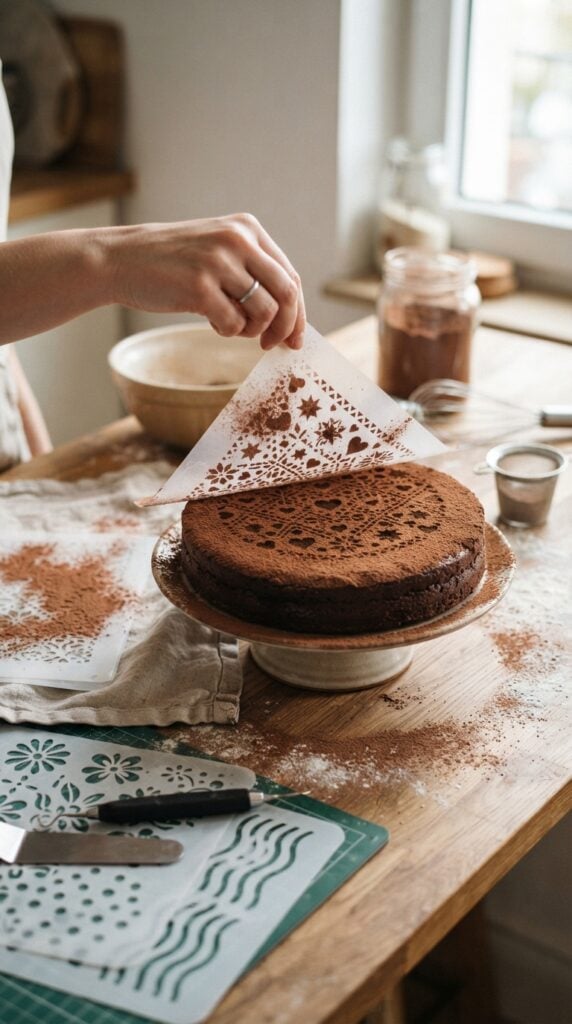
Custom baking stencils let you create decorative patterns on cakes, biscuits and other desserts without drawing each detail by hand. For example, a stencil with stars, dots, hearts or a simple geometric pattern can help you dust cocoa powder or icing sugar over a dessert.
Use Cricut Design Space to create a design with open spaces through which the powder can pass.
Cut it from a reusable stencil material that is explicitly suitable for direct food contact and compatible with your particular Cricut machine.
These two requirements matter: ordinary Cricut stencil vinyl and adhesive vinyl are not automatically food-safe just because they can be cut into a stencil shape.
Before using the stencil, make sure it is clean, dry and suitable for the food and decorating method.
Lay it gently on the dessert, apply a light layer of cocoa powder or icing sugar, then lift it carefully to reveal the pattern. Avoid pressing the stencil into soft icing, as this can disturb the surface.
Small pieces of seasonal cardstock and vinyl can be saved for festive labels, gift tags and decorations. More Christmas inspiration is available in 31 Easy Cricut Projects for Christmas.
24. Personalised Kitchen Utensil Holder
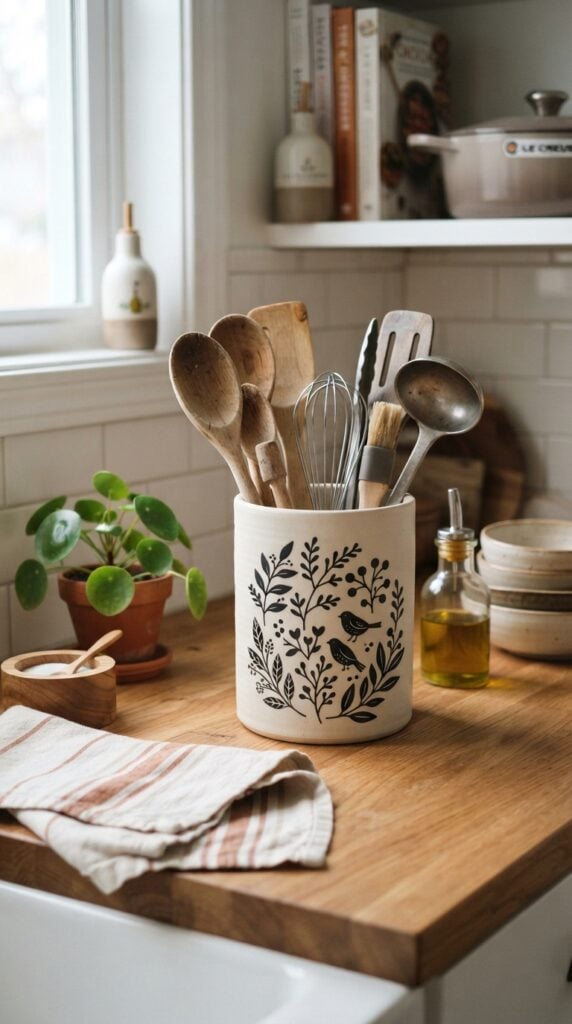
A personalised kitchen utensil holder can help distinguish your cooking space with a design that reflects your taste.
You could add a family name, a short inscription or a small illustration to a plain ceramic or suitably finished wooden holder. It also makes a practical Cricut kitchen accessory for keeping frequently used spatulas, wooden spoons and other utensils together.
Choose a holder with a smooth, clean exterior so the permanent vinyl can adhere properly. Create a design that fits the available space, cut it with your Cricut machine and apply it using transfer tape.
Keep the decoration away from the rim and interior, where utensils may rub against it, and avoid areas exposed to direct heat.
Check the manufacturer’s cleaning instructions because some holders may require hand-washing rather than dishwasher cleaning.
25. Custom Kitchen Cabinet Interior Reference Decals
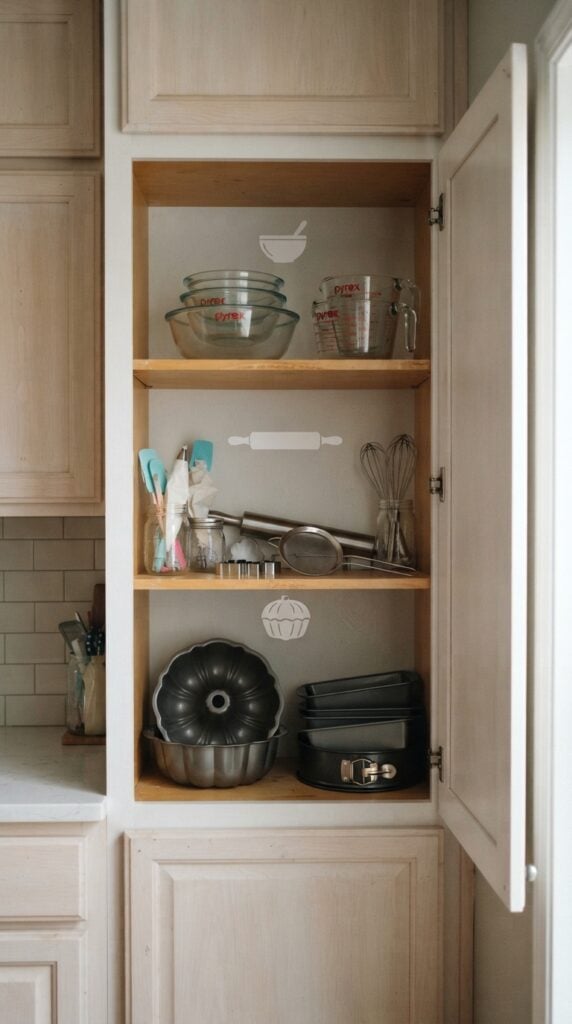
The inside of a kitchen cabinet can provide a convenient place for small storage reminders, particularly when you keep items that you do not use every day.
For example, a decal could identify where food processor attachments belong, show the arrangement of baking equipment or mark the storage location of less frequently used kitchen tools.
Measure the available cabinet space and create short labels or simple symbols in Cricut Design Space. Cut them from removable vinyl and apply them to a suitable smooth interior surface.
Keep the decals away from hinges, shelves and areas where stored items will repeatedly rub against them.
Use clear wording and lettering that remains easy to read when the cabinet door is open. This makes the labels useful as kitchen organisation aids without taking up space on the worktop.
Halloween-themed scraps can also be useful for small treat-bag decorations, labels and paper embellishments. Readers can find more seasonal projects in 33 Easy Cricut Projects for Halloween.
Application and Care Considerations
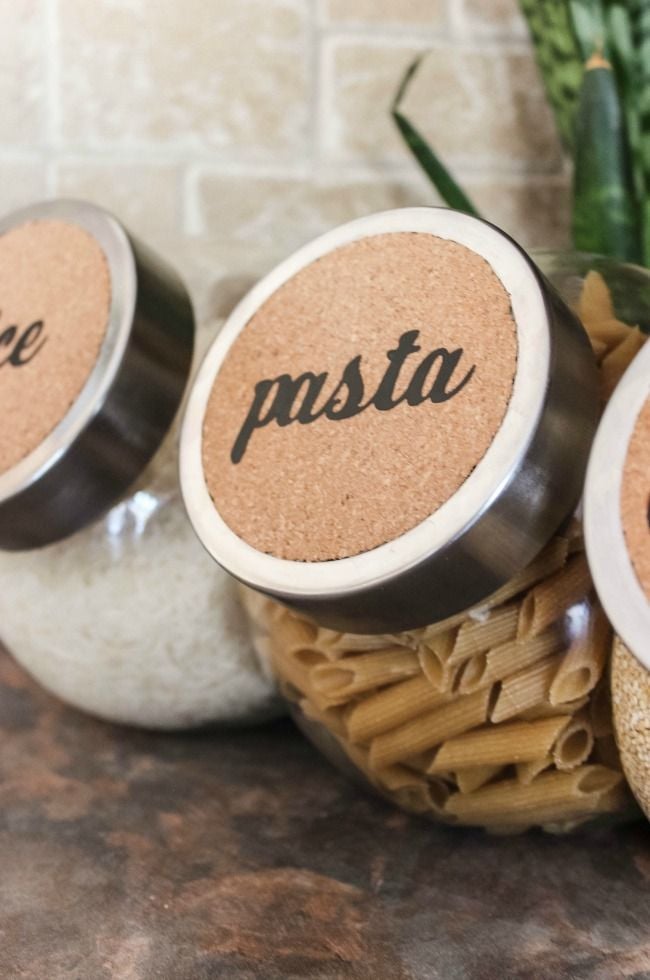
The finished appearance of a Cricut kitchen project depends on more than the design.
Surface preparation, cutting settings, vinyl selection and cleaning methods all affect how well the decoration adheres and how long it lasts. A few precautions can help prevent peeling, damaged designs and unsuitable material choices.
Clean and dry the surface before applying vinyl. Dust, grease, fingerprints and moisture can prevent adhesive vinyl from bonding properly. Clean the area with a suitable cleaner, remove any residue and allow it to dry completely. Avoid applying vinyl to a damp, oily or uneven surface.
Test the cut settings before making detailed designs. Different materials have different cutting requirements, even when they look similar.
Use the recommended material setting for your Cricut machine and make a small test cut before starting a detailed project. Check that the machine cuts through the material cleanly without cutting too deeply into the backing or damaging the mat.
Choose transfer tape that suits the vinyl. Transfer tape helps move a cut design from its backing paper to the project surface without disturbing the arrangement of the letters or shapes.
Standard transfer tape works for many adhesive vinyl designs, while some delicate or specialty vinyls require a lower-tack option. Check the vinyl manufacturer’s recommendations, particularly when working with small lettering.
Give permanent vinyl time to adhere before cleaning. Follow the manufacturer’s instructions for the specific vinyl and surface. Some permanent adhesive vinyl applications benefit from a 24–48-hour waiting period before washing, but this does not automatically make the finished item dishwasher-safe.
Only use a dishwasher when both the vinyl manufacturer and the item’s manufacturer confirm that the materials and surface can withstand that cleaning method.
Do not confuse waterproof vinyl with food-safe material. A vinyl product may resist water without being approved for direct contact with food. This distinction matters when decorating trays, utensils, baking accessories and other kitchen items.
Keep ordinary adhesive vinyl away from surfaces where food will be prepared, served or stored unless the manufacturer explicitly confirms its suitability for that intended contact.
Protect designs from heat and unsuitable cleaning conditions. Keep decorative vinyl away from hot cookware, open flames, oven interiors and surfaces exposed to direct heat.
Hand-washing may be more appropriate for decorated items, depending on the material and manufacturer’s instructions. Avoid abrasive sponges and harsh cleaning products that could lift or damage the design.
Taking these precautions helps keep Cricut kitchen accessories neat and functional while ensuring that the materials remain appropriate for their intended use.
Many scrap-material projects involve paper, adhesive vinyl or other supplies that do not require a heat press. 21 Cricut Projects for Beginners Without a Heat Press offers more ideas using alternative materials.
Conclusion
Cricut projects for your kitchen can be both decorative and useful when you choose designs that suit the way you cook, bake and organise your space.
A measurement board can make common conversions easier to check, personalised recipe accessories can keep instructions close at hand, and well-planned storage labels can help you locate kitchen tools more easily.
Start with a project that solves a small everyday problem, then select materials that suit the surface and how you intend to use the finished item.
With careful cutting, proper application and suitable care, your Cricut machine can help you create kitchen accessories that feel personal and serve a practical purpose.