Got cardstock waiting to be used? These Cricut cardstock projects turn simple sheets into personalised gifts, party details and products worth selling.
Cardstock can do more than decorate a scrapbook or become a greeting card. With a Cricut machine, it can be cut into gift-card holders, product packaging, table labels, paper displays and useful pieces for organising everyday items.
The challenge is choosing projects that look good but are also practical to assemble, sturdy enough for their intended use and suitable for the cardstock you have.
These Cricut projects using cardstock cover different occasions and purposes, from personalised gifts to small-business packaging and learning activities.
Each idea offers a clear use for the finished piece, along with details to consider before cutting so you can choose a project that fits your time, materials and skill level.
For more beginner-friendly ideas, check out 21 Simple Cricut Projects for Beginners That Actually Sell to find projects you can make with the goal of selling them.
Before You Cut: Choose Cardstock That Suits Your Project
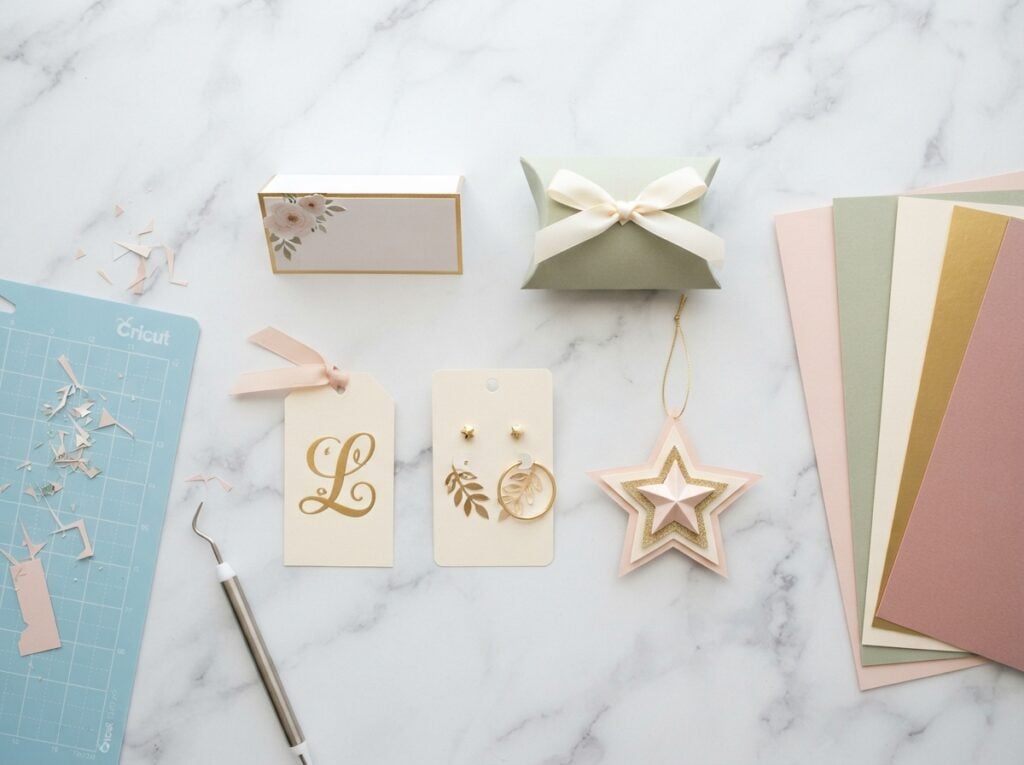
The cardstock that works for a gift tag may not work well for a standing table number or a small gift box. Choosing the right paper before cutting helps prevent torn designs, weak folds and wasted sheets.
1. Choose paper for what you are making
Making a flat gift tag? Ordinary cardstock may be enough. Making a small favour box that needs to hold sweets? Choose cardstock with enough body to hold its shape, and test the box before making several.
2. Watch out for tiny details
Small letters and thin shapes can tear when you remove them from the mat. For example, if the name on a gift tag has very thin letters, make the name larger or choose a simpler font.
3. Use the right cutting mat
Cardstock needs to stay flat while the Cricut cuts. A mat that has lost too much of its stickiness may let the paper move, while a very sticky mat can make delicate paper harder to remove. Choose a mat suitable for your cardstock and machine.
4. Score paper that needs to fold
A gift box or folded place card needs neat creases. Use a compatible Cricut scoring tool when your machine and project support it. Scoring helps the paper fold along a planned line instead of bending wherever it happens to give way.
5. Test before using a whole sheet
Cut a small shape from your chosen cardstock first. Check that the blade cuts through cleanly and that the paper comes off without tearing. This simple test can save you from wasting a full sheet on a design that doesn’t work well with that paper.
If you’re still learning how to use your machine, 22 Easy Cricut Projects for Beginners You Can Make at Home offers simple projects to practise with at home.
Easy Cricut Cardstock Projects
1. Folded Place Cards With Names
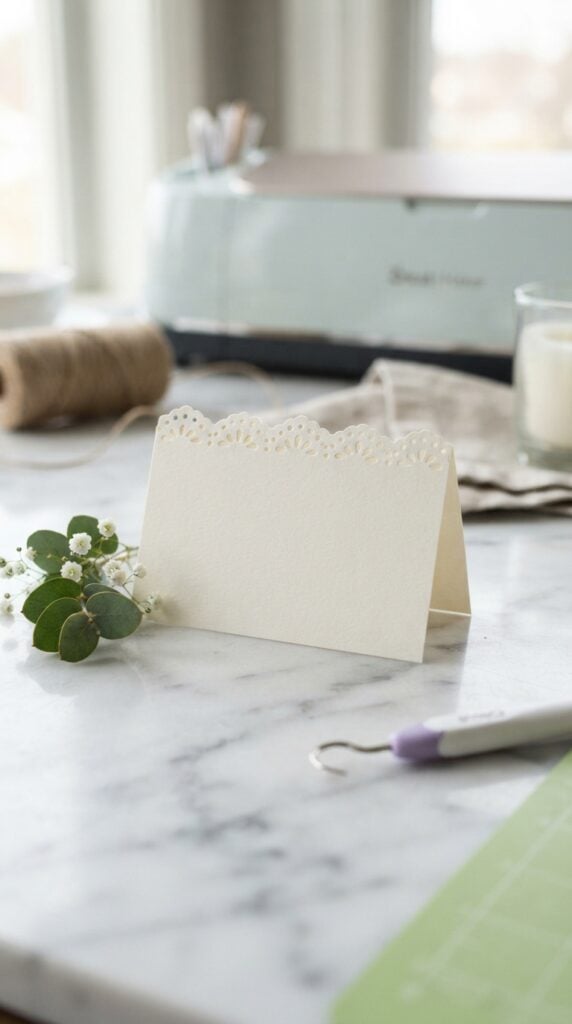
For a wedding reception, birthday dinner or family gathering, folded cardstock place cards can show each guest where to sit while adding a personal touch to the table.
Match the card colour to the event, then use the Cricut to cut the shape and write each guest’s name.
One detail that makes a difference: Start with the guest who has the longest name when choosing your font size. This helps you keep the names consistent without discovering later that one name no longer fits.
For a large guest list, use Cricut Design Space to duplicate the card layout and prepare each name, rather than designing every card from scratch.
If the cardstock tends to crack when folded, add a score line and use a compatible Cricut scoring tool. Cricut recommends scoring tools for making cleaner folds in cardstock.
2. Table-Number Stands
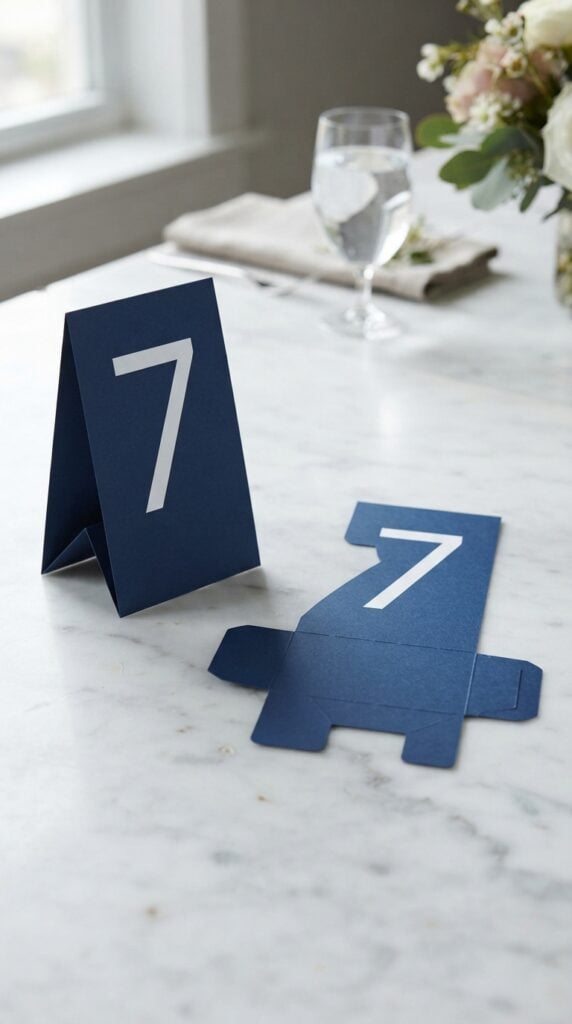
These easy Cricut cardstock projects can help guests find their tables at weddings, conferences and family celebrations.
Cut large numbers from cardstock and attach them to a folded stand or a separate support. Using a contrasting colour for the number makes it easier to spot against the table setting.
A detail worth checking: Test the stand on the actual table before making a full set.
A heavy number or a narrow base can cause it to tip, especially when the table is bumped. If the design needs extra support, use a wider folded base rather than adding more decorative layers.
3. Buffet and Food Labels
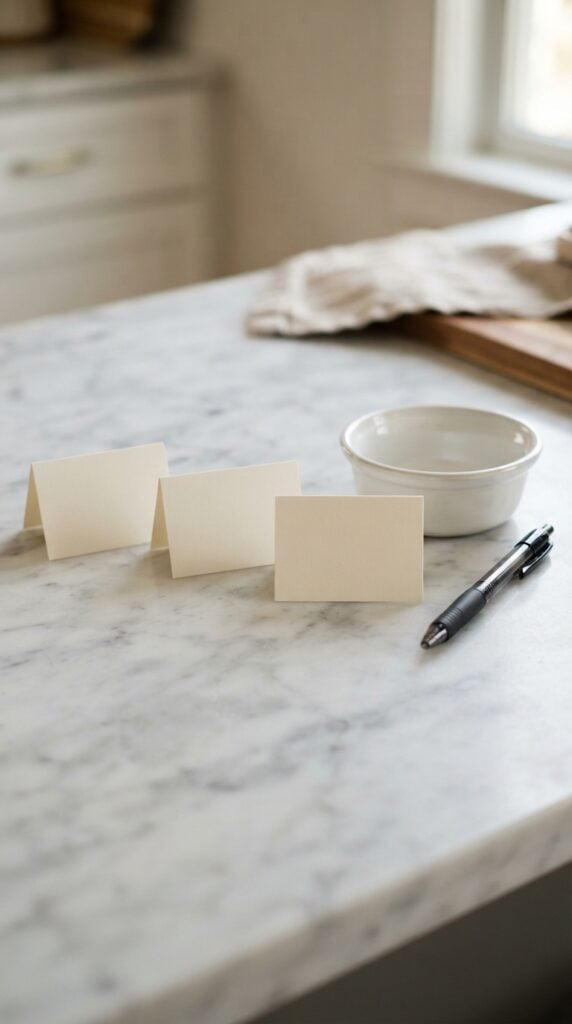
These easy Cricut cardstock projects help guests identify dishes at potlucks, weddings and family buffets.
Cut small folded labels for names such as vegetable rice, fruit salad or peanut-free option when that description has been verified by the person preparing the food.
Make the labels useful, not just pretty: Leave enough space to write a dish’s name clearly, and keep the label beside the correct serving dish.
If guests have food allergies, don’t rely on a decorative label alone to confirm that a dish is safe; check ingredients and prevent cross-contact with the food preparer.
For a buffet with many dishes, create one label layout in Cricut Design Space and change the text for each dish. This keeps the set consistent and makes replacements easier when the menu changes.
4. Gift-Card Sleeves
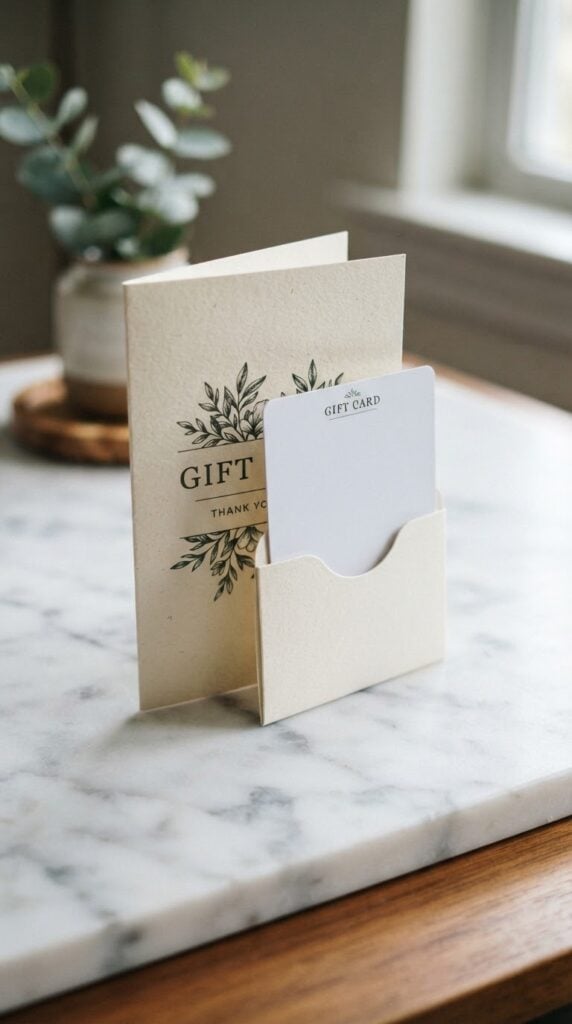
These easy Cricut cardstock projects give a store-bought gift card a more personal presentation for birthdays, graduations or thank-you gifts.
Cut a sleeve with a front pocket, then decorate it with the recipient’s name or a simple design that suits the occasion.
Avoid a frustrating fit: Gift cards can vary in size, and the sleeve also needs room for the card to slide in and out.
Measure the actual card and test the pocket with a spare piece of paper before cutting your chosen cardstock. If you are adding a pull tab, make sure it helps remove the card without bending it.
A small amount of double-sided tape can hold the pocket edges together without the dampness that too much liquid glue may add to paper.
5. Money-Gift Envelopes
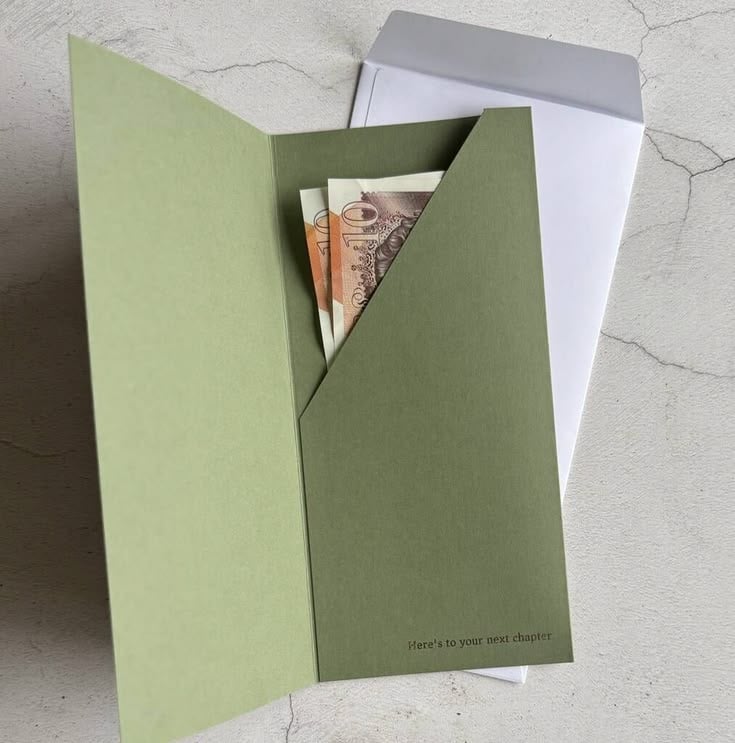
These easy Cricut cardstock projects are useful when giving cash for a wedding, graduation, birthday or holiday.
Instead of putting the money loose inside a greeting card, make a paper envelope with a flap that keeps the gift neatly contained.
Plan around the currency, not a guessed size: Banknotes differ in length and width, so measure the actual notes and leave enough space to insert and remove them easily.
If the envelope will hold several notes, allow extra room for the stack rather than sizing it for a single note.
For a cleaner finish, add a score line where the flap folds. Cricut explains that scoring helps reduce cracking by preparing the paper fibres for folding.
6. Small Favour Boxes
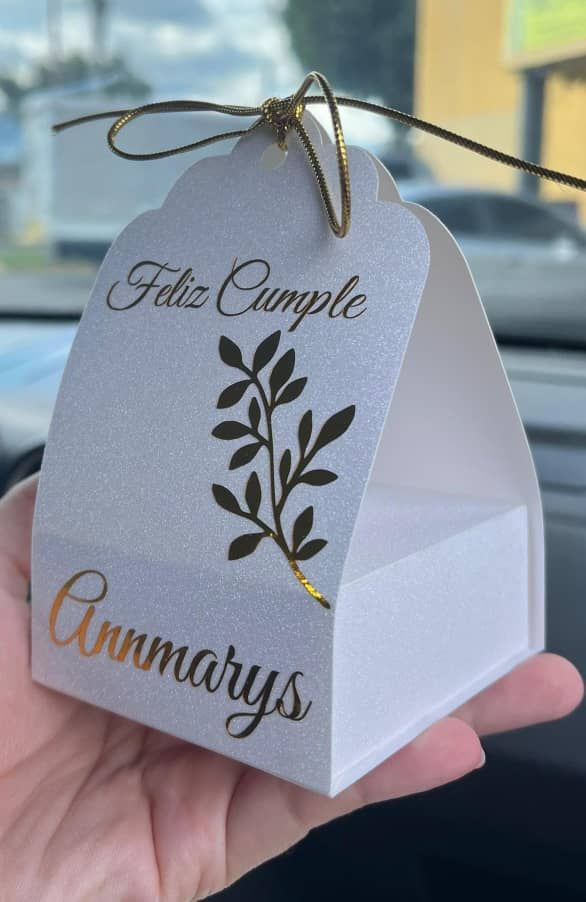
These easy Cricut cardstock projects can hold lightweight party favours such as wrapped sweets, small notes or tiny keepsakes for weddings, birthdays and community events.
Choose a box design that closes securely and suits the size of the item you want to put inside.
Test the box with its actual contents. A box that looks sturdy when empty may open or lose its shape once filled. Assemble one sample first, check that the tabs fit properly, and make sure the contents do not push against the lid.
Cardstock boxes are not automatically food-safe, so use an appropriate food-safe inner wrapper for unwrapped edible items.
If you are making a large batch, assemble one complete box before cutting all the pieces. That gives you a chance to spot sizing or closure problems before using the rest of your cardstock.
7. Paper Award Rosettes
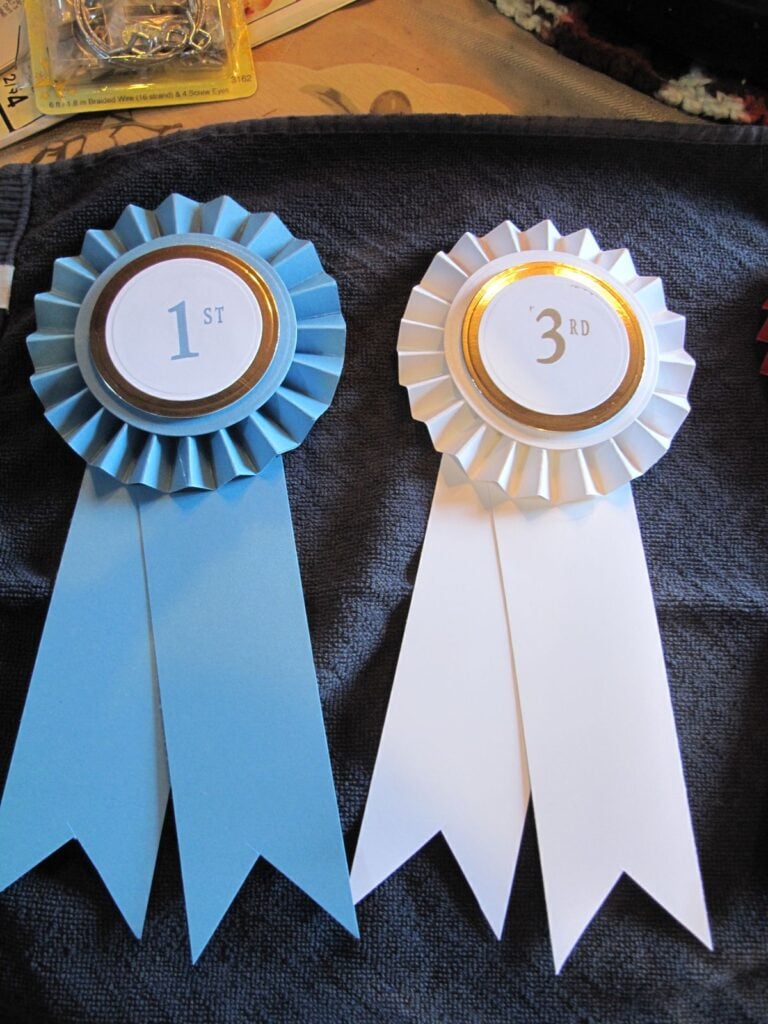
These easy Cricut cardstock projects can be used to recognise spelling-bee winners, school achievements, club participation or community volunteers.
Cut paper circles for the centre and strips for the pleated outer ring, then layer the pieces to create a badge with a ribbon-like finish.
Make the centre large enough for the message. A name, award title or short word such as “Winner” should be readable without squeezing the letters together.
Test the pleated ring with scrap paper first, because the finished rosette’s size depends on the width and number of folds. Attach a ribbon or badge backing securely, and use a safety pin only where it can be worn safely.
For more inspiration before choosing your next project, browse 19 Easy Cricut Projects for Beginners for additional ideas to try.
8. Product Belly Bands
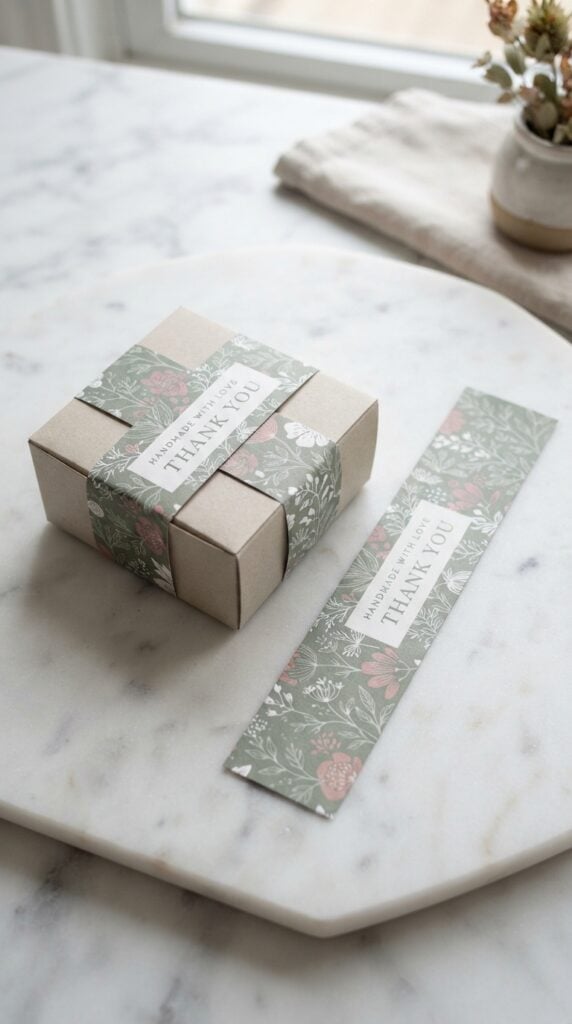
Product belly bands are paper strips that wrap around an item or its packaging.
These easy Cricut cardstock projects can give notebooks, folded fabric items, boxed gifts and handmade products a consistent branded look without requiring a fully printed box.
Measure the item in its final packed form. A band made for an empty box may become too tight once tissue paper or a product is added.
Wrap a strip of scrap paper around the finished package, mark where the ends meet, and use that measurement to plan your cardstock band. Keep the band snug enough to stay in place but loose enough to slide off without damaging the packaging.
For a small business, leave space for the product name or brand. Do not use the band to cover required safety, ingredient or other product information on the original packaging.
9. Earring Display Cards
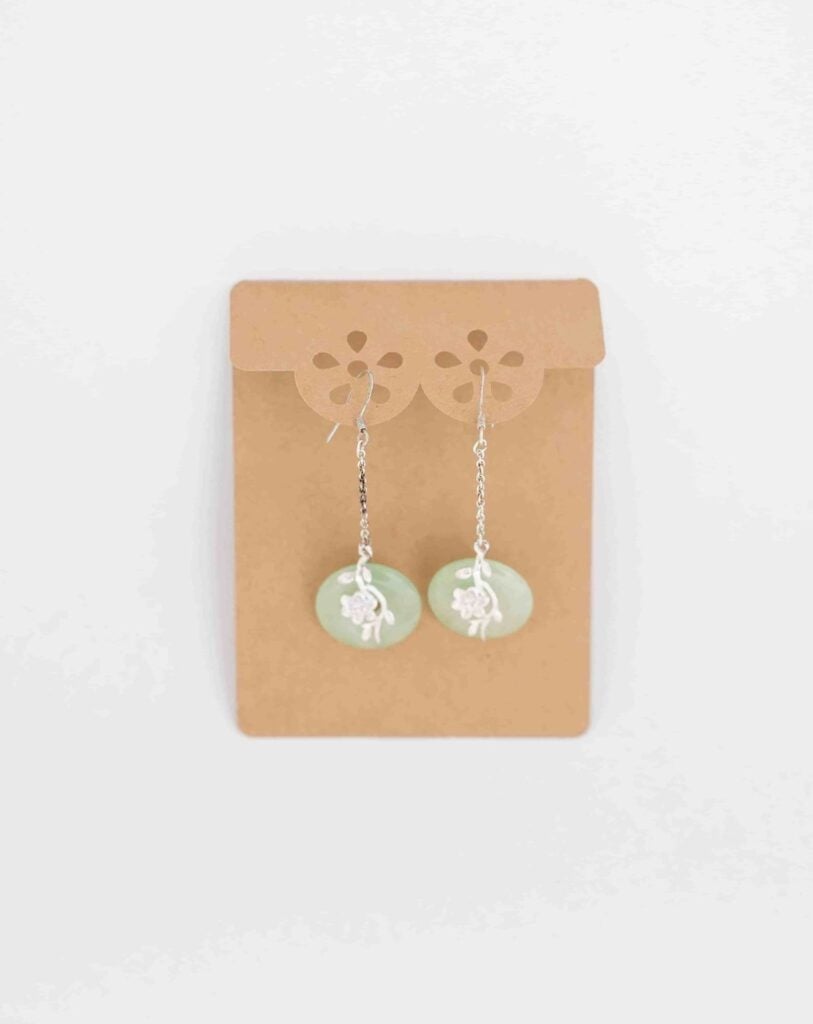
Earring display cards give handmade jewellery a neat way to be presented at craft fairs, in gift boxes or with customer orders.
Cut a rectangle or decorative shape from cardstock, then add holes for the earring posts or hooks.
Check the holes before making a batch. Place a pair of earrings on a test card to confirm that the holes are far enough apart and that the earrings hang without overlapping.
The holes should also sit far enough from the top and sides that the card does not tear easily. For heavier earrings, test a thicker cardstock or reinforce the hanging area.
If you sell jewellery, include your brand name on the card without crowding the space needed to display the earrings. Remember that the card is for presentation, not a substitute for protective packaging during shipping.
10. Necklace Display Cards
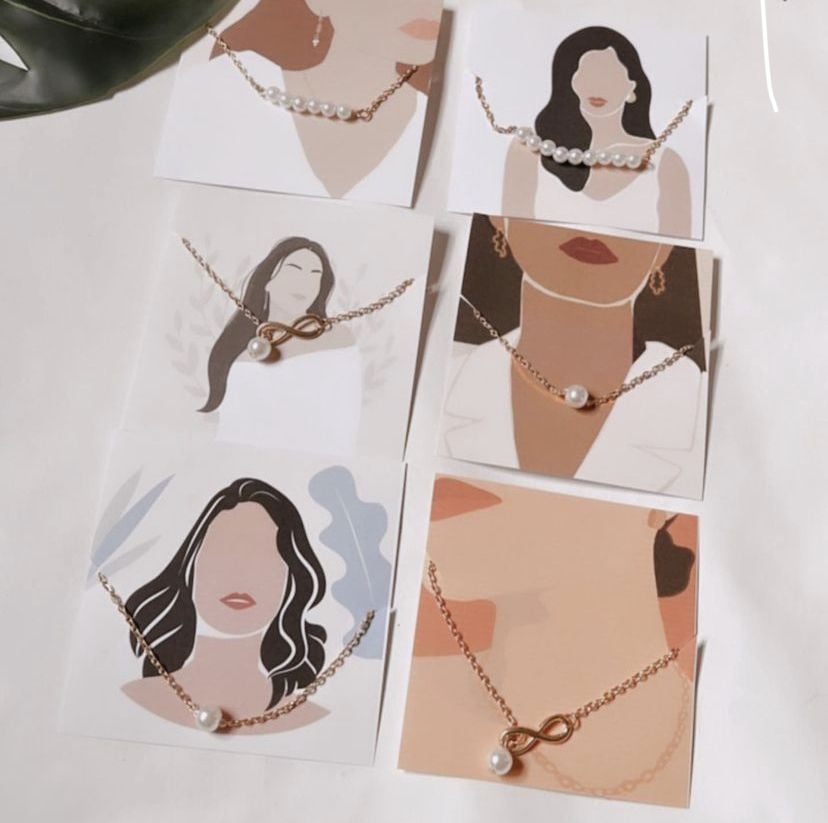
Necklace display cards help keep chains and pendants arranged neatly for product photographs, craft fairs or gift presentation.
Cut a card with small slots near the top for the chain, and add lower notches if needed to keep the necklace from slipping around.
Prevent the chain from sliding off. Test the design with the actual necklace before cutting several cards.
Slots that are too wide may release the chain, while cuts placed too close to the edge can weaken the card. A longer necklace may also need a larger card or a separate way to secure the chain.
For selling, choose a card size that fits your packaging and keeps the pendant visible. A decorative card looks good, but its main job is to keep the necklace in place.
11. Product-Care Insert Cards
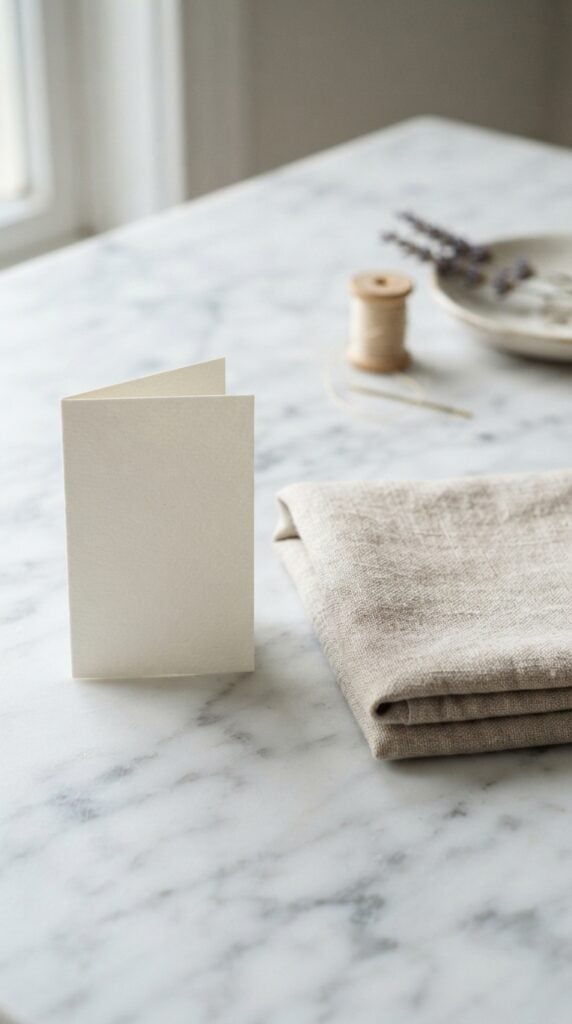
Product-care cards explain how customers should look after an item they have purchased.
These easy Cricut cardstock projects are useful for handmade clothing, accessories, jewellery and other products that need specific care instructions.
Write instructions that match the actual product. For example, a fabric item might need washing guidance, while jewellery may need advice about moisture or storage.
Check the maker’s material and care requirements rather than copying generic instructions that might damage the item. Keep the wording short and readable, and test any tiny text before cutting or printing a large batch.
A Cricut can cut the card shape and, with a compatible writing tool or suitable print-and-cut workflow, help prepare the design. For lengthy instructions, printed text is usually more practical than cutting each letter individually.
12. Order Thank-You Inserts
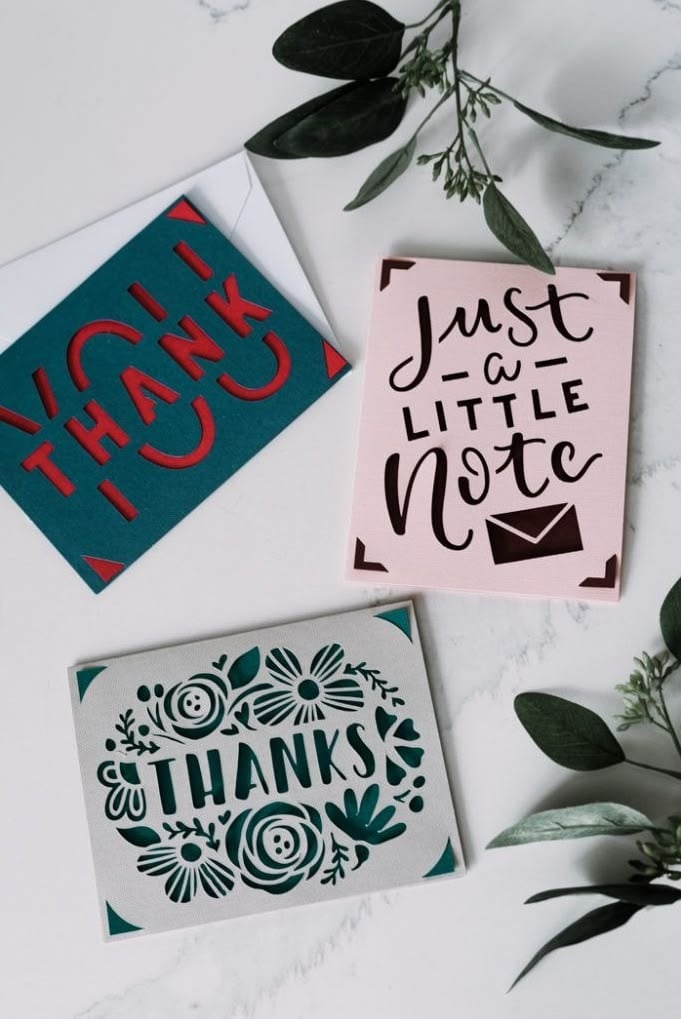
A thank-you insert gives a small business a chance to acknowledge a customer and invite them to return. Cut matching cardstock cards for orders, craft-fair purchases or handmade gifts, and leave room for a short personal note.
Make the card feel personal without adding unnecessary work. A simple message such as “Thank you for supporting my small business” is enough.
For repeat orders, you could include a relevant care reminder or your business contact details. If you add a discount code, check that it works and clearly state any conditions.
For larger batches, keep the main design consistent and write the customer’s name by hand when appropriate. This saves time while retaining a personal touch.
13. Decorative Envelope Closures
Decorative cardstock closures can add a finishing detail to invitations, greeting cards and gift envelopes. Cut small circles, hearts, initials or other shapes and attach them over the flap for presentation.
Choose the closure based on how the envelope will be used. A paper decoration can hold a flap down for a hand-delivered invitation, but it may not withstand handling during postage.
Use suitable envelope adhesive when a secure seal is needed, and keep decorative pieces flat enough that they do not interfere with the envelope’s closure or mailing requirements.
For a coordinated stationery set, cut the same motif in matching colours for several envelopes. Simple shapes are often easier to reproduce consistently than very intricate designs.
14. Drawer-Divider Labels
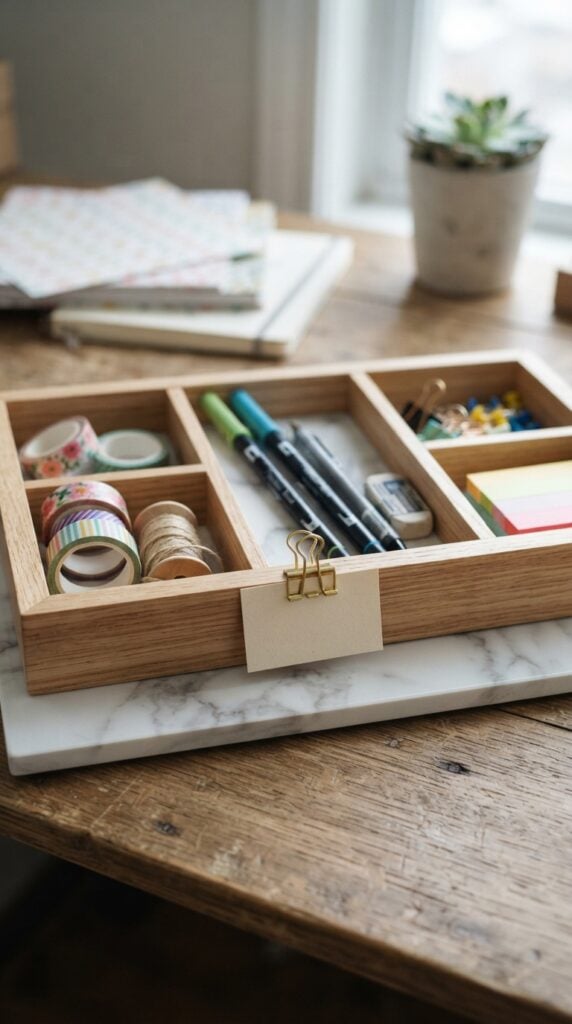
Keep craft supplies, stationery and office items easier to find with cardstock labels attached to drawer dividers.
Cut labels with the Cricut, then write or print names such as “glue sticks,” “markers” or “spare blades” so each item has a clear place.
Make the labels easy to update. If the contents of a drawer change often, attach each label with removable tape or a small clip instead of gluing it permanently. That way, you can rename the section without replacing the entire divider.
15. Paper Cable-Identification Tags
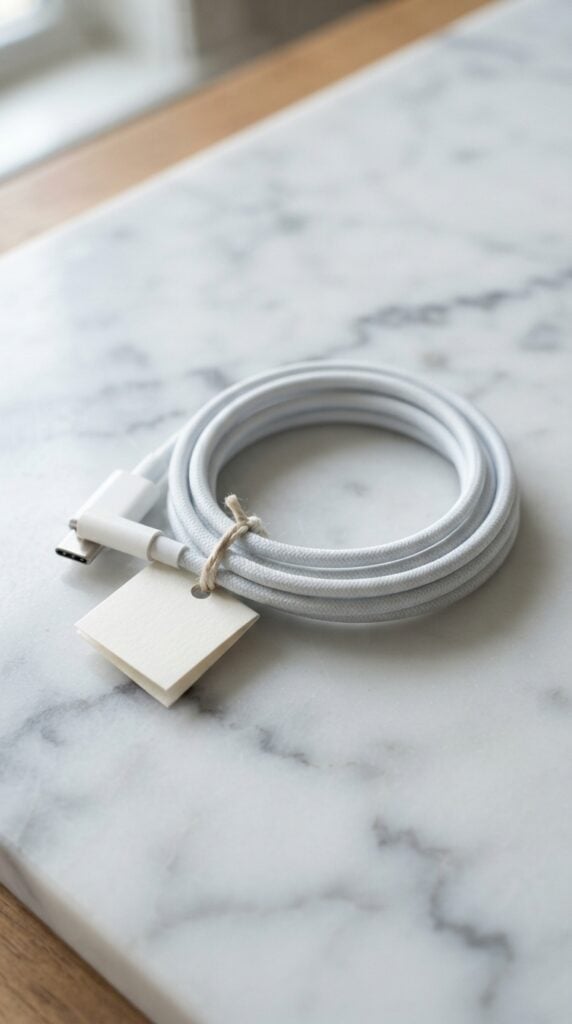
When several chargers and cables look alike, unplugging the wrong one can become frustrating. Cardstock tags can help identify cables for a printer, monitor, phone charger or other home-office equipment.
Cut small tags with space for a short name, then attach them around the cable using a paper loop or a suitable fastening method.
Label the equipment at both ends when cables run behind a desk, so you can identify the correct connection without tracing the whole length.
Keep paper tags away from hot surfaces, and never cover ventilation openings or electrical connectors.
16. Letter and Number Stencils
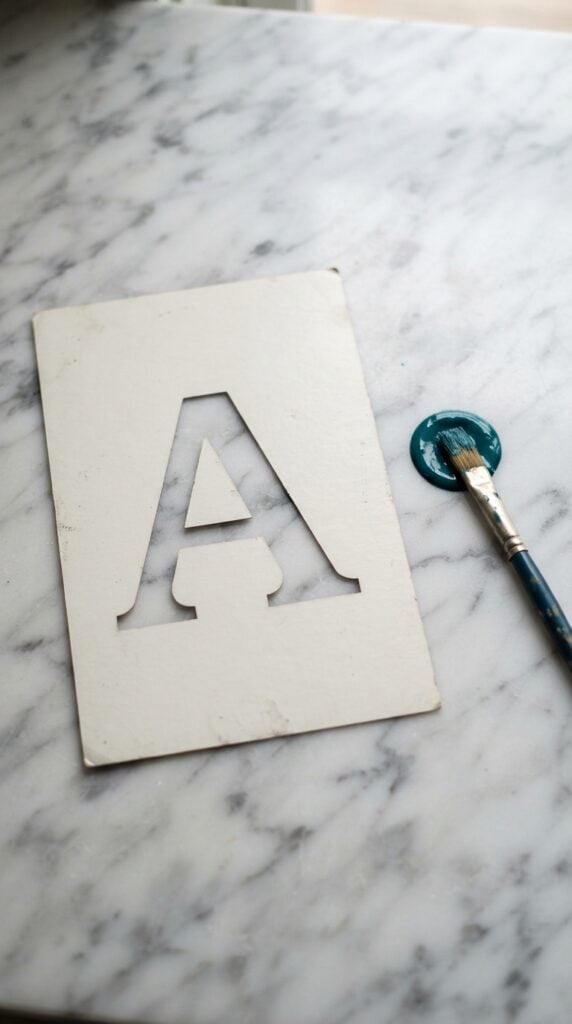
Cardstock stencils are useful for repeating large letters or numbers on classroom displays, handmade signs and school projects.
Cut a word or number with the Cricut, then use the remaining sheet as a guide for applying paint or drawing the same shape more than once.
Pay attention to letters with enclosed spaces. Letters such as A, O and P may lose their centres when cut as ordinary outlines. Choose a stencil-style font with connecting bridges, or keep the inner pieces and position them by hand when using the stencil.
Cardstock works best for light, dry use or a small number of applications. Repeated contact with wet paint can soften it, so a reusable plastic stencil is a better choice for frequent projects.
17. Matching-Game Cards for Children
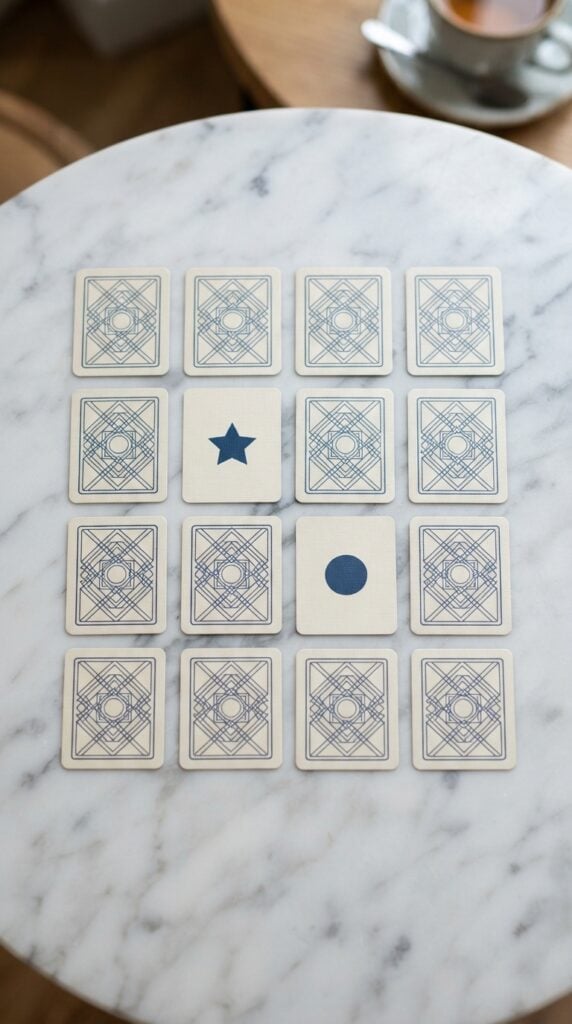
Make a matching game with cardstock pictures, letters, numbers or shapes for children to use at home or in a classroom.
Cut two copies of each design and place them face down so players can turn over cards to find matching pairs.
Keep the pairs consistent. Use the same size and backing colour for every card so children cannot identify a match simply by looking at the back. For younger children, choose large, familiar pictures and avoid tiny pieces that could become a choking hazard.
Cardstock is suitable for occasional play, but cards handled frequently may bend or wear. For a longer-lasting game, use a more durable material or protect the finished cards appropriately.
Want to turn your crafting skills into extra income? Explore 25 Easy Cricut Projects to Make and Sell for Extra Money for more products you could create and sell.
18. Layered Paper Shadow Boxes
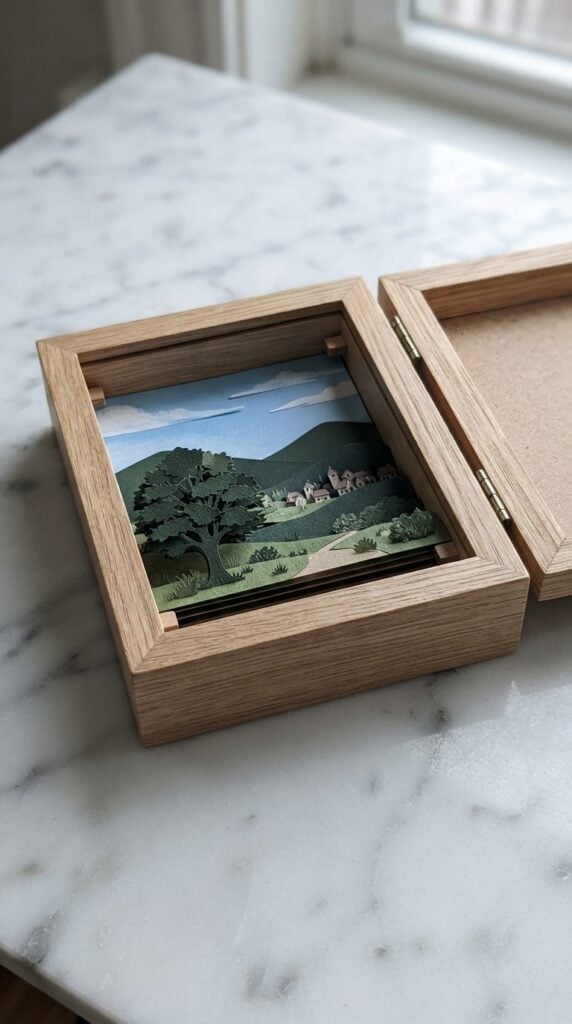
Layered cardstock shadow boxes create depth by placing several cut paper scenes at different distances inside a deep frame.
You could make a woodland scene, a city skyline or a family-themed display using separate layers for the background, middle ground and foreground.
Plan the layers before cutting. For example, a mountain scene could have a sky at the back, distant mountains in the middle and trees at the front. Leave enough open space in each layer for the shapes behind it to remain visible.
Small foam adhesive squares or paper spacers can separate the layers, but check that the frame has enough depth to close properly.
19. Miniature Paper Furniture for Models
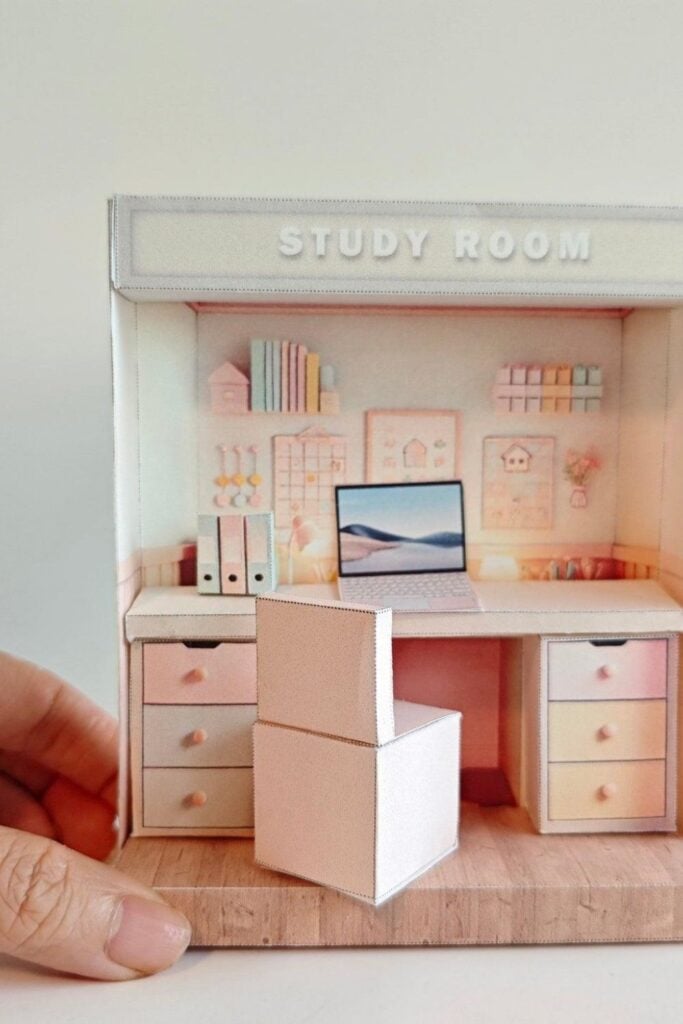
Cardstock furniture can add desks, chairs, shelves or beds to a dollhouse scene, school diorama or model room without requiring wood or plastic pieces.
Cut the flat shapes, fold the tabs and assemble the pieces according to the design.
Start with furniture that has simple sides and clear folds. A tiny chair with several narrow legs may be harder to assemble and less stable than a simple bench or bookshelf.
Check the finished dimensions against your model before cutting, and remember that cardstock furniture is decorative rather than designed to support real weight.
20. Folded Desk-Calendar Stands
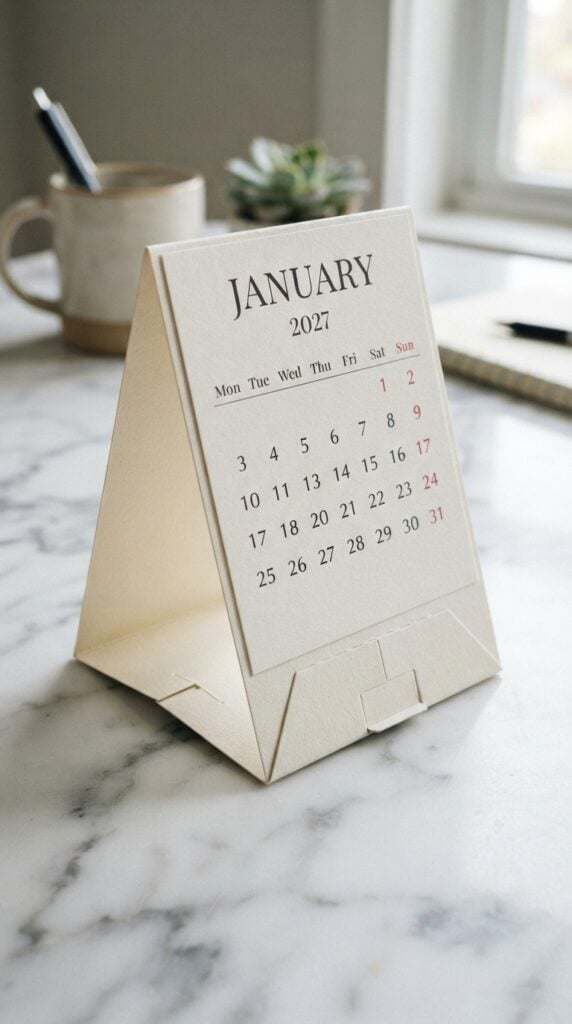
Create a cardstock stand for a small calendar, daily reminder cards or a rotating set of motivational messages.
The Cricut can cut the stand shape and score the folds, while the calendar pages can be printed or cut separately.
Design the stand around the pages it will hold. A thick stack of cards needs a deeper support than one lightweight sheet.
Make a paper prototype first and check that the stand stays upright when you turn a page. This helps you adjust the base and angle before using your preferred cardstock.
21. Layered Monogram Gift Tags
Sometimes the smallest detail makes a gift feel more personal. A gift tag with the recipient’s initials, cut from contrasting cardstock layers, adds that finishing touch to birthday presents, wedding favours and handmade-product packaging.
For example, place a gold initial over a kraft-paper tag for a simple, coordinated look.
To make this project, cut the tag base first, then cut the initial as a separate piece. In Cricut Design Space, check the lettering at its final size before cutting.
Thin strokes and tiny decorative details can tear during weeding, leaving you with letters that are difficult to assemble neatly. Choose a bold font and use foam adhesive for a raised effect or regular adhesive for a flatter finish.
One detail worth checking is the hanging hole. Leave enough cardstock around it to prevent the tag from tearing when tied to a gift.
If you are making several tags, save your layout and change the initials or names for each recipient. This makes personalised batches easier to produce without starting the design again.
22. Personalised Coupon Booklets
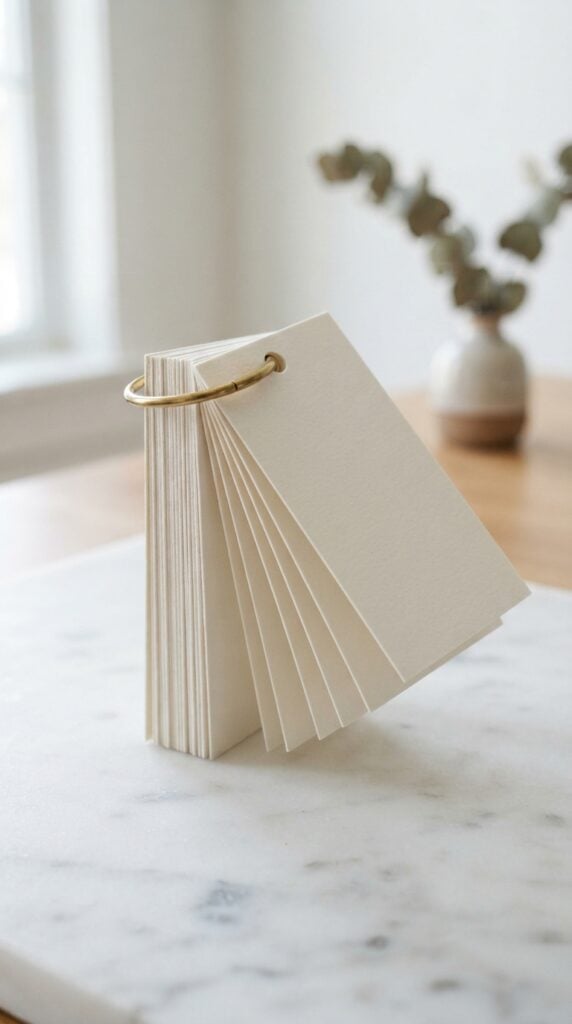
What can you give someone who would appreciate your time more than another purchased item?
A personalised coupon booklet lets you offer specific favours, such as preparing breakfast, helping with a chore, planning a movie night or letting a child choose the next family activity.
The value comes from making each promise thoughtful and realistic.
Cut a cardstock cover and matching voucher pages, leaving enough room for the offer and any conditions.
Instead of writing “One special treat,” for instance, use “One movie night with your choice of film.” Clear wording helps the recipient understand exactly what the coupon entitles them to receive.
Think about how the pages will be used. Small binder rings allow the coupons to turn freely, while carefully made perforations can make individual vouchers easier to remove.
Test the arrangement with scrap paper before cutting your final cardstock. Keep the cover slightly larger than the inner pages to protect their edges, and include an expiry date only if the offer genuinely has one.
For projects that use heat-transfer designs, explore 23 Cricut Projects for Beginners Using Vinyl to see what you can make with different types of vinyl.
23. Simple Pop-Up Cards
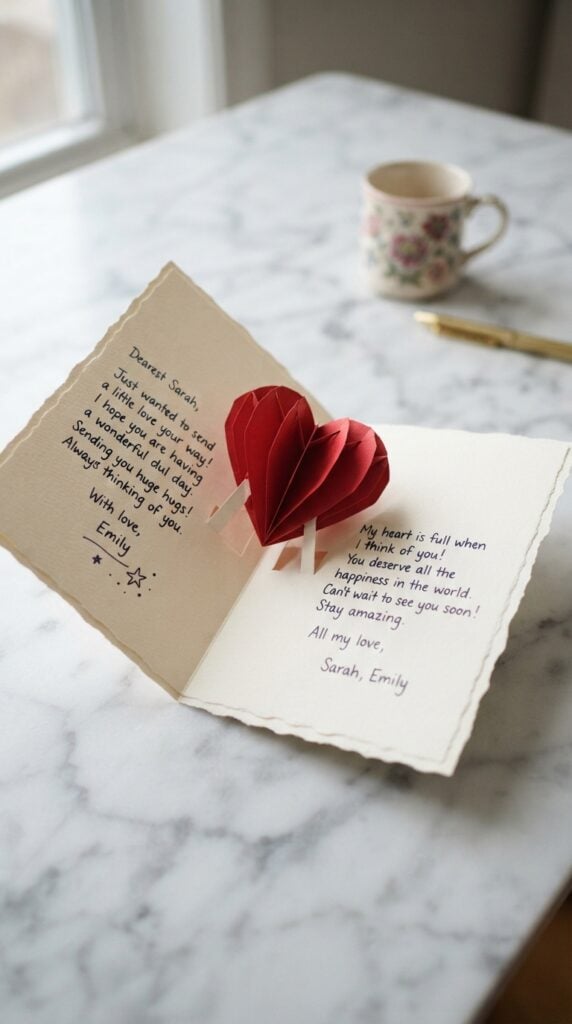
The best part of a pop-up card is the moment it opens and a cake, heart or other shape rises from the centre.
This extra dimension makes a handmade birthday or anniversary greeting feel more considered than a flat card, even when the design itself is simple.
A basic V-fold mechanism is a useful place to start. Cut the card base and the pop-up shape separately, then follow the design’s fold lines to attach the shape so it rises when the card opens.
If you are using Cricut scoring tools, check that the score lines are set correctly; a line intended for folding should not cut all the way through the cardstock.
Test the movement before adding decorations. Open and close a paper prototype several times to see whether the shape rises evenly and folds down without buckling.
Thick cardstock, bulky embellishments or a shape positioned too close to the card’s edge can prevent it from closing properly. Check the finished size against the envelope before completing the design.
24. Layered Hanging Ornaments
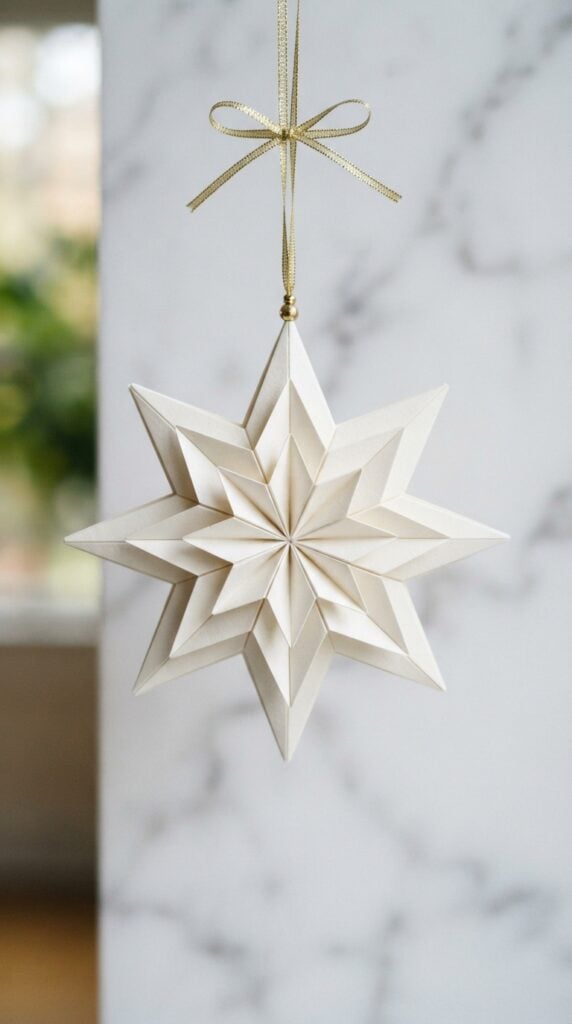
A flat cardstock star can become a dimensional decoration with just a few carefully joined layers.
Stars, hearts, snowflakes and geometric shapes work well for Christmas trees, party displays and classroom decorations. You can also fold matching shapes down the centre and join their halves to create an ornament that looks different from the front and side.
For these Cricut projects using cardstock, choose a design that will hold its shape after cutting and assembly.
Very narrow points and delicate cutouts can tear when removed from the mat or handled during construction. If you are making several ornaments, test one design first to see whether your chosen cardstock is sturdy enough.
Pay attention to where the ornament will hang. A small hole placed too close to the edge can rip under the weight of the decoration. Leave enough material around the opening or reinforce it with another cardstock layer.
Thread ribbon or string through the hole and test the ornament before hanging it. Keep adhesive away from visible edges, and allow joined layers to dry before displaying the finished piece.
25. Mini Menu Cards
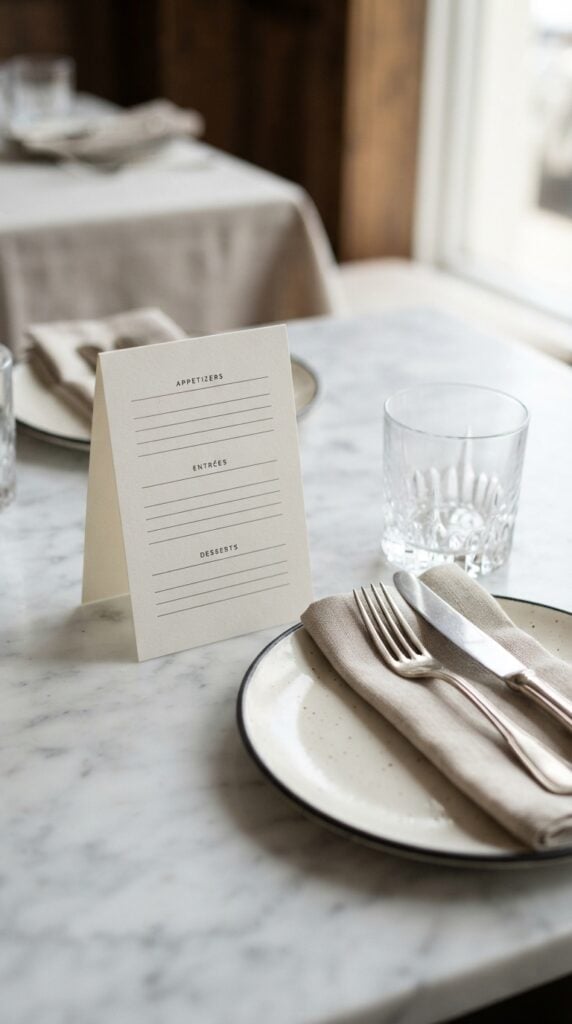
When guests arrive at a dinner party or celebration, a menu card gives them a quick way to see what is being served.
Folded cardstock makes a simple standing menu for a family dinner, wedding reception, church gathering or small catering event. Flat versions can also be placed beside individual plates.
Before cutting, decide which information guests need. A dinner menu might list starters, main courses, side dishes and dessert, while a catered event may also require allergen details.
Choose a readable font, leave space between sections and resist filling every empty area with decorative elements. If the menu contains several lines of text, printing the wording and using the Cricut to cut the card may be more practical than cutting individual letters.
Check the card on an actual table. Text that looks clear on your computer screen may be too small when viewed from a seated position. Make one sample, fold it and place it beside plates and glasses to check its height and stability.
Verify ingredient and allergen information against the dishes being served so the card provides accurate information.
26. Paper Photo Corners
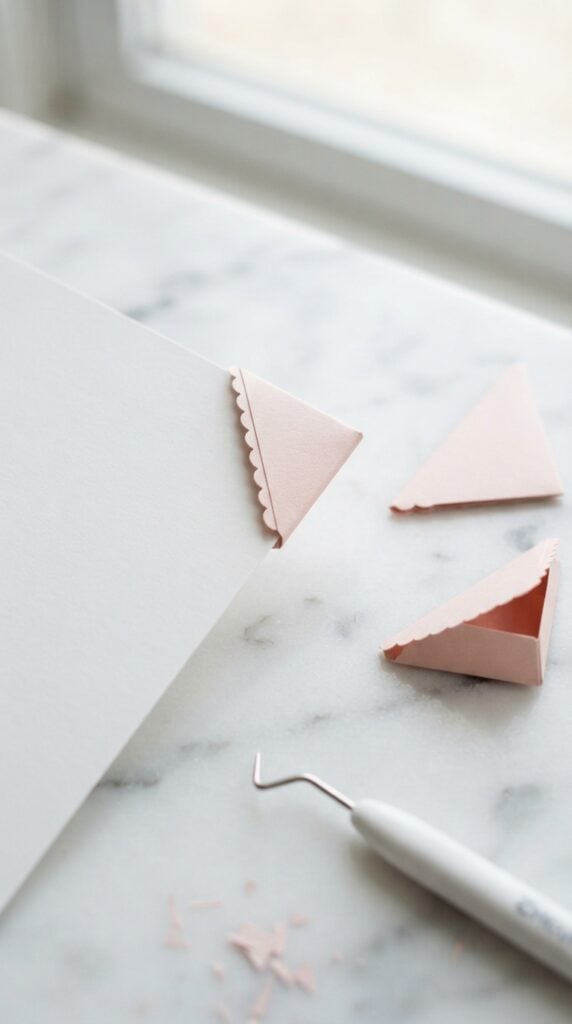
Have you ever wanted to rearrange a scrapbook photo without peeling adhesive from its back? Cardstock photo corners offer a simple alternative.
Small paper pockets hold the corners of a photograph in place, making them useful for memory albums, family-history displays and school projects where pictures may need to be removed later.
Cut four matching corner pieces and assemble them into pockets that grip the photograph.
The opening needs to be wide enough for the photo to slide in without bending, but snug enough to stop it from slipping out. Use a spare photo or a paper rectangle cut to the same dimensions to test the fit before cutting a full batch.
The depth of each pocket matters. Deep corners can cover important details in the image, while shallow ones may not hold the photo securely.
Adjust the design and test it again before making the remaining pieces.
For photographs you want to preserve for years, use materials and adhesives specifically suitable for photo storage rather than assuming every cardstock or glue is appropriate.
27. Family-Tree Name Displays
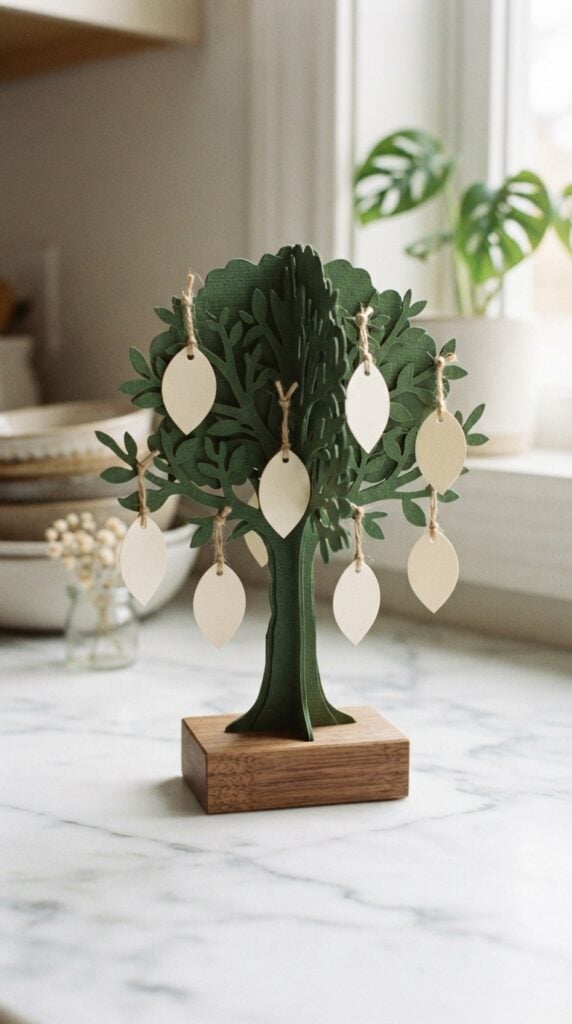
A family-tree display can become confusing when several generations and dozens of names need to fit on one backing.
Planning the relationships before cutting anything makes this project easier to assemble and helps the finished display tell the family story clearly.
Start by sketching the tree and deciding where each generation belongs. Cut the tree silhouette from cardstock, then create separate leaves, circles or nameplates for individual relatives.
Check names and relationships against your family records before making the final cuts, particularly when several branches share similar names.
Let the longest names guide your layout. A leaf that fits “Ada” may not be wide enough for a longer name, and lettering that looks attractive on screen can become difficult to read when cut too small.
Arrange paper templates on the intended backing first, leaving enough space between branches and labels.
You can use different cardstock colours to distinguish generations, with a small key explaining what each colour means. Once the layout is readable and every name fits, cut and assemble the final display.
You can also try 25 Easy Cricut Projects Using Cricut Infusible Ink for ideas that use Infusible Ink to create designs on compatible blanks.
How to Get Cleaner Cuts With Cricut Projects Using Cardstock
Ragged edges, torn corners and cardstock that lifts off the mat can waste an otherwise good sheet. Before changing your design or cutting everything again, check these common causes.
- Test unfamiliar cardstock first. Cut a small shape using the same settings you plan to use for the full project. Adjust the material setting if the cut does not go cleanly through the paper.
- Choose the right mat grip. A mat that grips too firmly can make delicate cardstock harder to remove, while a mat that has lost its grip may let the paper shift during cutting. Secure the sheet without stretching or bending it.
- Check the blade and mat. Paper scraps around the blade can interfere with cutting, and dust or loose fibres on the mat can affect how well the cardstock stays in place. Remove debris before starting another cut.
- Make delicate details easier to cut. Tiny letters, narrow bridges and intricate shapes are more likely to tear or fail to release cleanly. Enlarge fragile elements or simplify the design when necessary.
- Remove the mat from the cardstock carefully. Instead of pulling the paper straight up, turn the mat face down and gently peel the mat away from the cardstock. Supporting the sheet as you release it helps reduce curling and bending.
A little testing before cutting the full design can save both cardstock and time, especially when making several copies of the same project.
Can You Sell Cricut Projects Using Cardstock?
Yes. Cardstock projects such as gift tags, event place cards, favour boxes, menu cards and personalised invitations can be sold at craft fairs, through event orders or as part of a small business.
However, a product that looks inexpensive to make may leave little profit once all the costs are included.
Calculate more than the price of the paper. Include adhesive, ink or printing, packaging, failed cuts, assembly time, machine maintenance and any selling or payment-platform fees.
Your time matters too: a detailed item that takes 20 minutes to assemble has a different cost from one that takes two minutes.
Test a small batch before buying supplies in bulk. Make one or two products, record the materials and time required, and check whether customers are willing to pay enough to cover your costs and leave a reasonable profit.
This also helps you identify designs that are too fragile or time-consuming to produce consistently.
Before listing your work for sale, check the commercial-use terms for any purchased cut files, fonts and artwork. Being able to cut a design with your Cricut does not automatically give you permission to sell products made from it.
Choose designs whose licence permits your intended use, and check whether any restrictions apply to the finished products.
Choose Your Next Cricut Project
Cardstock can do more than make greeting cards. With the right cut settings and a little planning, you can turn it into gift packaging, event stationery, personalised keepsakes and useful items for home or business.
The best place to start is with a project that serves a clear purpose, whether that means making your next celebration easier to organise or creating a product you can produce consistently.
Choose one of these Cricut projects using cardstock, make a sample and check the finished result before cutting a full batch.
Pay attention to the small details, such as fold lines, lettering size and how the pieces fit together, because these often determine whether a project looks polished or needs reworking.
Which cardstock project will you try first? Start with the one you have a real use for, and let your first finished piece guide what you make next.