What can you make with your Cricut this Christmas? Get inspired by 31 easy Cricut projects for Christmas, from personal gifts to festive creations.
One thing worth knowing before making Christmas crafts with a Cricut is that the machine is not food-safe.
It cannot cut fondant or similar materials, even though it can help create the labels, gift boxes and decorative packaging used for homemade Christmas treats.
That difference is important when choosing projects, especially if you are preparing edible gifts.
There are also plenty of ways to use a Cricut beyond putting Christmas designs on mugs and T-shirts. Paper structures, personalised gift accessories, food packaging, family keepsakes and table details all offer different possibilities.
These 31 easy Cricut projects for Christmas focus on practical things to make for the season, with attention to the materials and machine capabilities each project requires.
Handmade presents often feel more meaningful when they reflect the recipient’s personality. 31 Easy Cricut Projects for Gifts has more ideas for creating personalised gifts for different occasions.
Why Your Cricut Cuts May Not Look Like the Design on Your Screen
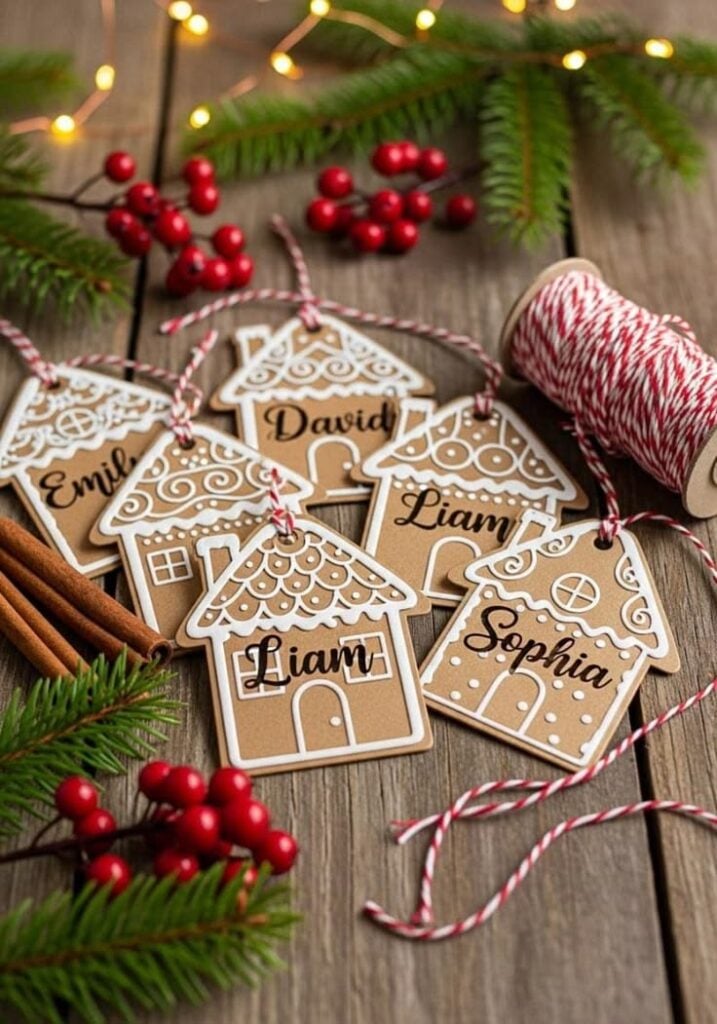
Before starting a Christmas project, remember that the design on your screen is not always a guarantee of how the finished cut will look. The material, blade condition and cutting settings all affect the result. A few checks can prevent common problems:
- Choose the correct material setting: Cardstock, vinyl and paperboard require different settings.
- Check the blade: Paper fibres and adhesive residue can affect cutting, so inspect the blade before starting.
- Secure the material: Make sure it is firmly attached to a suitable cutting mat to prevent shifting.
- Check small details: Very tiny letters and narrow shapes may tear, especially on thicker materials.
- Use Attach when necessary: This keeps separate design elements in their intended positions on the cutting mat.
A small test cut is also worth doing before committing a full sheet of material to any project.
Teenagers who enjoy custom accessories and personalised belongings may find something they like in 30 Cute Cricut Projects for Teen Girls.
Easy Cricut Projects for Christmas
1. DIY Christmas Shadow Box
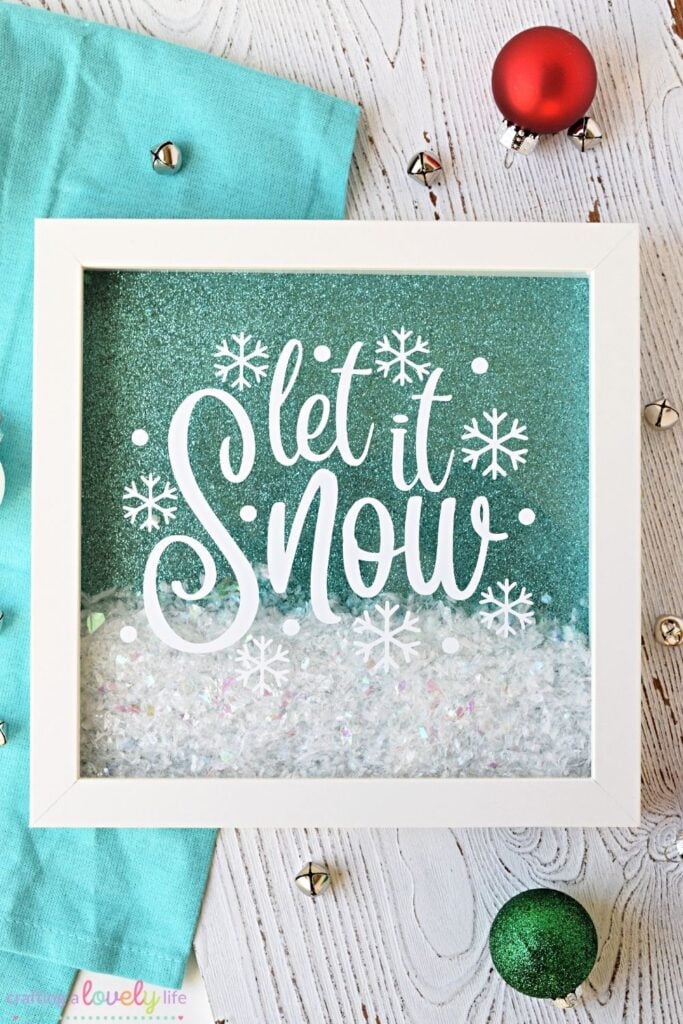
A Christmas shadow box is a framed picture made from several layers of cardstock arranged to create a 3D scene. A Cricut makes it easier to cut the small shapes and matching layers needed for the design.
How to make it:
Choose a Christmas scene with a few clear layers, such as a snowy village, a Christmas tree surrounded by gifts or a winter landscape. Download a layered shadow box SVG, then check that its dimensions match your frame before cutting.
Cut the layers from different cardstock colours. Place foam adhesive strips or small spacers between selected layers to create depth, then arrange them inside the shadow box frame. Use glue where the pieces need extra support.
Materials: Cricut machine, cardstock, layered shadow box SVG, deep shadow box frame, foam adhesive strips and glue.
Why it is a good Christmas project:
A shadow box can become a Christmas display for a mantel, shelf or side table, and it can be kept and brought out again each year. It also makes a thoughtful handmade gift because the scene can be personalised with a family name, a special year or a favourite Christmas setting.
2. Layered Paper Christmas Tree

Layered paper Christmas trees are made by stacking cut cardstock shapes to create a decorative tree with visible depth. You can use different shades of green or combine green with gold and white for a festive finish.
How to make it:
Choose a layered Christmas tree SVG with separate pieces designed to fit together. Upload the file to Cricut Design Space and cut the shapes from your selected cardstock.
Assemble the pieces according to the template, using glue or foam adhesive where needed. Add a small paper star at the top to complete the tree.
Materials: Cricut machine, green cardstock, layered Christmas tree SVG, glue, foam adhesive and decorative cardstock.
Where to Display Your Paper Trees:
These trees work well on shelves, desks, mantels and Christmas dinner tables. Make a few in different heights to create a small display, or use leftover cardstock from other projects to make additional decorations.
3. 3D Paper Christmas Village
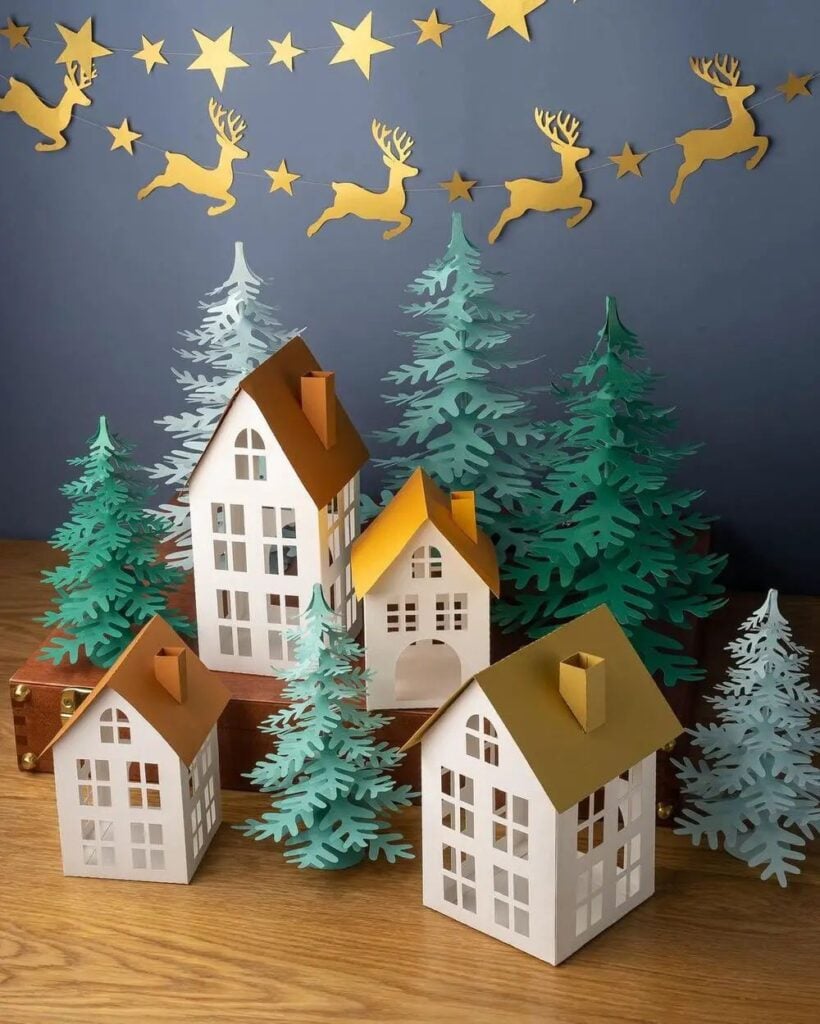
A paper Christmas village is made up of miniature houses arranged together to create a festive display. Each house can have its own roof, doors, windows and small decorative details.
How to make it:
Download a Christmas village SVG with house templates designed for cutting and folding. Choose cardstock in different colours and cut the pieces with your Cricut.
Use the scoring tool to mark the fold lines, then fold the walls and roof sections and glue the tabs together. Make a few houses in different sizes and arrange them on a shelf or tabletop.
Materials: Cricut machine, cardstock, Christmas village SVG, scoring tool and glue.
Creating a Christmas Village Display:
Arrange the houses at different heights to give the village a more natural appearance. You can add paper trees, small fences or a cardstock pathway to fill empty spaces.
Battery-operated tea lights can also be used inside suitable house designs, provided the lights fit safely and do not generate heat.
Beginners interested in making products for customers can get more inspiration from 21 Simple Cricut Projects for Beginners That Actually Sell.
4. DIY Christmas Window Clings
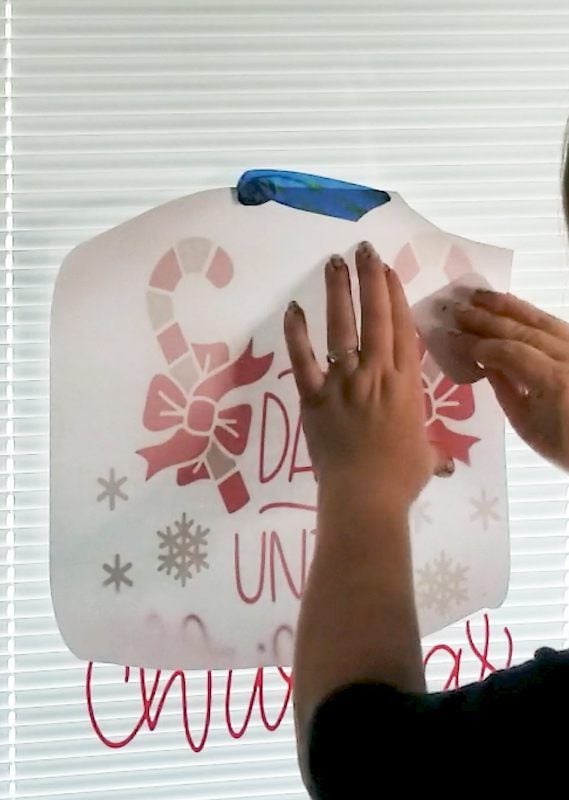
Christmas window clings are festive shapes that stick to smooth glass without the permanent adhesive used on ordinary vinyl. Snowflakes, stars, Christmas trees and reindeer are popular choices for decorating windows during the holiday season.
How to make it:
Choose window cling material that is compatible with your Cricut machine. Upload your Christmas designs to Design Space, size them for your windows and cut them.
Weed away the excess material and separate the individual shapes. Follow the manufacturer’s instructions for applying the clings to clean glass.
Materials: Cricut machine, compatible window cling material, cutting mat and weeding tool.
A Simple Way to Decorate Glass:
Window clings are useful for decorating living room windows, classroom glass doors and shop windows without using permanent stickers. They can also be removed and stored for another Christmas, depending on the material’s care instructions.
5. Christmas Paper Snowflake Decorations
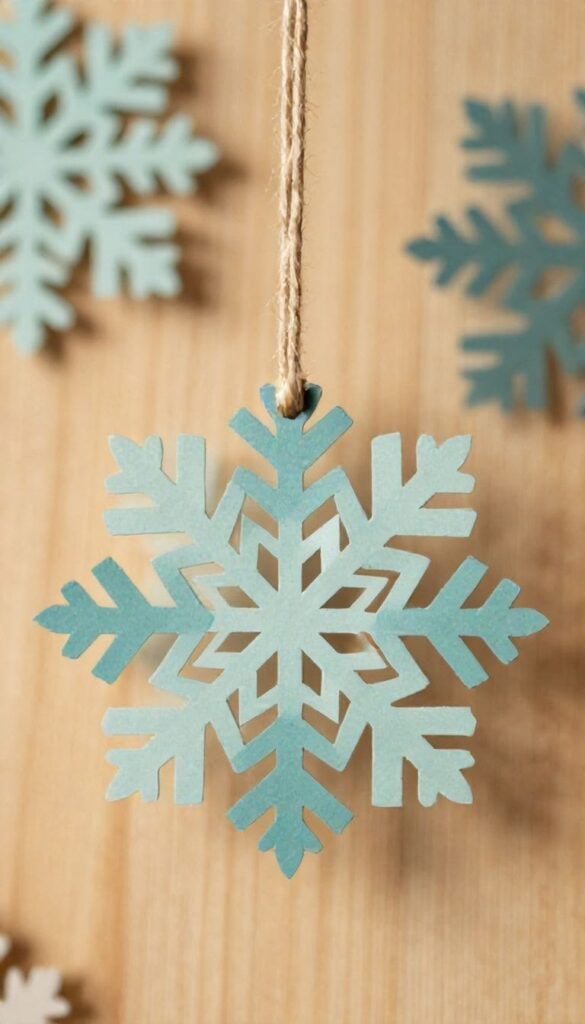
Paper snowflakes are simple Christmas decorations that can be cut in different shapes and sizes. With a Cricut, you can create detailed snowflake patterns without having to fold and cut each one by hand.
How to make it:
Choose a snowflake SVG with clear cut lines and enough space between its details. Upload it to Design Space and cut several copies from white, silver or pale blue cardstock.
Carefully remove each snowflake from the mat, then attach thread or ribbon if you want to hang them. You can also place them flat on windows, walls or Christmas table displays.
Materials: Cricut machine, cardstock, snowflake SVG, cutting mat, thread and ribbon.
Decorating Windows and Party Spaces:
Make large snowflakes for windows and walls, then use smaller ones for table decorations or hanging displays. Combining different sizes creates variety without requiring several different craft materials.
White and silver cardstock also give the decorations a winter look that works well with other Christmas colours.
6. 3D Christmas Star
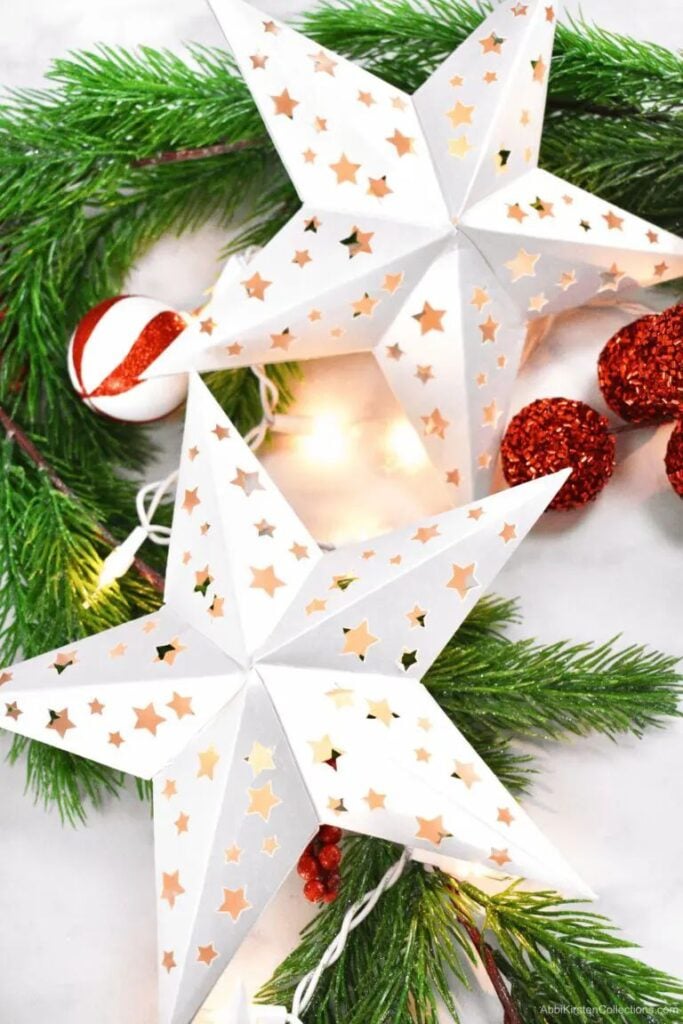
A 3D Christmas star is a folded paper decoration with raised sections that give it a dimensional shape. It can be made in gold, silver, white or traditional Christmas colours and used as a hanging decoration or tabletop display.
How to make it:
Find a Christmas star SVG that includes score lines and folding instructions. Cut the design from sturdy cardstock, then use a scoring tool to mark the fold lines.
Fold along the marked lines and join the sections with glue as directed by the template. Add a small hanging loop if you want to display it on the Christmas tree.
Materials: Cricut machine, cardstock, 3D star SVG, scoring tool, glue and ribbon.
Ways to Display Your Finished Star:
A large paper star can serve as a Christmas tree topper, provided it is light enough and can be secured properly. Smaller versions can hang from the ceiling, decorate windows or sit on a festive table. Choose a sturdy cardstock that holds its shape after folding.
Personalised decorations can make a living space feel more like home. 29 Easy Cricut Projects for Home Decor shares creative ways to decorate different rooms.
7. DIY Christmas Paper Wreath
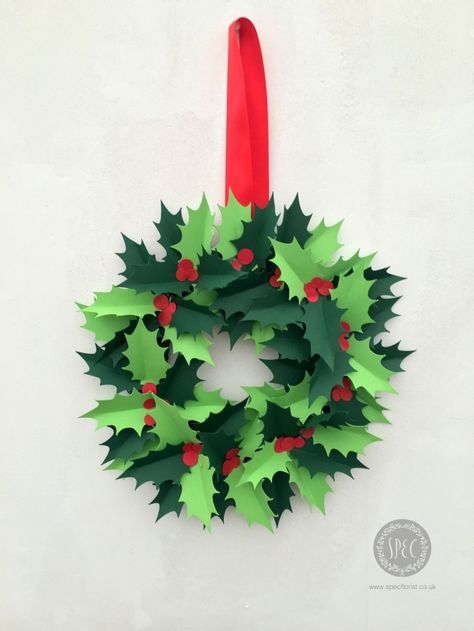
A paper Christmas wreath uses cut cardstock leaves and festive shapes arranged around a circular base. You can make a traditional green wreath with holly leaves and red berries or use poinsettia shapes for a different finish.
How to make it:
Cut a circular wreath base from sturdy cardstock or use a ready-made cardboard ring. Use your Cricut to cut several leaves, berries and other decorative shapes.
Arrange the leaves around the base, overlapping them to cover the surface, then glue them in place. Add a bow or hanging ribbon to complete the wreath.
Materials: Cricut machine, green and red cardstock, wreath base, Christmas leaf SVG, glue and ribbon.
Choosing Colours for Your Wreath:
Traditional green and red give the wreath a familiar Christmas appearance, while white and silver create a softer winter look.
You can also use burgundy, cream and gold for a different colour combination. Keep the colours consistent so the leaves, berries and bow look coordinated.
8. Christmas Tree Ornaments With Vinyl Names
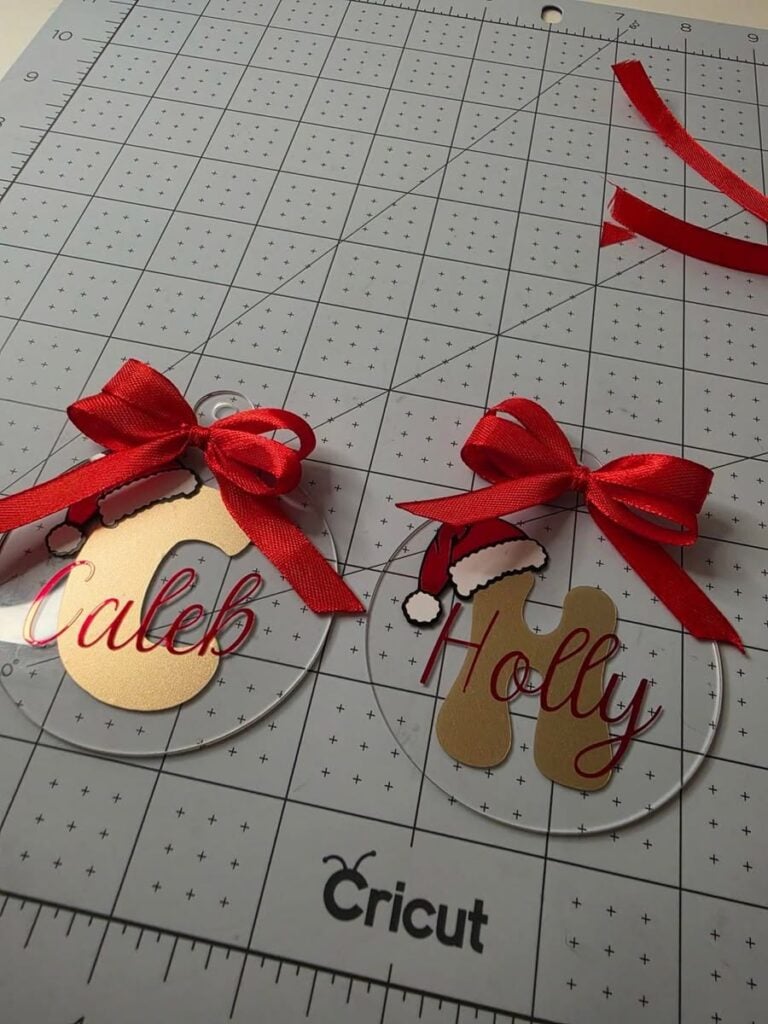
Personalised Christmas baubles are a simple way to give ordinary tree decorations a more personal touch. A Cricut can cut names, initials or short messages from adhesive vinyl, which can then be applied to plain baubles.
How to make it:
Create a name design in Cricut Design Space and size it to fit your bauble. Cut the design from permanent adhesive vinyl, weed away the excess and use transfer tape to lift the lettering. Apply it slowly to the clean, dry bauble, smoothing the vinyl to reduce wrinkles.
Materials: Cricut machine, plain baubles, permanent adhesive vinyl, transfer tape and weeding tool.
Personalising Ornaments for Family and Friends:
Make individual baubles with each person’s name, or add a family surname and Christmas year to create a shared keepsake.
These can also be used as place markers by hanging each person’s ornament on their dining chair or placing it beside their Christmas gift.
9. DIY Glitter Christmas Ornaments

Glitter Christmas ornaments add sparkle to a Christmas tree and can be customised with different colours and designs. The Cricut can help with the personalisation by cutting names, initials or small festive shapes from vinyl.
How to make it:
Start with plain ornament blanks and apply a suitable ornament adhesive according to its instructions. Add glitter and allow the coating to dry completely.
Once the surface is ready, use your Cricut to cut a name or Christmas design from permanent adhesive vinyl and apply it to the ornament.
Materials: Cricut machine, plain ornaments, suitable ornament adhesive, glitter, permanent vinyl and transfer tape.
Matching Glitter Ornaments to Your Christmas Theme:
Choose glitter colours that complement the decorations already on your tree. Gold and champagne work well with warm metallic decorations, while silver and white suit cooler colour schemes. You can also make a few matching ornaments for a coordinated gift set.
10. Personalised Wooden Christmas Ornaments
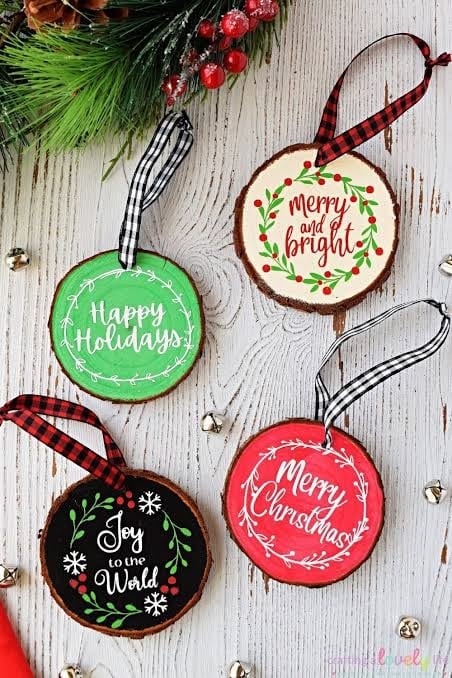
Wooden Christmas ornaments have a simple natural appearance that works well with both traditional and modern Christmas decorations.
Plain wooden blanks can be personalised with family names, dates, initials or small Christmas designs using your Cricut.
How to make it:
Choose smooth wooden ornament blanks with a suitable surface for adhesive vinyl. Create your lettering or design in Cricut Design Space, cut it from permanent vinyl and remove the excess.
Use transfer tape to position the design on the wood, then press it down carefully to ensure good contact.
Materials: Cricut machine, wooden ornament blanks, permanent adhesive vinyl, transfer tape and weeding tool.
Turning Wooden Ornaments Into Keepsakes:
Add details such as a baby’s first Christmas, a couple’s first Christmas in a new home or the year a family moved into a new house. These small details give the ornament a personal meaning beyond its use as a tree decoration.
11. Christmas Photo Ornaments
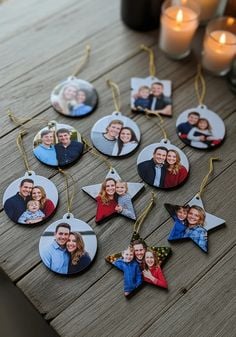
Christmas photo ornaments are a lovely way to add family memories to the Christmas tree. For this easy Cricut project for Christmas, use a plain photo ornament blank and add a name, date or short message around the picture.
How to make it:
Choose a photo ornament blank with an opening that fits your selected picture. Use your Cricut to cut a small vinyl design, such as a family name, Christmas year or festive border.
Apply the vinyl to the ornament, print or trim the photograph to size, and place it inside the frame. Check that the picture is secure before adding the hanging ribbon.
Materials: Cricut machine, photo ornament blanks, permanent adhesive vinyl, transfer tape, weeding tool and photographs.
Making It Personal:
Use a different photograph for each family member, or create a collection showing important family moments from the year. These ornaments also make thoughtful gifts for grandparents who enjoy having family pictures on display.
Cardstock is useful for making everything from greeting cards to decorative pieces. 27 Easy Cricut Projects Using Cardstock offers more paper-crafting ideas to try.
12. DIY Christmas Snow Globe Card
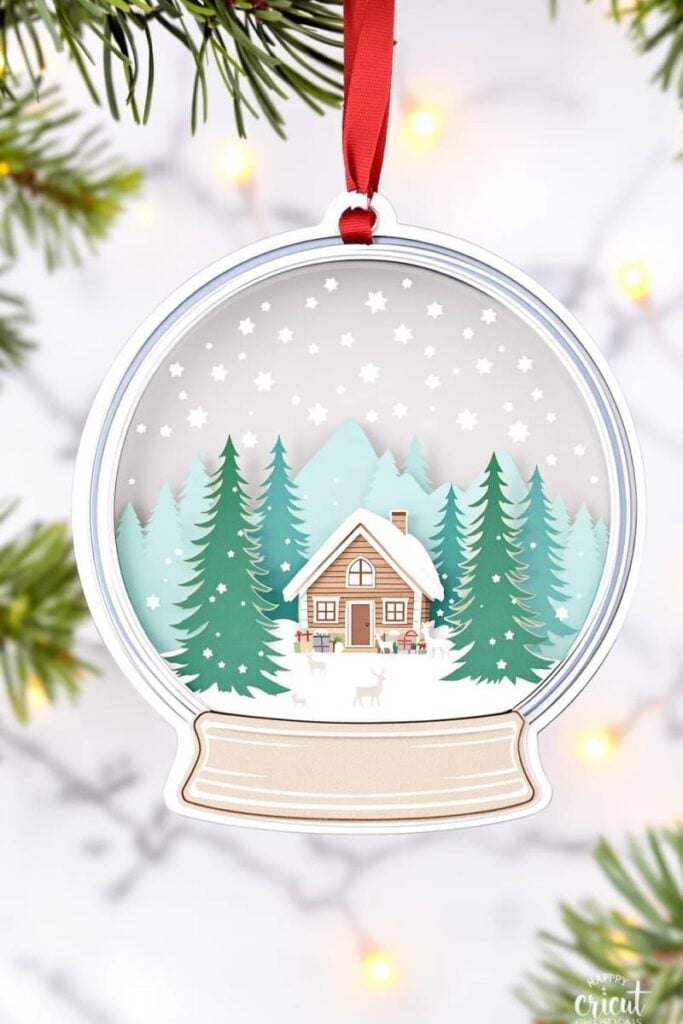
A Christmas snow globe card gives an ordinary greeting card a little more character. The design features a round globe with a Christmas scene inside, such as a decorated tree, a snowman or a small winter village.
This is one of the easy Cricut projects for Christmas that combines paper cutting with a simple handmade greeting.
How to make it:
Create or download a snow globe card SVG with separate pieces for the globe, base and Christmas scene. Cut the pieces from cardstock using your Cricut.
Layer the scene inside the globe shape, then attach the finished design to a folded card base. Add a short Christmas message inside.
Materials: Cricut machine, cardstock, snow globe card SVG, glue, scoring tool and decorative paper.
Adding a Personal Message:
Leave enough room inside the card for a handwritten greeting. A short family message, Christmas wish or personal note makes the card more meaningful than one with only a printed greeting.
13. Pop-Up Christmas Tree Cards
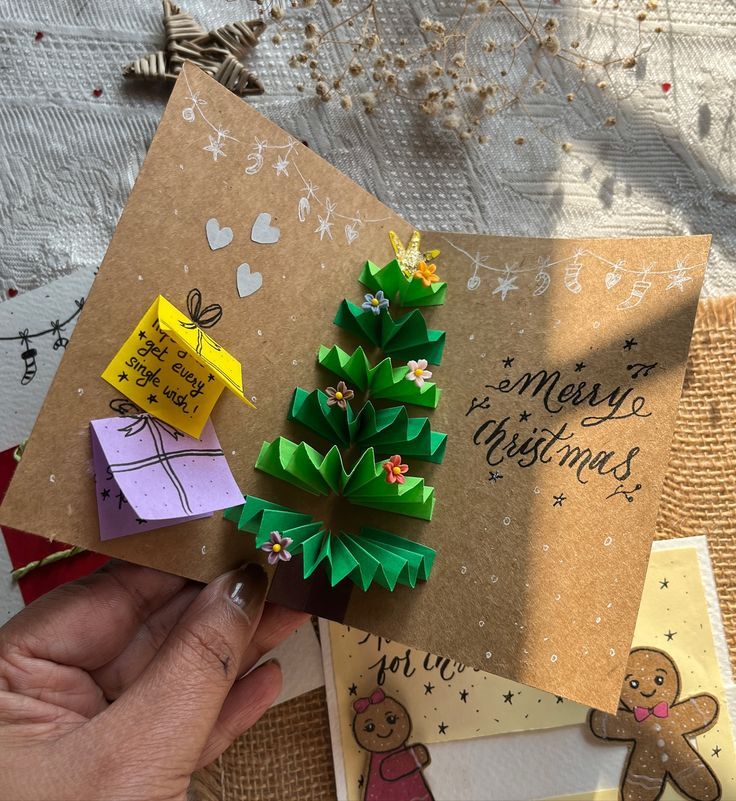
A pop-up Christmas tree card has a folded paper tree that rises when the recipient opens the card. Unlike a flat Christmas tree design, the pop-up section creates a small three-dimensional feature inside the card.
How to make it:
Choose a pop-up Christmas tree SVG designed for card making. Cut the tree and card pieces from cardstock with your Cricut.
Score the fold lines carefully, then attach the pop-up tree to the inside of the card following the template instructions. Test the card by opening and closing it before adding decorations.
Materials: Cricut machine, cardstock, pop-up Christmas tree SVG, scoring tool and glue.
Getting the Pop-Up to Fold Properly:
Use cardstock that is firm enough to hold the tree upright but not so thick that the card becomes difficult to close. Keep bulky embellishments away from the main fold so the card can fit into its envelope.
14. Layered Christmas Greeting Cards
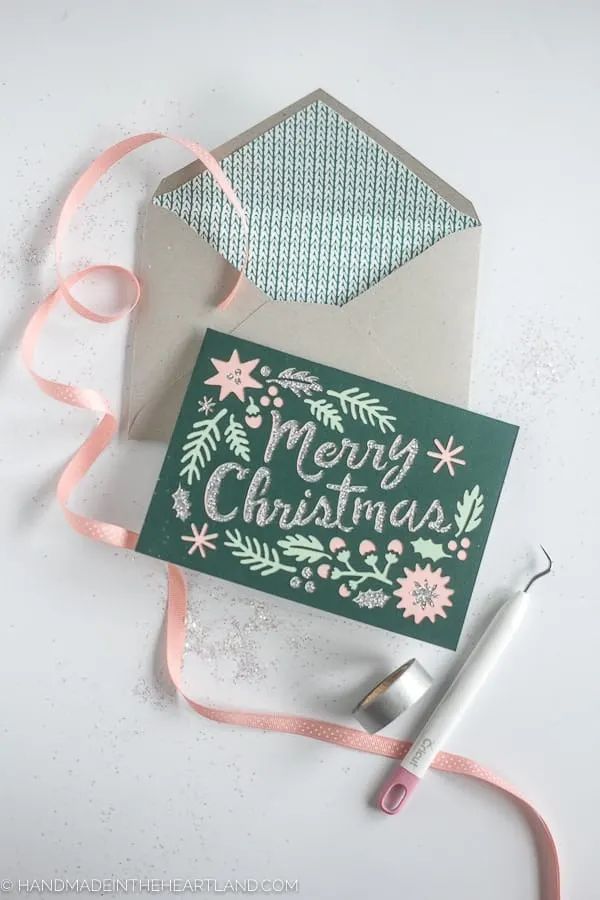
Layered Christmas greeting cards use several paper shapes to create a design with more detail than a single flat card. You can combine Christmas trees, stars, wreaths, snowflakes and lettering in different colours to make a card that suits the person receiving it.
How to make it:
Choose a layered Christmas card SVG or create your own design in Cricut Design Space. Cut the background, decorative shapes and lettering from different cardstock colours.
Arrange the pieces on the card front, then attach them with glue or foam adhesive. Add a matching insert for your handwritten greeting.
Materials: Cricut machine, cardstock, Christmas card SVG, glue, foam adhesive and scoring tool.
Choosing the Right Cardstock:
Use sturdy cardstock for the card base so it does not bend under the weight of the decorative layers. Lighter cardstock works well for small details such as snowflakes and lettering. Keep the front design relatively flat if the finished card will be mailed.
15. Christmas Gift Card Holders
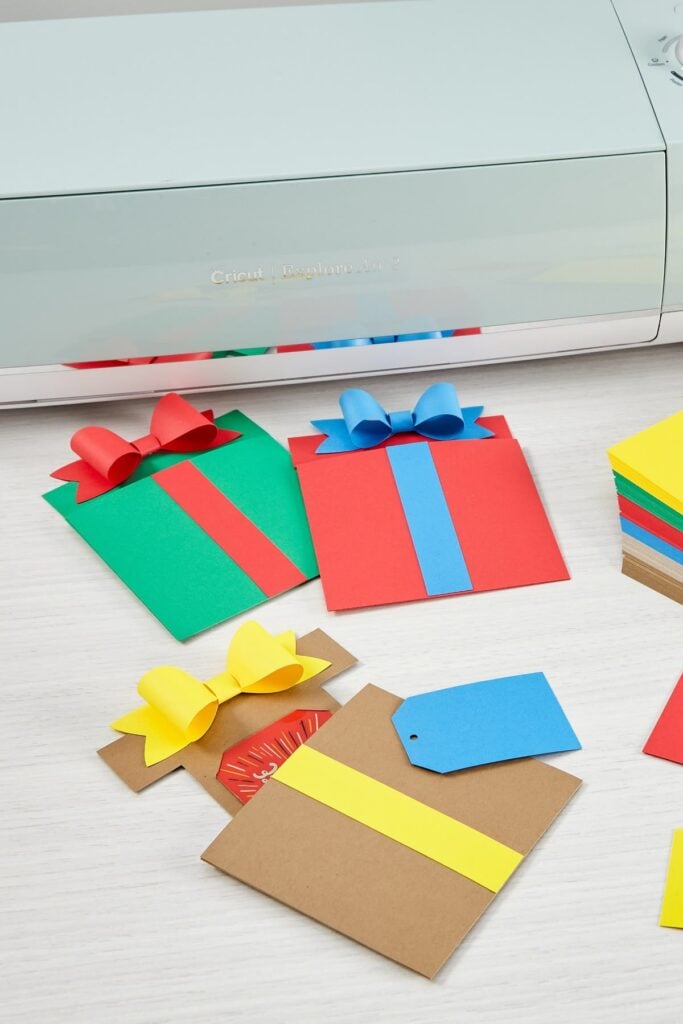
Gift cards are easy to give, but handing someone a plastic card without any presentation can feel impersonal. A Cricut can help turn one into a small Christmas gift by cutting a decorative holder shaped like a Christmas tree, stocking, gift box or festive envelope.
How to make it:
Download a gift card holder SVG with a pocket sized for standard gift cards. Cut the design from cardstock, score and fold along the marked lines, then glue the tabs to form the pocket.
Slide the gift card inside and close it with the flap or decorative fastening provided in the design.
Materials: Cricut machine, cardstock, gift card holder SVG, scoring tool, glue and ribbon.
Checking the Pocket Size:
Measure the gift card before cutting, especially when using a card from a particular shop. The pocket should hold the card securely without making it difficult to remove. A small message or the recipient’s name can also be added to the front.
Anyone interested in experimenting with Infusible Ink can find inspiration in 25 Easy Cricut Projects Using Cricut Infusible Ink, featuring designs for compatible blanks.
16. 3D Christmas Stocking Gift Boxes
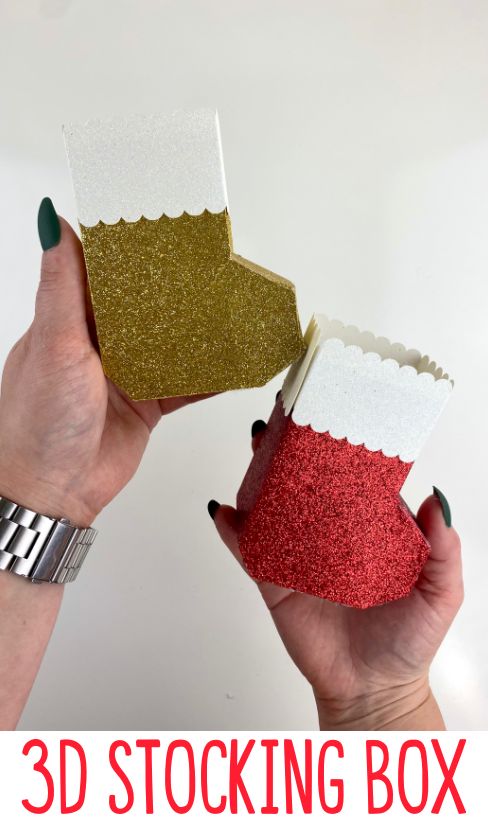
These miniature stocking-shaped boxes are designed to hold small Christmas presents rather than just decorate the tree. They can be filled with sweets, jewellery, small toys or other lightweight gifts.
How to make it:
Find a 3D Christmas stocking box SVG with fold lines and joining tabs. Cut the pieces from cardstock using your Cricut, then score and fold the marked sections.
Assemble the front, back and sides with glue, leaving the top open for filling. Finish with a small ribbon or paper cuff.
Materials: Cricut machine, sturdy cardstock, stocking box SVG, scoring tool, glue and ribbon.
What to Put Inside:
Choose items that fit comfortably without putting pressure on the paper seams. Wrapped sweets, hair accessories, small stationery items and gift vouchers are suitable options. Avoid heavy objects that could pull the box apart.
Simple projects are a good starting point when learning to use a Cricut machine. 22 Easy Cricut Projects for Beginners You Can Make at Home provides more ideas to practise with.
17. Christmas Treat Boxes
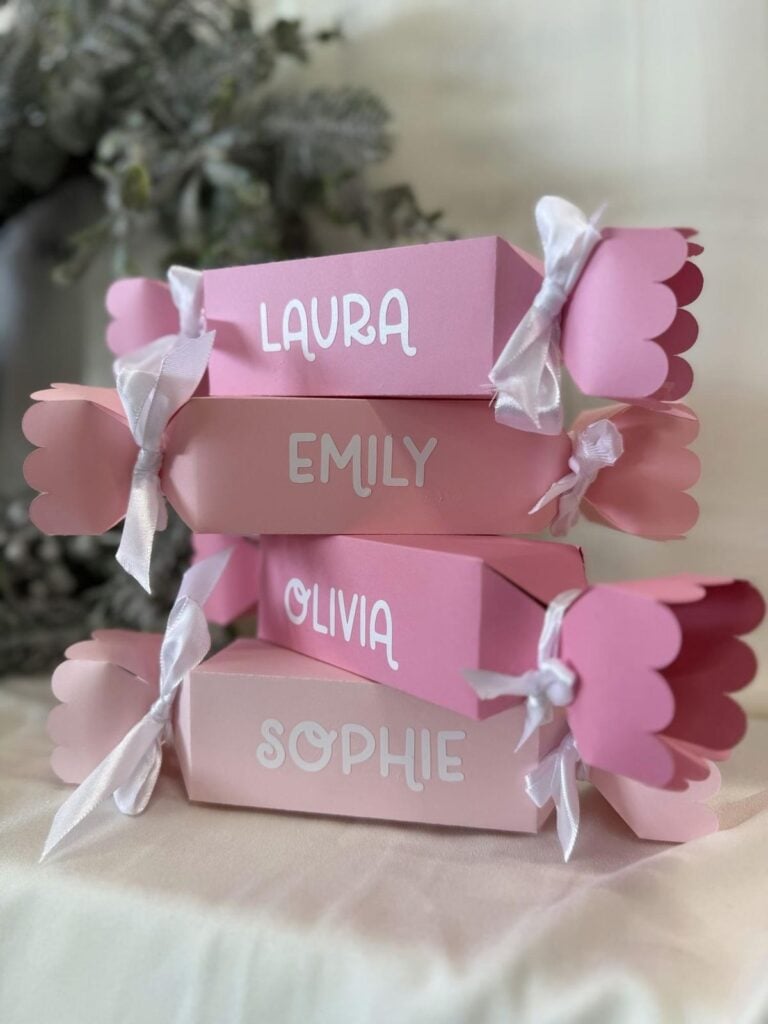
Christmas treat boxes are small paper containers for packaging homemade cookies, chocolates, sweets and other festive snacks. With your Cricut, you can cut matching boxes in different sizes and add Christmas lettering or decorative shapes to the outside.
How to make it:
Choose a treat box SVG that includes folding lines and tabs. Cut the template from cardstock, then score and fold the sections before joining the tabs with glue. Add a window using suitable clear packaging material if you want the treats to be visible.
Materials: Cricut machine, cardstock, treat box SVG, scoring tool, glue and optional clear packaging film.
Packaging Edible Gifts Safely:
Place cookies and other treats in suitable food-safe bags or liners before putting them inside the paper box.
Cardstock and ordinary decorative vinyl should not come into direct contact with food unless the material is specifically certified for that use. This keeps the packaging attractive without compromising food safety.
18. Reindeer Lollipop Holders
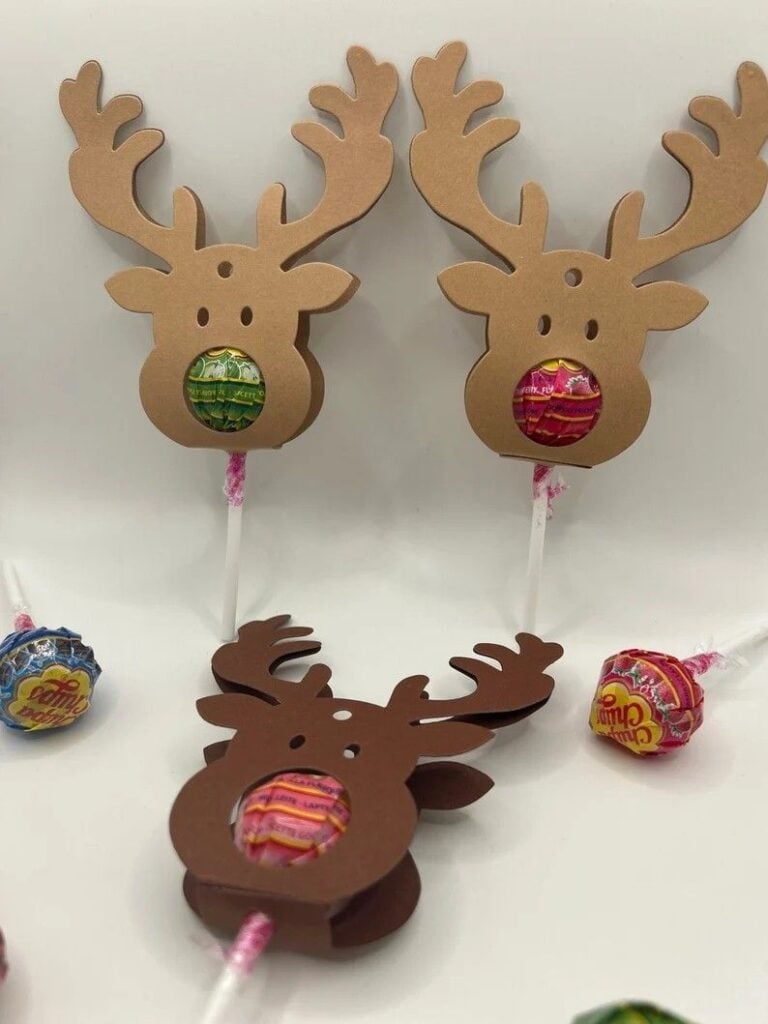
Reindeer lollipop holders turn an ordinary lollipop into a small Christmas favour.
The paper design usually features a reindeer face with a hole or opening for the lollipop stick, making it easy to hand out at school parties, church gatherings and children’s Christmas events.
How to make it:
Upload a reindeer lollipop holder SVG to Cricut Design Space and cut the pieces from brown, red and white cardstock. Assemble the face, antlers and other details with glue. Insert the lollipop through the designated opening and secure it according to the template.
Materials: Cricut machine, cardstock, reindeer lollipop holder SVG, glue and individually wrapped lollipops.
Preparing Them for Children’s Parties:
Make the holders in advance and choose lollipops that fit the opening properly. Check for loose paper pieces and small decorative parts before distributing them, particularly when the treats are intended for young children.
19. Christmas Candy Cane Treat Bags
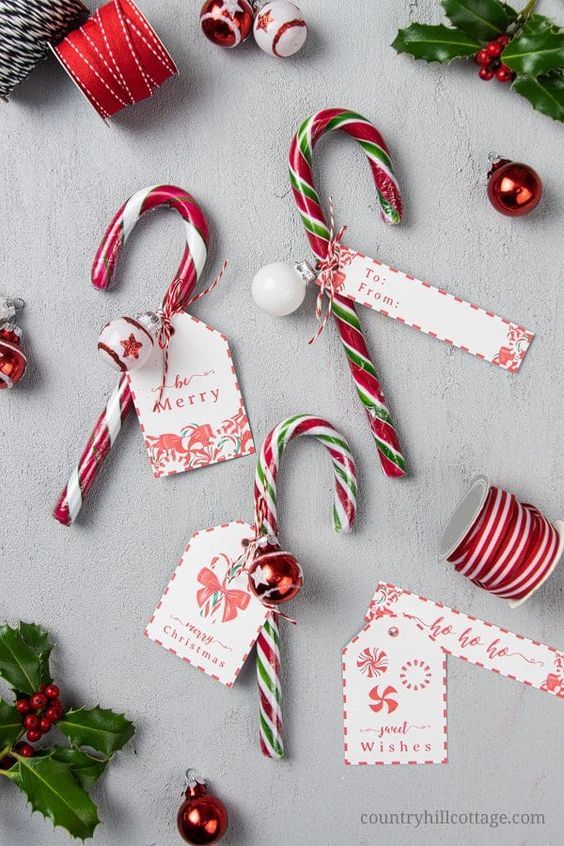
Candy cane treat bags provide a simple way to package small Christmas sweets for friends, neighbours, teachers or party guests. The Cricut can cut decorative cardstock toppers with Christmas trees, candy canes, snowflakes or personalised names.
How to make it:
Fill small clear treat bags with candy canes or other individually wrapped sweets. Create a topper design in Cricut Design Space and cut it from cardstock.
Fold the topper over the open end of the bag, then secure it with glue or staples. Add a small vinyl name or Christmas message if desired.
Materials: Cricut machine, cardstock, clear treat bags, candy canes, glue or stapler and optional adhesive vinyl.
Making the Treat Bags Neat:
Choose bags wide enough to hold the sweets without stretching or tearing. Keep the topper large enough to cover the opening and leave space for a name or short greeting. This makes the bags suitable for handing out individually.
Vinyl offers plenty of possibilities for personalising everyday items, and 23 Cricut Projects for Beginners Using Vinyl shares more ways to work with this material.
20. Personalised Christmas Gift Bags
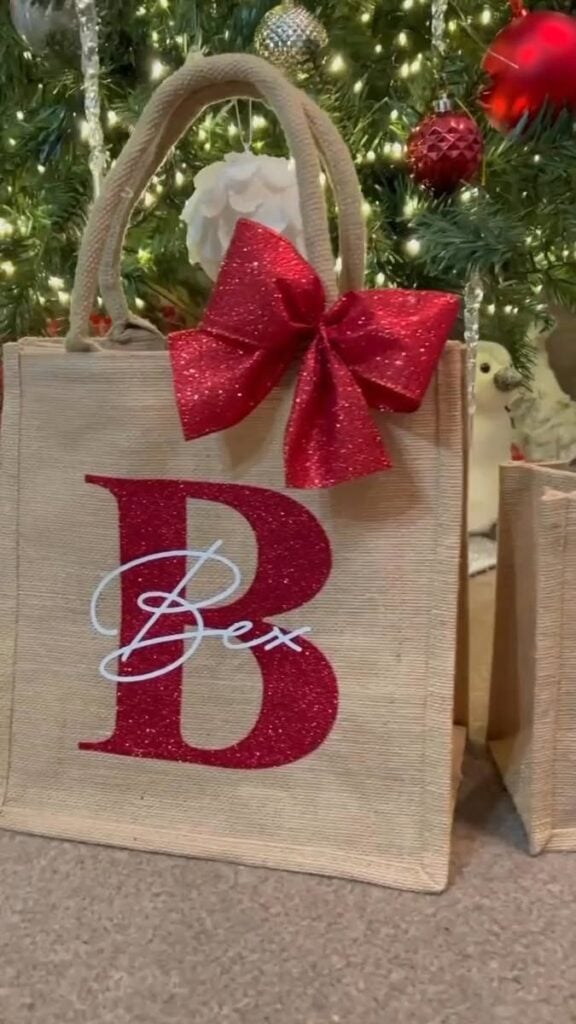
Plain paper gift bags can be customised with names, Christmas messages and festive images using a Cricut. This is particularly useful when several people are receiving gifts and you want each package to have its own design.
How to make it:
Choose plain paper gift bags with smooth surfaces. Create a Christmas design in Cricut Design Space, then cut it from permanent adhesive vinyl.
Weed the design and use transfer tape to apply it to the front of the bag. For a simpler paper decoration, cut a Christmas shape from cardstock and attach it to the bag instead.
Materials: Cricut machine, plain paper gift bags, permanent adhesive vinyl or cardstock, transfer tape and weeding tool.
Matching Bags to Different Recipients:
Use names to identify each person’s gift, or create different designs for children, adults, teachers and family members. Keep the design away from the bag handles and folded edges so it does not get damaged when the bag is carried.
21. DIY Christmas Advent Calendar
A Christmas advent calendar gives families a way to count down the days until December 25. Instead of buying a ready-made calendar, use your Cricut to cut and decorate small numbered envelopes, boxes or pockets for each day.
How to make it:
Choose a format that suits the items you plan to put inside. Cut 24 small envelopes or boxes from cardstock, then add numbers from 1 to 24 using vinyl or cut paper.
Arrange them on a display board, hang them from a string or place them in a decorative basket. Fill each compartment with a small treat, activity card or Christmas message.
Materials: Cricut machine, cardstock, advent calendar SVG, glue, number designs, ribbon and small treats or message cards.
Planning the Daily Contents:
The compartments do not have to contain expensive gifts. Short Christmas activities, Bible verses, family challenges, jokes and small sweets can make the countdown enjoyable. Check the compartment sizes before choosing what to put inside.
Turning your crafting skills into extra income starts with choosing products people may want to buy. 25 Easy Cricut Projects to Make and Sell for Extra Money offers ideas to consider for a small business.
22. Christmas Countdown Calendar
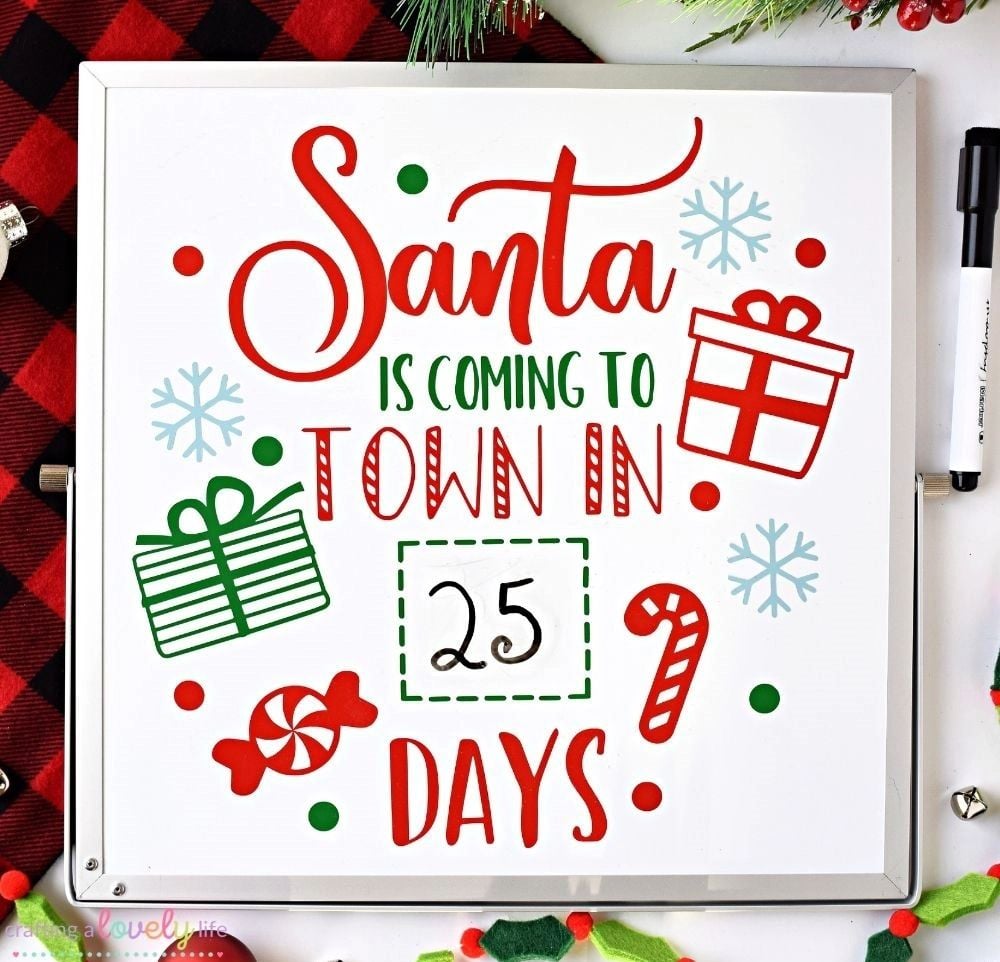
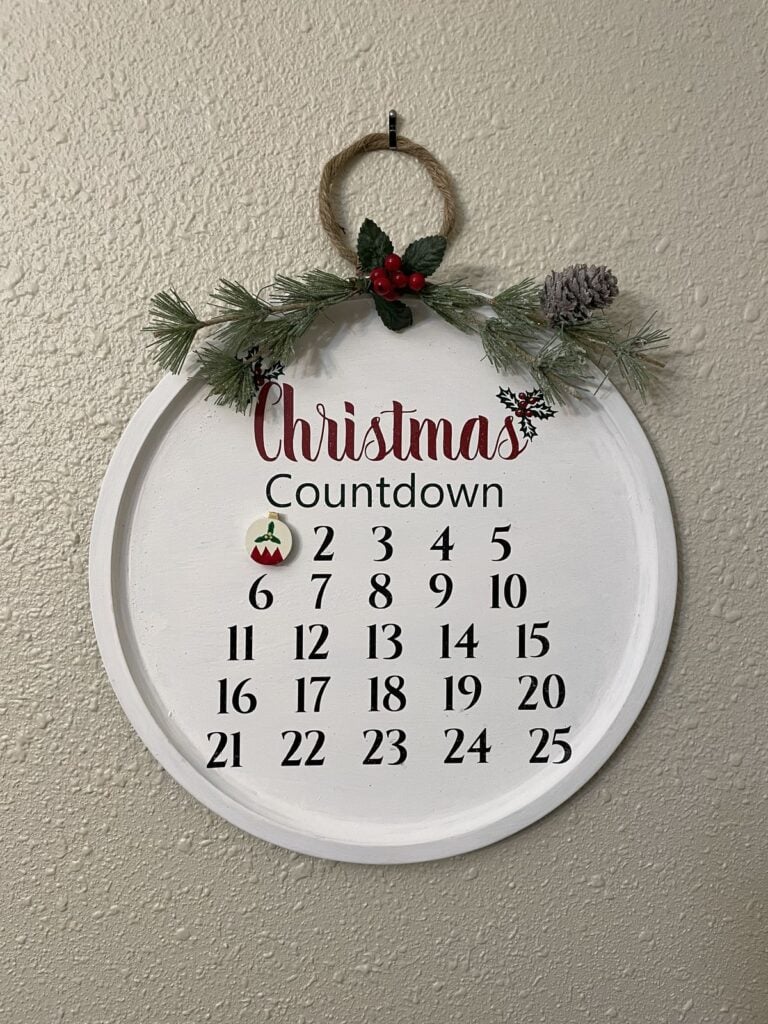
A Christmas countdown calendar is a reusable display that helps children and adults keep track of how many days remain until Christmas. One simple Cricut version uses a decorative board with interchangeable number pieces.
How to make it:
Create a Christmas-themed board design and cut the decorative lettering or shapes from vinyl or cardstock.
Add a small section for the countdown number, using a chalkboard area, a number slider or removable number cards. Assemble the pieces on a firm backing board and make sure the numbers can be changed easily.
Materials: Cricut machine, cardstock or vinyl, backing board, number designs, adhesive and optional chalkboard material.
Making It Reusable:
Choose a number system that can be changed without damaging the main display. Removable number cards or a slider are useful because the calendar can be stored after Christmas and brought out again the following year.
23. Christmas Stocking Name Tags
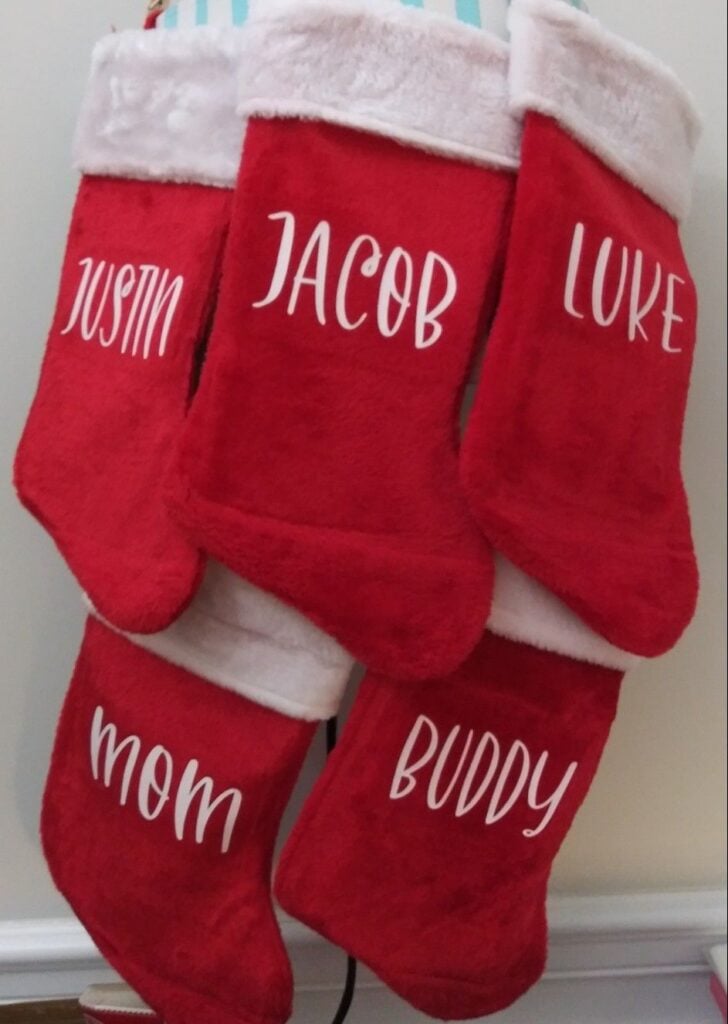
Stocking name tags help families identify whose stocking belongs to whom, especially when several stockings are displayed together. Cricut can cut names from cardstock, acrylic-compatible designs or suitable wood blanks, depending on the machine and material.
How to make it:
Create name designs in Cricut Design Space and cut them from your chosen material. For cardstock tags, use layered shapes and attach the name with adhesive.
For smooth wooden or acrylic blanks, use permanent vinyl lettering. Punch or use an existing hole to add ribbon or twine for hanging.
Materials: Cricut machine, cardstock or suitable ornament blanks, vinyl where appropriate, ribbon, transfer tape and glue.
Choosing a Tag That Lasts:
Cardstock tags are inexpensive and easy to replace, while suitable wooden or acrylic blanks can be reused for several Christmas seasons. Make sure the tag is light enough for the stocking cuff and that the hanging loop is firmly attached.
24. Personalised Christmas Stockings
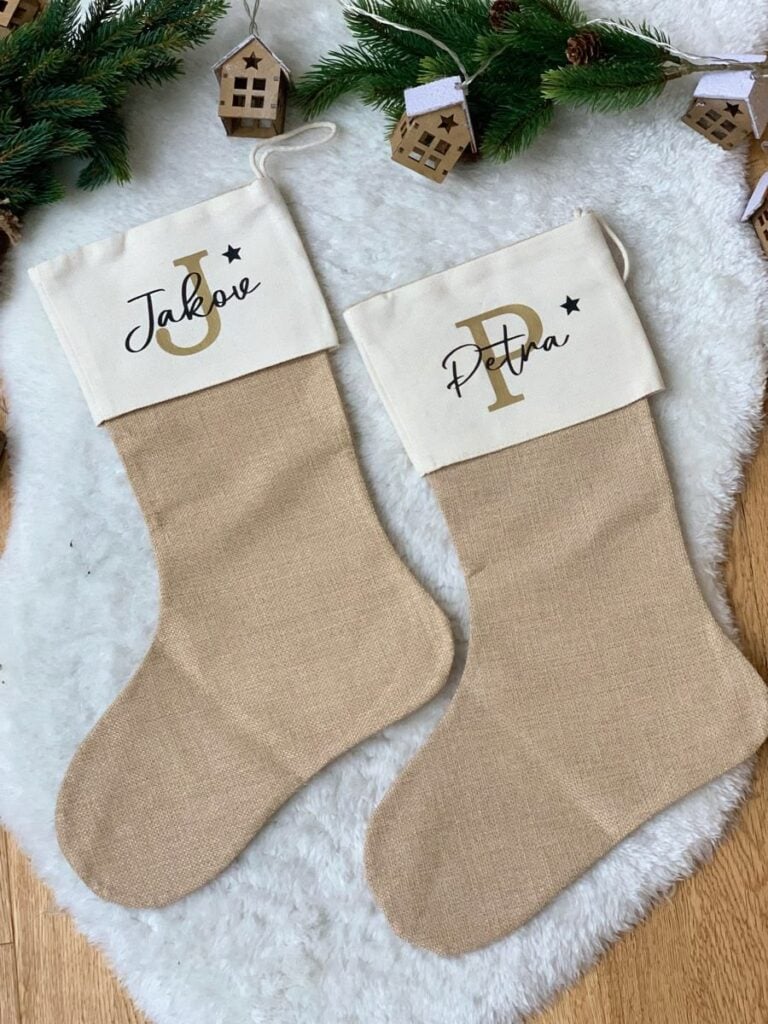
Plain Christmas stockings can be customised with names, initials or festive designs using heat-transfer vinyl. This gives each family member a stocking that is easy to identify and can be reused every December.
How to make it:
Choose a stocking with a smooth fabric cuff or front panel suitable for heat-transfer vinyl. Create the name design in Cricut Design Space, cut the HTV with the shiny side down and mirror the design before cutting.
Weed the excess vinyl, then apply it using the recommended temperature, pressure and pressing time for the specific vinyl and fabric.
Materials: Cricut machine, plain fabric stockings, heat-transfer vinyl, weeding tool and suitable heat press or EasyPress.
Getting a Neat Name Finish:
Check the fabric’s heat tolerance before pressing. Some stocking materials, especially those with synthetic fibres or delicate decorations, may be damaged by high temperatures.
Test the chosen material where possible and follow the vinyl manufacturer’s heat instructions.
25. DIY Christmas Pillow Covers
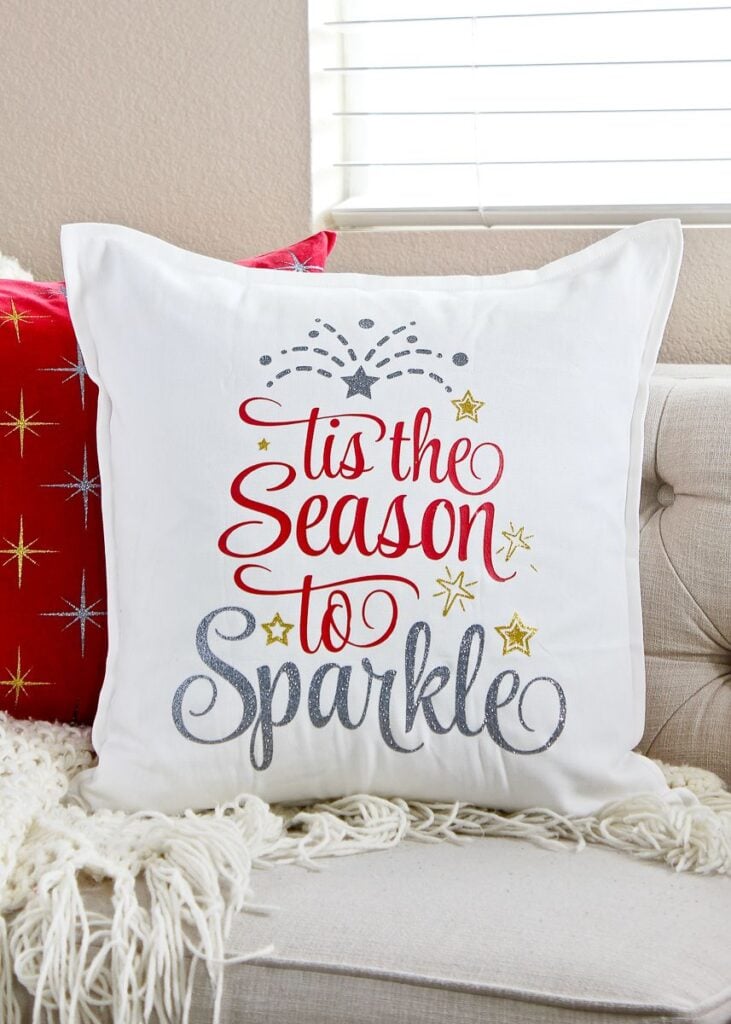
Christmas pillow covers are a simple way to add seasonal designs to existing cushions without buying completely new pillows.
Use your Cricut to cut festive phrases, snowflakes, Christmas trees or reindeer from heat-transfer vinyl and apply them to plain fabric covers.
How to make it:
Choose a plain pillow cover made from a fabric compatible with your heat-transfer vinyl. Create and size your design in Cricut Design Space, then mirror it before cutting the HTV. Weed away the excess vinyl and position the design on the cover.
Apply heat using the manufacturer’s recommended settings, allowing the material to cool as instructed before removing the carrier sheet.
Materials: Cricut machine, plain pillow cover, heat-transfer vinyl, weeding tool and suitable heat press.
Choosing a Design for Your Cushion:
A short Christmas phrase or one clear festive image usually works better than a design with too many small details.
Check the finished design size against the pillow cover before cutting, and leave enough space around the edges so the artwork does not sit too close to the seams.
New users can also build their confidence with the projects in 19 Easy Cricut Projects for Beginners.
26. Christmas Kitchen Towels With Iron-On Designs
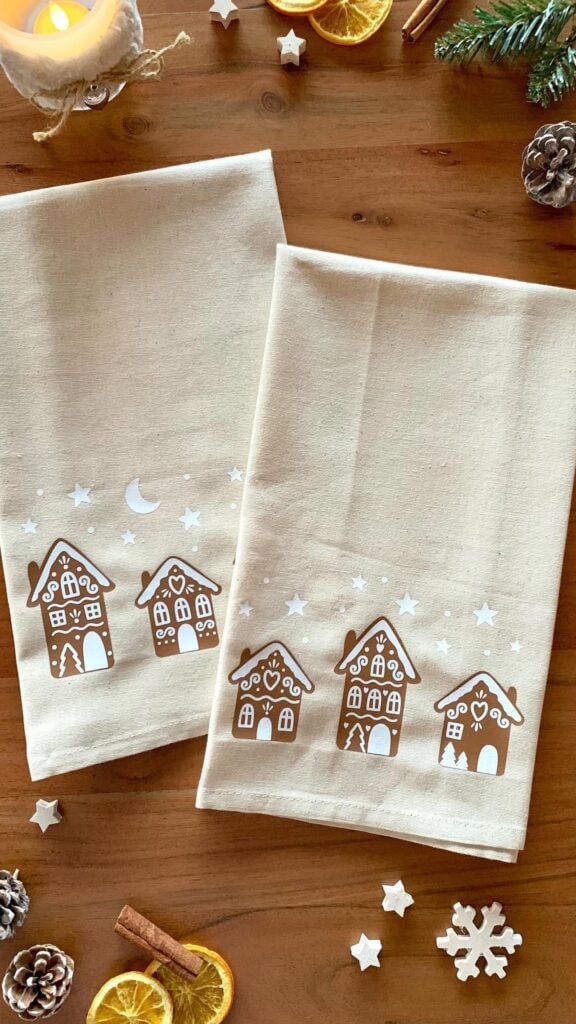
Plain kitchen towels can be given a festive look with Christmas phrases, snowflakes, gingerbread men or small Christmas tree designs. This is one of the easy Cricut projects for Christmas that also gives you something useful to display or give as a gift.
How to make it:
Choose plain cotton kitchen towels with a smooth surface. Create your Christmas design in Cricut Design Space and size it to fit the towel.
Cut the heat-transfer vinyl with the shiny side facing down, remembering to mirror the design before cutting. Weed the excess vinyl and apply the design using the recommended heat settings for your vinyl and fabric.
Materials: Cricut machine, plain kitchen towels, heat-transfer vinyl, weeding tool and suitable heat press.
Choosing Designs That Suit Kitchen Towels:
Short phrases such as “Merry Christmas” and “Baking Spirits Bright” work well because they remain readable on a folded towel.
Small gingerbread or holly designs can also be placed near the bottom edge for a simple finish. Avoid placing the design where it will be hidden when the towel is folded.
27. Personalised Christmas Aprons
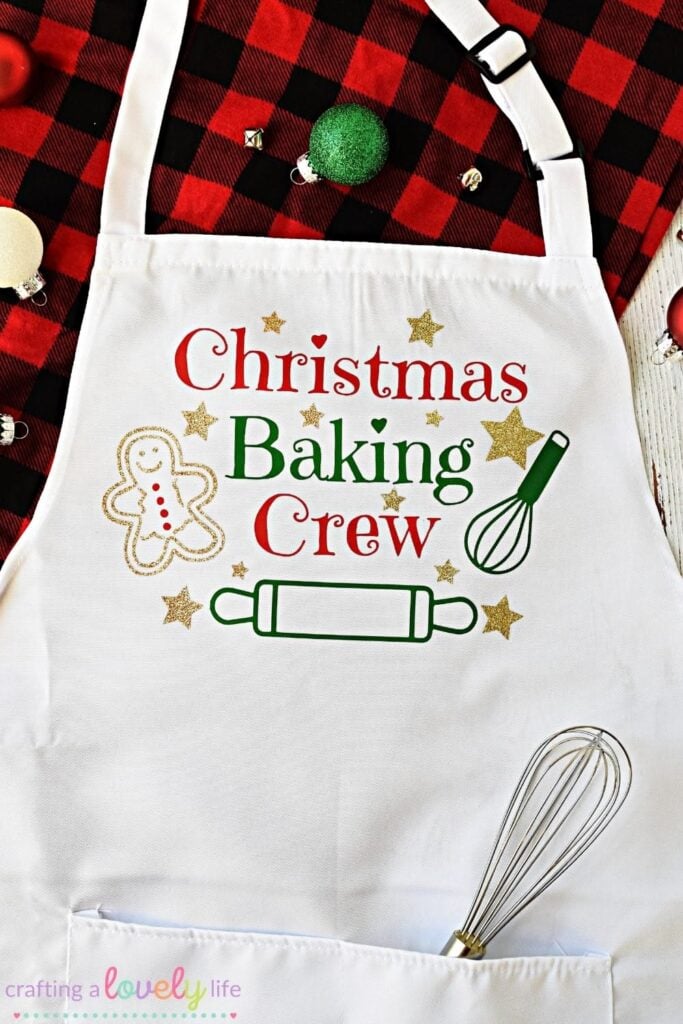
Christmas aprons make useful gifts for people who enjoy baking, cooking or preparing family meals during the holidays. With a Cricut, you can personalise a plain apron with the recipient’s name, a Christmas baking message or a festive illustration.
How to make it:
Start with a plain apron made from cotton or another fabric suitable for heat-transfer vinyl. Create your design in Cricut Design Space, mirror it and cut the HTV.
Weed the excess material, position the design on the apron and apply it using the recommended heat settings. Allow it to cool as instructed before removing the carrier sheet.
Materials: Cricut machine, plain apron, heat-transfer vinyl, weeding tool and suitable heat press.
Personalising the Apron:
A name with a small Christmas illustration can make the apron feel more personal without overcrowding the front.
You could also use messages such as “Christmas Baking Crew” or “Santa’s Kitchen.” Check the fabric’s heat tolerance before pressing, particularly when working with coated or synthetic aprons.
28. Christmas Wine Bottle Gift Bags
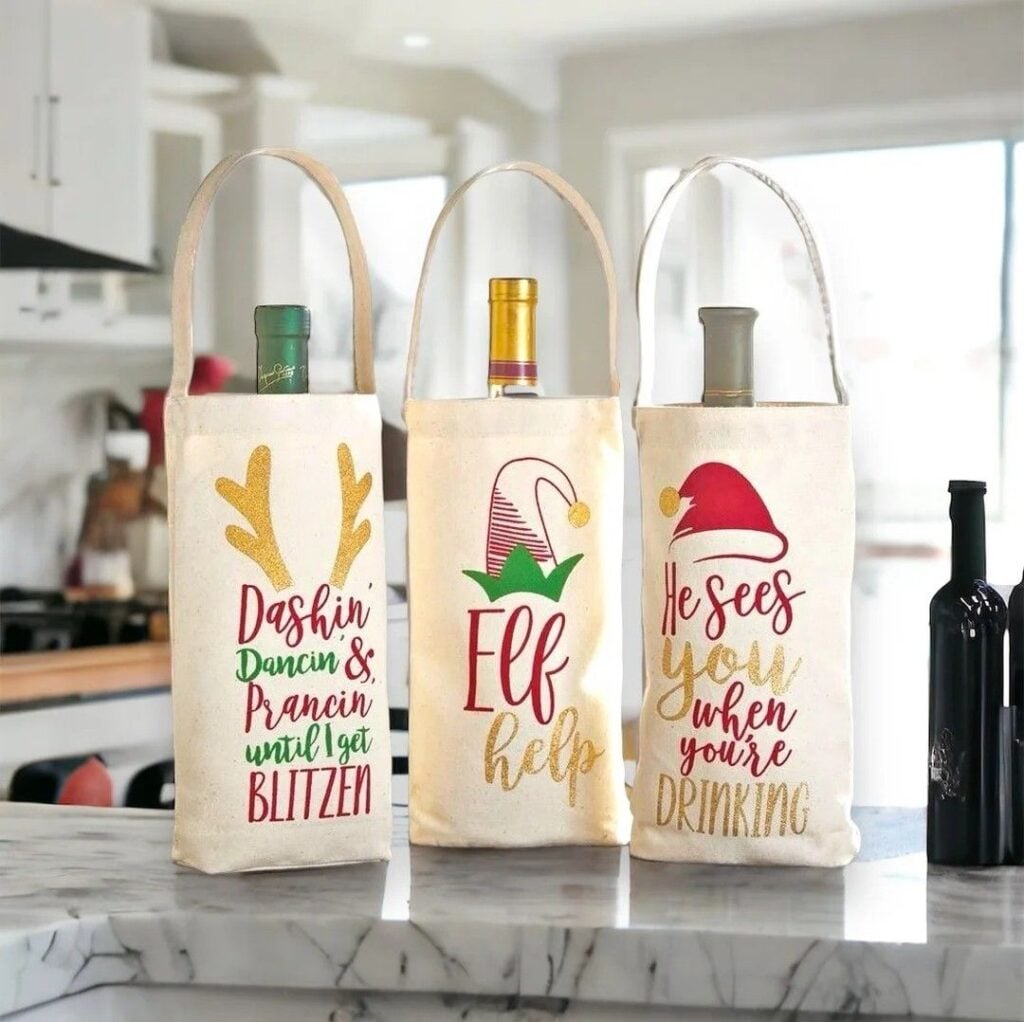
A Christmas wine bottle gift bag gives a bottle of wine a more thoughtful presentation when taking a gift to a family gathering, dinner party or holiday visit. Use your Cricut to cut festive designs, names or short messages for the bag.
How to make it:
Choose a ready-made fabric or paper wine bag with enough room for the bottle. For a fabric bag, cut a Christmas design from heat-transfer vinyl and apply it using the correct heat settings.
For a paper bag, cut a decorative cardstock label or use permanent vinyl on a suitable smooth surface. Finish with ribbon or a gift tag.
Materials: Cricut machine, plain wine bottle gift bag, cardstock or suitable vinyl, transfer tape where needed, ribbon and weeding tool.
Getting the Bag Size Right:
Check the bottle height and width before choosing a bag. A standard wine bottle may not fit every decorative gift bag, especially those designed for smaller bottles.
You can also make the design suitable for non-alcoholic sparkling drinks, juice bottles or other bottled gifts.
More gift-making inspiration is available in 33 Cricut Projects for Beginners That Make Great Personalized Gifts, with ideas for creating thoughtful presents using your machine.
29. Christmas Table Place Cards
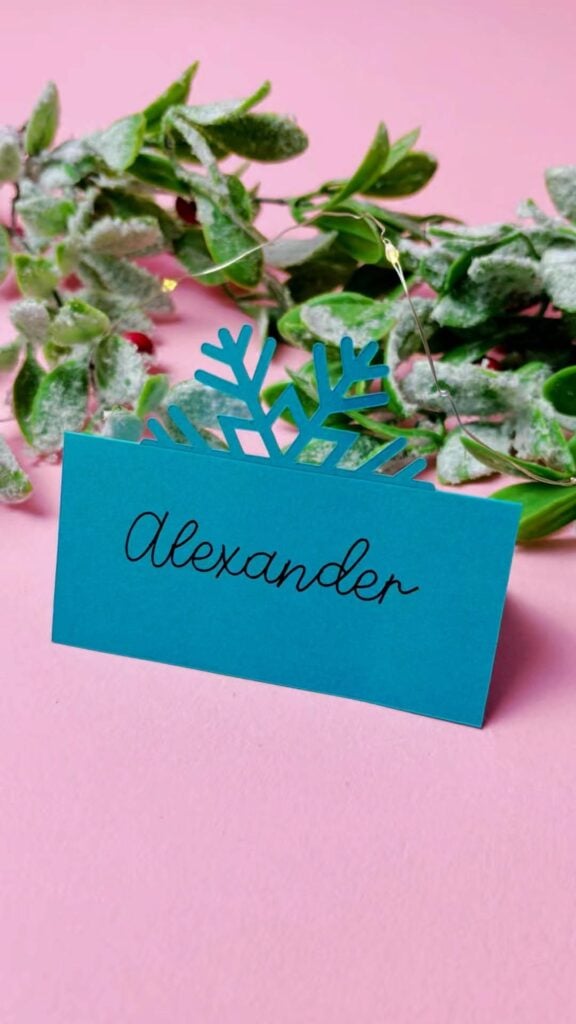
Christmas table place cards help guests find their seats before dinner and make a festive table setting look more organised.
Instead of writing names on ordinary paper, use your Cricut to cut folded cards, decorative shapes or small Christmas-themed name holders.
How to make it:
Choose a folded place card template or create a simple rectangular design in Cricut Design Space. Add each guest’s name using the writing or cutting function, depending on your chosen design.
Cut the cards from cardstock, score and fold them, then add small details such as stars, holly leaves or Christmas trees.
Materials: Cricut machine, cardstock, place card template, scoring tool and glue if needed.
Making Place Cards for Different Guests:
For a family dinner, use first names so everyone can identify their seat easily. For a larger Christmas gathering, full names may be more useful.
Keep the lettering large enough to read from across the table, and choose a card size that stands firmly without taking up too much space.
30. Christmas Napkin Rings
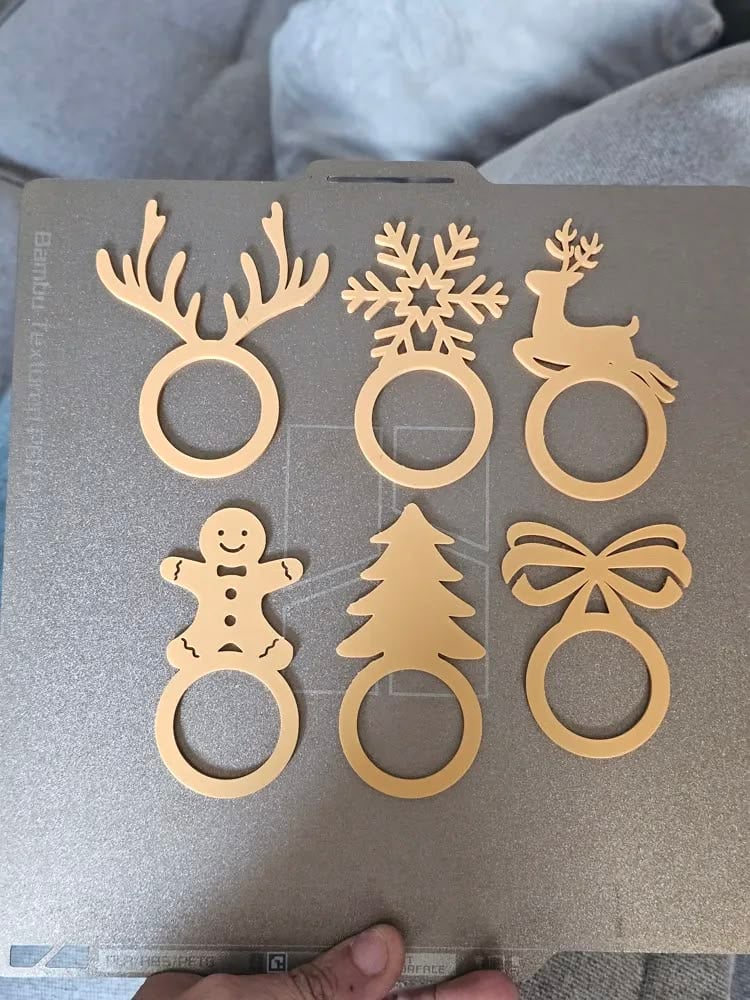
Christmas napkin rings are small decorations that hold folded table napkins in place. A Cricut can cut them from cardstock or suitable flexible materials, with designs featuring holly leaves, stars, snowflakes or simple Christmas patterns.
How to make it:
Find or create a napkin ring template that forms a band with joining tabs or slots. Cut the design from sturdy cardstock using your Cricut, then fold or connect the ends to form a ring.
Add a separate paper holly leaf, bow or Christmas message to decorate it. Test the size with your actual napkins before making a full set.
Materials: Cricut machine, sturdy cardstock, napkin ring SVG, glue and decorative paper.
Matching Napkin Rings to Your Table Setting:
Use colours that complement your plates, table runner and centrepiece. Gold and cream can suit a formal Christmas dinner, while red and green create a traditional festive look. Make sure the ring is wide enough for the folded napkin without squeezing it too tightly.
31. DIY Christmas Door Hanger
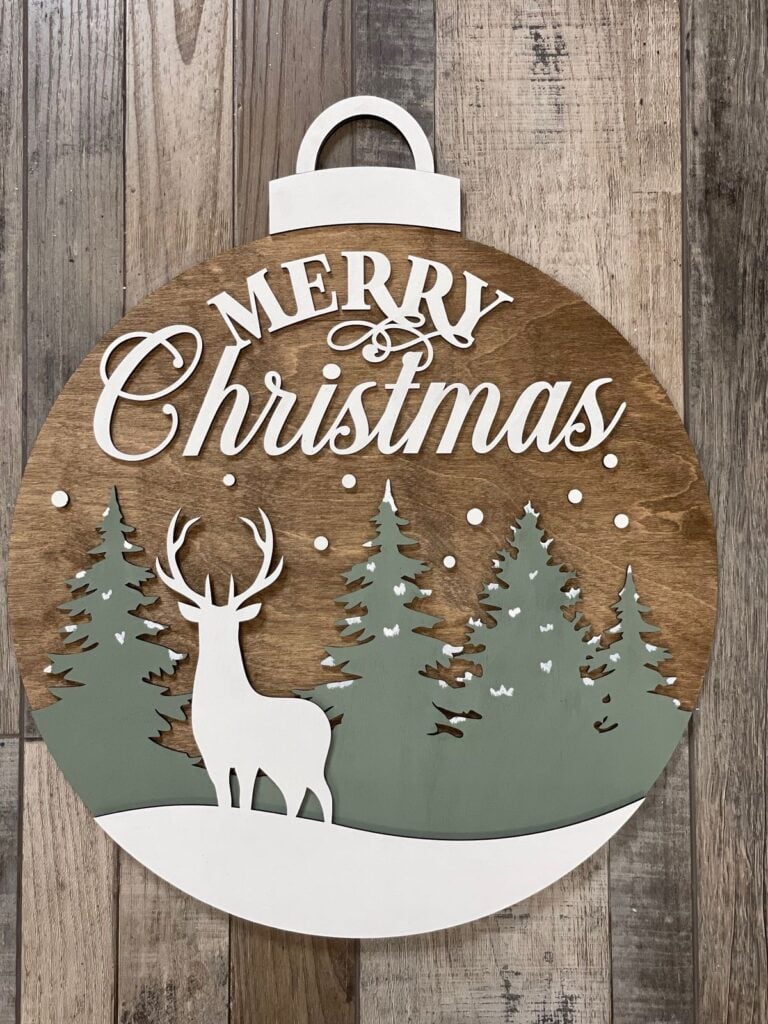
A Christmas door hanger is a decorative sign that can be placed on an interior door, bedroom door or entryway. With a Cricut, you can cut Christmas messages, names and festive shapes to create a personalised decoration for the home.
How to make it:
Choose a suitable wooden, acrylic or thick cardstock door hanger blank. Create a design with a short message such as “Merry Christmas,” “Welcome” or “Santa Stop Here.” Cut the lettering from permanent vinyl and apply it to the clean surface using transfer tape.
Add decorative details such as stars, snowflakes or a small Christmas tree, then attach a ribbon if the hanger has a hole.
Materials: Cricut machine, door hanger blank, permanent adhesive vinyl, transfer tape, weeding tool and ribbon.
Choosing a Door Hanger Design:
Keep the message short and easy to read from a distance. For a family home, a surname or welcome message can make the hanger more personal.
Choose a blank that is light enough for the intended hook and suitable for the location where it will be displayed.
Crafting with children can be a fun way to encourage creativity and hands-on learning. 35 Easy Cricut Projects for Kids offers age-friendly ideas for making things together.
Conclusion
Christmas comes around quickly, and sometimes the hardest part is finding a gift or decoration that feels personal without spending so much time or money getting it right.
That is where these easy Cricut projects for Christmas can come in handy.
Which one would make someone smile this Christmas? Start with that project, put your own touch on it, and see where your creativity takes you.
Save this post to your Christmas craft ideas so you can return to your favourites when it’s time to make them!