Which Cricut projects are worth making to sell? See product ideas for weddings, small businesses, gifts and everyday use, plus tips for testing demand.
A wedding planner needs 80 matching favour tags by Friday. A candle maker needs labels for a new batch. A dog owner wants a bandana with a pet’s name on it.
These are different customers, but each is looking for something specific, not just another craft made with a Cricut.
That is the opportunity behind simple Cricut projects for beginners that sell: making useful, personalised products for people who already have a reason to buy them.
But before you order blanks and rolls of vinyl, it helps to know which products fit your machine, which ones are practical to produce in small batches, and how to check whether buyers are searching for them.
Here are 21 ideas worth investigating, along with the details to consider before turning any of them into a product for sale.
Start crafting with projects that are manageable at home using these 22 Easy Cricut Projects for Beginners You Can Make at Home, with ideas to help you get comfortable using your Cricut machine.
Simple Cricut Projects for Beginners That Actually Sell
1. QR Code Signs for Small Businesses
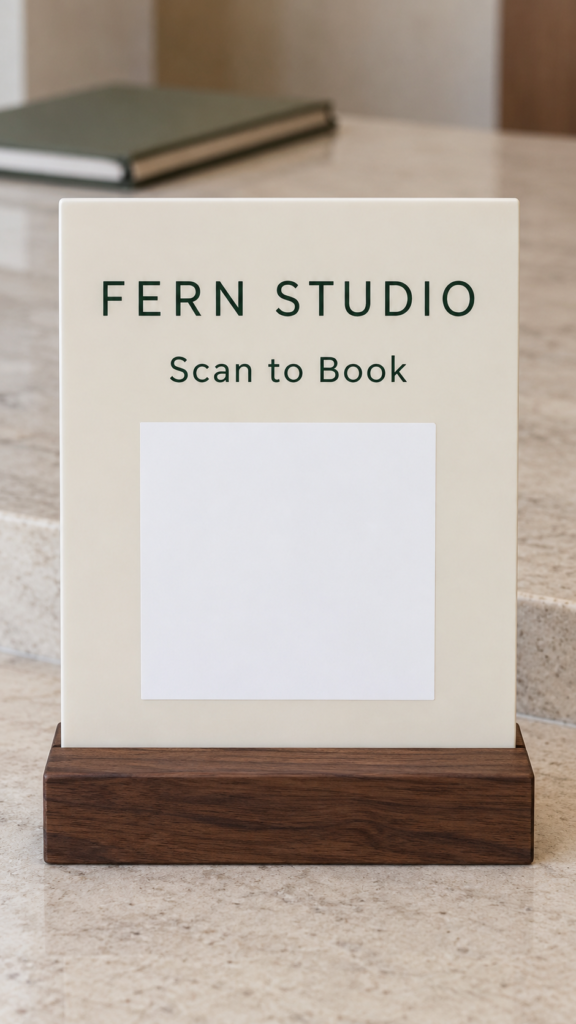
A small salon might want customers to book appointments without asking for a phone number, while a market vendor may want shoppers to scan a code to view a product catalogue.
A simple QR code sign can help with both, and you don’t need an elaborate design to make one.
For this project, you’ll need a blank sign suitable for vinyl, adhesive vinyl, transfer tape, and a QR code that links to the business’s chosen page.
You can create the sign with the business name, a short message such as Scan to Book, and the QR code.
Your Cricut cuts the lettering and decorative elements, while the QR code itself can be printed or prepared separately using a suitable method.
The important part is making sure the QR code still scans. Keep it clear and high-contrast, don’t stretch or distort it, and leave the blank margin around it. Test the finished code with a phone before handing the sign over. Also, confirm that the link works and belongs to the customer.
This could be a useful product to offer local salons, barbers, cafés, and independent businesses. Begin with one sample sign so you can work out the material cost and production time before accepting orders.
2. Branded Labels for Small-Batch Candle Makers
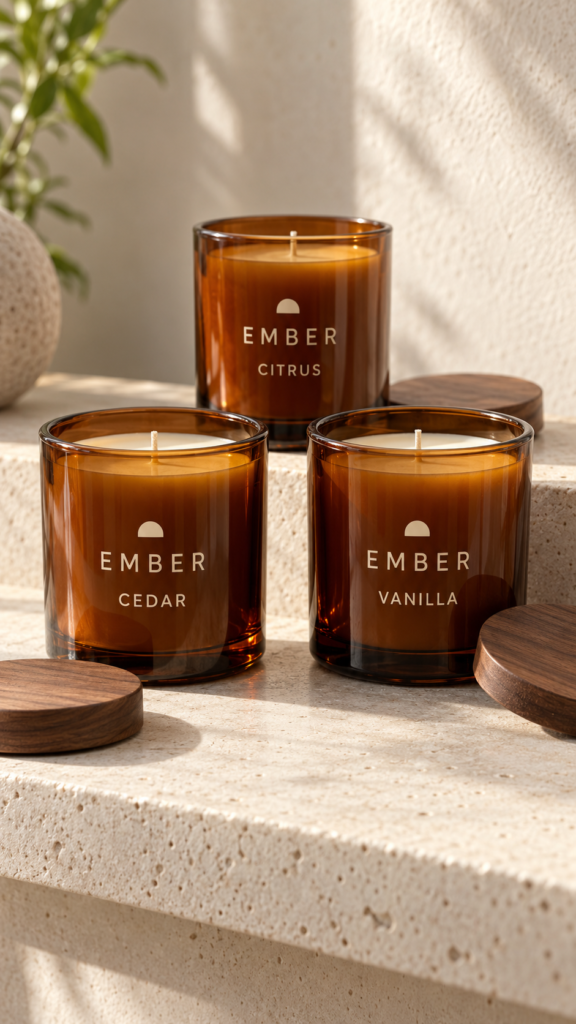
Someone who makes candles at home may need labels that look consistent across different scents.
You could create a simple set featuring the candle brand, scent name, and a small decorative detail, then change the scent name for each product.
You’ll need a Cricut machine, adhesive vinyl suitable for the container, transfer tape, a ruler, and a clean, smooth candle jar or container. Measure the flat area available for the label before designing it.
Keep the wording short enough to read easily, then cut the vinyl, weed away the excess, and transfer the design onto the container.
A useful way to offer this product is to create matching labels for several scents using the same layout. The candle maker gets a coordinated look without needing a completely different design for every jar.
Before making a batch, test the vinyl on the actual container.
Curved surfaces and certain coatings can affect adhesion, and decorative vinyl should not replace any required candle safety or product information. Check that the material and its placement are suitable for the intended container and use.
3. Personalised Pet Bandanas
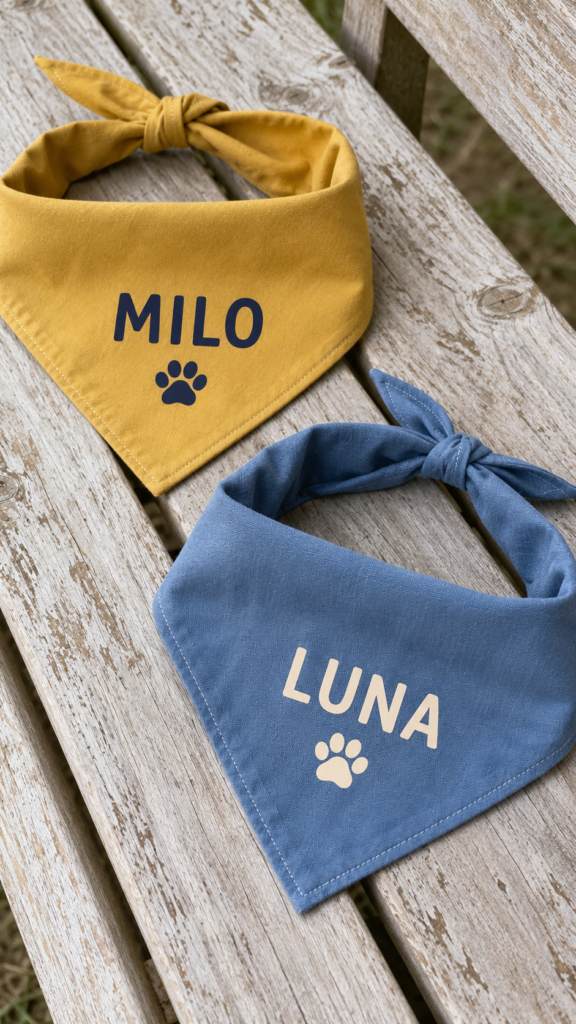
Pet owners often like accessories with their dog’s name on them.
A plain bandana personalised with a name or a small paw-print design is a straightforward project to test, especially if you keep the design simple and offer a few colour choices.
You’ll need a plain fabric bandana, heat-transfer vinyl (HTV) compatible with the fabric, a Cricut machine, and a suitable heat press or other application equipment recommended for the vinyl.
Choose a design that will remain readable on the folded or worn bandana. Cut the HTV, mirror the design when required by the product instructions, weed away the excess, and apply it according to the manufacturer’s temperature, pressure, and timing guidance.
You could offer the bandanas with a choice of names, lettering styles, and vinyl colours. Making one sample first will help you check how the lettering looks against the fabric and how much time each order takes.
Test the finished bandana according to the vinyl’s care instructions, including washing if appropriate. Avoid loose embellishments that could become a choking hazard, and make sure the bandana fits comfortably.
Pets should be supervised while wearing accessories.
4. Personalised Fabric Labels for Handmade Businesses
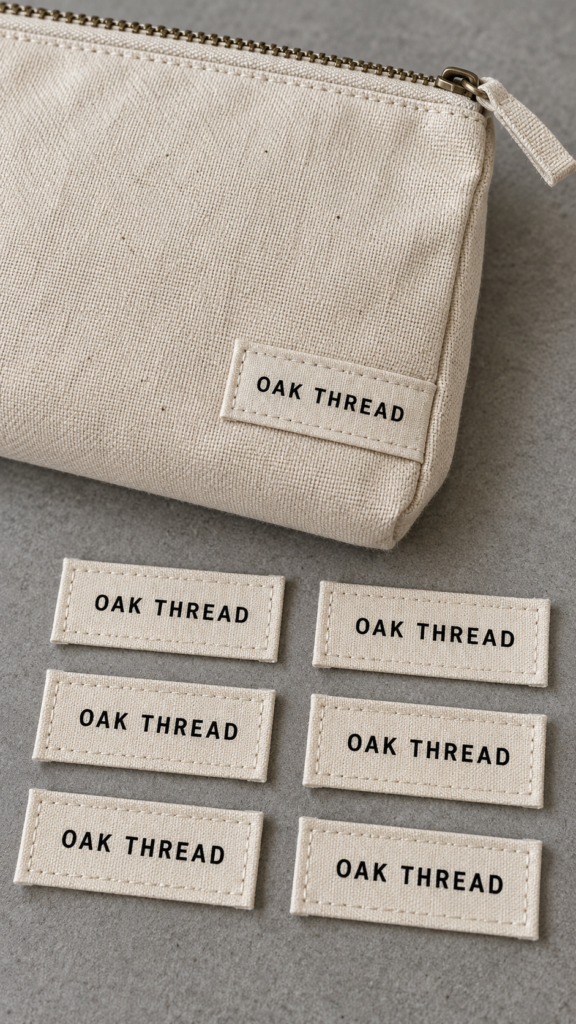
People who sew bags, make crochet items, or sell handmade accessories may want their business name displayed on their products.
You can create simple personalised fabric labels using compatible heat-transfer vinyl on suitable fabric labels or items.
For this project, you’ll need a Cricut machine, compatible HTV, suitable blank fabric labels or fabric pieces, weeding tools, and the recommended heat-application equipment.
Use a short business name or simple logo that won’t become difficult to weed at a small size. Cut the design from HTV, weed it carefully, and apply it according to the vinyl manufacturer’s instructions.
You could offer a small matching set for makers who want to add their name to several handmade products. Keep the first designs simple, since tiny lettering and intricate logos can be difficult to cut and apply neatly.
Be clear about what you’re selling: these are personalised fabric labels, not woven labels manufactured with the design built into the fabric.
Test the vinyl on the chosen material and check how it holds up to washing and handling before offering larger batches.
5. Name Decals for Reusable Bottles
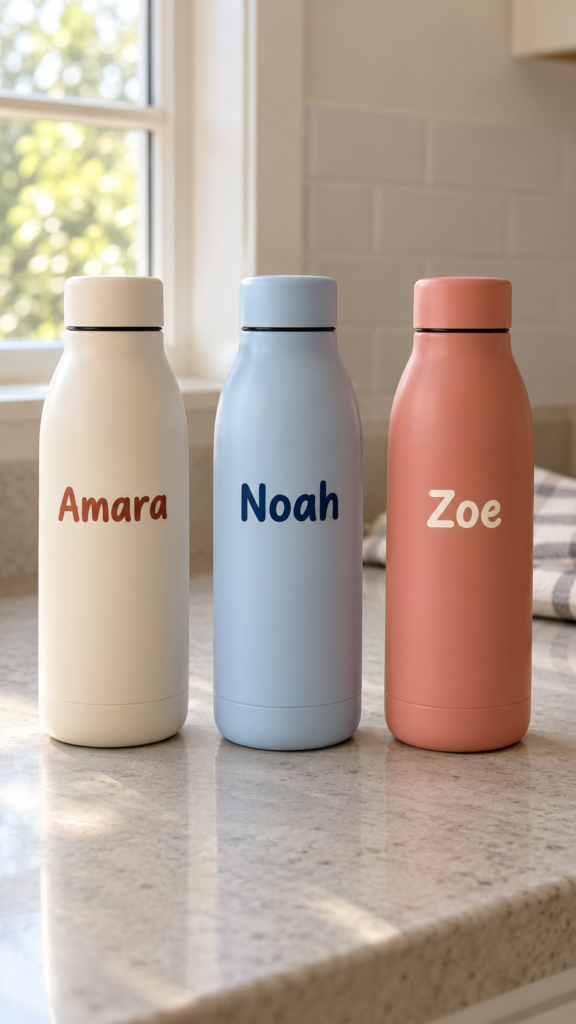
Reusable bottles are easy to mix up at school, work, the gym, or family gatherings. A personalised name decal gives each bottle a clear identifier without requiring a complicated design.
You’ll need adhesive vinyl suitable for the outside of the bottle, transfer tape, a Cricut machine, a weeding tool, and a clean, dry bottle.
Measure the area where the name will sit, then choose a font and size that fit without wrapping too far around the bottle. Cut the name, weed the excess vinyl, transfer it onto the bottle, and smooth it down carefully.
You could offer a few lettering styles and colours, with options for first names, initials, or short words. Photograph a finished sample on a bottle so buyers can judge the size and appearance before ordering.
The bottle’s surface matters. Textured finishes and some coatings may not hold vinyl well, so test the material before making several decals.
Avoid placing the design on the drinking rim or other food-contact areas, and don’t promise dishwasher safety unless the exact vinyl and application have been tested for that use.
6. Personalised Wedding Vow Book Covers
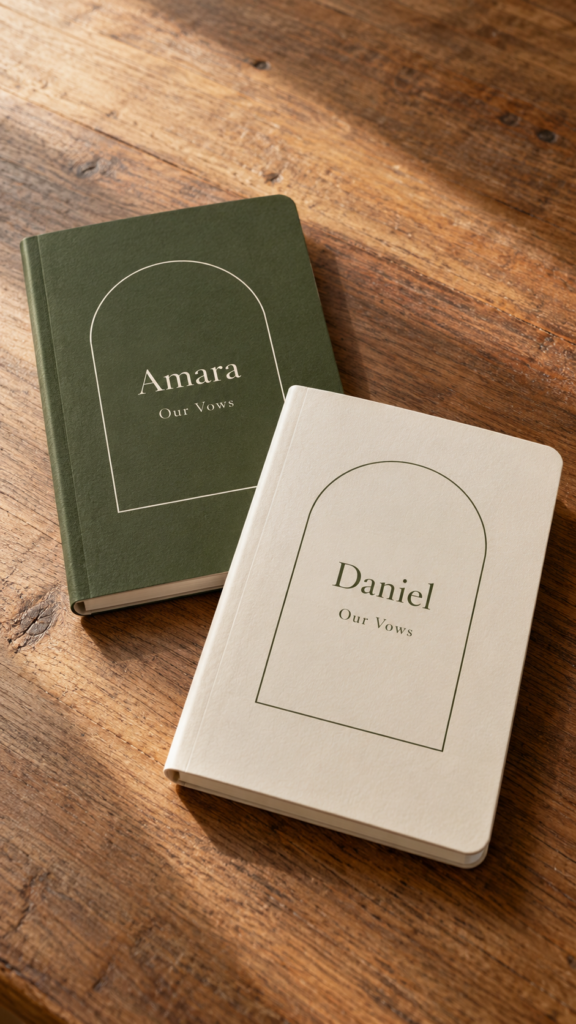
Couples preparing for their wedding may want matching vow books with their names, wedding date, or initials on the covers.
Personalising plain notebooks or suitable vow books gives you a simple product to offer as a pair rather than selling only one item.
You’ll need two blank vow books or notebooks with covers suitable for vinyl, adhesive vinyl, transfer tape, a Cricut machine, and a ruler.
Measure each cover before creating the design, and keep the lettering proportionate to the available space. Cut the names or initials, weed the excess vinyl, and transfer the design carefully onto the cover.
A matching pair is a natural option for this project. You could offer the same lettering style on both books, with each partner’s name on their own cover and the wedding date included where requested.
Check the cover material before accepting an order. Textured, fabric-covered, or specially coated surfaces may not hold adhesive vinyl reliably, so test a sample first.
Confirm the spelling, initials, and date with the customer before cutting, and agree on a realistic completion date for wedding orders.
7. Personalised Wedding Welcome Bags
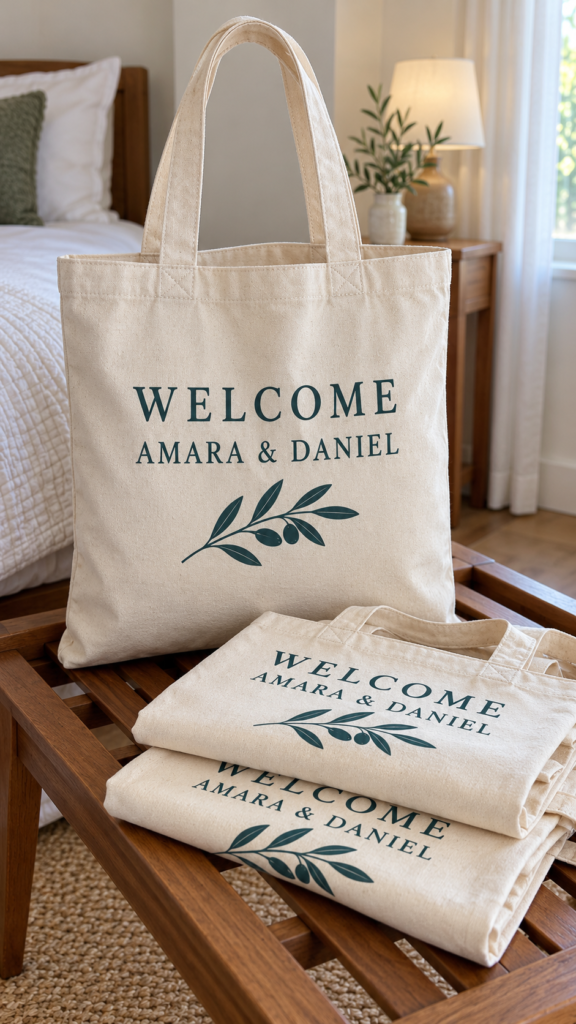
Couples planning destination weddings may want welcome bags for guests arriving at their hotel, while wedding coordinators may need several matching bags for an entire group.
Personalising plain tote bags with guests’ names, the couple’s names, or a short wedding message gives the bags a more personal touch.
For this project, you’ll need suitable blank bags, heat-transfer vinyl (HTV) compatible with the fabric, a Cricut machine, and the recommended heat-application equipment.
Create a simple design, cut the vinyl, weed away the excess, and apply it according to the manufacturer’s instructions. Test the design on one bag before working on the full order.
Among simple Cricut projects for beginners that sell, this idea is worth testing because wedding orders may involve several matching items.
Calculate the cost of each blank bag, vinyl, packaging, and the time spent personalising and assembling the bags. Send the couple a proof to approve before producing a large batch.
8. Guest Name Decals for Event Cups
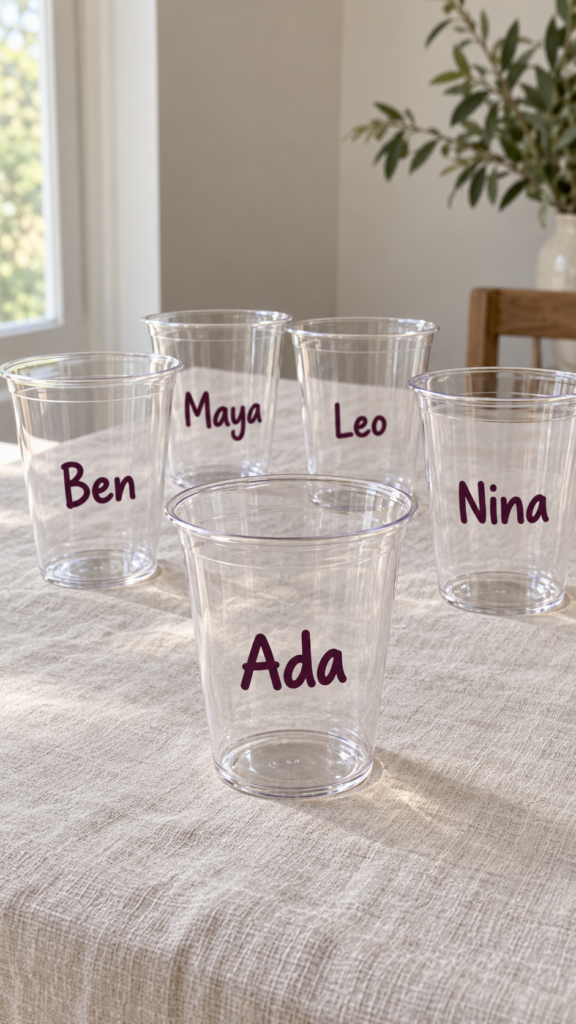
At weddings, birthdays, and other gatherings, guests can easily pick up the wrong cup. Personalised name decals give each cup an individual label while allowing the host to match the event’s colours or theme.
You’ll need cups with smooth surfaces suitable for the chosen adhesive vinyl, a Cricut machine, transfer tape, and weeding tools.
Create names in a clear font, cut the vinyl, remove the excess, and transfer each name onto a clean, dry cup. Make a sample first to check that the lettering fits the available space.
You could offer these decals in sets for small parties and larger events. This is one of the simple Cricut projects for beginners that sell worth considering when you can reach event planners or people organising celebrations.
State whether the decals are intended for temporary use or longer-term application.
Keep them away from the drinking rim, and give customers care instructions based on the vinyl and cup materials rather than promising dishwasher safety without testing.
9. Reserved and Special-Seat Signs
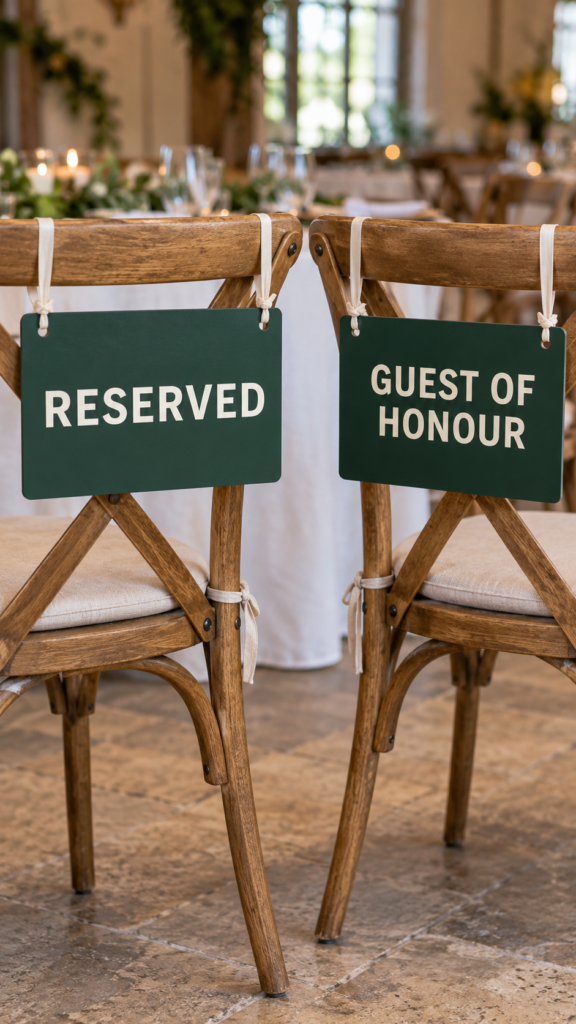
Wedding couples, event planners, restaurants, and party hosts may need signs to mark seats for the guest of honour, close family members, or reserved guests.
A simple sign with clear lettering can be more useful than an elaborate design that is difficult to read across a room.
You’ll need a blank sign, adhesive vinyl suitable for its surface, transfer tape, and a Cricut machine. Measure the sign before designing the wording, and choose lettering large enough to read from the expected viewing distance.
Cut and weed the vinyl, then transfer it onto the sign. Check that the stand or hanging method can support the finished piece.
You can offer individual signs or matching sets for a wedding reception, birthday party, or formal dinner.
For beginners exploring simple Cricut projects for beginners that sell, this option lets you start with a small sample instead of keeping finished signs in stock.
Check the sign’s stability and make sure the text and colour contrast remain clear under the venue’s lighting.
For more beginner-friendly cutting machine inspiration, browse these 19 Easy Cricut Projects for Beginners and choose a project that suits your skills and supplies.
10. Graduation Stole Personalisation
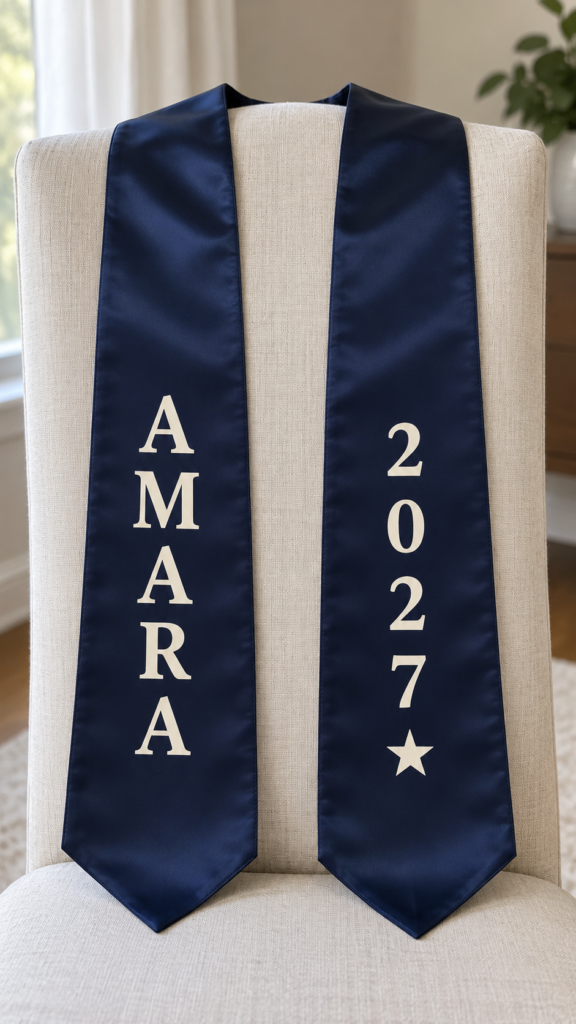
Graduates and their families may want a plain graduation stole personalised with a name, graduation year, or short original message.
Since graduation dates vary by school and location, this is a seasonal product that requires planning around local ceremony schedules.
You’ll need a plain stole made from fabric compatible with your chosen heat-transfer vinyl, a Cricut machine, and suitable heat-application equipment.
Check the fabric’s care label and the vinyl manufacturer’s instructions before setting the temperature. Keep the design simple enough to fit the stole without interfering with its usual drape, then cut, weed, and apply the lettering as directed. Test a sample of the material first.
This can be one of the simple Cricut projects for beginners that sell during graduation season, but avoid buying large amounts of blank stoles before confirming interest.
Ask the customer to check the spelling, year, and requested wording, and confirm the school’s rules about decorating graduation clothing before accepting the order.
11. Personalised Classroom Door Signs
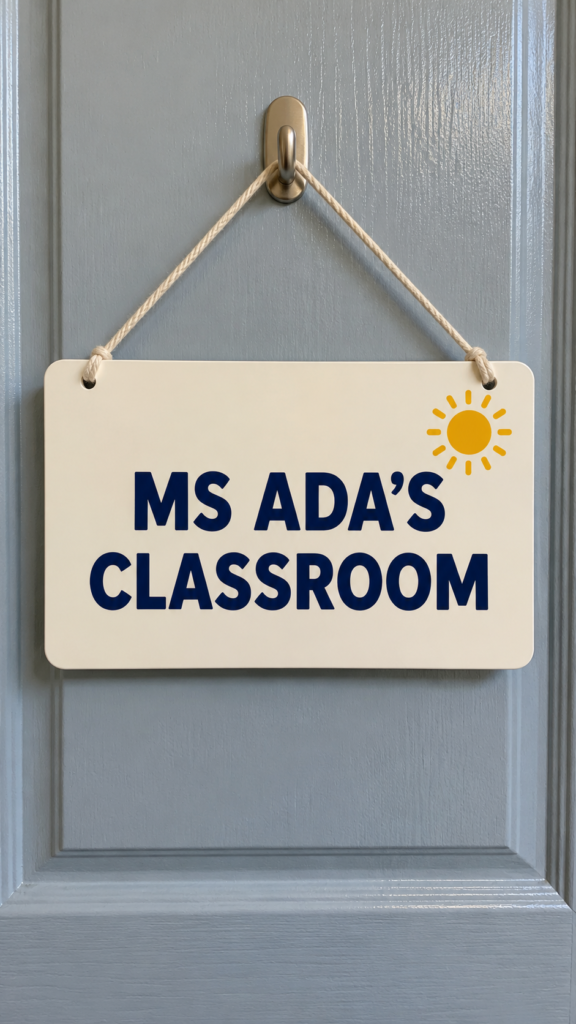
Teachers, tutors, daycare providers, and parents setting up learning spaces may want signs displaying a teacher’s name, classroom number, or subject. A personalised sign can help identify a room while matching the colours or theme already used in the space.
For this project, you’ll need a stable sign blank, adhesive vinyl compatible with its surface, transfer tape, and a Cricut machine.
Measure the blank, arrange the wording so it is easy to read, then cut and apply the vinyl. You can keep the design simple with a name and one small decorative element rather than filling the sign with tiny details.
Offer a few sizes or colour combinations so customers can choose what suits their classroom.
These simple Cricut projects for beginners that sell may appeal to teachers who want a personalised sign without commissioning a complicated design.
Use a secure hanging method suited to the sign’s weight and the intended location, and check any relevant school rules before suggesting where it should be displayed.
12. Personalised Name Badges for Tutors and Event Staff
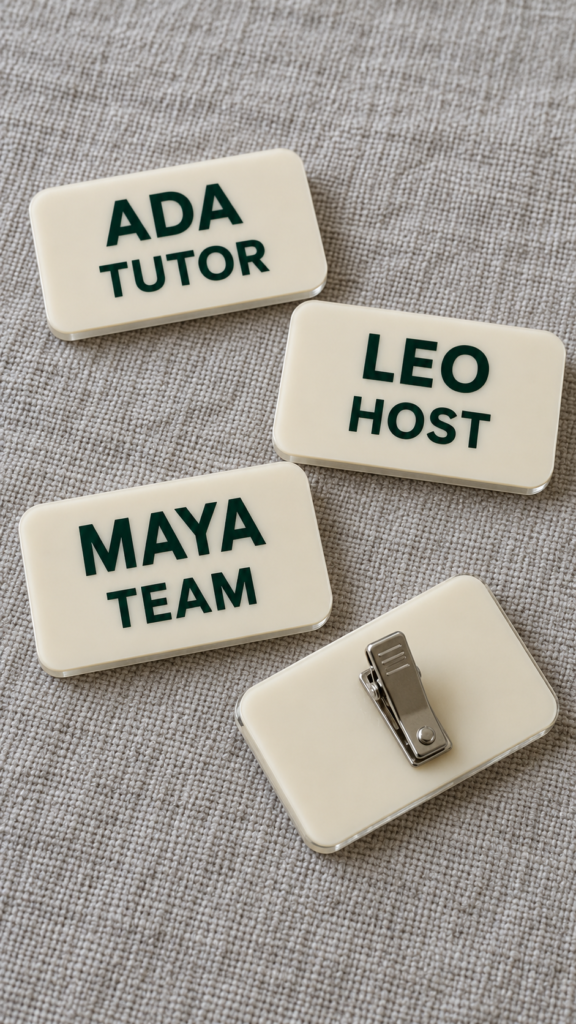
Tutors, workshop leaders, volunteers, and event teams often need name badges so visitors can identify them. A badge with a person’s name and, where appropriate, their team or event role can be useful at classes, community gatherings, and workshops.
You’ll need compatible blank badges, adhesive vinyl or another suitable Cricut-compatible material, and a Cricut machine.
The exact method depends on the badge: some blanks are suitable for vinyl application, while others may require a different process. Measure the usable area, choose readable lettering, and make a sample before preparing several badges.
You could offer individual badges or coordinated sets for a workshop or small event team. Among simple Cricut projects for beginners that sell, this one is practical because customers may need several names in the same style.
Check how each badge attaches to clothing and ensure the finished item is comfortable and secure. Use only names and roles supplied or approved by the customer, and do not copy protected logos or create badges that falsely suggest official credentials.
13. Children’s Height-Chart Wall Decals
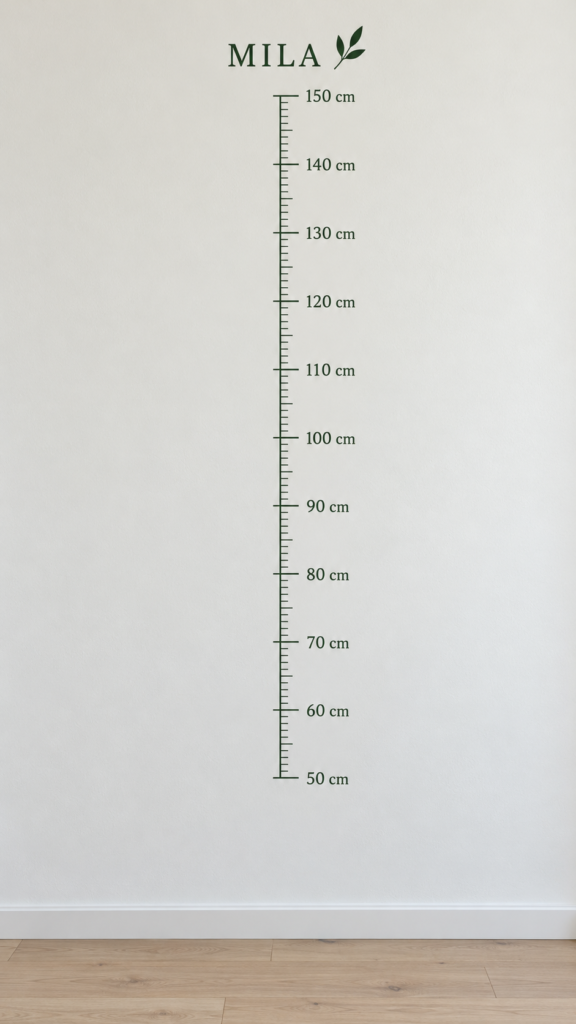
Parents and nursery decorators may like a wall height chart that records a child’s growth while adding a personal touch to the room.
A name and a simple decorative design can make the chart feel individual, but the measurement marks must remain accurate for it to be useful.
You’ll need suitable wall-safe adhesive vinyl, a Cricut machine, transfer tape, a measuring tool, and a smooth surface on which the chart can be applied.
Plan the measurement scale carefully before cutting. Check the spacing between marks, decide where the starting point will sit above the floor, and test the design’s readability before making the complete decal.
This is one of the simple Cricut projects for beginners that sell that combines decoration with a practical purpose. You could offer a plain version and a personalised version with the child’s name.
Explain which wall surfaces are suitable and test the decal before offering it.
Removability depends on the vinyl, paint, wall finish, and how long the decal remains in place, so avoid promising damage-free removal on every surface.
14. Matching Spice-Jar Label Sets
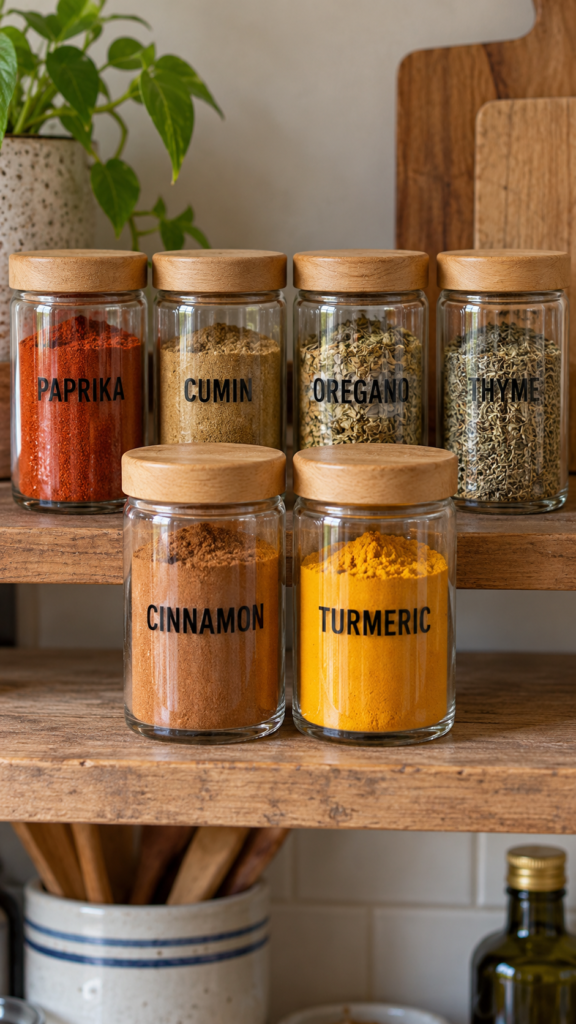
People organising their kitchens may want matching labels to identify spices and give their jars a consistent appearance. A set with clear names is especially useful when several spices look similar or are stored in identical containers.
You’ll need adhesive vinyl suitable for the jars, a Cricut machine, transfer tape, and a ruler. First, decide whether the labels will go on the front, lid, or both.
Measure the available space and choose lettering that remains readable at that size. Cut the names, weed the excess vinyl, and apply each label to a clean, dry surface.
You could offer a standard set of common spice names alongside a custom option for less common ingredients. These simple Cricut projects for beginners that sell can be easier to produce in batches when the label sizes and design stay consistent.
Check the vinyl’s suitability for the jar material and the conditions in which the jars will be used. Do not describe the labels as waterproof or dishwasher-safe unless the exact materials have been tested for those conditions.
15. Workshop and Tool-Drawer Labels
DIY enthusiasts, home workshop owners, craft makers, and small repair businesses may need labels to organise screws, nails, fasteners, drill bits, and other supplies.
Clear labels make it easier to identify what belongs in each drawer without opening every container.
You’ll need adhesive vinyl compatible with the drawer fronts or storage containers, a Cricut machine, transfer tape, and a measuring tool.
Start by measuring the smallest drawer fronts, since the lettering must fit those as well as the larger ones. Use short names such as Wood Screws, Washers, or Drill Bits, then cut and apply the labels to clean surfaces.
A useful product could be a matching set sized for a particular storage unit, with optional custom labels for less common tools. This is one of the simple Cricut projects for beginners that sell to consider if you can reach local makers or people setting up workshops.
Choose materials that can withstand the expected handling and exposure to dust or grease, and test adhesion on the actual storage surface before making a full set.
Keep children engaged with hands-on creativity through these 37 Art Projects for Kids That Are Pinterest-Worthy, featuring ideas they can make and proudly display.
16. Personalised Bookplates for Readers
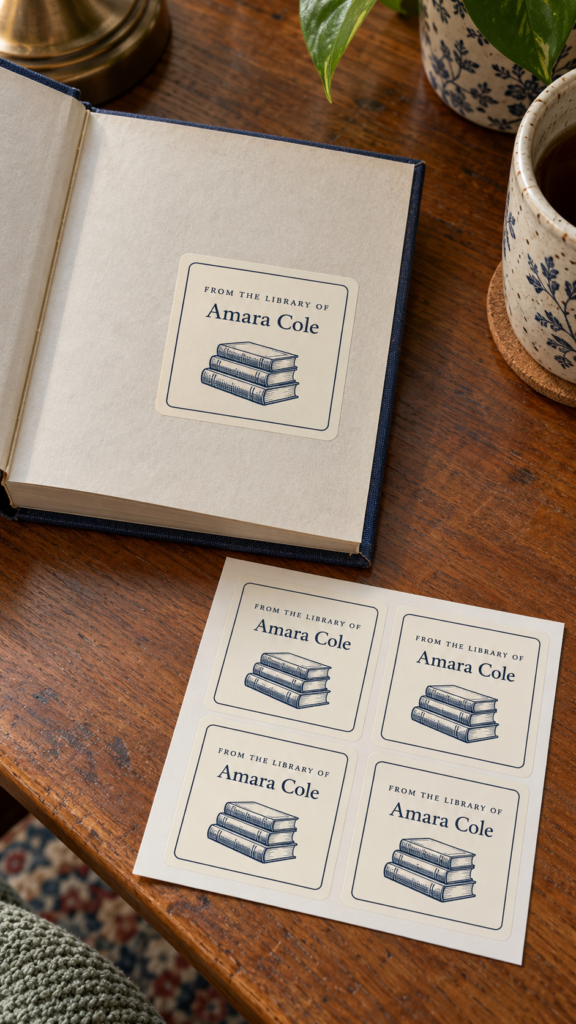
Book lovers, teachers, book-club members, and gift buyers may appreciate bookplates that identify who owns a book.
Unlike general decorative stickers, a bookplate has a clear purpose: it records the owner’s name inside a book, making it useful for personal libraries and book gifts.
You’ll need printable or writable adhesive labels suitable for paper, or compatible paper and adhesive materials that work with your Cricut setup.
Create a small design with space for the owner’s name, then cut the labels to a consistent size. If you’re using a printed design, check that your machine and materials support the print-then-cut process before preparing a batch.
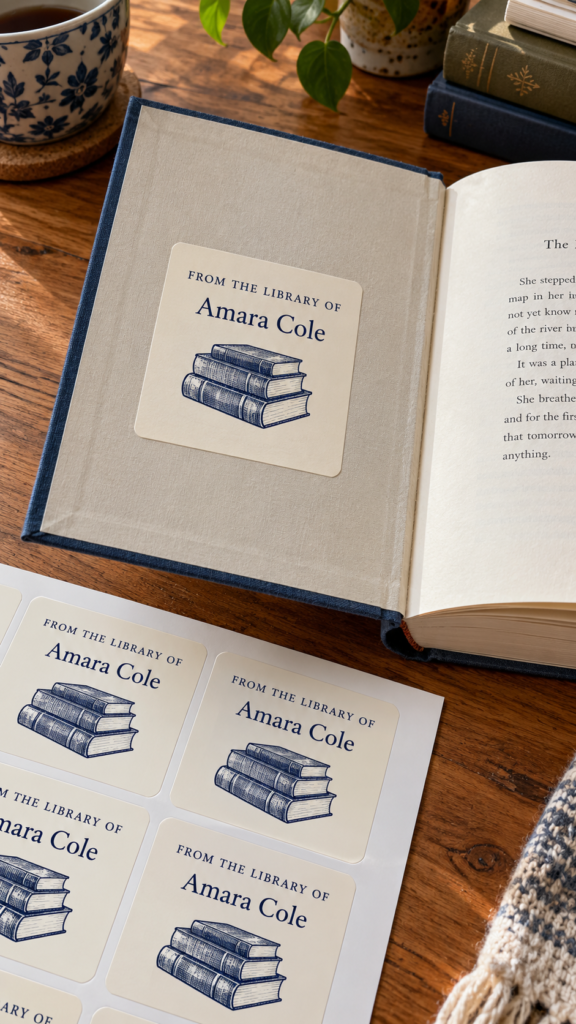
You could offer a set with one name and a simple original illustration, such as a stack of books or a small floral border.
These simple Cricut projects for beginners that sell can work as small gifts for readers or teachers. Make it clear whether the labels are removable or intended to stay in place, and test one inside a spare book before offering a large set.
17. Personalised Memorial Keepsake Frames
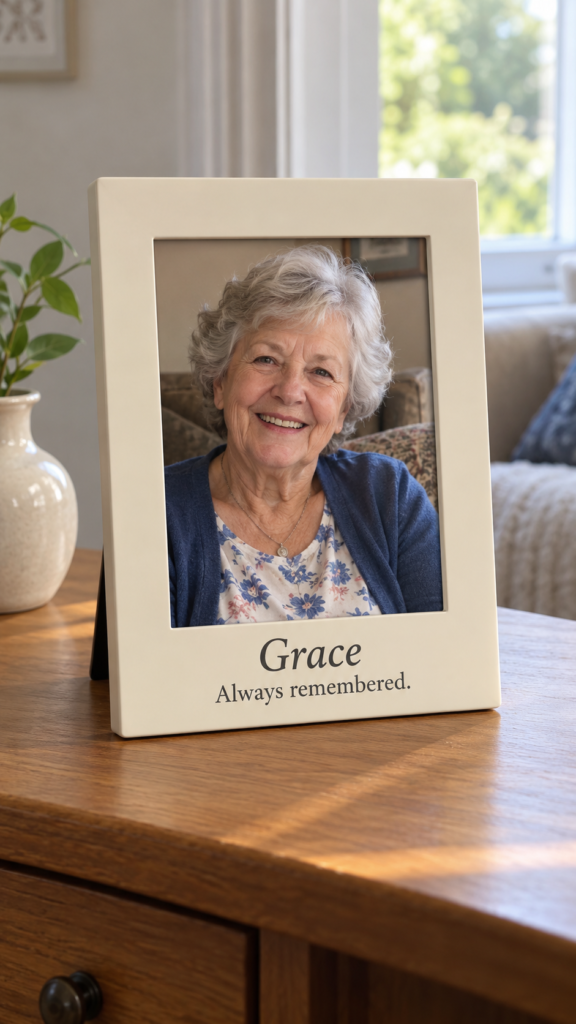
Families and friends sometimes look for a thoughtful way to display a photograph in memory of someone who has died.
A plain photo frame personalised with a name, dates, or a short message can provide a simple, individual keepsake.
You’ll need a photo frame with a surface suitable for vinyl, adhesive vinyl, transfer tape, a Cricut machine, and a ruler. Measure the space available around the photograph and keep the wording short enough to remain readable.
Cut and weed the design, then transfer it onto the frame. Test the vinyl on the frame’s material before completing the piece.
This is one of the simple Cricut projects for beginners that sell where careful communication matters as much as the design. Confirm every name, date, and message with the customer before cutting, and handle any photographs or personal details respectfully.
Offer a digital proof so the family can check the wording and layout. Avoid rushing the customer into a decision or making promises about how the keepsake will make them feel.
18. Personalised Wedding Favour Tags
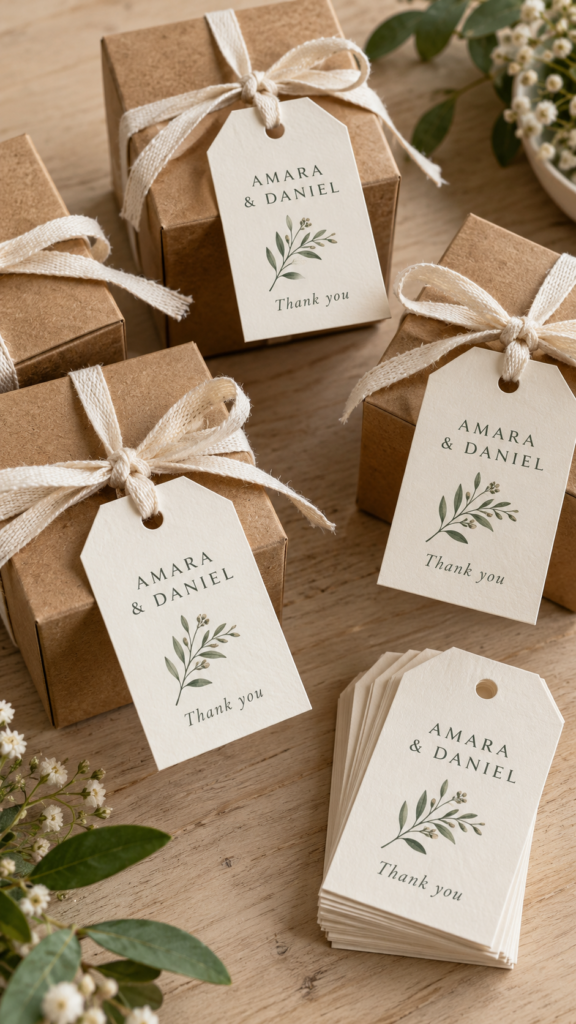
Couples and wedding planners may need tags for favour bags, small gift boxes, or other items prepared for guests.
Tags featuring the couple’s names, wedding date, or a brief thank-you message can bring a consistent look to the favours without requiring every item to be individually decorated.
You’ll need suitable cardstock, a Cricut-compatible cutting mat and blade, ribbon or string if the tags will be tied, and a hole-punching method if your design does not include a cut hole.
Create a tag shape, add the wording, and cut a sample to check the size and strength of the cardstock. Once the design is approved, produce the remaining tags and assemble them.
You could offer tags in sets of 25, 50, or another quantity agreed with the customer, with a choice of colours and simple layouts.
These simple Cricut projects for beginners that sell may suit customers who need coordinated wedding details in larger quantities.
Calculate the time needed for cutting, weeding if vinyl is used, tying, sorting, and packing. Confirm the quantity, spelling, colours, and deadline before starting the full batch.
19. Branded Packaging Seals for Small Shops
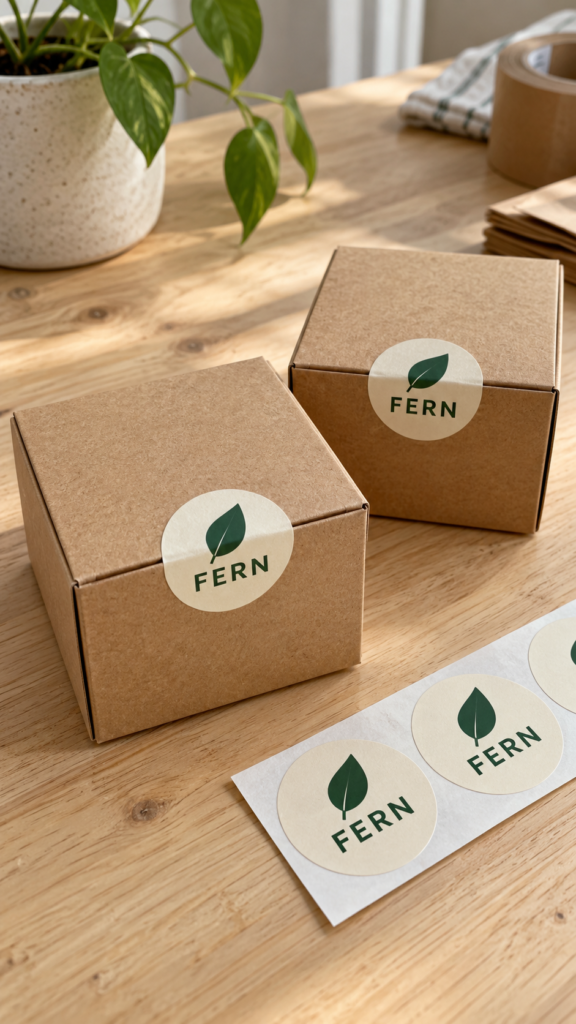
A small soap business might want its packaging to look consistent across every order, while a stationery seller may want a neat way to close tissue paper around a purchase.
Branded packaging seals can add a business name, a simple logo, or a short thank-you message without requiring the shop owner to redesign the entire package.
For this project, you’ll need a Cricut machine, adhesive vinyl suitable for the intended surface, transfer tape, and a smooth surface or packaging sample to test.
Create a simple design with lettering that remains readable at a small size. Cut the vinyl, weed the excess, and transfer the design onto the packaging or seal surface.
There is an important difference between cut-vinyl seals and printed sticker labels. Cut vinyl works best for simple designs with clear shapes and limited colours.
A design with photographs, gradients, or several small coloured details is usually better suited to printed stickers or a compatible Print Then Cut workflow.
Also, adhesive vinyl may not be the most practical choice for producing large numbers of small seals, so compare the material cost and time per piece before setting your price.
You could offer matching seals for tissue paper, gift boxes, or parcels, depending on the adhesive and packaging material.
Ask the customer for their correct logo and brand colours, and test the seal on the actual packaging before making a batch. This helps you avoid spending time on a design that does not stick well or is difficult to apply.
20. Simple Vehicle Window Lettering for Local Businesses
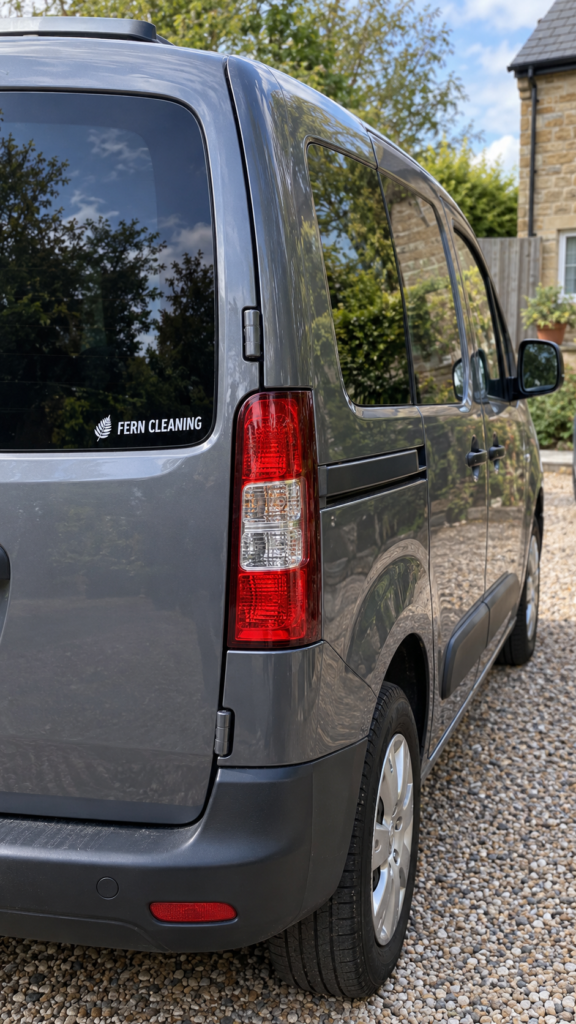
Mobile cleaners, pet groomers, plumbers, and other service providers may use their vehicles to travel between customers. Clear lettering with a business name, phone number, or website can help people identify the business when the vehicle is parked or visiting a customer’s property.
You’ll need exterior-grade vinyl intended for vehicle graphics, a Cricut machine, transfer tape, a measuring tape, and a clean application surface.
Keep the design simple, with readable lettering and enough spacing between the details. Before cutting, measure the intended area and check that the complete design fits without covering important parts of the window.
This project requires more care than making a small decorative decal. Vehicle glass, paintwork, and other surfaces may need different vinyl products, so confirm the intended application before buying materials.
Follow local rules on vehicle lettering and window placement, and never obstruct the driver’s view. Intricate, multi-colour graphics may also require professional printing or a different production method.
For a beginner, a small business-name decal may be a more manageable first order than a full vehicle design.
Confirm the contact details with the customer, make a sample or digital proof, and explain which surfaces the chosen vinyl is suitable for. Price the job based on the vinyl used, design time, application difficulty, and whether installation is included.
21. Personalised Advice Cards for Milestone Celebrations
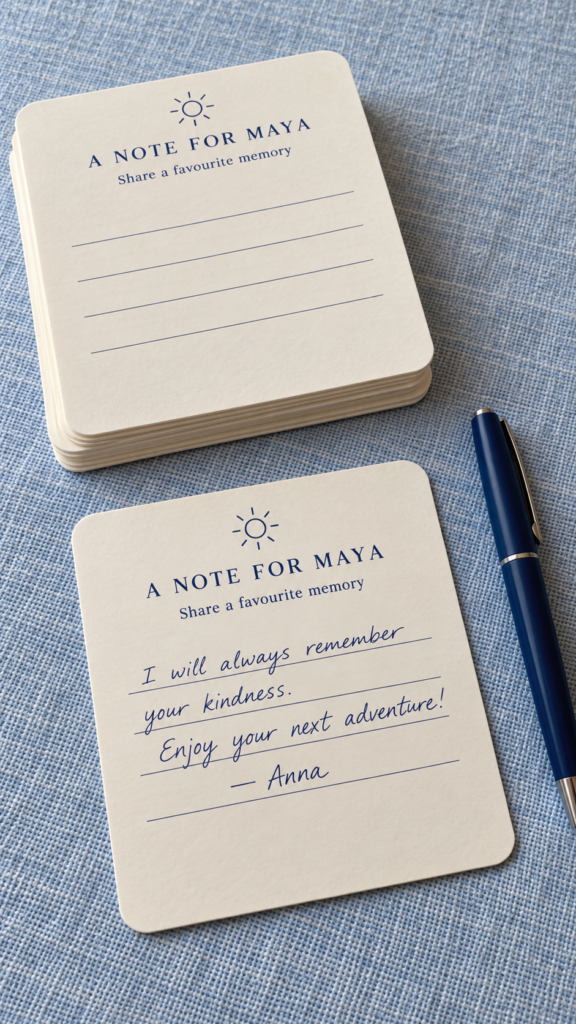
At weddings, anniversaries, retirement parties, and milestone birthdays, hosts sometimes want guests to leave written messages for the person or couple being celebrated.
Personalised advice cards give guests a clear place to write a memory, a wish, or a piece of advice that can be collected after the event.
You’ll need cardstock compatible with your Cricut machine, a cutting mat and suitable blade, and a design with a heading and enough blank space for handwriting.
You might use prompts such as Share a favourite memory or What advice would you give the couple? Keep the wording short and the writing area generous; decorative borders should not take up the space guests need to use.
You can make a coordinated set with the event date, names, and colours, then package the cards together for the host. Before producing the full order, cut a sample and test the cardstock in your machine.
Very thick or textured card may not cut cleanly, and some materials can shift on the mat.
If you plan to sell these cards, consider offering them as part of a small celebration stationery set alongside matching welcome signs or favour tags. Confirm the wording, quantity, and delivery date before production, especially when the cards are needed for a specific event.
Make a balcony feel more inviting without taking on a major renovation with these 21 Quick and Easy DIY Projects to Upgrade Your Balcony.
How to Tell Whether a Cricut Project Has Real Selling Potential
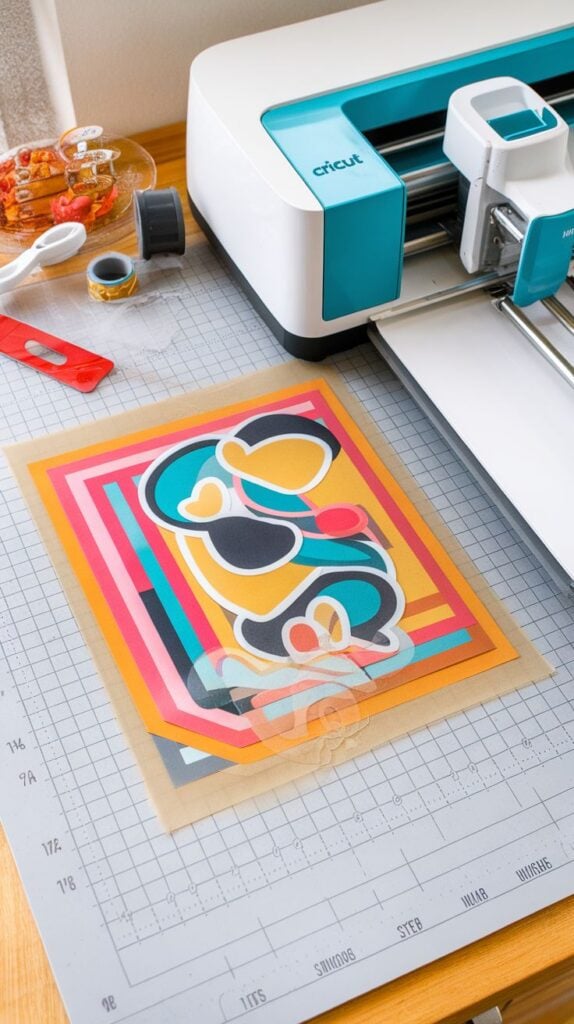
Before buying materials for a new product, look at what customers are already paying for.
Are they buying personalised pet accessories, ordering branded packaging for their shops, or searching for custom wedding items? The answers can help you choose which Cricut projects to test first, what features to offer, and whether the price you can charge will cover your materials and working time.
-
Research the Words Buyers Actually Use
Start with the name of the finished product, not just the machine used to make it. Someone shopping for a personalised pet bandana may search for a dog bandana with a name, while a small business owner may look for branded packaging stickers rather than Cricut projects.
Use Etsy Marketplace Insights, where available, to explore search terms and competition.
You can also check marketplace search suggestions, Google results, and relevant local selling groups to see how people describe what they want. Compare specific phrases with broader ones, and look at the products appearing in the results.
Search interest can help you decide which ideas deserve more investigation, but it does not prove that a product will sell.
Search suggestions are not confirmed sales figures, and competitor listings alone do not tell you how many orders a shop receives. Treat these findings as clues to investigate, not guarantees of demand.
-
Compare Similar Products, Not Just Their Prices
A low price does not always mean a competitor is offering a better deal. One seller may offer a single name decal, while another includes several decals, different colour choices, or a more durable material.
Compare products with similar sizes, materials, finishes, personalisation options, and quantities.
Check what the customer receives, whether shipping is included, and how the item is presented. These details help you judge what buyers may expect from your own product.
Then calculate your costs. Include the blank item, vinyl or cardstock, transfer tape where needed, packaging, and any marketplace or payment fees that apply.
Add the time spent designing, cutting, weeding, applying, checking, and packing the product. A product that looks profitable before labour is included may leave very little once you account for the work involved.
- Make One Sample Before Buying Materials in Bulk
A finished sample helps you spot problems before they become expensive. Small lettering may be difficult to weed, vinyl may not adhere well to a particular surface, and a design that looks attractive on screen may not fit the blank as expected.
Make one complete item and record how long each stage takes. Check the finish, test the material in the way the product will be used, and note any steps that are difficult to repeat consistently.
For personalised products, also consider how much extra time each custom order will require.
Take clear photographs of the sample and show it to people who might realistically buy it. Ask specific questions about the design, size, personalisation, and price rather than simply asking whether they like it.
Their feedback can help you decide what to change before offering the product more widely.
-
Test Interest Before Committing to a Large Order
Once your sample is ready, create a listing or share it with a relevant audience. Be clear about the price, available options, production time, and delivery arrangements.
Where possible, look for stronger signs of interest, such as genuine enquiries, requests for a quote, or paid orders, rather than relying only on likes and compliments.
Start with a small batch if the product requires several materials or involves a lot of hand assembly.
Review the results after the test: how many people enquired, which options they preferred, how long each order took, and what remained after expenses.
The aim is not to prove that every Cricut project will sell. It is to find out which products have a plausible buyer, can be made consistently, and leave enough profit to justify your time.
Conclusion
A personalised label for a small business, a name decal for a pet bandana, or a set of wedding favour tags can each serve a different type of customer.
The challenge is finding out which of these products people in your target market are willing to pay for and which you can produce without spending too much time or money on each order.
Pick one or two ideas from this list, make samples, and calculate the cost of materials, packaging, and labour before setting your prices.
Show the finished products to potential buyers and pay attention to genuine enquiries and orders, not just compliments.
As you gain experience, you can add more designs or offer matching products to customers who have already bought from you.
This gives you room to improve your work and grow your range based on what buyers request, rather than investing in supplies for products that may not find a market.