Think a heat press is essential for Cricut crafting? Try Cricut projects for beginners without a heat press using supplies you already own.
A heat press is often one of the first extra tools people consider when buying a Cricut, especially after seeing tutorials for customised T-shirts, tote bags and sweatshirts.
But is it worth putting your Cricut projects on hold until you can afford one? Not when your machine can already cut intricate paper designs, make stickers, create decorative stencils and personalise suitable hard surfaces with adhesive vinyl.
There are plenty of ways to put your Cricut to work without adding a heat press to your shopping list.
These Cricut projects for beginners without a heat press focus on what you can make with basic materials and the machine you probably already own.
Each idea gives you a practical starting point and helps you understand what supplies and tools are needed.
Birthday celebrations often call for small keepsakes that guests can take home, so readers may also enjoy these 31 Easy Cricut Projects for Gifts for more personalised ideas.
What Can You Make With a Cricut Without a Heat Press?
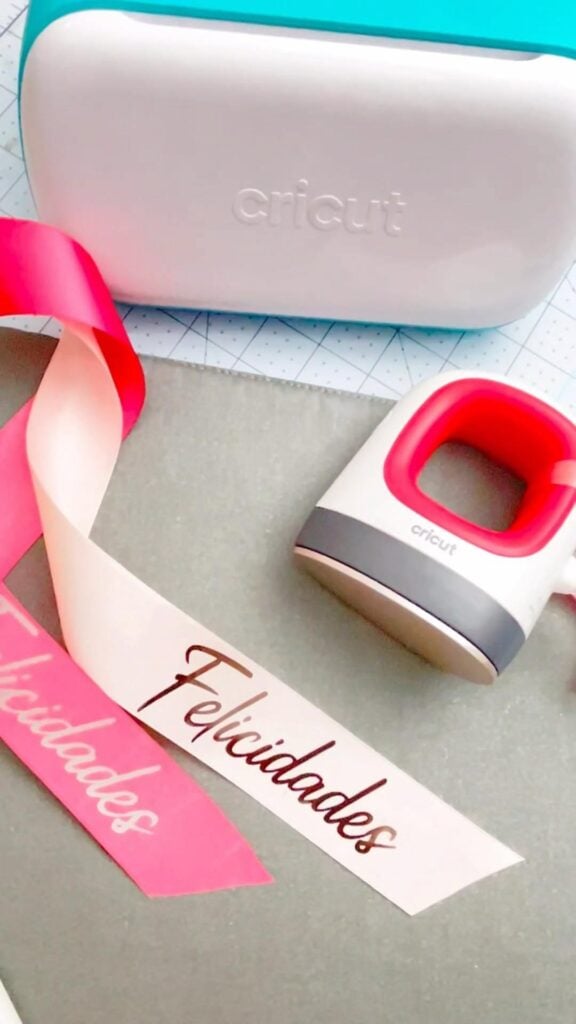
A heat press is only needed for projects that require heat-applied materials, such as iron-on vinyl.
Your Cricut can perform several other operations using its blade, compatible pens and specialist tools. Here are the main options beginners can use.
1. Cut Paper, Cardstock and Adhesive Vinyl
Use the cutting blade to create lettering, shapes, paper decorations, card components and vinyl decals. For example, cut layered cardstock for wall art or adhesive vinyl for decorating a smooth glass jar. Choose the blade and material setting according to your machine and material.
2. Draw With Cricut Pens
Compatible Cricut pens let your machine draw designs directly onto paper. Use them for illustrated greeting cards, invitation details, place cards and decorative lettering. Select the Draw operation in Design Space for the elements you want the machine to draw rather than cut.
3. Score Paper for Folding
Scoring creates crease lines that help cardstock fold neatly. It is useful for making paper boxes, envelopes, folded cards and storage trays. The required tool depends on your Cricut model; check whether it supports a Scoring Stylus or Scoring Wheel before purchasing one.
4. Decorate Surfaces With Adhesive Vinyl
Cut adhesive vinyl designs and apply them to suitable surfaces such as glass, plastic and metal.
This works for decals, decorative signs and personalised containers without heat. Choose removable or permanent vinyl according to the intended use and follow the manufacturer’s application instructions.
5. Make Full-Colour Stickers With Print Then Cut
Print Then Cut combines a compatible printer with a Cricut machine. Print your full-colour design first, then let the machine read its registration marks and cut around the artwork.
This is useful for planner stickers, illustrated sticker sheets and colourful labels. Check that your machine supports Print Then Cut and that your printable material suits your printer.
6. Cut Stencils for Painting
Cut designs from suitable stencil material, then use the openings to apply paint to signs, boards or other compatible surfaces. The Cricut makes the stencil; you apply the paint separately. Secure the stencil and apply paint carefully to reduce bleeding around the edges.
Teen birthday parties can have a more personal touch with decorations and accessories made around the celebrant’s interests. See 30 Cute Cricut Projects for Teen Girls for ideas suited to that age group.
Cricut Projects for Beginners Without a Heat Press
1. Interactive Pop-Up Greeting Cards
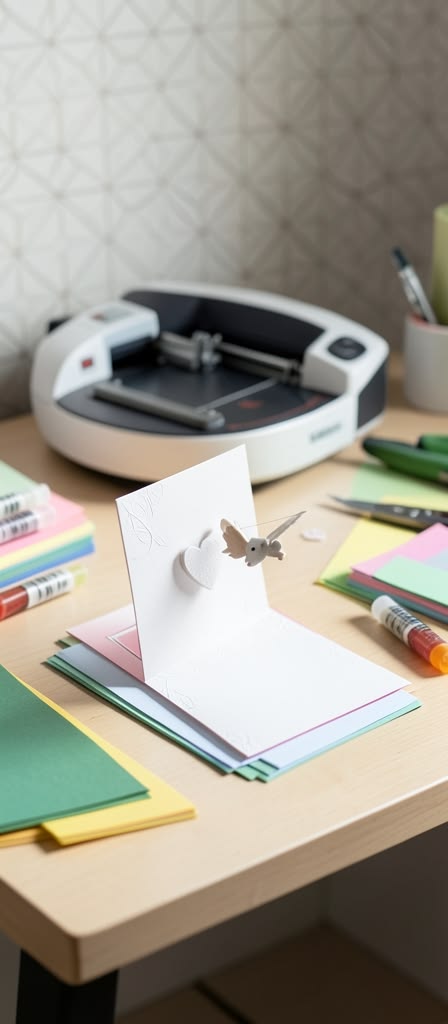
A birthday card can reveal more than a printed message when the recipient opens it. Create a pop-up birthday cake, flower bouquet, heart or geometric design that rises from the centre fold.
This project introduces beginners to paper engineering because the cut-out pieces must move with the card rather than simply sit on its surface.
Making the card
- Choose a simple pop-up template in Cricut Design Space or create one with a central fold and connected pop-up sections.
- Cut the card base and decorative pieces from cardstock. Use a heavier cardstock for the base so it can support the raised design.
- Fold the card along the centre line, then carefully fold the pop-up mechanism in the direction shown by the template.
- Attach the decorative pieces to the mechanism, keeping glue away from the moving folds.
Details to check
The pop-up mechanism must sit inside the folded card without extending beyond its edges. Test the card by closing it slowly before adding decorations.
Check that no pieces overlap, catch or prevent the card from lying flat. Scoring the fold lines helps reduce cracking in heavier cardstock.
2. Paper Quilled-Effect Wall Art
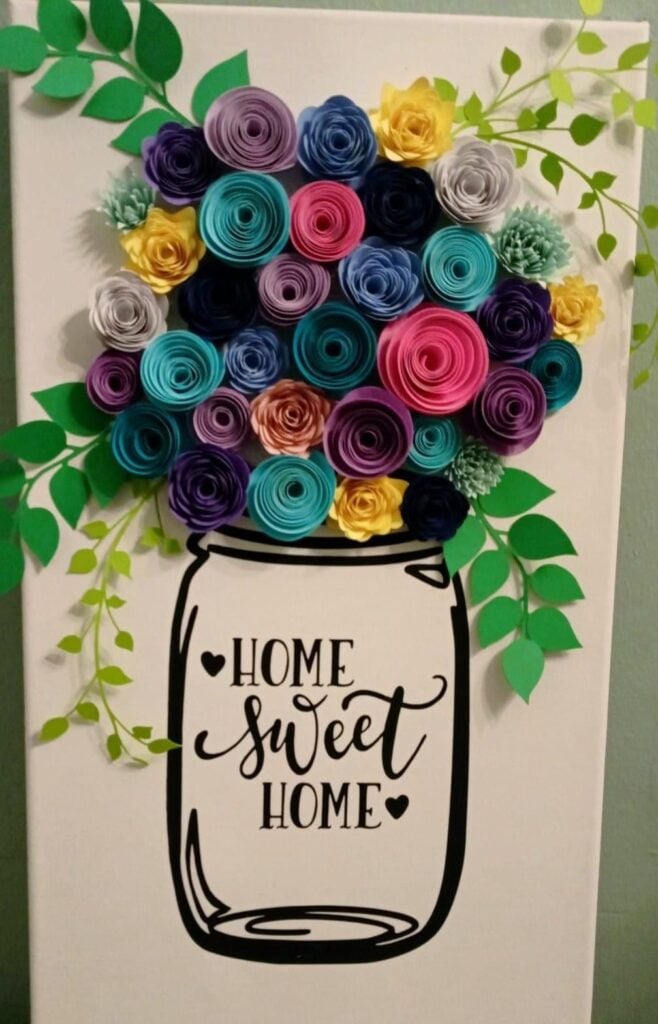
Traditional paper quilling involves rolling thin strips of paper into coils and shaping them into patterns. A Cricut can make the cutting stage easier by producing strips of consistent width, but the rolling and arrangement are still done by hand.
This makes it a useful option among Cricut projects for beginners without a heat press, especially for anyone who enjoys detailed paper crafts.
Making the design:
- Cut narrow cardstock strips, keeping their widths consistent so the finished coils have a uniform appearance.
- Roll each strip around a quilling tool, skewer or similar narrow object, then release it slightly before securing the end with a small amount of glue.
- Arrange the coils into a flower, leaf, butterfly or abstract pattern on a backing sheet.
- Glue the shapes in place only after checking the spacing and overall composition.
Use lightweight cardstock that can curl without creasing sharply. Very thick cardstock may resist rolling and produce bulky coils. A quilling tool can also make the hand-rolling stage easier.
Party decorations do not have to be packed away after one use. Some Cricut-made pieces can also be displayed at home, as shown in 29 Easy Cricut Projects for Home Decor.
3. Layered Paper Lightbox
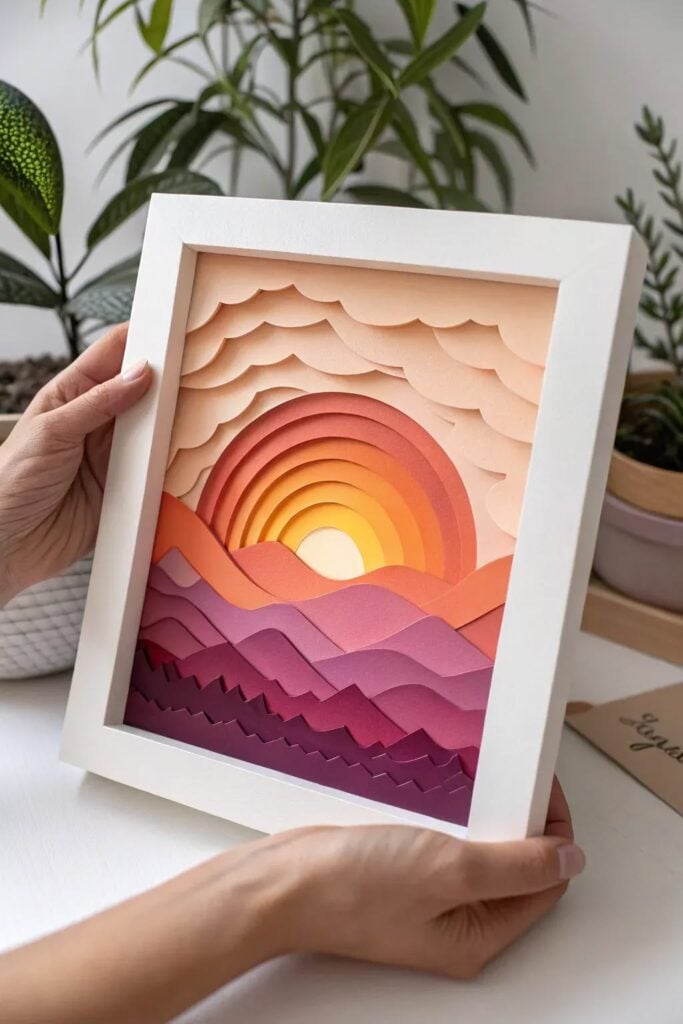
A paper lightbox creates depth by placing several cut-paper scenes inside a deep frame. Each layer forms part of the picture, while the gaps between them allow light and shadows to create a sense of distance.
A Cricut can cut the silhouettes, but the finished effect depends on how carefully the layers are arranged.
Making the design:
- Choose a simple scene, such as a forest, mountain landscape or night sky.
- Create separate foreground, middle-ground and background layers. Keep the outer dimensions consistent so the pieces fit inside the frame.
- Cut the designs from cardstock and place small spacers between the layers to hold them apart.
- Assemble the layers inside a deep frame, checking that the design remains visible from the front.
The spacing affects the shadows: layers placed close together create a subtler effect, while wider gaps produce more noticeable shadows. Use battery-powered LED lights rather than candles or other open flames near the paper.
4. Custom Paper Doll Wardrobe
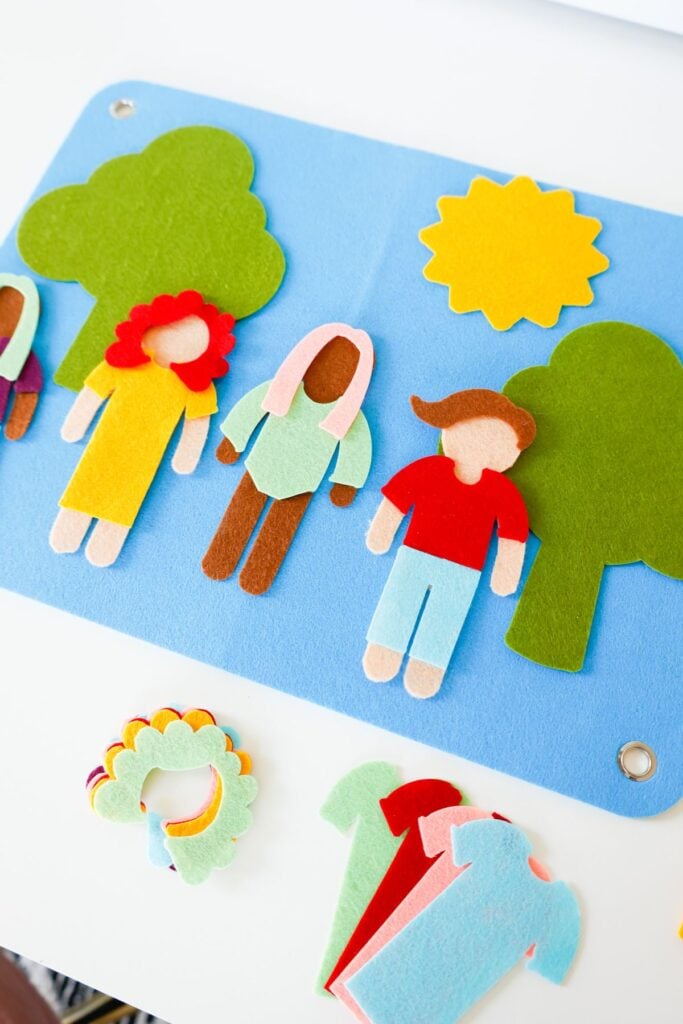
A paper doll wardrobe can include outfits for different seasons, occasions and professions.
The Cricut cuts the doll and clothing pieces, while the attachment method determines how easily a child can change the outfits without tearing the paper.
Making the design:
- Cut the doll from sturdy cardstock and create clothing pieces that match its proportions.
- Add small fold-over tabs at the shoulders, waist or sides of each garment so the clothes can sit around the doll.
- Make each outfit slightly wider than the body where necessary to allow room for the tabs.
- Test the clothing on the doll before cutting a full collection.
Keep the tabs wide enough to fold without tearing, especially around narrow sections such as sleeves and trouser legs. For younger children, larger clothing pieces are easier to handle than tiny accessories.
5. Foil-Accented Place Cards
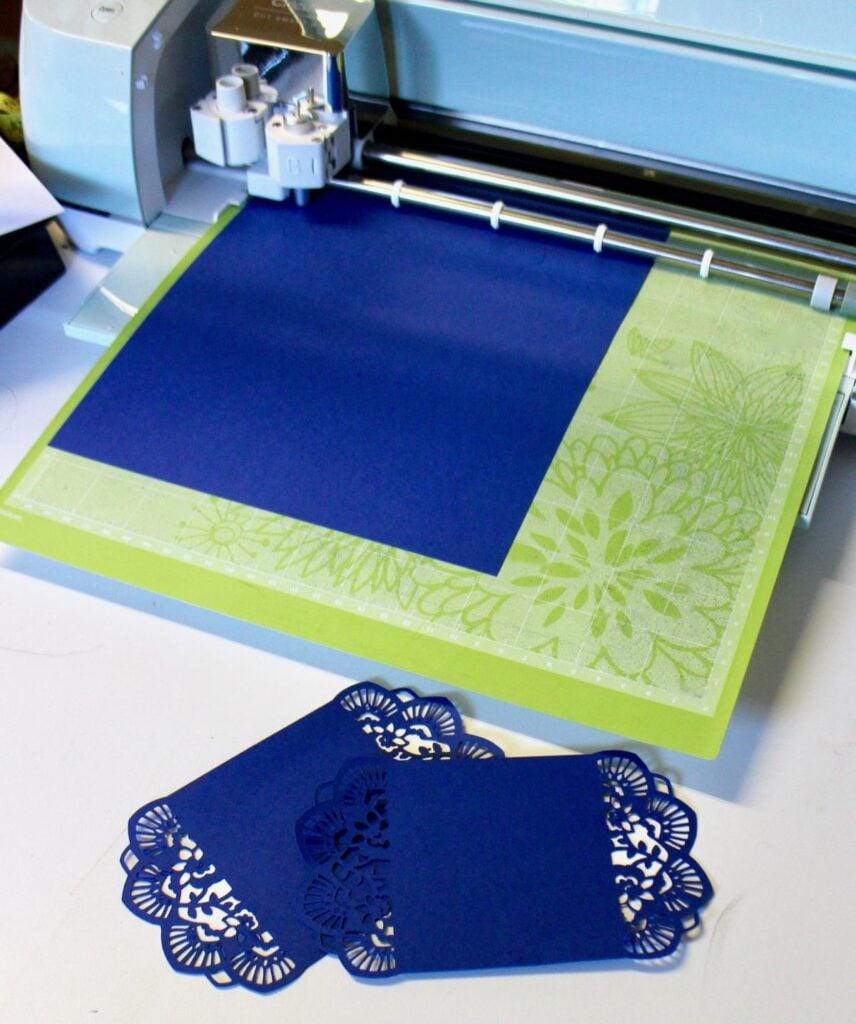
Foil details can make a place card look more polished without covering the whole design in metallic material.
Use the Cricut Foil Transfer Tool to add a guest’s name, a fine border or a small decorative motif to cardstock. The foil is applied through pressure, not heat, so this project does not require a heat press.
Creating the place cards:
- Design the card with a clear space for the name and decide which details should receive the foil finish.
- Select a cardstock that is listed as compatible with your machine and foil tool.
- Position the foil transfer sheet over the design area, with the shiny side facing up, and secure it firmly with tape along the edges.
- Run the foil operation when Design Space prompts you to use the foil tool. The machine will then guide you through any remaining cutting or drawing steps.
- Fold the card along its score line, or assemble it according to your chosen template.
Foiling and cutting are separate operations, even when they are part of the same project. The foil sheet must stay flat and secure, and the tape must not cover the design area.
Check tool compatibility before buying: Cricut has different foil tools for its Joy machines and its Explore, Maker and Venture machines. The desktop version of Design Space is required for the Cricut Foil Transfer Tool used with Explore, Maker and Venture models.
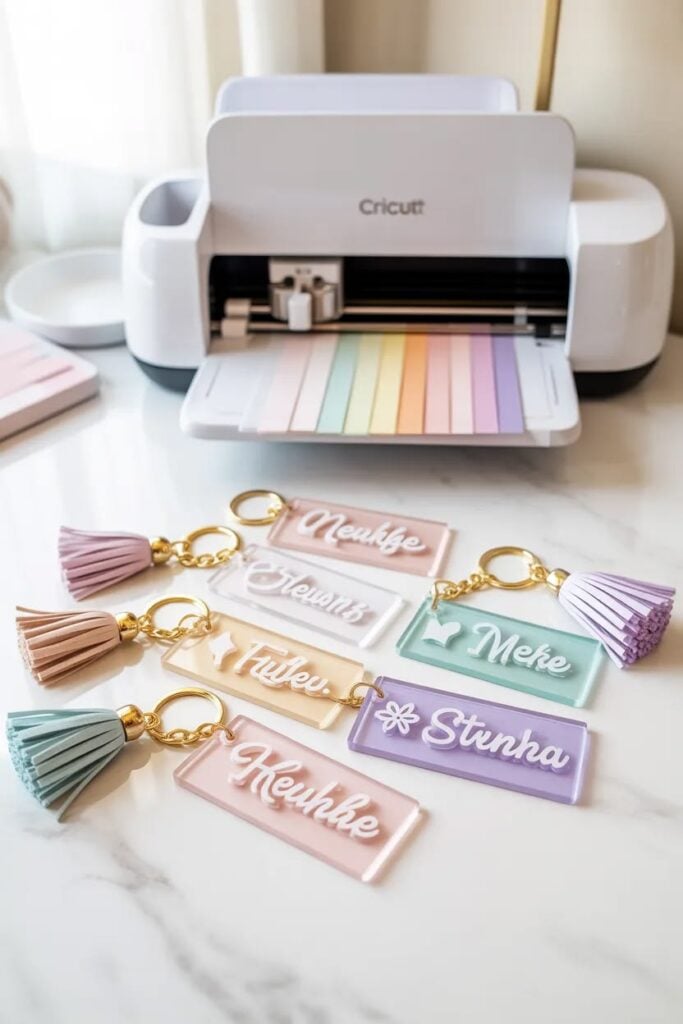
6. Engraved Acrylic Key Fobs
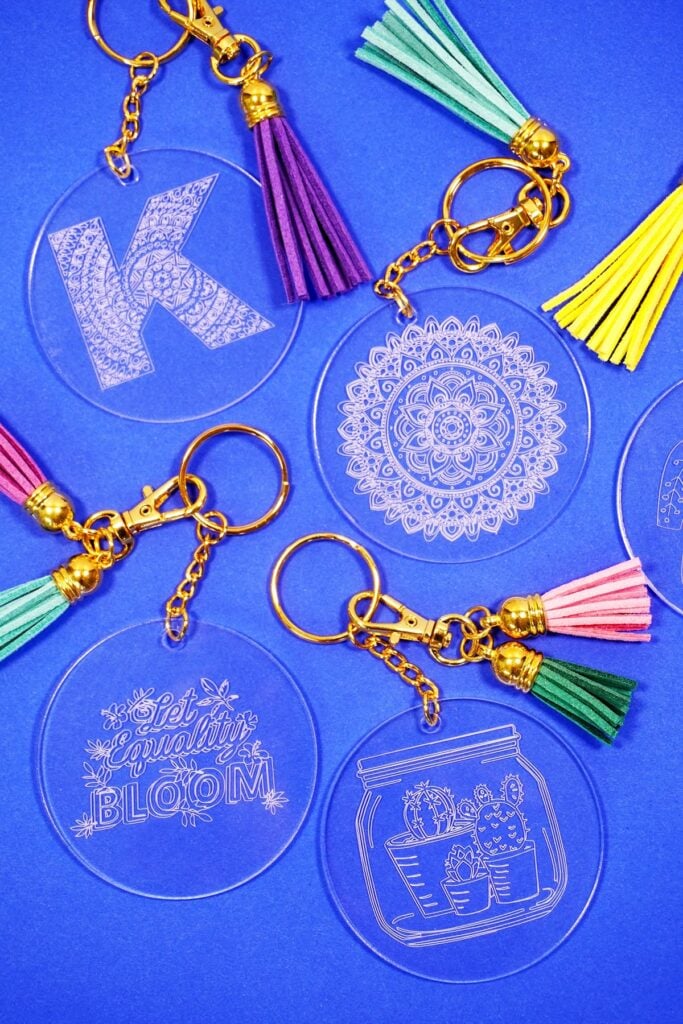
Engraving is a more advanced project because it requires a compatible Cricut Maker machine and an Engraving Tip with QuickSwap Housing.
The tool scratches a permanent design into a suitable acrylic blank, making it possible to create personalised key fobs with initials, simple symbols or short names.
Preparing and engraving the key fob:
- Choose a flat acrylic blank that is listed as compatible with your Maker model. Check its thickness and dimensions against Cricut’s material guidelines.
- Create a simple design using clear lettering or single-line artwork. Avoid tiny text and crowded details, which may become difficult to read when engraved.
- Place the blank on the mat and secure all sides with painter’s tape, keeping the tape outside the engraving area.
- Select the Engrave operation in Design Space and choose the compatible material setting.
- Run a test on a spare blank before engraving the finished key fob. This helps you check the design size, position and appearance.
Keep the mat supported and do not move it while the machine is engraving. Once the job is complete, remove the blank carefully and clear away any engraving debris, as the process can leave small fragments or rough edges.
Engraving is available on Cricut Maker machines, not the Explore or Joy families, so check your model before purchasing the tip.
Cardstock is useful for making party invitations, cake toppers, banners and table decorations. Readers who want to work with this material can find more ideas in 27 Easy Cricut Projects Using Cardstock.
7. Paper Shadow Puppets
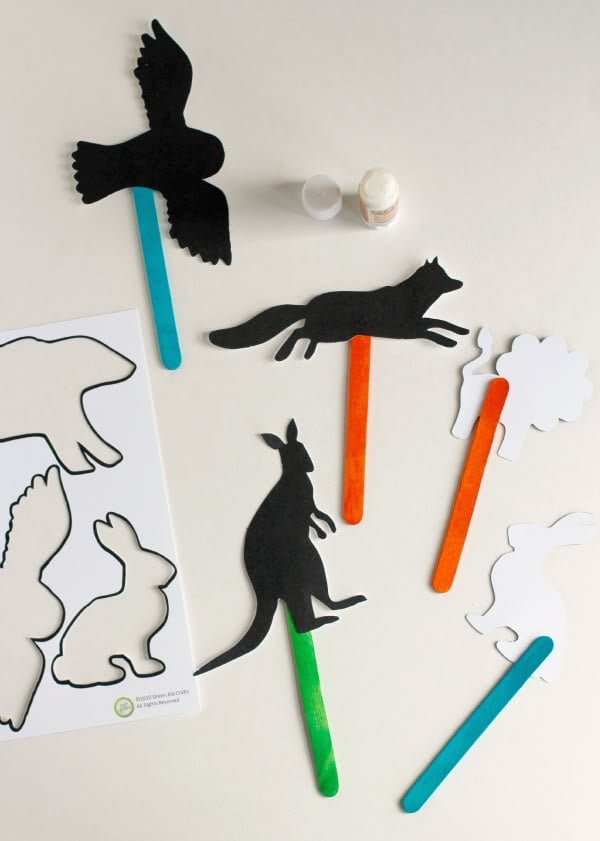
Paper shadow puppets are cut-out characters or objects that appear as silhouettes when placed between a light source and a screen. The Cricut can cut the shapes, while handles attached by hand make them easier to move during storytelling.
Making the design:
- Choose recognisable shapes, such as animals, people or familiar objects.
- Cut the silhouettes from cardstock, keeping narrow features and connecting sections thick enough to withstand handling.
- Attach a wooden craft stick or suitable handle to the back of each puppet.
- Shine a light towards a plain, light-coloured screen and move the puppets between the light and screen.
Avoid delicate cut-outs with very thin legs, tails or other projecting parts, as these can bend or tear during use. A simple silhouette with clearly defined features will usually be easier to control.
8. DIY Paper Weaving Mats
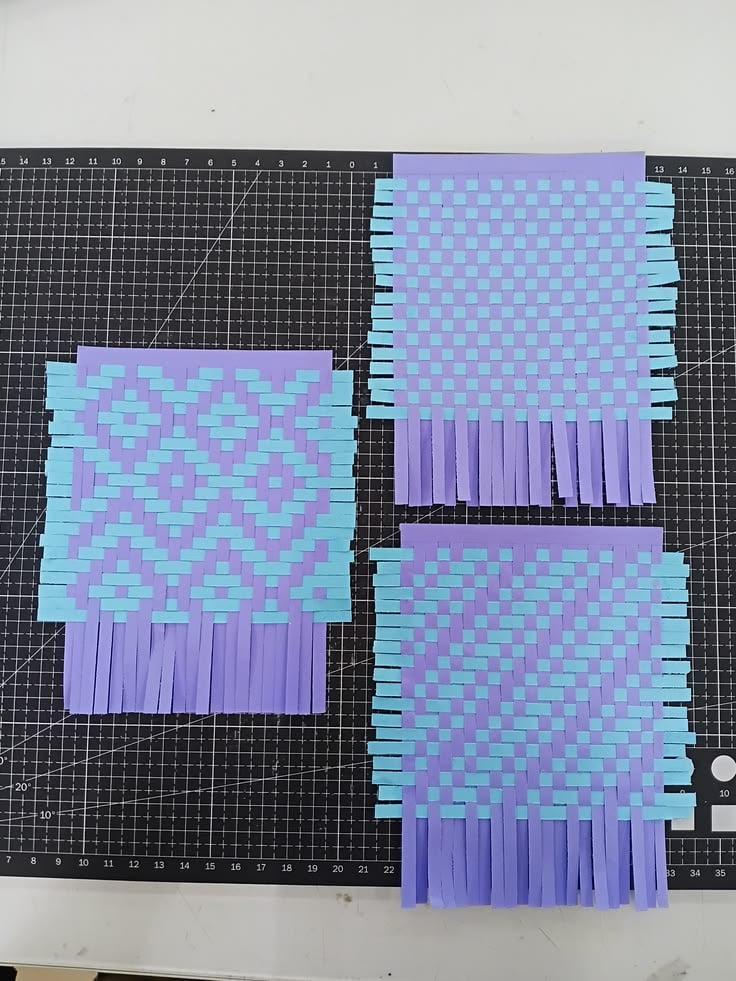
Paper weaving uses a slotted base and separate strips that pass alternately over and under one another. A Cricut can cut the slits and strips to consistent dimensions, but the measurements must work together for the weaving to sit neatly.
Making the design:
- Cut a rectangular cardstock base with evenly spaced slits, leaving an uncut border around the edges.
- Cut separate paper strips slightly longer than the width of the base so their ends can be secured at the back.
- Weave each strip over and under the base sections, alternating the starting position on each new row.
- Secure the strip ends behind the base once the weaving is complete.
Keep the strips narrower than the gaps between the slits so they can pass through without tearing the base. The uncut border is important too: it holds the woven sections together and prevents the edges from separating during handling.
9. Decorative Laptop Lid Decal
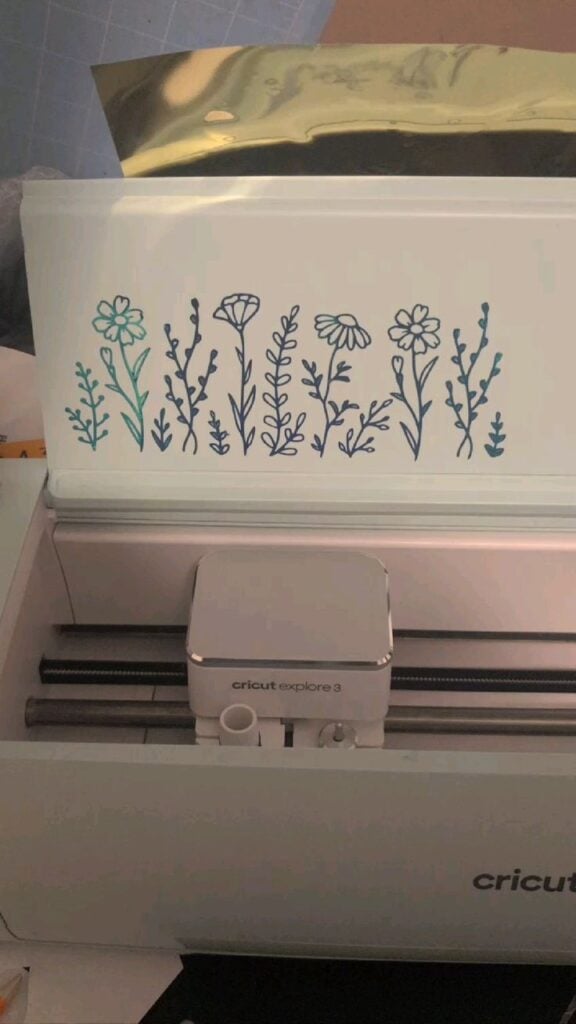
A laptop decal can be a small illustration, monogram or geometric pattern cut from adhesive vinyl. The design should complement the laptop without interfering with its openings, labels or other important markings.
Making the design:
- Measure the available space on the laptop lid and size the design to fit comfortably within it.
- Cut the design from adhesive vinyl, then weed away the excess material.
- Clean the lid according to the manufacturer’s care instructions and allow it to dry completely.
- Use transfer tape to position the decal, then smooth it down from the centre towards the edges.
Check the laptop’s layout before applying the design. Keep decals away from vents, openings, cameras, labels and important device markings.
Test a small piece of vinyl in an inconspicuous area if you are unsure how the finish will respond to adhesive or removal.
10. Reusable Window Season Markers
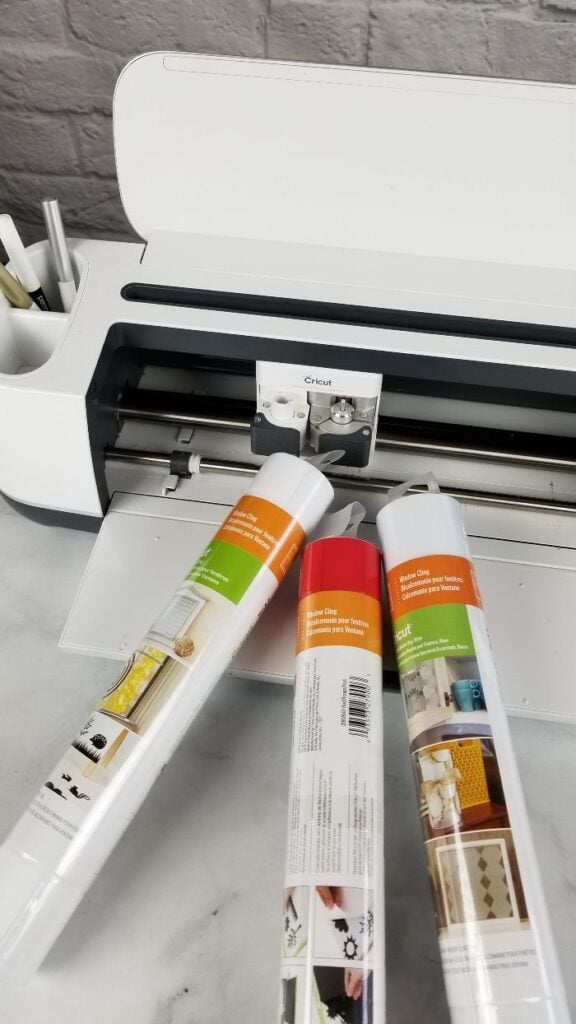
Seasonal window decorations can include leaves for autumn, snowflakes for winter or simple shapes for birthdays and celebrations. The material matters because window cling and removable adhesive vinyl attach to glass in different ways.
Choosing and making the design:
- Use window-cling material when you want decorations that attach to suitable smooth glass without adhesive.
- Choose removable adhesive vinyl when you want a design that sticks to the glass but can be removed later.
- Cut simple shapes with enough space between details to make handling and placement easier.
- Clean and dry the window before applying the decorations, following the material manufacturer’s instructions.
Do not treat window cling and removable vinyl as interchangeable. Check the packaging for the recommended surfaces and removal instructions, and test the material on a small area first, particularly on treated or coated glass.
Personalised shirts and other fabric items can add a matching detail to birthday celebrations. 25 Easy Cricut Projects Using Cricut Infusible Ink offers more projects using this transfer method.
11. Personalised Light Switch Plate Covers
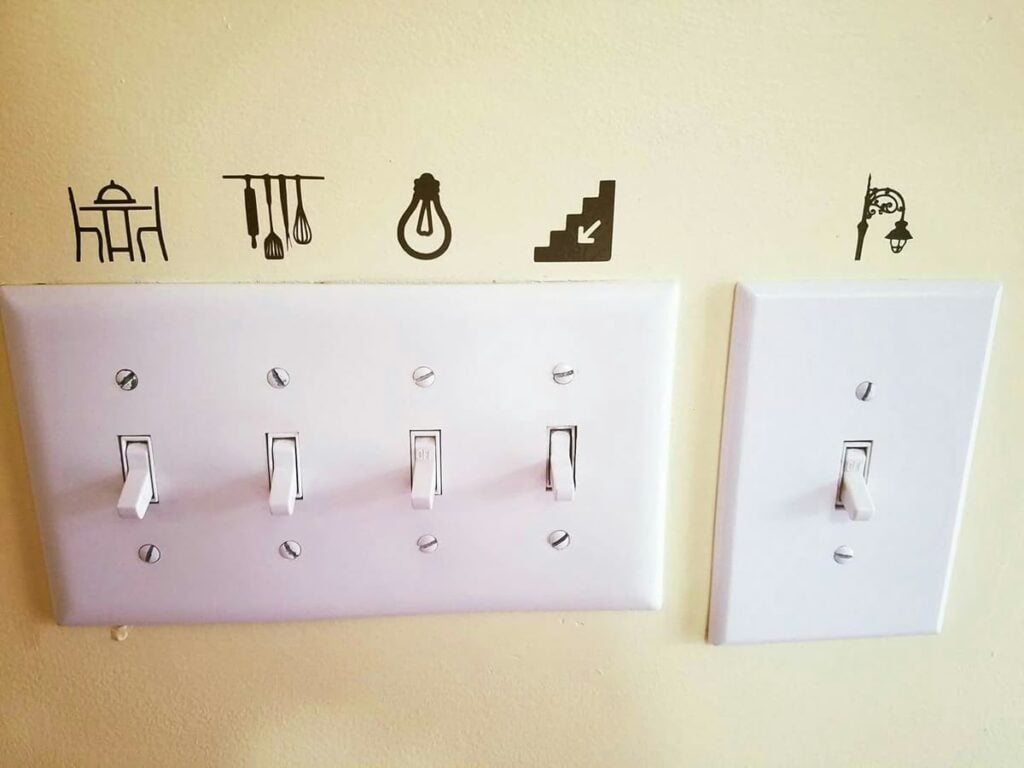
A small vinyl detail can make a plain switch plate match a room’s colour scheme without repainting the wall.
This is one of the simpler Cricut projects for beginners without a heat press, but the plate needs to be removed and decorated separately from the electrical fitting.
Safe preparation and application:
- Turn off power to the switch at the circuit breaker before removing the cover plate. Remove only the plate, not the switch or its wiring.
- Wash the detached plate with a suitable cleaner, dry it thoroughly and check that its surface is smooth enough for adhesive vinyl.
- Cut a small monogram, leaf, geometric shape or border that fits within the flat area of the plate.
- Apply the vinyl with transfer tape, smoothing it gently to avoid bubbles.
Keep the design clear of the switch opening, screw holes and any safety or product markings. Refit the plate securely before restoring power. Avoid decorating damaged or cracked plates.
12. Geometric and Botanical Drawer Front Accents
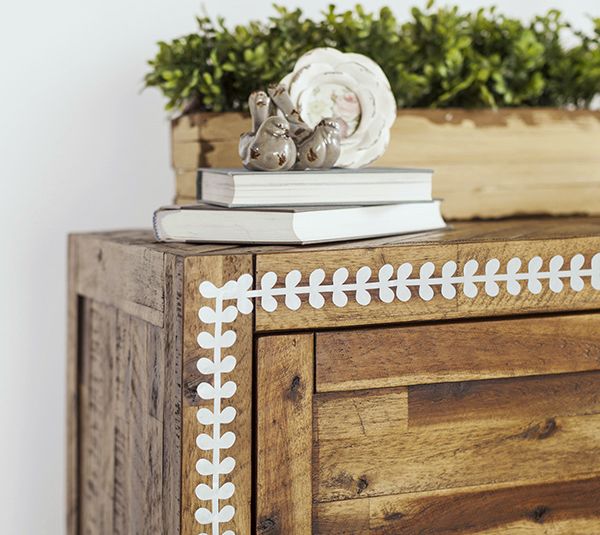
Adhesive vinyl can add a simple pattern to plain drawer fronts, but the finish of the furniture matters more than the complexity of the design.
Smooth, clean surfaces generally give vinyl a better chance of adhering than rough, dusty or heavily textured ones.
Planning the pattern:
- Measure each drawer front and decide how much space the design should occupy. A narrow border, repeated arches or a small botanical motif can be easier to position than one large graphic.
- Cut the shapes from adhesive vinyl and arrange them on a flat surface first to check spacing and alignment.
- Clean the drawer fronts with a suitable cleaner and allow them to dry completely.
- Apply the motifs gradually, using a scraper to smooth the vinyl as you work.
Painted furniture deserves extra care. Paint should be fully cured, not merely dry to the touch, before applying vinyl. Test a small piece in an inconspicuous area and check the removal instructions, since some adhesives can lift weak or delicate paint.
Names, labels and decorative lettering can make ordinary party supplies feel more personal. Readers can find more vinyl-based ideas in 23 Cricut Projects for Beginners Using Vinyl.
13. Stencil-Painted Wooden Signs
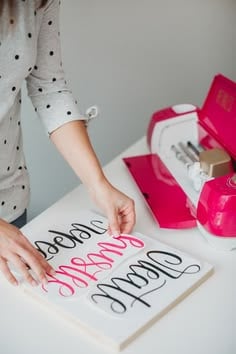
A Cricut-cut stencil lets you reproduce lettering or a small illustration on a wooden sign without cutting each detail by hand. The machine creates the stencil; the lettering or image is added with paint.
Getting a clean painted result:
- Choose stencil film designed for the surface and paint you intend to use.
- Cut the design, weed out the areas where paint should pass through, and transfer the stencil to the prepared wood.
- Press the edges down firmly, paying particular attention to narrow letters and small openings.
- Apply paint in thin layers with a stencil brush or sponge, using a gentle dabbing motion rather than brushing heavily across the edges.
- Remove the stencil carefully, following the film manufacturer’s instructions.
Too much paint can seep beneath the stencil and blur the edges. A light first coat is easier to control than one heavy application. Test the stencil and paint on a scrap piece of wood before working on the finished sign.
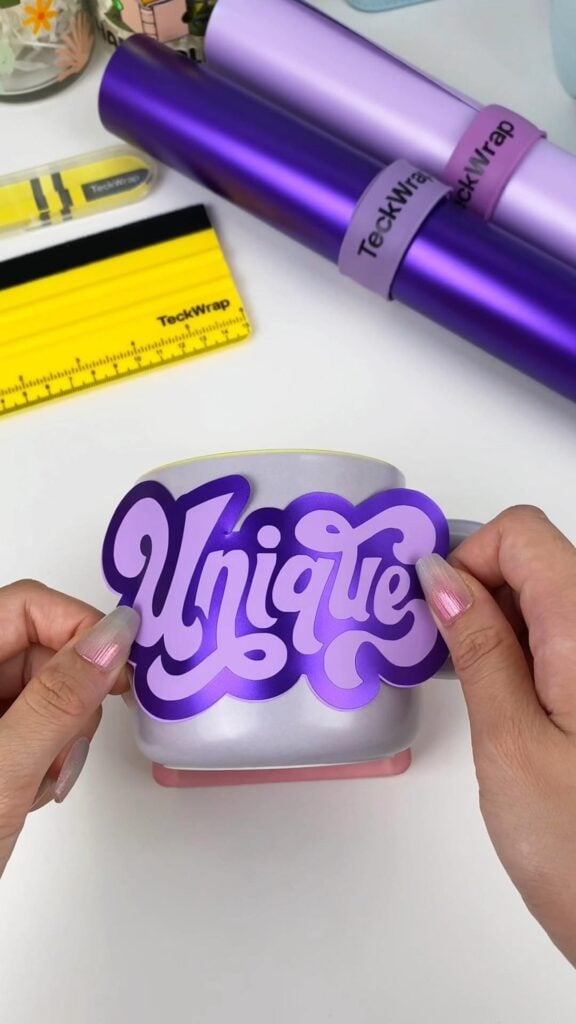
14. Frosted-Glass Effect With Adhesive Vinyl
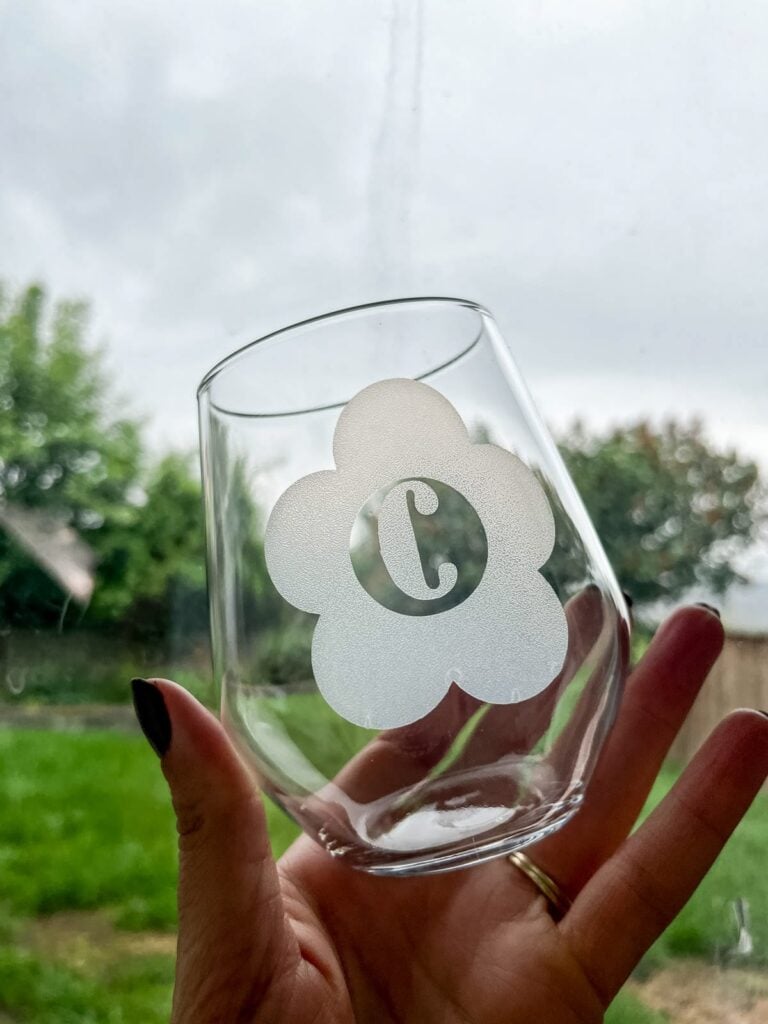
Frosted adhesive vinyl can give a glass jar, decorative panel or suitable window a translucent appearance while allowing light through.
It is important to describe this accurately: the Cricut cuts a vinyl decoration; it does not chemically etch or permanently alter the glass.
Applying the frosted effect:
- Select frosted or translucent adhesive vinyl intended for glass.
- Measure the area and cut a simple pattern, such as a border, initials or repeating geometric shapes.
- Clean the glass thoroughly and let it dry before application.
- Use transfer tape to position the design, then smooth it down to remove air bubbles.
The result depends on the vinyl’s finish and the glass itself. A frosted film may look different on clear, tinted or textured glass, so test a small section first. Check the product’s instructions for indoor or outdoor use and removal.
Making party items in batches can also be a starting point for a small craft business. 25 Easy Cricut Projects to Make and Sell for Extra Money covers more products readers can consider selling.
15. Decorative Tile Coasters
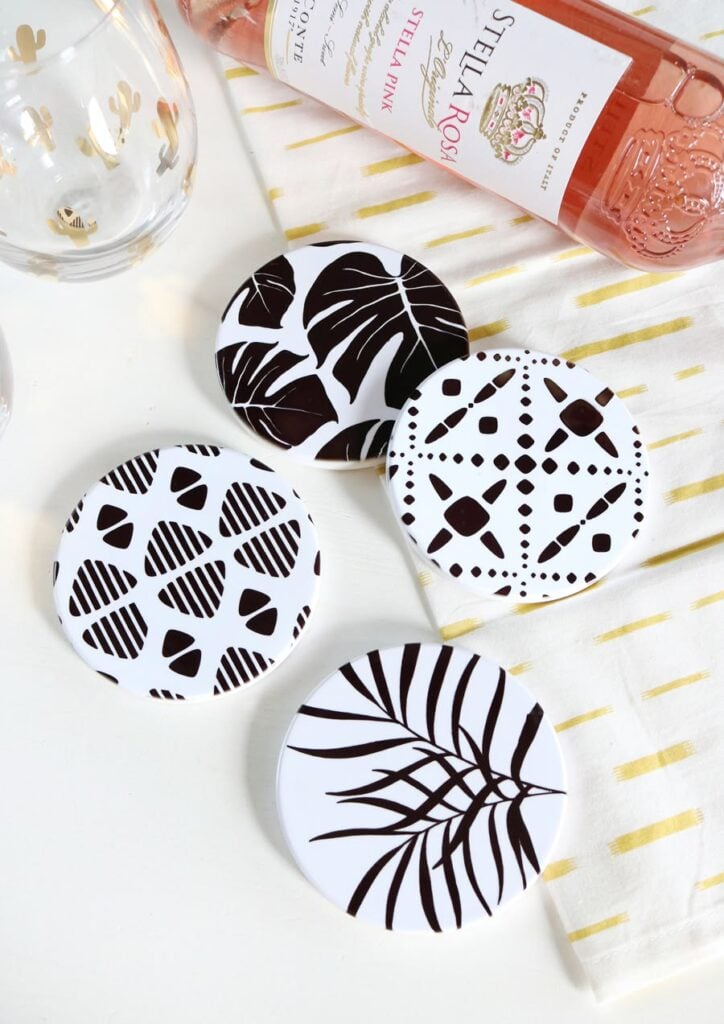
Plain ceramic tiles can serve as the base for personalised decorative coasters. Adhesive vinyl adds names, initials or simple patterns, although it should not be assumed to withstand the heat and moisture associated with regular coaster use.
Decorating the tile:
- Choose a smooth, unglazed or suitably finished tile with a flat surface.
- Clean and dry it completely so dust and residue do not interfere with adhesion.
- Cut a simple design from adhesive vinyl and use transfer tape to position it on the tile.
- Add suitable felt or cork pads underneath to help protect the table from scratches.
Treat this as a decorative project rather than a guaranteed functional coaster. Repeated contact with hot mugs, moisture, cleaning products and friction can affect the vinyl. Check the material manufacturer’s care guidance before using the finished tile.
16. Functional Planner Sticker Sheets
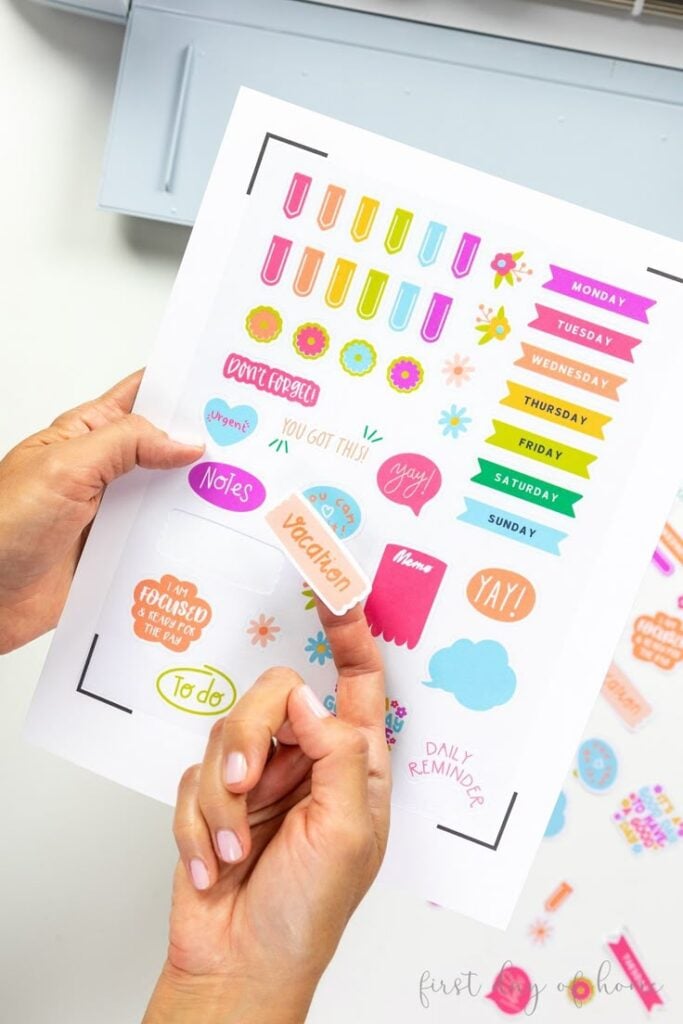
Planner stickers can mark appointments, errands, bill payments, deadlines and household tasks.
The useful part of this project is deciding how each sticker will be used, because that determines its size and how the Cricut should cut it.
Setting up the sheet:
- Arrange the stickers on one printable sheet, leaving enough space between designs for clean cutting.
- Use Print Then Cut with a compatible Cricut machine and printer to print the artwork and cut around the shapes.
- Choose a kiss cut when you want the sticker separated from the surrounding sheet while leaving its backing intact.
- Choose a die cut when you want the Cricut to cut through both the sticker material and its backing.
For planner sheets, kiss cuts are generally more practical because the stickers remain together on one backing sheet.
Test the cut settings on a small section first; printable materials vary in thickness, so the correct pressure may require adjustment.
17. Pantry Stock and Restock Stickers
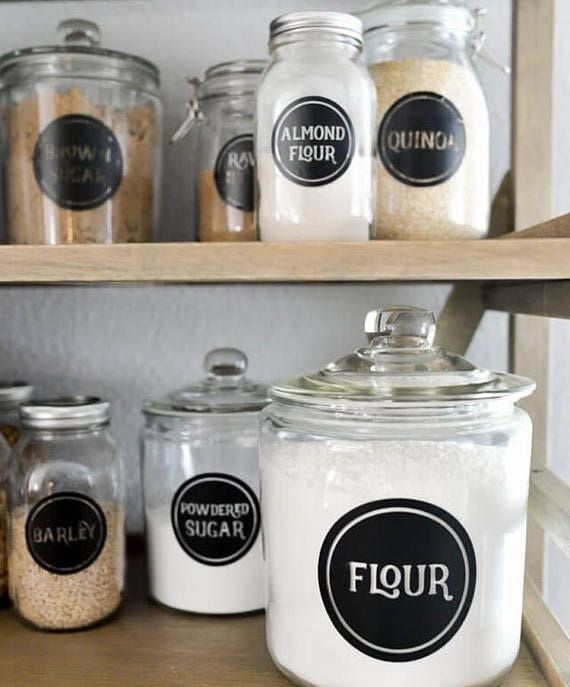
These stickers help track pantry supplies rather than simply identify what is inside a container. A small inventory system can record details such as the quantity remaining, opening date or whether an item should be added to the next shopping list.
Information worth including:
- Item name or product category.
- Opening date for items where that information is useful.
- Quantity remaining, using a blank space that can be updated by hand.
- A restock box that can be marked when supplies run low.
Create the artwork in Design Space or another design programme, print it on compatible printable sticker paper, and use Print Then Cut to cut around each sticker.
Check the sticker paper packaging for printer requirements; some products are made for inkjet printers and are not suitable for laser printers. Print Then Cut also requires a compatible Cricut model.
Anyone thinking beyond one birthday order may find useful ideas in 21 Simple Cricut Projects for Beginners That Actually Sell, with projects aimed at beginner sellers.
18. Children’s Reward Chart With Moveable Markers
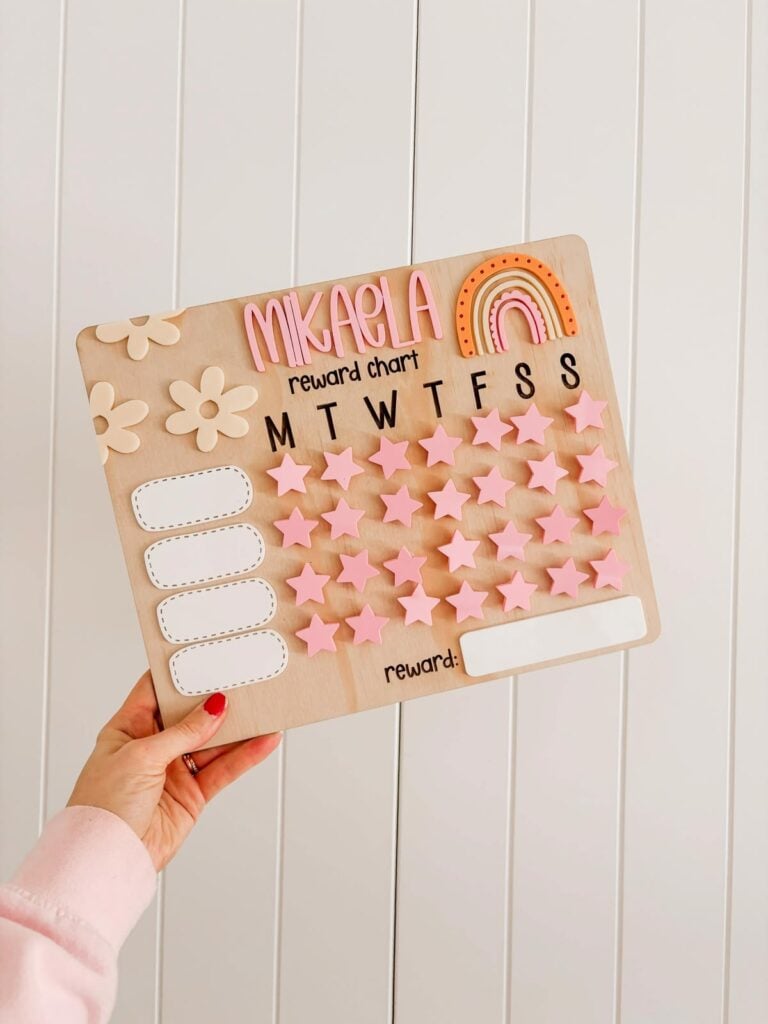
Photo credit: @ Etsy
A reward chart is easier to update when children can move a marker as they complete a task. The chart can track activities such as putting toys away, reading or completing a simple daily responsibility.
Making the chart usable:
- Divide the chart into clear task rows and spaces for daily or weekly progress.
- Cut or print large markers with simple shapes, such as stars, circles or animals.
- Attach hook-and-loop dots or another suitable repositionable fastening method to the chart and markers.
- Leave enough room between spaces for small hands to move the markers without disturbing the others.
Keep the markers large enough for the intended age group. Avoid small detachable pieces for children who may put objects in their mouths, and secure the chart to a suitable board or wall rather than relying on loose paper.
Readers who are still learning how to use their machine can practise with simple projects before making a full set of party decorations. 22 Easy Cricut Projects for Beginners You Can Make at Home is a helpful place to start.
19. Folded Gift-Card Holders With Hidden Pockets
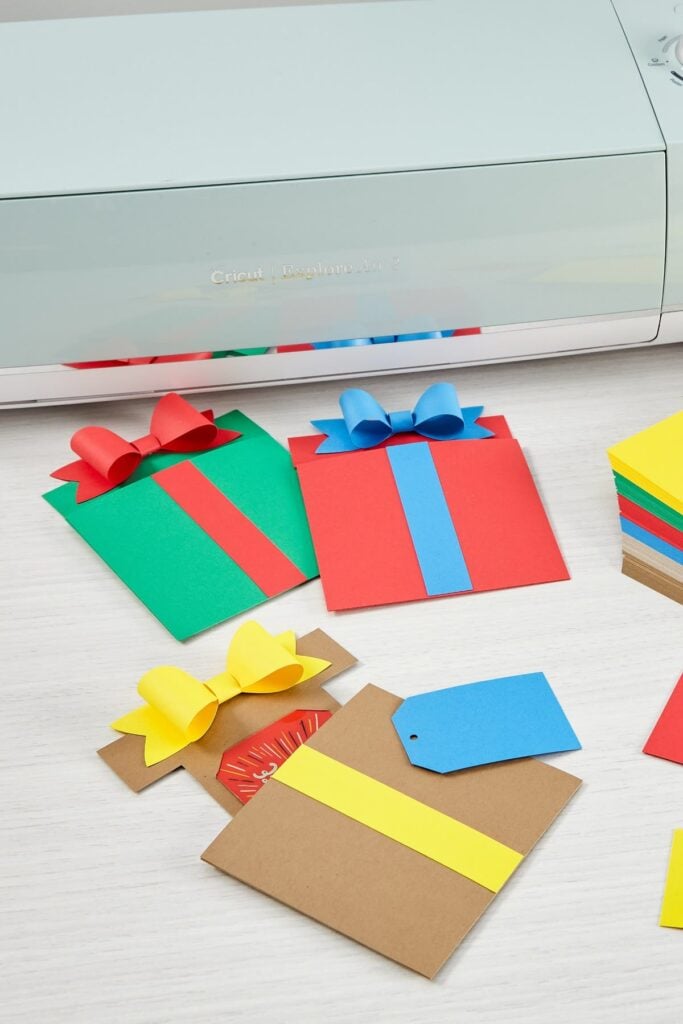
A folded gift-card holder can keep a small present and a personal message together. Unlike a flat gift tag, this project involves creating a pocket that holds the card securely while leaving room for a note.
Paper construction:
- Choose cardstock sturdy enough to hold its shape without becoming difficult to fold.
- Create a folded outer cover and a separate pocket panel sized to fit the gift card.
- Add tabs or adhesive areas along the pocket’s sides and bottom, leaving the top open for inserting the card.
- Attach the pocket inside the cover and check that the gift card slides in and out without catching.
- Add a small space for a handwritten message on the opposite panel.
Measure a real gift card before finalising the template. Allow a little extra room around its edges so it can be removed easily, but avoid making the pocket so loose that the card slips out.
20. Recipe Binder Divider Tabs
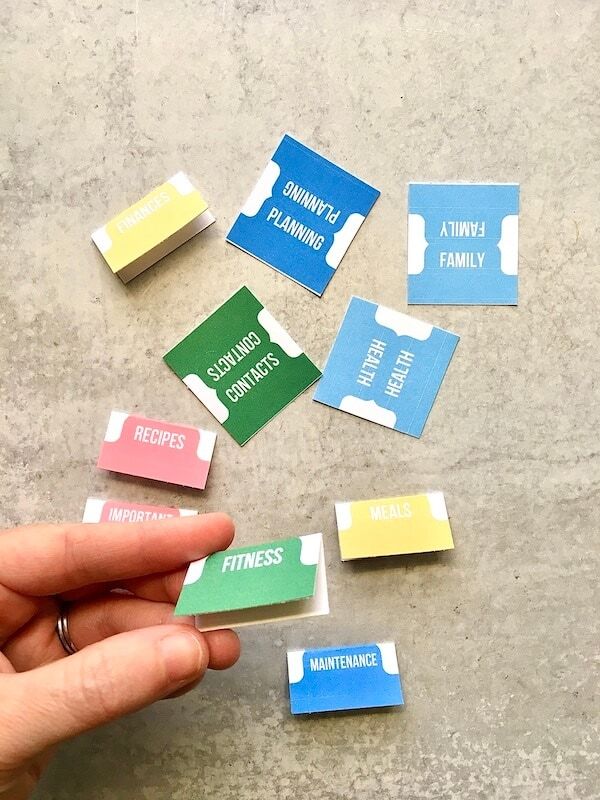
Recipe dividers make a collection easier to browse by separating sections such as breakfast, main meals, desserts and drinks.
The tabs need to remain visible when the binder is closed, so their width and position should be planned around the pages they will separate.
Creating the dividers:
- Measure the binder pages and choose a divider size that fits without extending beyond the binder’s edges.
- Assign each section a clear label and use different colours or simple icons to distinguish categories.
- Cut the divider shapes from cardstock, or print the labels and use Print Then Cut on a compatible machine.
- Position the tabs at staggered heights so one does not hide another.
- Punch holes that match the binder mechanism, leaving enough space around each hole to prevent tearing.
Use cardstock with enough weight to withstand frequent page turning. Keep the tabs wide enough to grip comfortably, but not so wide that they overlap when the dividers are stored together.
Simple designs are often enough for handmade party details, especially when learning the cutting and assembly process. More beginner-friendly options are available in 19 Easy Cricut Projects for Beginners.
21. Scored Cardstock Storage Trays
A cardstock storage tray can hold paper clips, craft embellishments, jewellery or other small desk supplies. The Cricut cuts the tray’s outline and creates fold lines, while scoring helps the cardstock bend more neatly at the corners.
Cutting and assembling the tray:
- Choose a tray template with a flat base, four sides and joining tabs.
- Check the finished dimensions against the items you intend to store.
- Cut the template from sturdy cardstock and score the fold lines using a tool compatible with your Cricut model.
- Fold the sides along the scored lines, then secure the corner tabs with suitable paper adhesive.
- Allow the adhesive to dry before filling the tray.
Scoring tools are not interchangeable across every Cricut machine. Depending on the model, you may use a scoring stylus or a compatible scoring wheel.
Check the machine’s tool compatibility before purchasing anything, and test the template with scrap cardstock first. A shallow tray is also more practical than a deep one when using paper rather than a rigid material.
A personalised birthday gift can carry more meaning than a store-bought item chosen at the last minute. Readers can find additional inspiration in 33 Cricut Projects for Beginners That Make Great Personalized Gifts.
How to Choose Your First Project Without Buying Extra Supplies
The easiest way to start is to match a project to the materials and tools already in your craft space.
A Cricut can do several jobs without a heat press, but not every machine supports every operation. Check your model first, then choose a project that uses what you have.
- Working with cardstock: Start with a simple greeting card, paper bookmark or small storage tray. Choose a design with broad shapes and only a few folds or cut-outs. This lets you practise cutting, removing paper from the mat and assembling pieces without using much material.
- Already have adhesive vinyl: Try a small monogram or geometric decal on a smooth, compatible surface. Use a little spare vinyl to test the cut and practise transferring the design before applying it to the finished item.
- Have an inkjet printer: Printable stickers are worth considering, provided your Cricut model supports Print Then Cut. Check the sticker paper’s printer requirements too; not all printable materials work with every printer.
- Prefer folded paper projects: Try a simple card or shallow tray. Check whether your machine supports a scoring stylus or scoring wheel before choosing a template that depends on scored folds.
- Interested in foil or engraving: Hold off on buying specialist accessories until you have checked the machine and tool compatibility. Practise with ordinary cutting and drawing projects first; they will help you become familiar with Design Space and material settings.
A useful first project should teach you one new operation at a time.
For example, a cardstock card lets you practise cutting and folding, while a vinyl decal introduces weeding and transfer tape. You can build on those skills without buying several accessories at once.
Children can take part in making decorations or simple party activities with age-appropriate supervision. 35 Easy Cricut Projects for Kids has more ideas for creative projects they can enjoy.
Common Mistakes When Making Cricut Projects Without a Heat Press
Most problems with these projects come from choosing a material or tool that does not suit the machine, surface or intended use. Checking a few details before cutting can save both supplies and time.
1. Buying Printable Materials Before Checking Machine Compatibility
Print Then Cut requires a compatible Cricut machine, a printer and printable material. The original Cricut Joy does not support this function, so buying printable sticker paper for that machine will not give you the expected result.
Cricut Joy Xtra, Explore and Maker models have Print Then Cut capabilities, but check the specifications for your exact model before purchasing supplies. Also check the sticker paper packaging: some products are made for inkjet printers and are not suitable for laser printers.
2. Confusing Adhesive Vinyl With Window Cling
These materials attach to glass and other surfaces differently. Adhesive vinyl has a sticky backing, while window cling is designed to cling to suitable smooth surfaces without the same adhesive layer.
Choose based on how you want the decoration to attach and how you plan to remove it. A window decoration made with adhesive vinyl may leave residue, while window cling may not stay in place on every type of glass.
3. Cutting Paper Designs With Details That Are Too Small
Tiny letters, narrow bridges and delicate cut-outs can tear when removed from the cutting mat. This is especially common with miniature room models, paper dolls and intricate wall art.
Enlarge fragile details, simplify crowded designs and use cardstock suited to the project. For intricate cuts, remove the surrounding material carefully and use a spatula tool where appropriate rather than pulling delicate pieces off the mat.
4. Assuming Adhesive Vinyl Is Automatically Waterproof or Heatproof
The word permanent on a vinyl product does not mean it can withstand every condition. Water exposure, repeated washing, heat, friction and cleaning products can affect the adhesive or vinyl finish. This matters particularly for tile coasters, kitchen items and frequently handled surfaces.
Check the manufacturer’s care instructions and describe the finished item according to the material’s stated capabilities. A decorative vinyl-covered tile, for example, should not be presented as a heat-resistant coaster unless the materials are specifically rated for that use.
5. Purchasing Specialist Tools Without Checking Compatibility
Scoring, foiling and engraving depend on the machine model and the tool designed for it. A scoring wheel intended for a Maker machine will not automatically work with an Explore or Joy model.
The same applies to engraving tips and foil-transfer tools. Check Cricut’s compatibility information for your exact machine before ordering an accessory; a project tutorial may have been created for a different model.
6. Using a Material Setting That Does Not Match the Material
A setting that works for ordinary cardstock may cut too deeply into a thinner paper or fail to cut through a heavier one. Adhesive vinyl and printable sticker paper can also vary in thickness and construction.
Select the closest material setting recommended in Design Space, then test a small piece before cutting the full design. A good test cut should separate cleanly without cutting deeply through the mat or leaving the material attached by uncut sections.
The same cutting skills used for birthday banners and table details can be applied to seasonal celebrations. 31 Easy Cricut Projects for Christmas offers ideas for the holiday season.
Conclusion
Working without a heat press does not limit your Cricut to basic cuts. You can still learn how to prepare files, adjust cut settings, work with different materials and assemble finished pieces by hand.
Those skills matter because even a well-designed file can produce poor results when the material, machine setting or assembly method is wrong.
Give yourself room to test, make adjustments and learn from small mistakes.
Once you understand the functions your particular Cricut model supports, you can make better decisions about future projects and avoid spending money on tools that do not serve your needs.
Halloween parties also provide plenty of opportunities for handmade decorations, treat bags and themed accessories. See 33 Easy Cricut Projects for Halloween for seasonal inspiration.
Frequently Asked Questions
1. Can I use a Cricut without connecting it to the internet?
Cricut Design Space generally requires an internet connection for setup, accessing cloud-based projects and downloading content.
Some previously saved projects can be used offline through the Design Space app, but offline access has limitations. Save projects to your device beforehand and check that the designs and fonts you intend to use are available offline.
2. Do I need Cricut Design Space to make my own projects?
Design Space is Cricut’s main software for preparing and sending projects to the machine.
You can create artwork in other design programmes, but you will generally need to upload compatible files into Design Space before cutting. SVG is commonly used for cut designs, while PNG and JPG files can be used for certain image workflows.
3. Can a Cricut cut fabric without a heat press?
Yes. Compatible Cricut machines can cut suitable fabric using the appropriate blade, mat and material settings.
A heat press is not required for cutting fabric; it is used when applying heat-transfer materials to fabric. Check the fabric-cutting capabilities of your specific machine before choosing a project.
4. Can I use free SVG files with my Cricut?
Yes, provided the SVG file is compatible with Design Space and its licence permits your intended use.
Check whether the file is free for personal use only or allows commercial use before selling finished products. Also inspect the uploaded design for missing layers, unwanted cut lines or details that may be too small to cut cleanly.
5. Can I make money with a Cricut without owning a heat press?
Yes. You can sell products that rely on paper cutting, adhesive vinyl, stickers, stencils and other compatible machine functions. Examples include personalised cards, planner stickers, paper gift boxes, decorative decals and painted signs made with Cricut-cut stencils.
Calculate material costs, packaging, design time and platform fees before setting prices, and check the commercial-use terms for any fonts or designs you sell.