Give old furniture and everyday accessories a fresh look with 29 easy Cricut projects for home decor, from wall art to seasonal accents.
One of the most interesting things about decorating with a Cricut is that the design does not have to stay on the material it was originally intended for.
A pattern cut from vinyl can become a detail on glass, while the same machine can cut a stencil for a painted design or create custom lettering for a decorative piece.
That opens up more possibilities than simply personalizing mugs and signs.
This collection of 29 easy Cricut projects for home decor brings together different ways to use those techniques around the house, from subtle decorative details to designs that become the main feature of a room.
For more beginner-friendly ideas, explore 21 Simple Cricut Projects for Beginners That Actually Sell to find projects you could make with selling in mind.
When Your Home Decor Needs Something a Little Different
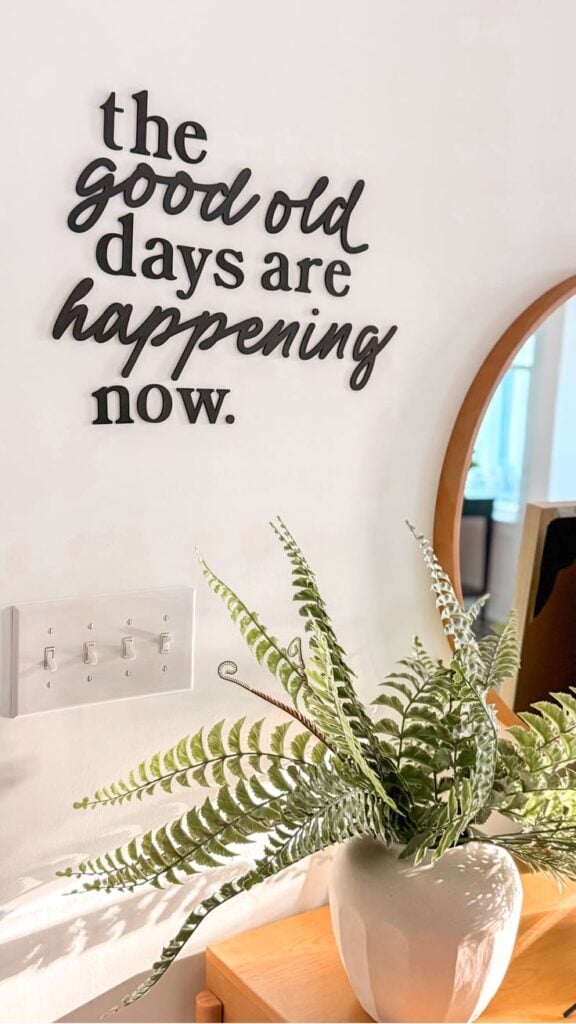
A room feels unfinished: The main furniture may be in place, yet the space still lacks the small details that make everything feel connected.
Old favourites no longer fit the style: A perfectly good piece of furniture can look out of place after a change in colour scheme or decorating taste.
Store-bought options fall short: Finding the right pattern, shade, or size can be difficult when ready-made decorations follow trends that don’t suit every home.
Every room looks much the same: Repeating identical styles throughout the house can leave each space without a distinct personality.
Seasonal decorating creates extra clutter: Holiday decorations can accumulate over the years, taking up storage space long after the celebrations end.
Personal taste is missing from the details: A home may look polished but still feel impersonal when its decorations don’t reflect the interests, colours, or patterns its occupants love.
A small change feels more sensible than a major expense: Replacing furniture or buying an entirely new set of accessories isn’t always necessary to give a familiar space a different look.
Easy Cricut Projects for Home Decor
1. Removable Botanical Wall Decals
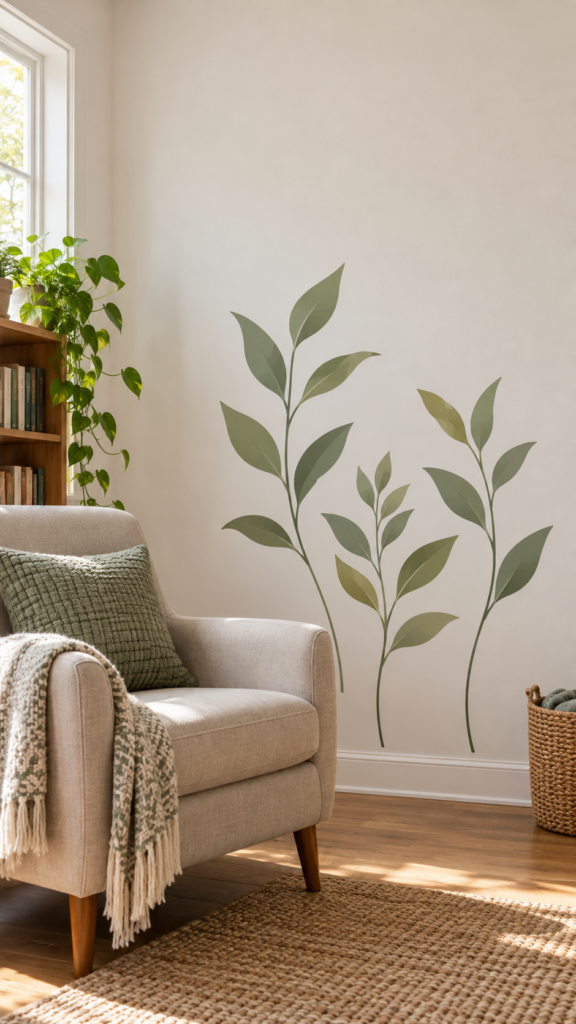
Botanical wall decals are a way to bring the look of leaves, flowers, or trailing vines into a room without committing to wallpaper or painting a permanent design.
With a Cricut, individual shapes can be cut from removable vinyl and arranged into a pattern that fits the available wall space.
For example, a few long stems can frame a reading corner, while scattered leaves can fill an empty section of wall without making it feel crowded.
The design itself deserves some thought before cutting. Large leaves and widely spaced stems create a different look from small, closely grouped flowers, so consider the size of the wall and the furniture around it.
You can use one colour for a subtle effect or combine two or three complementary shades, provided the extra layers do not make the design look busy.
For a more natural arrangement, vary the direction and spacing of the leaves rather than repeating every stem at the same angle.
Removable vinyl is not suitable for every wall. Choose a product intended for indoor wall applications, and check that the paint is fully cured and the surface is clean, smooth, and dry.
Textured walls can prevent the vinyl from adhering evenly, while delicate or poorly bonded paint may lift during removal. Test a small piece in an inconspicuous area first, and follow the vinyl manufacturer’s instructions.
2. Layered Paper Landscape Art
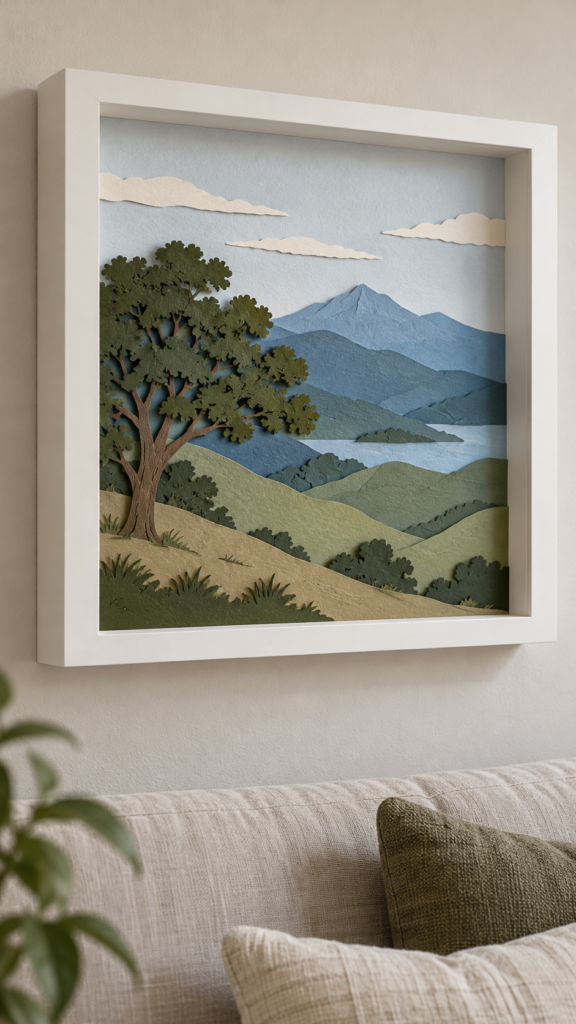
Layered paper landscape art uses several cut-out layers to create a scene with depth, almost like a miniature landscape inside a frame.
A Cricut can cut rolling hills, distant mountains, trees, rooftops, or buildings from different colours of cardstock, which are then arranged one behind another.
For example, a bedroom could have a framed mountain scene in muted blue and green, while a living room might suit a simple skyline inspired by a favourite city.
The key is to make the layers work together rather than simply stack paper on top of paper.
Place distant hills or buildings at the back, then bring trees, foreground shapes, or larger silhouettes forward.
Small foam adhesive squares between selected layers can create extra depth by casting soft shadows, but keep the spacing consistent so the artwork sits neatly inside the frame.
Choose cardstock sturdy enough to hold its shape, and check the depth of the frame before cutting.
A standard flat frame may compress the layers, while a deep shadow box gives them room to stand apart.
This project is particularly useful for creating personalised artwork that suits a room’s colours without painting directly onto the walls.
3. Geometric Framed Art
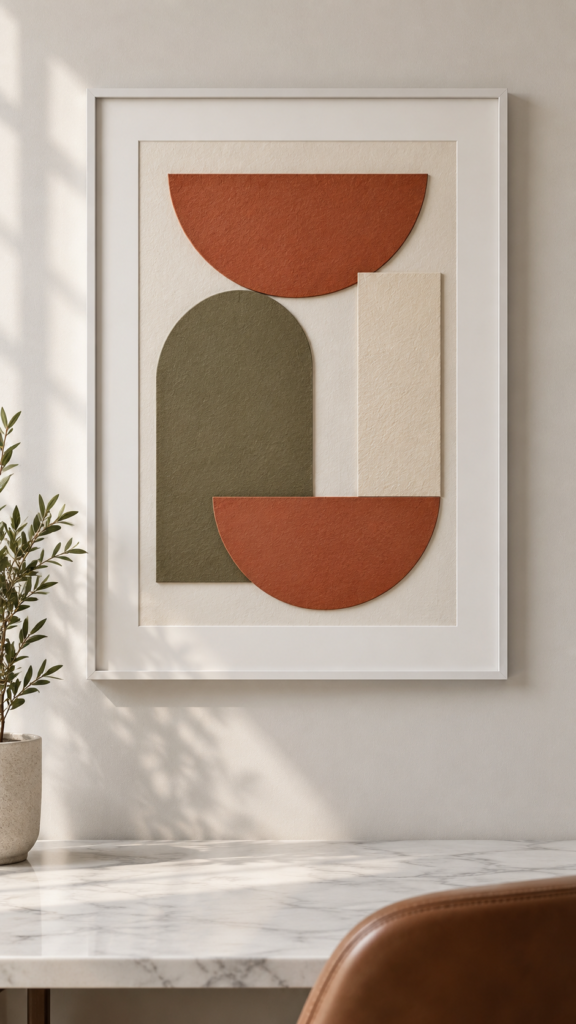
Geometric framed art is a simple way to bring a room’s colours together through shapes such as arches, circles, semicircles, and angular blocks.
With a Cricut, you can cut clean, repeated shapes from coloured cardstock and arrange them into an abstract composition.
For instance, a room decorated in cream, terracotta, and olive green could have three overlapping arches in those colours, while a home office might suit a more minimal arrangement of black, white, and grey shapes.
Before cutting, decide where each shape will sit and how much of the background should remain visible. Using two or three coordinated colours usually makes it easier to create a balanced design, especially when the shapes overlap.
You can cut the pieces from cardstock and mount them on a backing sheet, or use adhesive vinyl on a suitable backing if you prefer a flatter finish.
A frame with a mat can help separate the artwork from its surroundings and prevent the composition from feeling cramped. Measure the visible opening of the frame before sizing your design, since part of the backing sheet may be hidden beneath the mat.
The finished piece can then coordinate with cushions, curtains, or other colours already present in the room.
4. Botanical Silhouette Prints
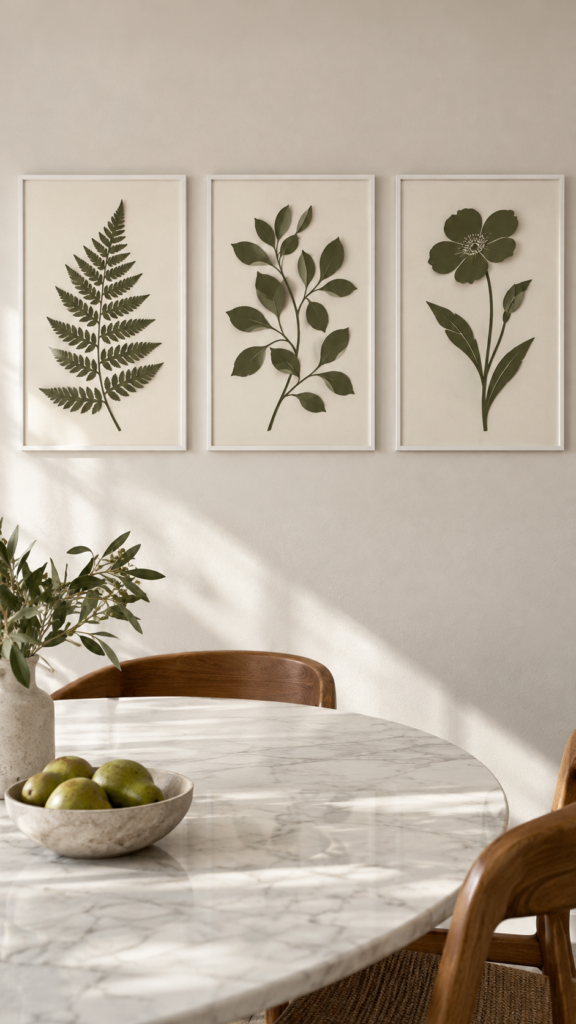
Botanical silhouette prints feature the outline of a leaf, fern, branch, or flower against a contrasting background. Unlike detailed botanical illustrations, these designs rely on the shape itself, making them suitable for a coordinated set of framed prints.
For example, three black fern silhouettes on cream backgrounds can create a consistent display, while green leaf shapes on pale beige cardstock may suit a room with natural colours.
Choose a cut file with clear, sturdy stems and leaves, particularly if the design contains narrow sections. Very delicate details can tear during weeding or become difficult to handle when transferring the cut piece.
A simple monstera leaf, broad fern frond, or single-stem flower is often easier to cut cleanly than a design with many tiny branches.
For a polished finish, use the same frame style and background colour across the set, then vary the botanical shapes. Leave enough empty space around each silhouette so its outline remains easy to see.
These prints can be displayed individually or grouped together, depending on the wall space available.
5. Stair-Riser Accent Designs
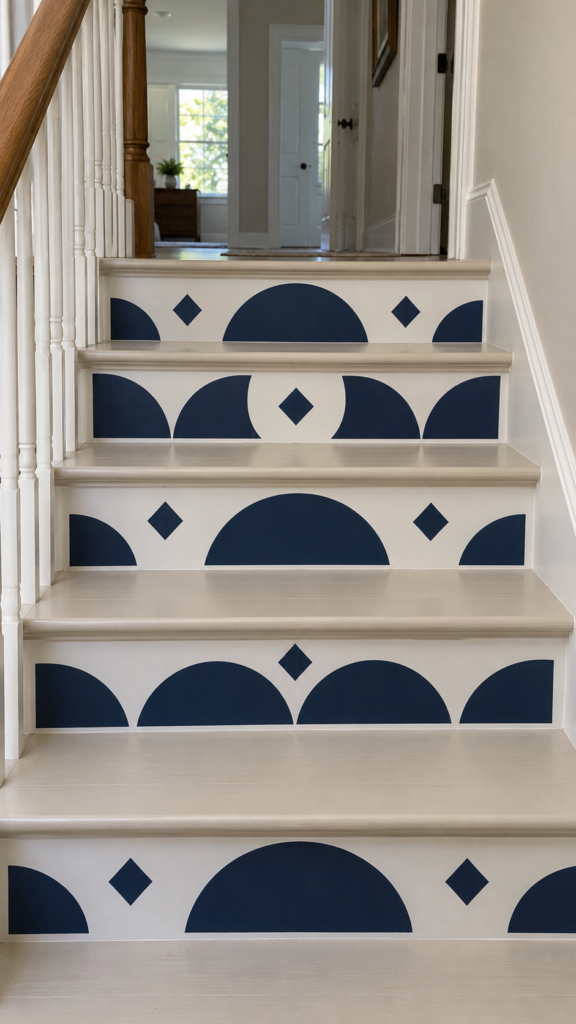
The vertical faces between indoor stair treads, known as risers, offer a place for repeating decorative patterns without covering the surfaces people walk on.
A Cricut can cut geometric shapes, small floral motifs, or tile-inspired designs that give a plain staircase a more distinctive appearance.
For example, a neutral hallway might suit a repeating black-and-white pattern, while a brighter home could use simple shapes in two coordinating colours.
Measure each riser separately before cutting, as their heights and widths may vary.
Create a test design from scrap material first to check the scale and placement, especially if the pattern needs to line up across several steps. Use a material suitable for the riser surface and expected wear, and clean and dry the area before application.
Keep the design on the vertical risers, not the horizontal treads. Decals on walking surfaces can create a slip hazard, and ordinary decorative vinyl may not withstand repeated scuffing.
If the staircase receives heavy use, check the material’s durability and suitability before committing to the full design.
If you’re learning how to use your machine, 22 Easy Cricut Projects for Beginners You Can Make at Home offers more simple projects to practise with.
6. Decorative Window Privacy Patterns
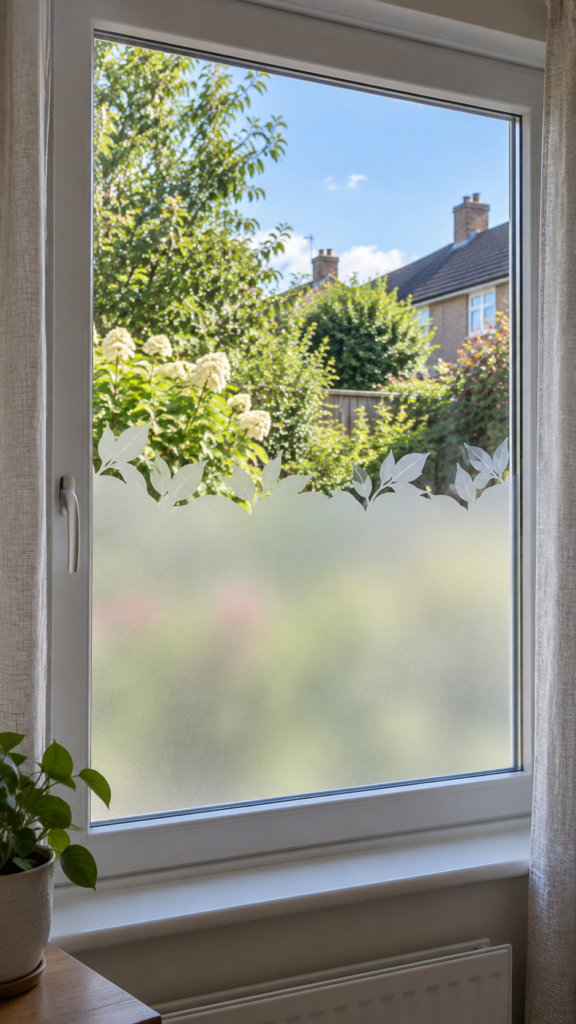
Among these easy Cricut projects for home decor, decorative window patterns offer a way to add visual interest while screening selected parts of a window.
Cut simple geometric shapes, leafy branches, or floral motifs and arrange them across the lower portion of a window or along its edges.
For example, a ground-floor living room could have a leafy pattern along the bottom of a window to soften the view from outside without covering the entire pane.
The material matters here. Decorative adhesive vinyl can create a patterned effect, but it does not provide the same consistent screening as purpose-made privacy film.
Check visibility from both sides, especially during the evening when indoor lights are on, and choose a window-compatible material suited to the amount of sunlight and moisture the glass receives.
7. Mirror-Corner Decals
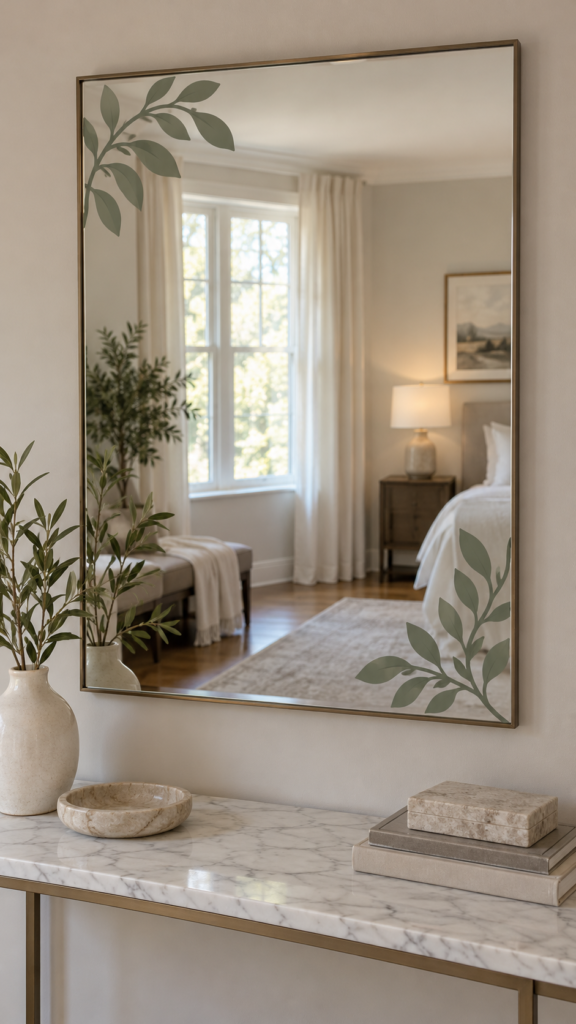
A plain mirror can become a decorative feature with small motifs placed around its corners. This is one of the easy Cricut projects for home decor that works well in an entryway, bedroom, or dressing area where a full decorative frame might feel too heavy.
Cut delicate leaves, stars, curved lines, or small floral shapes and position them around the edges while leaving most of the reflective surface clear.
For a coordinated look, match the vinyl colour to nearby hardware, picture frames, or other room accents.
Clean and dry the mirror before applying the decals, and smooth each piece carefully to prevent bubbles.
Keep the design away from areas that need frequent wiping, and test the adhesive in a discreet spot first to check its suitability for the mirror’s surface.
8. Glass-Cabinet Door Accents
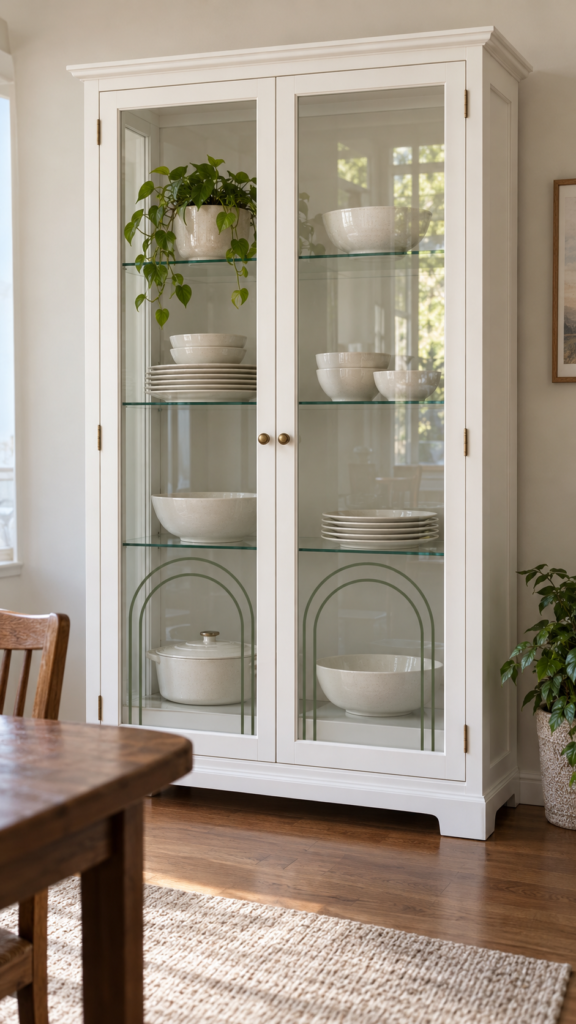
Glass-front cabinets can display dishes, books, or keepsakes while also contributing to a room’s overall style.
Add a repeated line pattern, small geometric shapes, or delicate botanical motifs to the glass to make a plain cabinet feel more distinctive.
These easy Cricut projects for home decor are particularly useful when you want to decorate an existing cabinet without repainting its frame or replacing its doors.
Measure the visible glass area before designing the pattern, allowing enough space around the edges so the decals do not interfere with the door frame, hinges, or handles.
A simple repeating motif often looks more intentional than covering the entire pane. Removable vinyl may be suitable for a temporary update, but test it first and avoid assuming it will come off every surface without leaving residue or damaging the finish.
9. Botanical Glass-Vase Designs
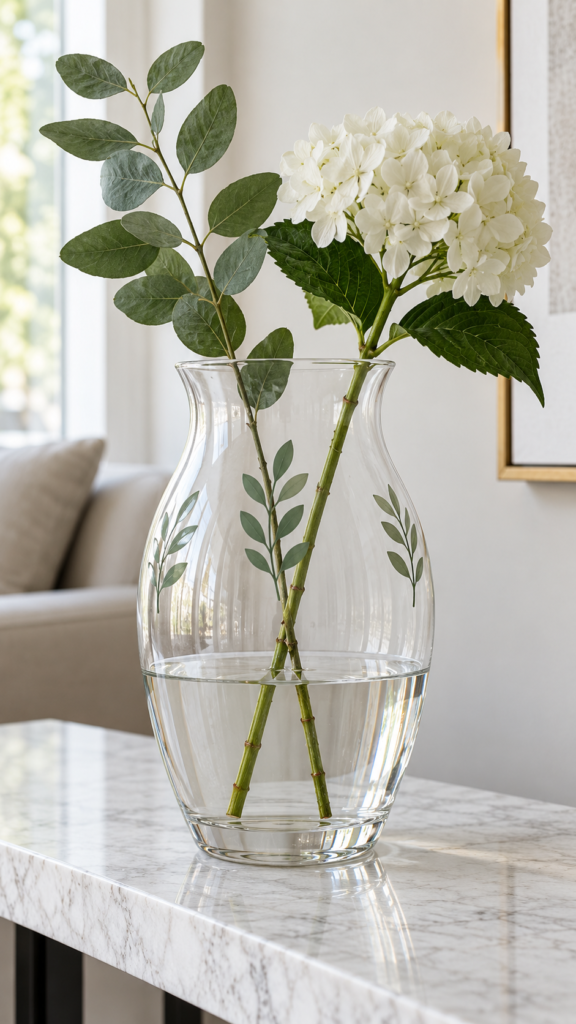
A clear glass vase can look quite different with a few carefully placed leaves, stems, or fine botanical outlines. For this easy Cricut project for home decor, cut a small selection of motifs from adhesive vinyl and arrange them around the outside of the vase.
A single branch on a tall vase can create a restrained look, while several small leaves may suit a wider vase displayed on a shelf or dining table.
Choose a smooth vase and clean it thoroughly before applying the design.
Curved glass can make large vinyl shapes wrinkle, so smaller motifs are generally easier to position neatly.
Keep the design away from the rim and interior, and treat the finished vase as decorative unless the vinyl manufacturer’s instructions specifically support washing and repeated water exposure.
Hand washing alone does not guarantee that every adhesive vinyl will remain intact.
For additional project ideas to try as a new Cricut user, see 19 Easy Cricut Projects for Beginners.
10. Decorative Glass-Hurricane Accents
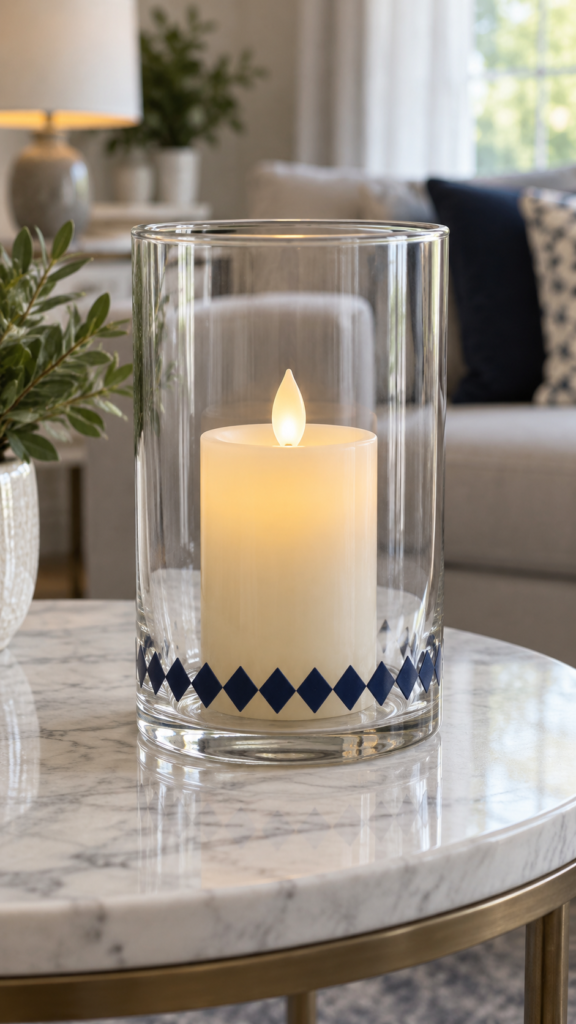
Glass hurricane holders and candle covers can be personalised with simple geometric shapes, narrow lines, or small seasonal motifs.
This easy Cricut project for home decor is suited to decorative holders that need a little more character without adding bulky embellishments.
For instance, a plain glass hurricane used as part of a table display could have a small pattern near its base, provided the decoration remains well away from heat.
Safety comes first with anything used around a candle. Adhesive vinyl is not automatically heat-resistant, and it should not be placed where it could become hot or come into contact with an exposed flame.
Follow the candle holder’s instructions and the vinyl manufacturer’s temperature guidance. If safe clearance cannot be established, use the decorated glass as a display piece without a lit candle.
11. Minimal Cushion-Cover Designs
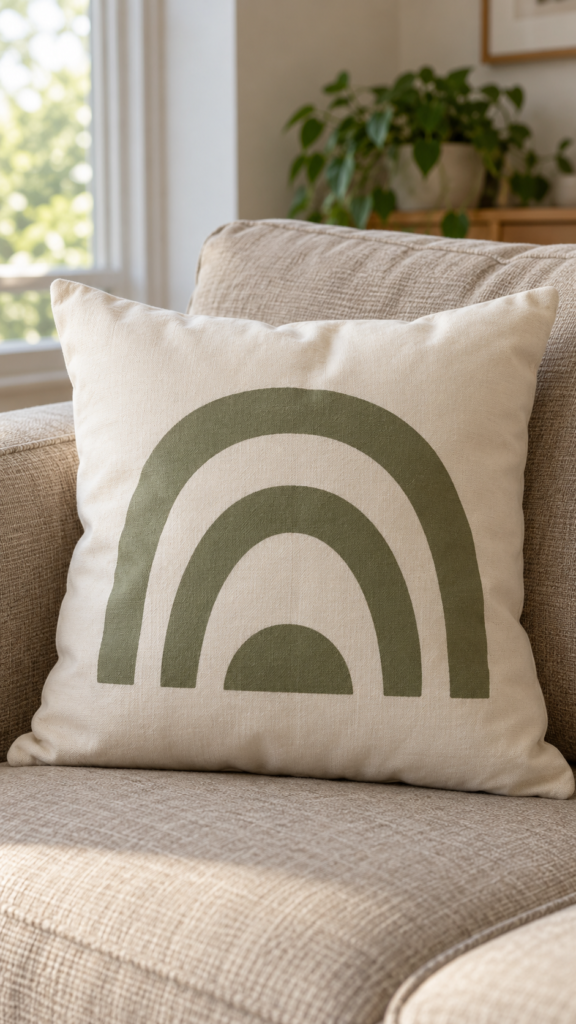
A plain cushion cover can be the missing link between colours already present in a room.
For example, if a sofa is beige and the curtains have muted green leaves, adding a similar botanical design to two cushion covers can make the pieces feel coordinated without buying a matching set.
A simple arch, a few abstract shapes, or a single outlined leaf can also work well when the room already has patterned furniture or rugs.
For this project, use heat-transfer vinyl (HTV) made for the cushion fabric rather than ordinary adhesive vinyl. Cotton and some cotton-blend covers may be suitable, but check the fabric and HTV manufacturer’s instructions before applying heat.
Remove the cushion insert, place a pressing mat inside the cover if required, and test the design on a spare piece of similar fabric where possible.
Keep the design away from seams and zippers so the press can make even contact. Follow the specified temperature, pressing time, and washing instructions to help the design last.
12. Small Curtain-Hem Motifs
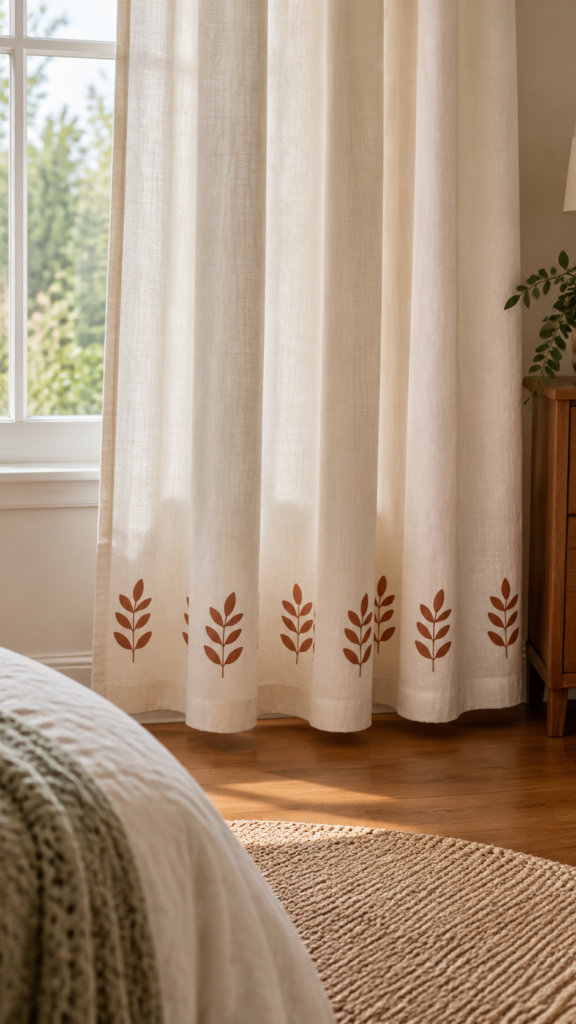
Curtains do not always need a bold print to become part of a room’s design. A row of small leaves, stars, or simple geometric shapes along the bottom edge can echo details in a rug, cushion, or lampshade.
For example, tiny terracotta shapes on cream curtains could tie in with terracotta cushions without making the window look overly busy.
Before cutting, check the curtain’s fibre content and care label. Some synthetic fabrics can be damaged by the heat needed for iron-on vinyl, and lightweight or textured curtains may not provide an even surface for application.
Choose an HTV product compatible with the fabric, test a hidden section if the manufacturer’s instructions allow it, and keep the motifs small and spaced apart so the curtain still hangs naturally.
If the fabric cannot tolerate heat, a fabric stencil and suitable textile paint may be a better alternative.
13. Geometric Table-Runner Accents
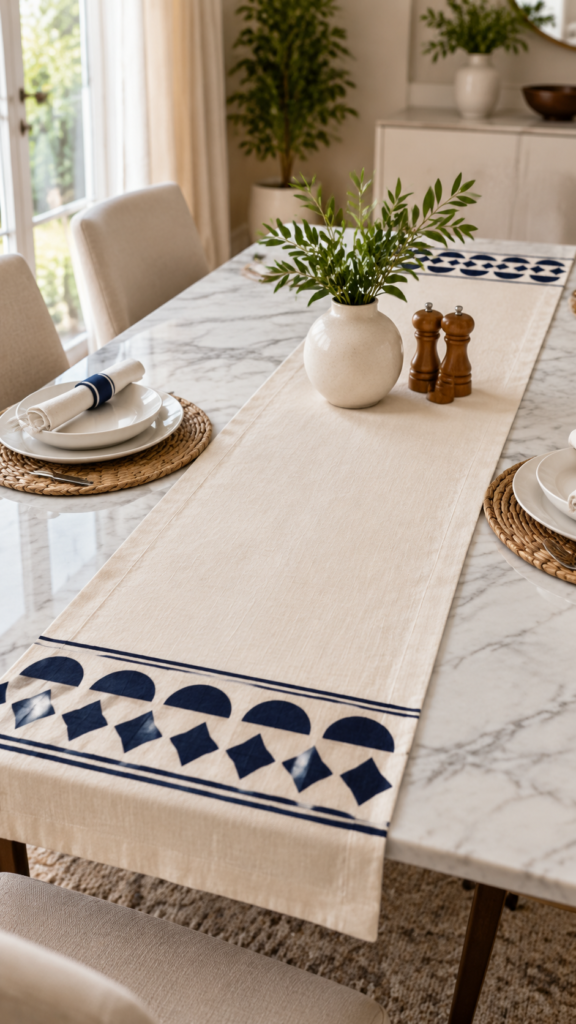
A plain table runner can look more suited to a dining space when its pattern relates to the plates, placemats, or centrepiece.
A repeating line of diamonds, semicircles, or small arches along each end can give the runner a finished look without covering the entire fabric.
For a practical example, a neutral runner with navy geometric accents could complement simple white dinnerware and blue napkins.
Plan the pattern before applying anything. Measure the runner, mark the centre point, and arrange the shapes on a flat surface first so the spacing remains balanced at both ends.
If using HTV, confirm that the fabric can tolerate the required heat and that the finished runner can be cared for as intended.
For a runner that needs frequent washing or ironing, follow the transfer product’s care instructions rather than assuming the design will withstand every laundry routine.
14. Stencilled Lampshade Patterns
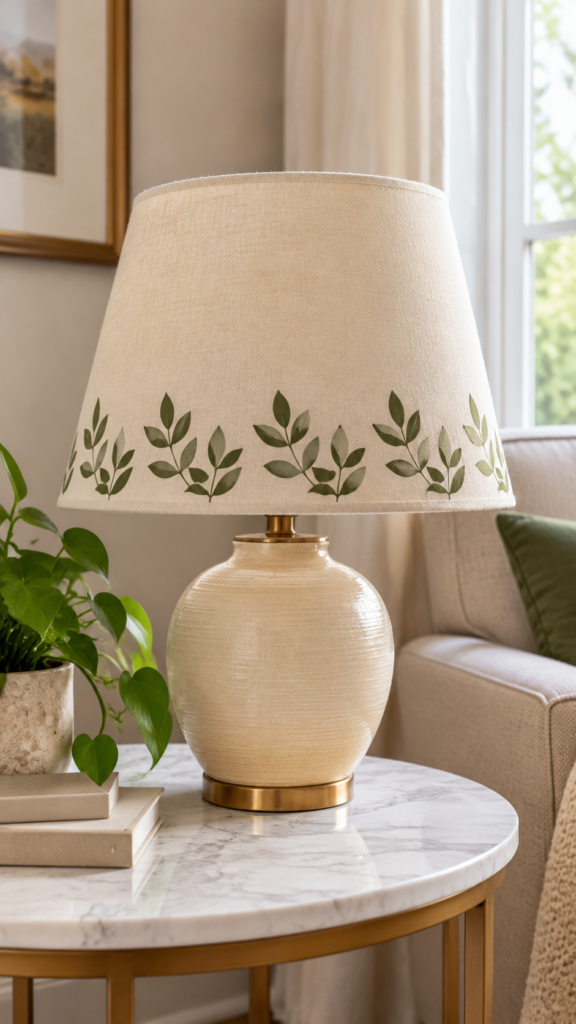
A plain lampshade can become a more distinctive feature with a restrained pattern, such as small leaves, scattered dots, or a simple repeating border.
For instance, a shade in a reading corner might pick up the botanical pattern used on nearby cushions, helping the area feel coordinated without adding another accessory.
This project needs extra care because the shade sits close to a light source.
First, check the lamp and shade manufacturer’s guidance about decorating the shade, heat clearance, and suitable materials.
If decorating is permitted, cut a stencil from material designed for the chosen paint and shade surface, then test the pattern on a spare piece of the same material.
Use only paint approved for that surface, and keep the design away from areas that may become hot. Do not assume ordinary adhesive vinyl or craft paint is safe on a lampshade simply because it adheres well.
15. Decorative Fabric-Basket Panels
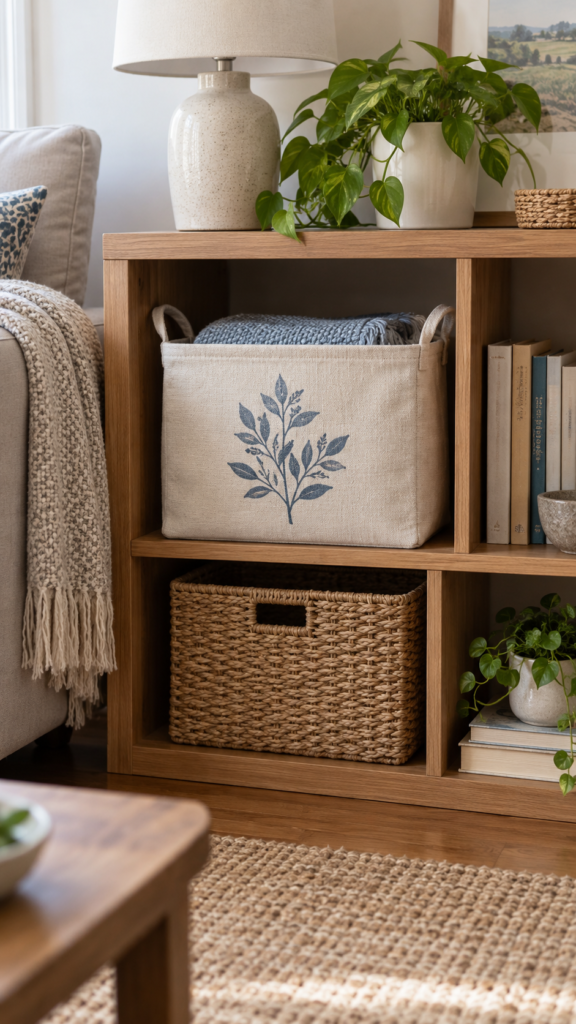
Fabric storage baskets often sit in plain view on bedroom shelves, beside sofas, or in living rooms holding blankets and magazines.
A small motif can make one feel more like part of the decor. For example, a basket used to store neutral-coloured throws could have a simple leaf or abstract design that echoes the cushion covers nearby.
Choose a basket with a fabric surface compatible with the transfer material. A flat, stable panel is easier to decorate than a heavily textured or floppy section, where the design may not adhere evenly.
Before applying heat-transfer vinyl, check the basket’s construction for plastic inserts, coatings, stiffeners, or handles that could be damaged by heat.
If the basket cannot be pressed safely, consider using a suitable fabric paint and stencil instead. Keep the decoration on the outside panel, away from areas that rub heavily against the contents, to reduce wear.
16. Personalised Planter Designs
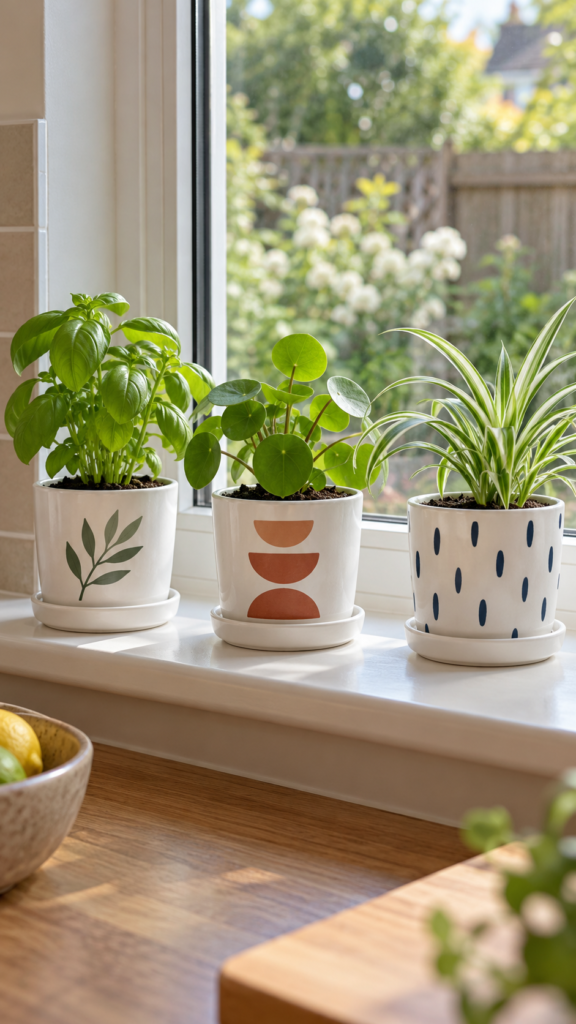
Plain plant pots can look a little disconnected from the rest of a room, especially when several different styles are grouped on one shelf or windowsill.
Adding a small botanical outline, a simple geometric pattern, or a short name can help bring them together.
For example, three matching white planters with different leaf designs can create a coordinated display on a kitchen windowsill without every pot looking identical.
For this project, smooth ceramic, glazed terracotta, or suitable plastic planters are easier to decorate than rough, porous clay, which may not hold adhesive vinyl well.
Wash away dust, allow the surface to dry completely, and apply the design to the outside of the pot. Keep vinyl away from the rim and areas that remain wet after watering.
If the planter will sit outdoors, check that the vinyl is suitable for sunlight and weather exposure; indoor decorative vinyl may fade or peel more quickly outside.
17. Decorative Tray Patterns
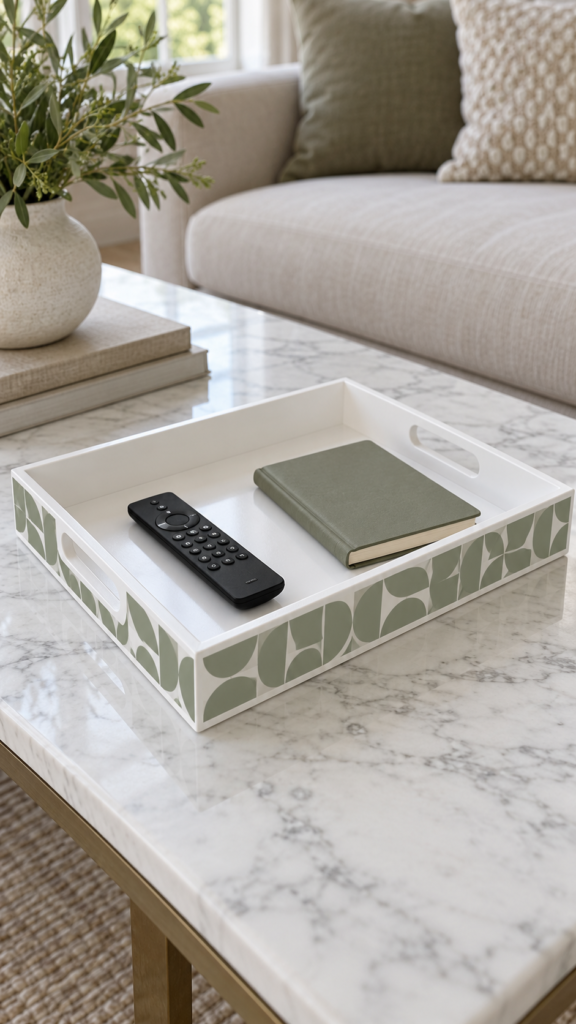
A plain tray on a coffee table or bedside cabinet can become part of the room’s colour scheme with a simple border, a few small shapes, or a restrained geometric pattern.
For instance, a wooden tray used to hold a remote control, coasters, and a small ornament could have a narrow design around its outer edge that complements nearby cushions or curtains.
The tray’s material will determine which decoration works best. Adhesive vinyl may suit a smooth, sealed wooden or acrylic tray, but it can struggle to adhere to rough wood or an uneven finish. Clean and dry the surface before applying the design, and press down the edges carefully.
Keep the vinyl away from places where cups, wet glasses, or frequently handled objects will rub against it.
Treat the tray as decorative rather than food-safe unless the materials and finished surface are specifically rated for food contact.
18. Decorative Tile Art
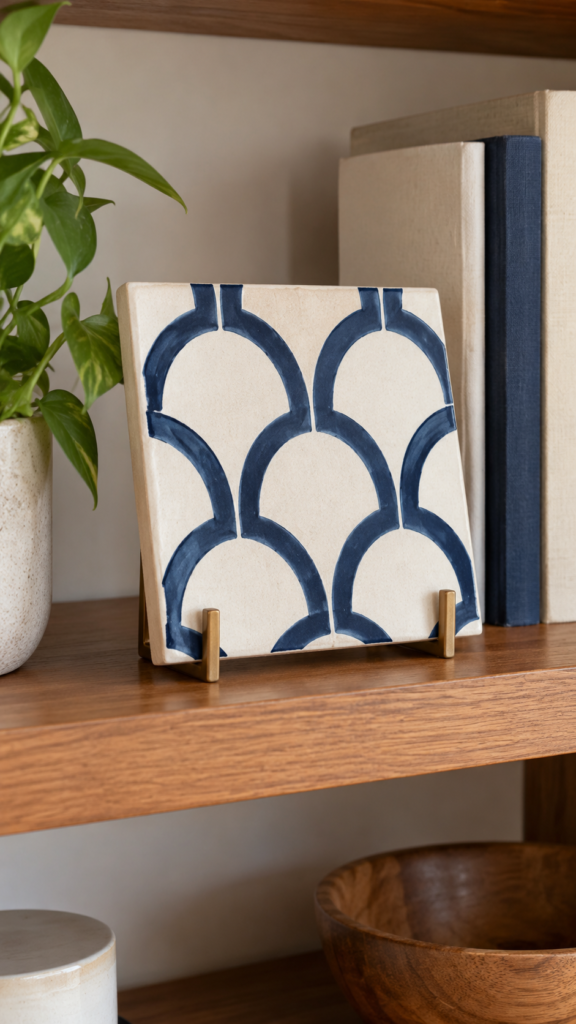
A single decorated tile can become a small piece of display art for a shelf, desk, or wall.
Use your Cricut to cut a stencil featuring a geometric pattern, a simple flower, or a repeating line design, then apply paint suitable for the tile’s surface
. For example, a white tile with a navy geometric motif could sit on a bookshelf beside framed photographs or be displayed on a small stand in a hallway.
Start with a clean, dry tile and test the stencil and paint on a spare tile or an inconspicuous area. Smooth tiles generally make stencil placement easier, while textured tiles can allow paint to seep beneath the edges.
Follow the paint manufacturer’s drying and curing instructions before handling or displaying the finished piece.
Unless the complete finish is designed for wet, high-wear conditions, keep the tile as decorative art rather than using it on a backsplash, shower wall, or floor.
19. Exterior Bowl Accents
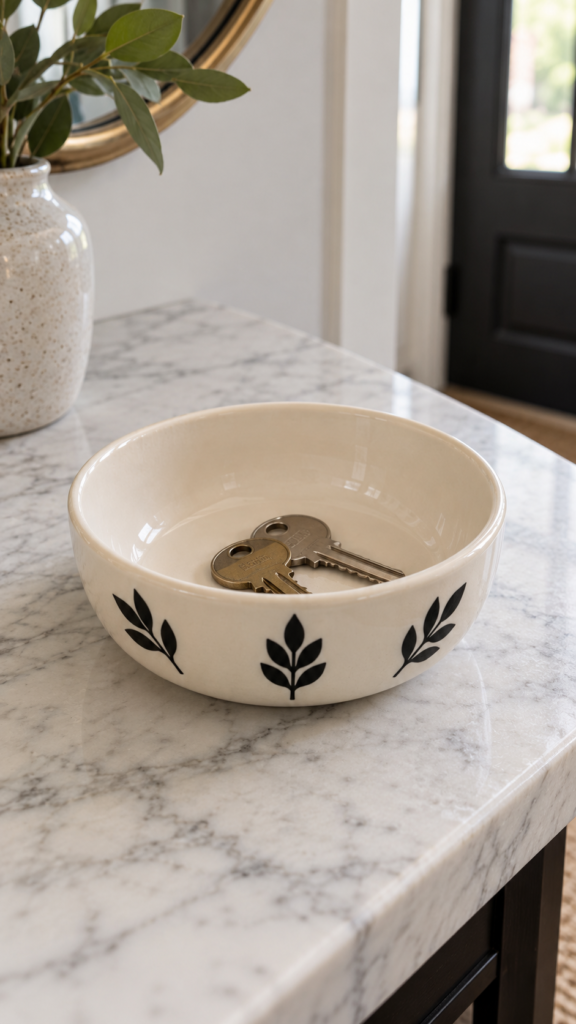
A plain decorative bowl can be customised with a small leaf motif, a curved line, or a few geometric shapes.
These easy Cricut projects for home decor work particularly well for bowls used to hold wrapped sweets, keys, or other small household items.
For example, a ceramic bowl on an entryway table could have a simple black design on the outside to complement the nearby picture frames or lamp.
Choose a smooth bowl and check that the vinyl is compatible with its finish. Apply the design only to the exterior, away from the rim and any area that touches food.
Ordinary craft vinyl is not automatically food-safe, dishwasher-safe, or suitable for repeated soaking, so a decorated bowl should be treated as a display or storage piece unless the materials are explicitly approved for the intended use.
Hand washing does not make an otherwise unsuitable material food-safe.
20. Picture-Frame Corner Details
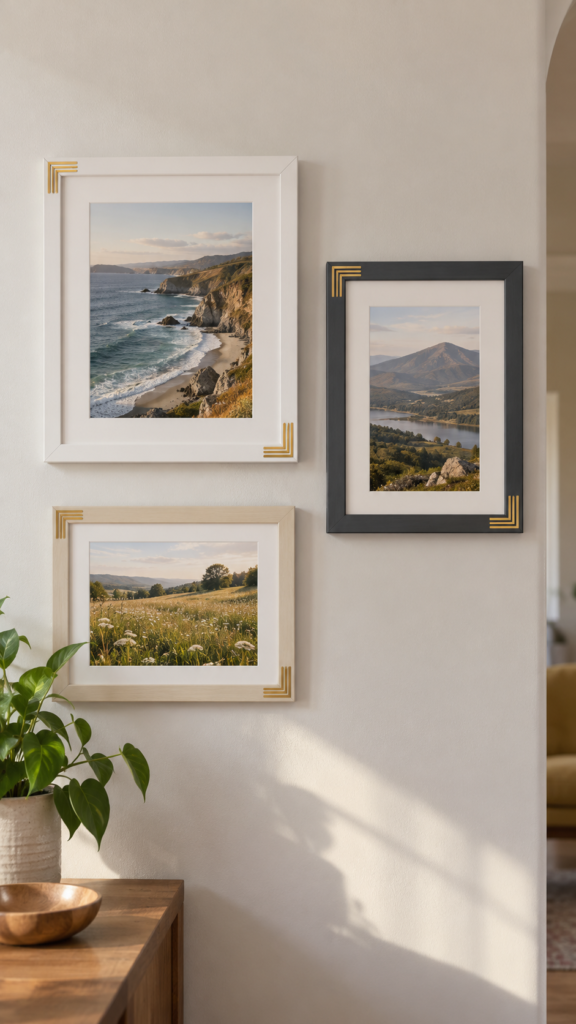
A collection of photographs can look more coordinated even when the frames themselves do not match.
Small corner motifs, fine lines, or a narrow geometric border can help tie different frames together without requiring you to replace them.
For example, adding the same small gold corner detail to black, white, and natural-wood frames can create a subtle connection across a gallery wall.
Measure the frame’s visible edges before cutting so the design does not overlap the photograph or glass. Smooth, sealed frames are usually easier to decorate with adhesive vinyl than rough, unfinished wood.
Test the adhesive on a discreet section first, particularly on painted, waxed, or delicate finishes that may mark during removal.
Keep the decoration restrained enough that it complements the photographs instead of drawing attention away from them.
If you’d like to make products for extra income, browse 25 Easy Cricut Projects to Make and Sell for Extra Money for more ideas to consider.
21. Layered Mantel Garlands
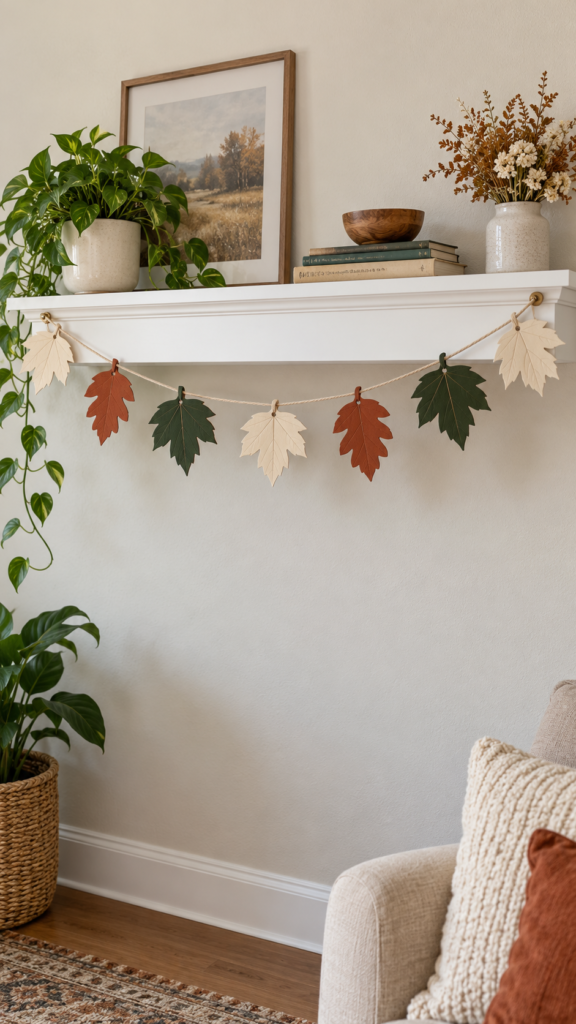
A layered paper garland can add colour and shape to a mantelpiece without requiring bulky decorations that take up valuable surface space.
Cut leaves, circles, stars, or simple seasonal shapes from cardstock, then arrange them along a length of string or ribbon.
For example, a garland made with cream, rust, and deep green leaves can suit an autumn display, while simple stars in white and gold can work for a Christmas shelf.
The arrangement matters as much as the shapes. Alternate colours and leave enough space between pieces so the garland does not look crowded.
If you want to reuse it, attach the shapes in a way that allows them to be removed and stored flat without bending.
Cardstock thickness also matters: very thin paper may curl, while heavier cardstock can make the garland too weighty for delicate string.
Keep paper garlands away from fireplaces, candles, heaters, and other sources of heat or flame. For a home with an active fireplace, display the garland on a shelf or wall well outside the area exposed to heat.
22. Reusable Paper Window Snowflakes
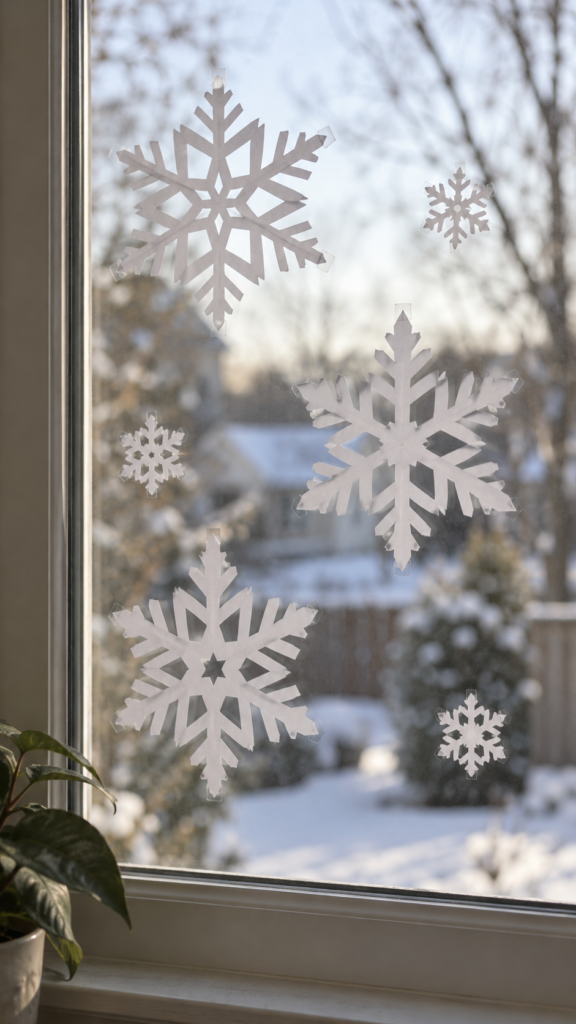
Paper snowflakes create a seasonal window display that can be taken down when winter decorations are no longer needed.
A Cricut makes it easier to cut several matching shapes or create a mix of large and small snowflakes.
For example, three larger snowflakes near the corners of a window, surrounded by smaller ones, can create a balanced display without covering all the natural light.
Choose designs with strong connecting points rather than extremely thin tips, which can tear when handled.
Cut a test snowflake first to check that the paper holds together, particularly if the design has many narrow openings.
Lightweight paper is easier to attach to glass, while cardstock offers more structure but may be harder to keep in place.
Use a glass-appropriate attachment method that can be removed without damaging the window finish.
If you plan to store the snowflakes for another year, remove them carefully and keep them flat between sheets of paper. This helps prevent creases and broken points.
23. Changeable Seasonal Banners
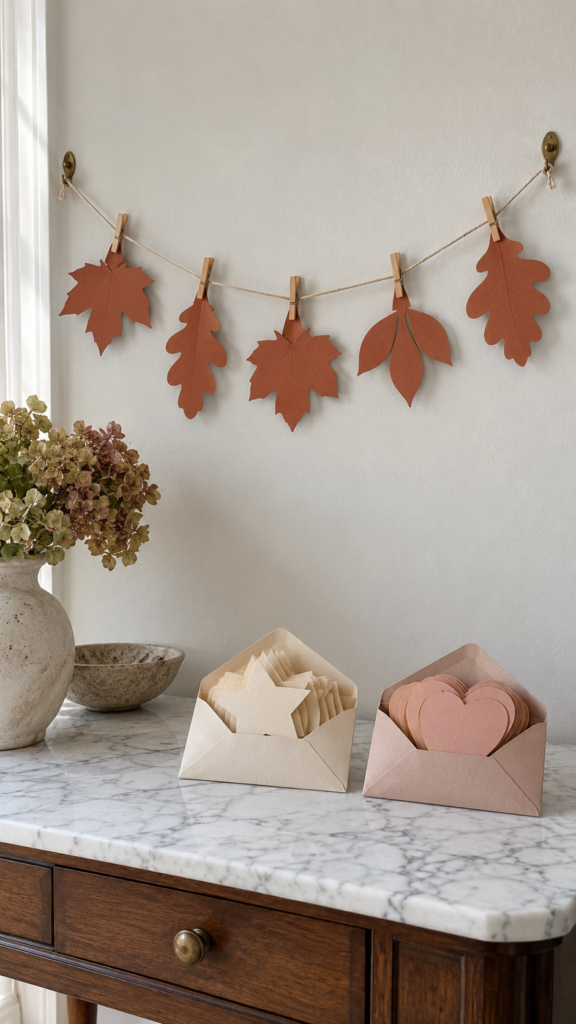
A changeable banner lets you keep the same hanging base while switching the decorative pieces for different occasions.
For example, a neutral string banner could have autumn leaves in October, stars for Christmas, and hearts for Valentine’s Day.
Rather than making a completely new garland each time, you replace only the shapes that give it its seasonal look.
Cut the shapes from cardstock and attach them with small clips, removable fasteners, or another method that suits the banner’s weight.
Before cutting a full set, arrange a few paper samples along the string to check their size and spacing. Large shapes can overlap when the banner hangs, while very small pieces may be difficult to see from across the room.
Store the seasonal pieces in labelled envelopes or flat folders to make them easier to find and reuse.
Keep the finished banner lightweight, and make sure the hooks or other hanging points are secure enough to support it.
24. Layered Paper Ornaments for Decorative Branches
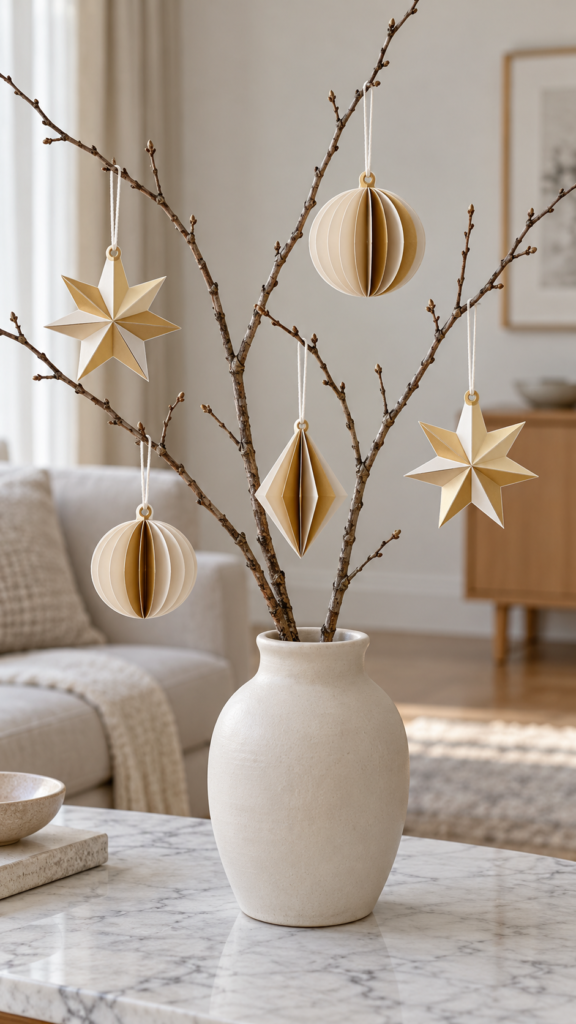
Bare branches arranged in a vase can become a simple decorative display with lightweight paper ornaments.
Cut stars, leaves, circles, or folded geometric shapes from cardstock and hang them at different heights.
For example, white and metallic-look paper shapes on dark branches can create a restrained display for a side table, while coloured leaves can suit an autumn arrangement.
The hanging hole needs enough space from the edge to prevent tearing. If the paper is delicate, reinforce the hole with a small eyelet or a carefully placed backing piece.
Keep each ornament light enough that it does not bend the branch, and check that it hangs straight rather than turning sideways.
This project works particularly well when you want a seasonal display without storing a large collection of bulky ornaments.
Choose shapes that can be flattened or nested together after use, and keep the branches and paper away from open flames or other heat sources.
25. Interchangeable Seasonal Frame Inserts
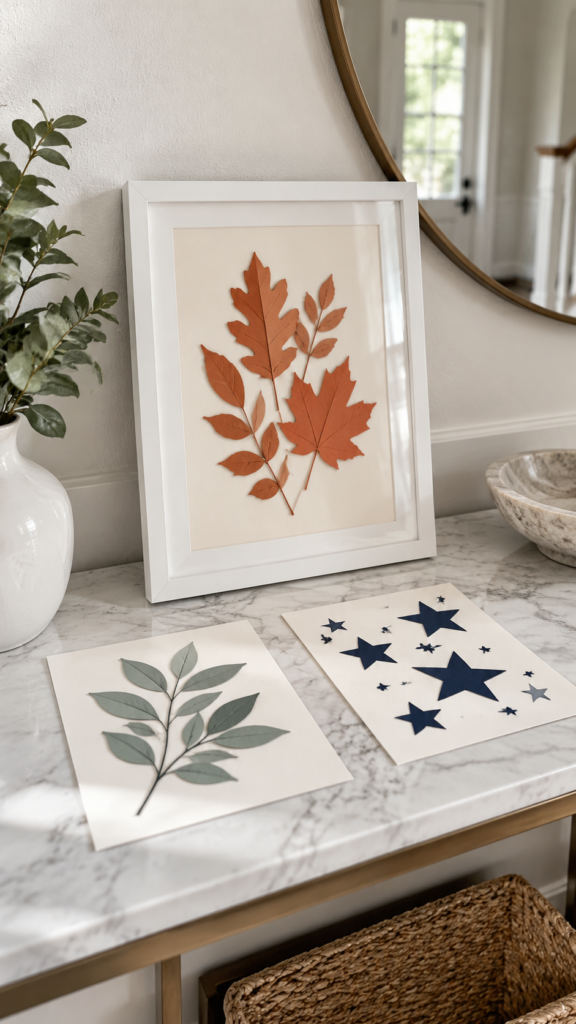
A frame you already own can serve as the base for artwork that changes with the season or the room’s colour scheme.
Use your Cricut to cut a cardstock design featuring leaves, flowers, stars, or geometric shapes, then place it inside the frame.
For example, a neutral frame on a hallway console could hold a terracotta leaf design in autumn and a simple green botanical arrangement in spring.
Measure the frame’s visible opening, not its outer dimensions, because the edges of the frame or mat will cover part of the artwork.
Cut a test sheet from inexpensive paper first, then check that the finished insert sits flat and does not buckle behind the glass. If the design uses several layers, confirm that the frame has enough depth to accommodate them without pressing the shapes out of place.
Keeping the frame and changing only the insert makes seasonal updates less expensive and easier to store.
Flat cardstock designs can be filed between sheets of paper, ready to use again when the room needs a different accent.
Vinyl opens up plenty of crafting possibilities, and 23 Cricut Projects for Beginners Using Vinyl has more ideas to explore.
26. Decorative Light-Switch Plate Accents
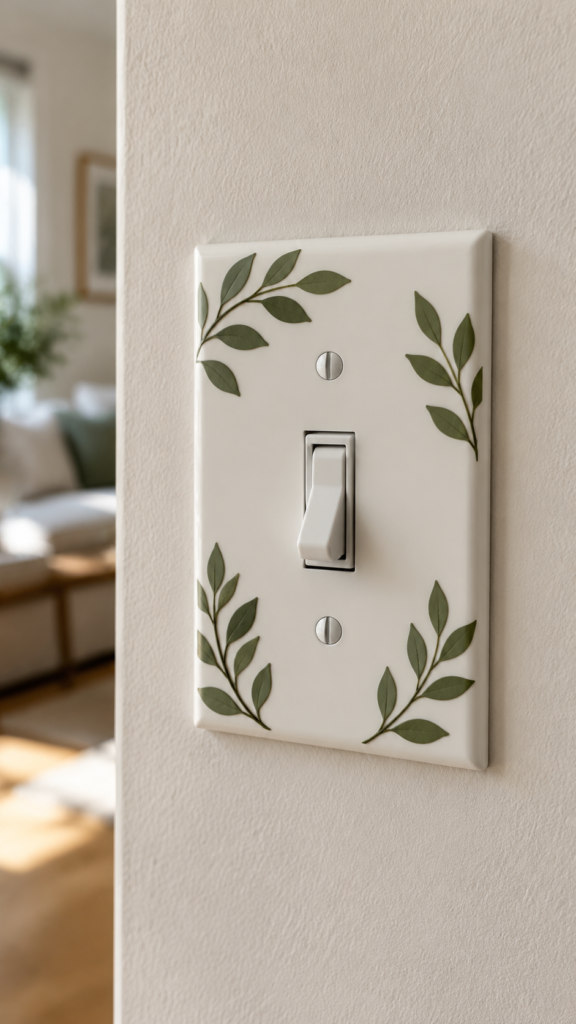
A small decorative motif can make a plain light-switch plate fit better with the room’s colours or style.
Use your Cricut to cut a simple leaf, tiny flowers, or a geometric border from compatible adhesive vinyl. For example, a subtle botanical design could complement a room with leafy prints without making the switch plate a focal point.
Remove the plate before decorating, where appropriate, and make sure the power and electrical components are handled safely. Keep vinyl away from the switch mechanism, screw holes, and electrical openings.
Never cover the switch itself or apply materials inside the electrical box. Choose a design that fits the plate without interfering with its normal use.
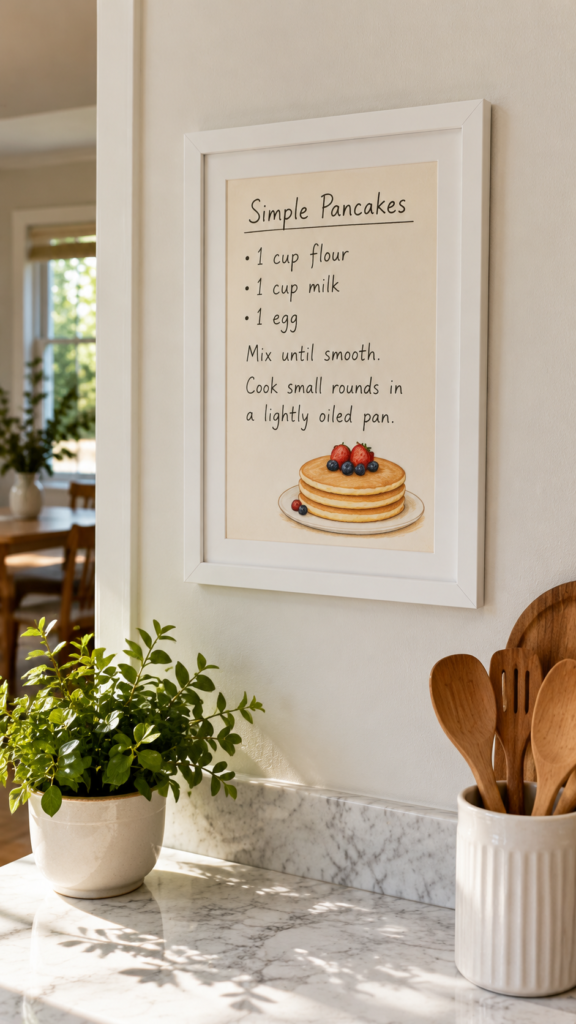
27. Framed Family-Recipe Typography
A handwritten family recipe can become a personal piece of kitchen artwork. Use a Cricut-compatible writing tool to reproduce the text, or create a printed design that preserves the original handwriting.
A recipe for a family’s favourite soup, cake, or traditional meal can make the display meaningful without needing extra decorative wording.
Check every ingredient, measurement, and instruction against the original before making the final piece. If the handwriting is difficult to read, scan or photograph it clearly before preparing the design.
Choose a frame that suits the kitchen, and hang it away from direct heat, steam, and cooking splashes to protect the paper.
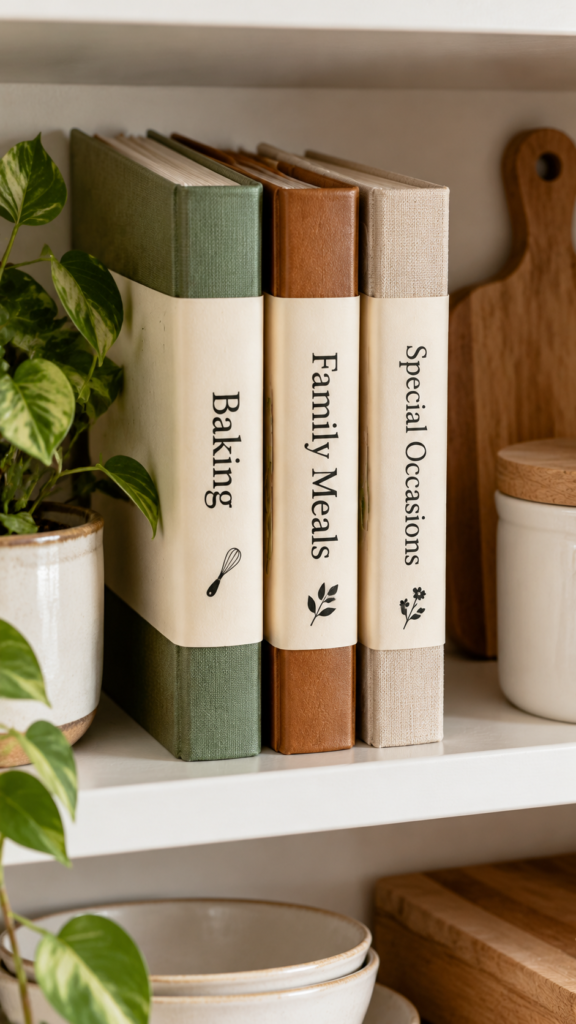
28. Coordinated Decorative Book-Spine Labels
Matching labels can give notebooks, journals, recipe books, or decorative storage books a more consistent appearance on a shelf.
Cut small labels or simple spine motifs with your Cricut, using lettering that remains readable at the size available.
For example, a set of recipe notebooks could have matching labels for baking, family meals, and special occasions.
Measure each spine before cutting, since books in the same collection may have different widths. Removable adhesive can be useful when you expect to reorganise the shelf, but it is not guaranteed to come off every cover without leaving marks.
For valuable books or delicate finishes, attach the labels to removable paper bands or small tags instead of applying adhesive directly.
29. Personalised Entryway Typography Prints
Personalised typography prints are among the easy Cricut projects for home decor that can give an entryway a more individual touch.
Create a design featuring a family name, a short welcome message, or a phrase that has meaning to the household. You could use layered cardstock lettering for a dimensional effect or prepare a clean, printed design for a simpler finish.
Before cutting or printing, check how the wording will look at the finished size. Lettering that appears clear on a computer screen may be difficult to read from the doorway when reduced.
Choose a font with distinct letter shapes, leave enough space around the text, and match the background and lettering colours to the surrounding space.
A frame also makes it easier to update the message later without replacing the entire display.
For paper-based projects, check out 25 Easy Cricut Projects Using Cricut Infusible Ink to learn about designs made with Infusible Ink and compatible blanks.
How to Get a Clean, Polished Finish
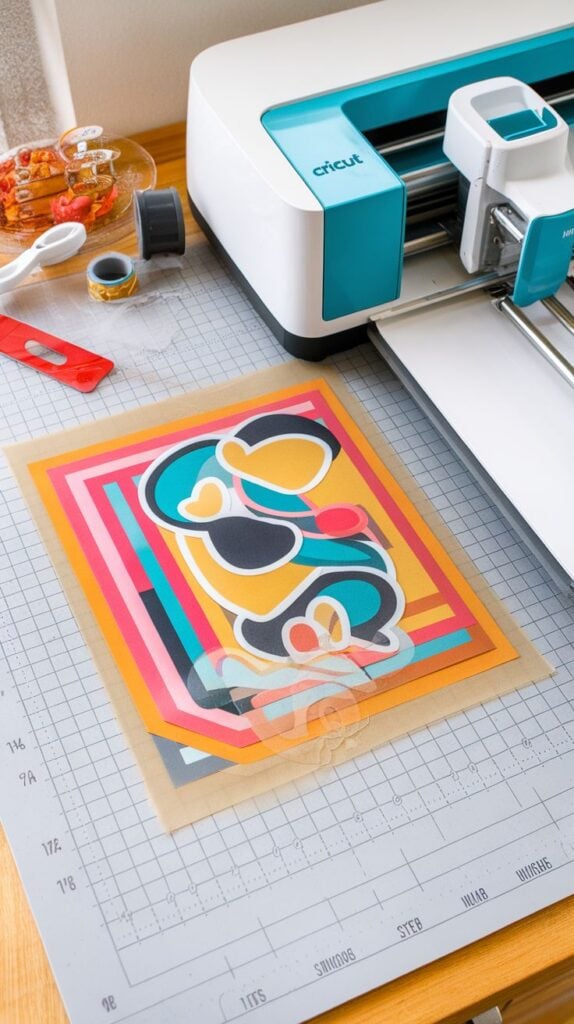
Even a well-designed Cricut project can look untidy when the vinyl lifts at the edges, small details tear during weeding, or the decoration does not suit the item’s surface.
A few checks before cutting and applying the design can help prevent these problems, especially when updating furniture, walls, glassware, fabric, or other items already in the home.
✅ Test the surface before applying vinyl
Dust, grease, texture, loose paint, and certain coatings can affect adhesion. Clean the surface using a method suitable for the material, then allow it to dry completely.
Smooth, flat surfaces are generally easier to decorate than rough or heavily textured ones. Test a small piece of vinyl in an inconspicuous spot before committing to the full design.
✅ Treat removable vinyl with care
Removable vinyl is intended for easier removal than permanent vinyl, but it is not guaranteed to come off every painted wall, wallpaper, or finish without leaving marks or causing damage.
Paint condition, surface texture, and how long the vinyl stays in place can all affect removal. Test a hidden area first and follow the vinyl manufacturer’s instructions, particularly when decorating rented spaces.
✅ Simplify details that are too small to cut cleanly
Tiny lettering, narrow lines, and delicate cutouts may tear during weeding or lose their shape when transferred.
Before cutting the full design, check that the details are suitable for the finished size. Widen thin lines, enlarge small lettering, or remove unnecessary cutouts rather than forcing a complicated design onto a small surface.
✅ Use the right material for fabric projects
Iron-on vinyl, also called heat-transfer vinyl (HTV), is designed to be applied using heat according to the product instructions. Ordinary adhesive vinyl is not a substitute for HTV on cushions, curtains, or other washable fabric items.
Check the fabric’s care label, confirm that it can tolerate the required temperature, and follow the instructions for pressing, cooling, and washing.
✅ Check how the finished item should be cleaned and handled
A vinyl design on a decorative vase may need different care from an iron-on cushion motif or a framed paper print. Hand-washing, repeated water exposure, friction, and heat can affect materials differently.
Check the manufacturer’s care guidance before describing a project as waterproof, washable, dishwasher-safe, or permanent.
When the material has not been rated for those conditions, treat the decorated item as a display piece and clean it gently using a suitable method.
If you enjoy making cards, decorations, or other paper crafts, 27 Easy Cricut Projects Using Cardstock offers more ways to use cardstock with your Cricut.
Conclusion
Decorating your home with a Cricut doesn’t mean starting from scratch or buying new accessories for every room.
A simple framed design, a personalised cushion, or a seasonal paper display can give an existing space a different look when the materials and design suit the item.
Start with one project that fits your home, the supplies you already have, and the amount of time you can spare. Test your design before cutting the final material, and pay attention to how the finished item will be used and cleaned.
Which of these easy Cricut projects for home decor would you like to make first? Choose an idea, gather your materials, and give one familiar corner of your home a personal touch.