Give everyday household items a more useful purpose with Cricut projects to make for your home, from custom labels to practical accessories.
The home has many little details that can make everyday living more comfortable, organised and personal.
From identifying household essentials to refreshing furniture and making practical fabric accessories, a Cricut can help you create items that are both useful and attractive.
These Cricut projects to make for your home go beyond the usual decorative signs and wall art, offering fresh ways to customise your living space.
Supposedly you are updating a room or making something to solve a small household problem, the right project can give ordinary items a purpose and a personal touch.
Looking beyond wedding orders? 21 Personalized Cricut Items People Actually Buy highlights custom products with real selling potential.
Cricut projects to make for your home
1. Bird-Visible Window Pattern Decals

Birds can mistake large glass windows and doors for open space, especially when the glass reflects trees or the sky.
You can use a Cricut to cut small shapes such as dots, leaves or simple geometric patterns and apply them across the glass to make the windows more visible to birds.
Rather than placing just one or two stickers in the middle, create a repeated pattern that covers the glass more evenly.
The spacing is important. American Bird Conservancy recommends leaving no gaps larger than 2 inches horizontally or vertically between the markings.
Apply the pattern to the outside of the glass where possible, so birds can see it clearly. Keep in mind that the Cricut only cuts the shapes; the correct spacing, coverage and visibility of the finished pattern are what matter.
For the homeowner, this is a way to add a simple decorative detail while making windows easier for birds to see. Choose a suitable outdoor material that can withstand the weather.
For craft sellers: You could offer custom window marker sets in different shapes and colours, with a simple spacing guide to help customers apply them correctly. Avoid advertising untested vinyl decals as certified bird-safe.
Seasonal orders can bring fresh opportunities for your craft business. See 30 Cricut Projects to Make and Sell for Christmas.
2. Custom House Number Plaques
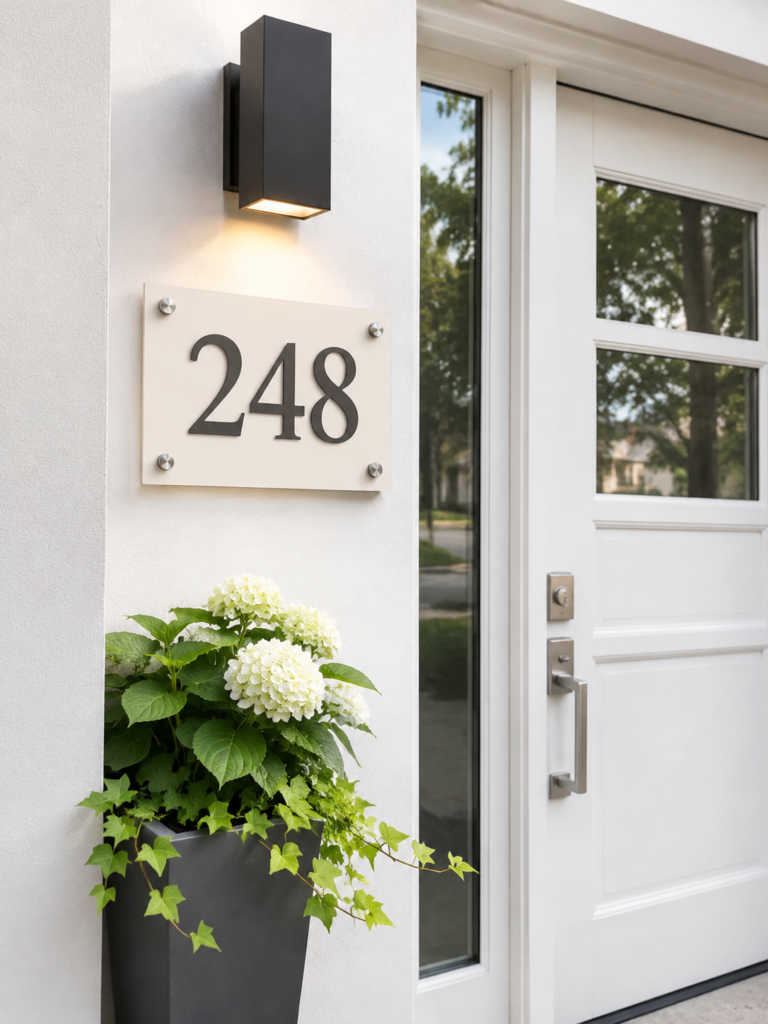
A house number plaque can make an entrance easier to identify while adding a personal touch to the exterior.
Among the Cricut projects to make for your home, this is a useful option because you can cut numbers, street names or family names from outdoor-rated vinyl and apply them to a suitable weather-resistant plaque or sign blank.
Pay attention to the size and spacing of the numbers so they can be read easily from the street. A clear contrast between the lettering and the background also makes a difference.
Choose a plaque material and vinyl designed for outdoor use, since ordinary craft materials may fade, peel or deteriorate when exposed to sunlight and rain.
Remember that the Cricut cuts the lettering; the finished sign’s weather resistance depends on the materials used.
For homeowners, custom plaques make it easier to match house numbers with an existing entrance style.
For craft sellers: Offer different plaque sizes, finishes and lettering styles, allowing customers to provide their own house numbers and preferred wording.
Small material costs can leave more room for profit. These 29 Cricut Projects You Can Make For Under $5 And Sell For More offer budget-friendly ideas to consider.
3. Mailbox Number and Name Decals

A plain mailbox can look more personal with a neatly arranged house number and family name. Use your Cricut to cut the lettering from outdoor-rated adhesive vinyl, then apply it to a clean, suitable mailbox surface.
You can create a simple layout with the house number as the main feature and the family name in smaller lettering.
Before cutting, measure the available space on the mailbox, especially if the surface is curved.
Clean and dry the area according to the vinyl manufacturer’s instructions, then position the design without covering hinges, locks, openings or other parts that need to remain accessible. Choose lettering large enough to be seen clearly from the road.
For homeowners, this is a straightforward way to identify a mailbox without replacing the entire unit.
A custom order can include matching number and name decals in different sizes, with layouts suited to flat or curved mailbox surfaces.
Not every popular craft brings a worthwhile return. Explore 27 Cricut Projects With High Profit Margins for ideas with stronger earning potential.
4. Custom Doorbell Nameplate Inserts
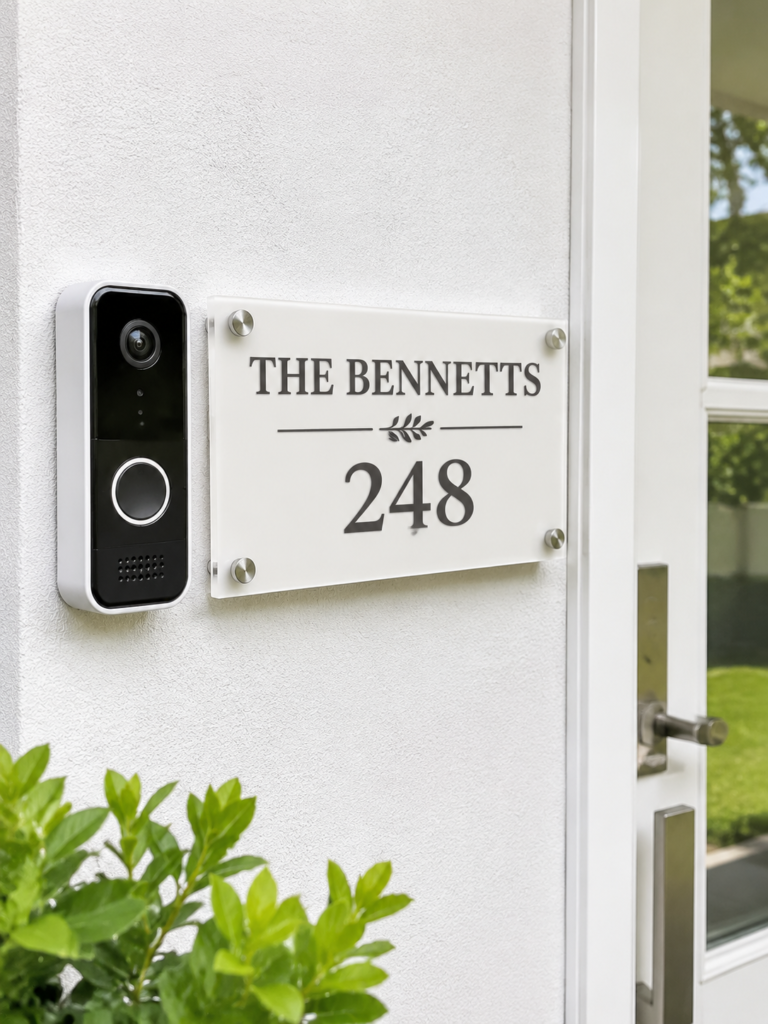
A small nameplate can make the entrance feel more personal while helping visitors identify the right home.
For this project, use your Cricut to cut a house number, family name or short label from adhesive vinyl and apply it to a separate, suitable nameplate blank or removable insert.
Measure the available space before designing the lettering, as doorbell surrounds and mounting plates come in different shapes and sizes.
Keep the button, camera lens, speaker, sensors and screw holes completely clear. Do not cut or modify the doorbell unit itself, and avoid applying vinyl where it could interfere with its operation.
For homeowners, a personalised insert can update the appearance of an existing entrance without replacing the doorbell.
A small custom range could include different lettering styles and sizes for customers who want their house number or family name displayed beside the doorbell.
Starting a Cricut business doesn’t have to involve complicated products. These 23 Easy Cricut Crafts To Sell For Beginners offer a simpler starting point.
5. Room-Specific Interior Door Plaques
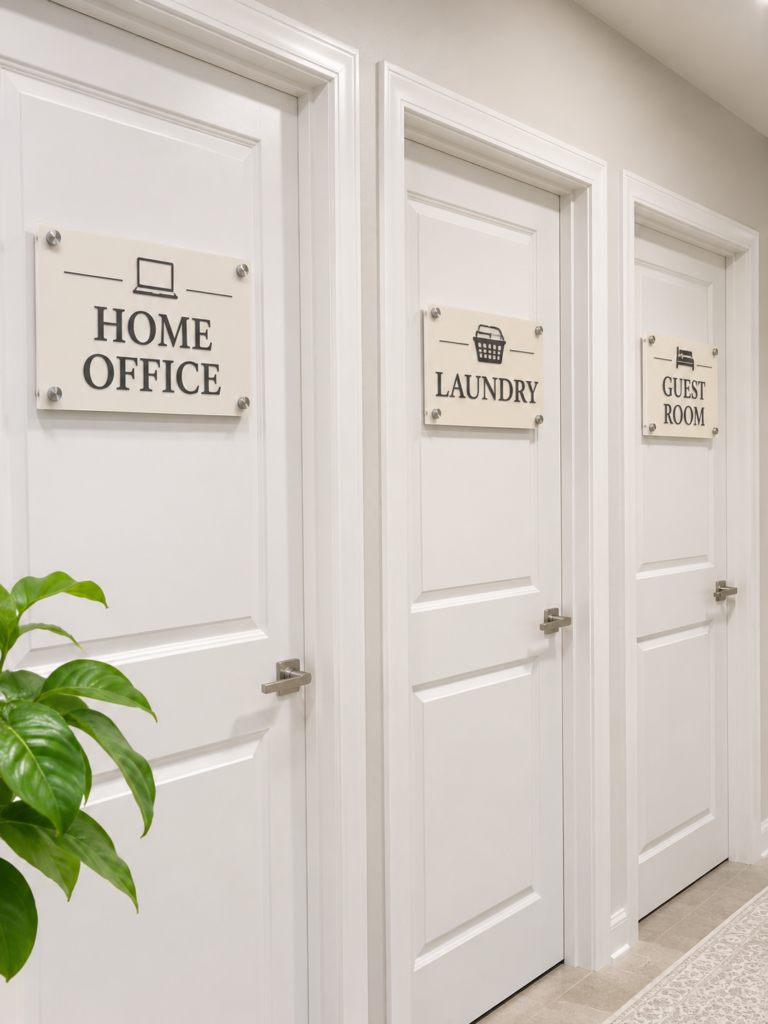
A study, laundry room, guest room or home office can have its own simple door plaque to make the space easier to identify.
Cut the room name from adhesive vinyl with your Cricut and apply it to a purchased plaque blank. You can also add a small symbol or a layered cardstock detail to suit the room.
Keep the lettering large enough to read at a glance, and choose a plaque size that fits the available door space. A short room name usually works better than squeezing too much wording onto a small surface.
The Cricut cuts the design, but the plaque material and mounting method determine how sturdy the finished piece will be.
For homeowners, these plaques are useful when several rooms serve different purposes, particularly in shared homes or properties with guest accommodation.
For a personalised collection, craft sellers can offer matching room-name plaques with options for different colours, shapes and lettering styles.
Personalisation can make ordinary items more appealing to buyers. See 21 Personalized Cricut Items People Actually Buy for products with custom appeal.
6. Faux Leather Cabinet Pulls
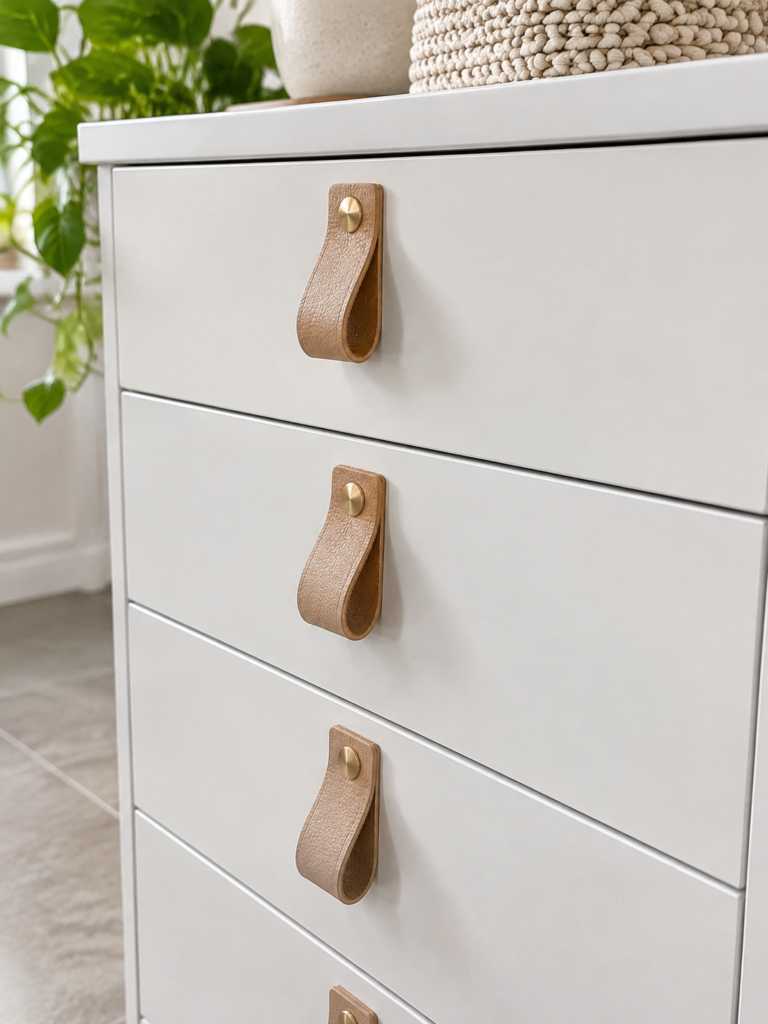
Give plain cabinets or drawers a different look with simple faux leather pulls. Your Cricut can cut suitable faux leather sheets into matching strips, and you can punch or cut holes for the fasteners, depending on the material and machine being used.
Fold each strip into a loop and secure it with suitable rivets or screws to create a soft, decorative handle.
Check your Cricut machine’s material compatibility before choosing the faux leather, since thickness and construction affect how easily it can be cut. Use the correct blade, mat and material setting recommended for your machine.
Measure the cabinet or drawer fronts carefully so the pulls are consistent, and make sure the fasteners are appropriate for the furniture. These pulls are best suited to lightweight cabinet doors and drawers rather than heavy drawers that require a strong, rigid handle.
For homeowners, faux leather pulls offer a way to refresh suitable furniture without replacing every handle.
For a made-to-order range, you could offer different strip lengths, colours and finishes, while making the recommended use and hardware requirements clear.
Craft fairs give handmade products a chance to stand out in person. Browse 20 Cricut Products to Sell at Craft Fairs for market-friendly ideas.
7. Decorative Switch Plate Covers
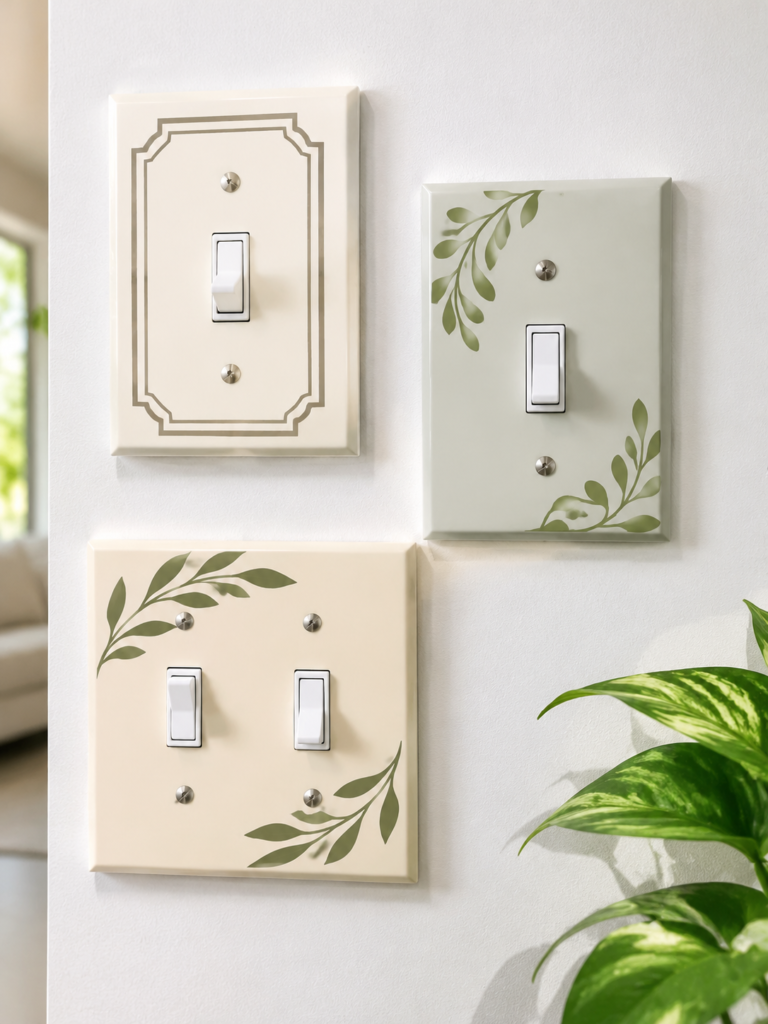
Plain switch plates can look more coordinated with the rest of a room when you add a simple decorative design.
Use your Cricut to cut a suitable vinyl pattern or paper insert and apply it to a compatible purchased switch plate. You could choose small geometric shapes, subtle borders or patterns that match the room’s colours.
Before decorating, make sure the switch plate is safely removed, following the appropriate electrical safety instructions.
Keep the switch opening and screw holes clear, and never apply decorative materials to the electrical switch or wiring.
Check that the plate is not cracked or damaged before reinstalling it correctly. Also, choose materials that are suitable for the plate and will not interfere with its fit.
For homeowners, matching switch plate designs can bring a more consistent look to bedrooms, home offices and other spaces.
For craft sellers: Create coordinated designs in different colours and patterns, but ask customers to check their switch plate measurements and shape before ordering.
Affordable supplies can make experimenting with new designs less expensive. These 29 Cricut Projects for Beginners Using Dollar Store Items show what’s possible on a tight budget.
8. Custom Curtain Tiebacks
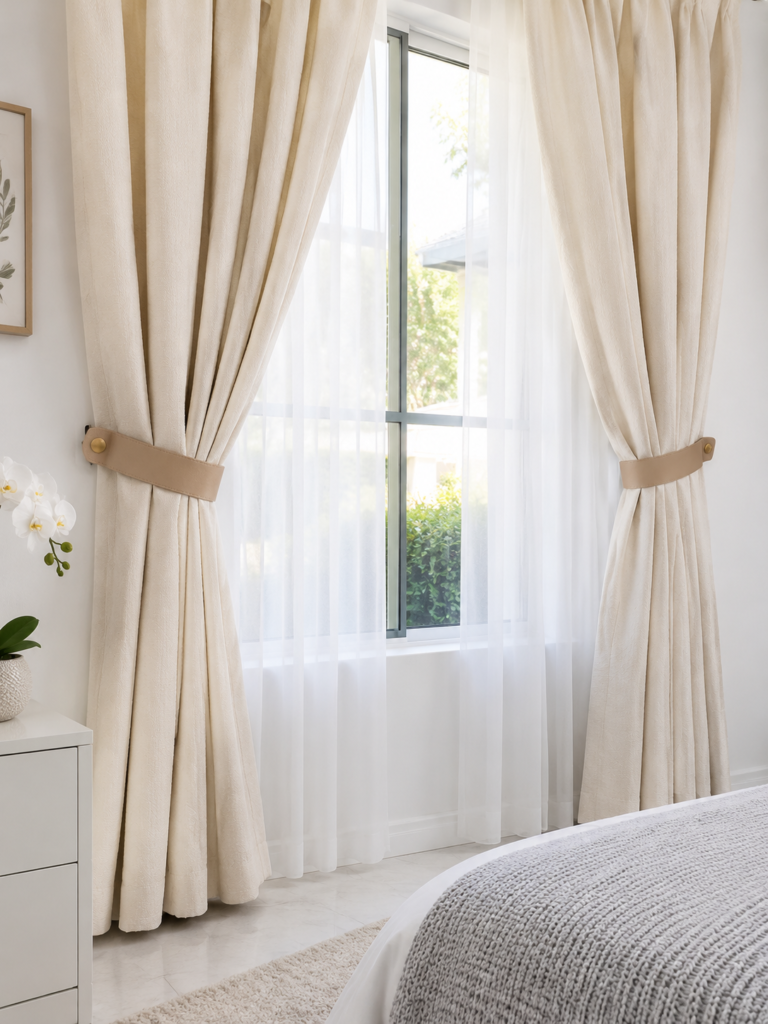
Curtains do not always need elaborate accessories to look neat. A pair of custom tiebacks can hold them to the side while adding a small detail that complements the room.
Use your Cricut to cut suitable fabric or compatible faux leather into matching straps, then add appropriate fasteners such as snaps, buttons or other secure closures.
Measure the curtains before deciding on the tieback length. Thick or heavily lined curtains may need wider straps and stronger fastening hardware than lightweight curtains.
For fabric versions, finish the edges with sewing or another suitable method to prevent fraying. Make sure the finished tiebacks can hold the curtains without stretching, tearing or coming loose.
For homeowners, these accessories offer a simple way to coordinate curtains with cushions and other fabric details.
For a matching collection, you could make pairs in different lengths, colours and materials to suit various curtain styles.
A home-based craft business can offer more than wedding orders. Get ideas from 35 Profitable Cricut Projects You Can Make From Home.
9. Fabric Door Draft Excluders
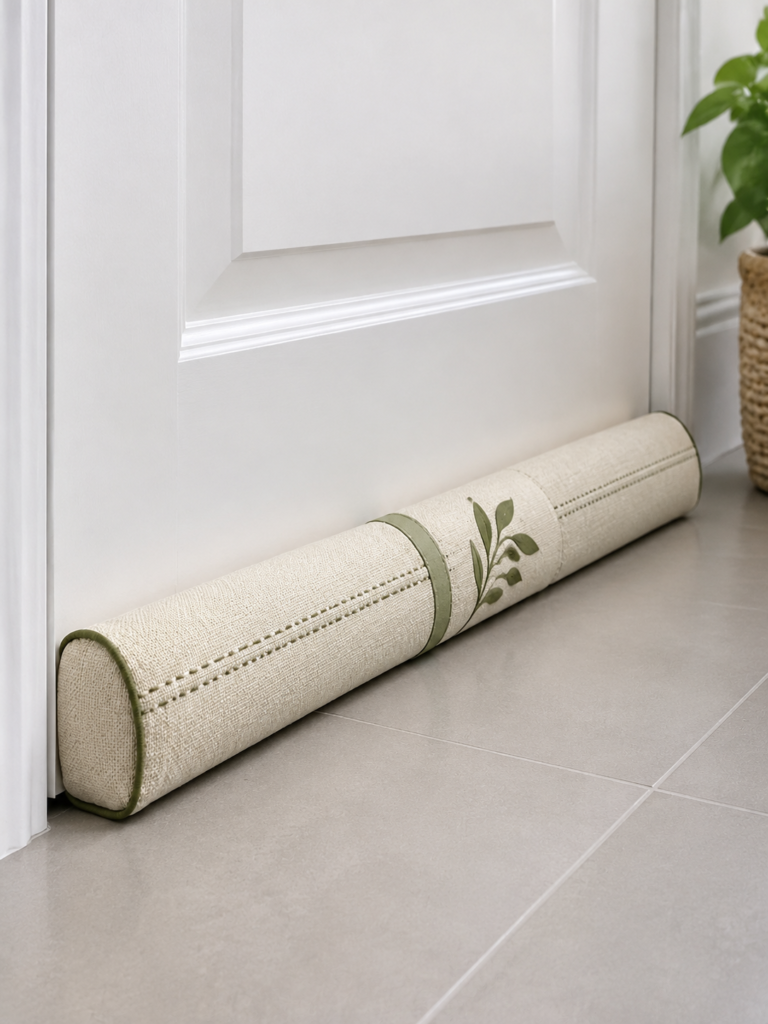
A gap beneath an exterior door can allow cold air, dust and insects to enter a room. A fabric door draft excluder helps cover that space when the door is closed.
Your Cricut can cut the fabric pieces to size, while sewing and filling turn them into a long, padded tube that rests along the bottom of the door.
Measure the door width and the gap beneath it before cutting the fabric. The finished excluder should be long enough to cover the gap without preventing the door from opening or closing properly.
Use a suitable filling and sew the ends securely to prevent it from leaking out. Also, do not use one where it would block required ventilation or interfere with an escape route.
For homeowners, washable fabric makes it easier to keep this household accessory clean.
For craft sellers: Offer different lengths and fabric patterns, with options for customers who need a particular door width.
See which handmade products have selling appeal in 33 Cricut Projects That Actually Sell Well.
10. Weighted Fabric Doorstops
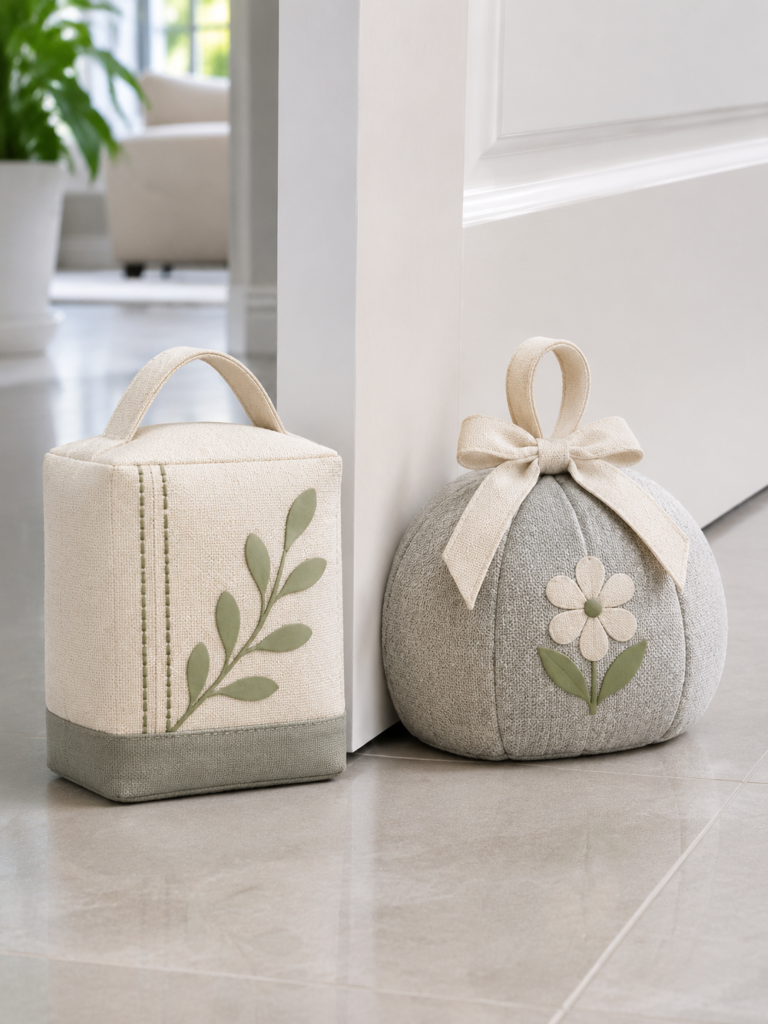
A fabric doorstop can keep an open door in position while adding a soft furnishing detail to the room. Use your Cricut to cut decorative fabric shapes or appliqué pieces for the cover, then sew them onto a suitable fabric casing.
The doorstop also needs a separate weighted filling, such as an appropriately contained weight, to keep it in place.
The fabric design is only one part of the project. Choose a durable outer fabric, sew strong seams and make sure the filling is securely enclosed.
A removable cover can be useful for washing, but its closure must stay firmly shut during use. Keep small decorative pieces and loose filling away from young children and pets.
For homeowners, a fabric doorstop can coordinate with curtains, rugs or cushions without taking up much space.
For craft sellers: Offer different cover styles and colours, with the weight and dimensions clearly stated so buyers know what they are purchasing.
Online selling opens your products to customers beyond your local area. These 33 Best Cricut Projects to Make and Sell Online offer ideas for your next listings.
11. Sofa-Arm Remote Control Pockets
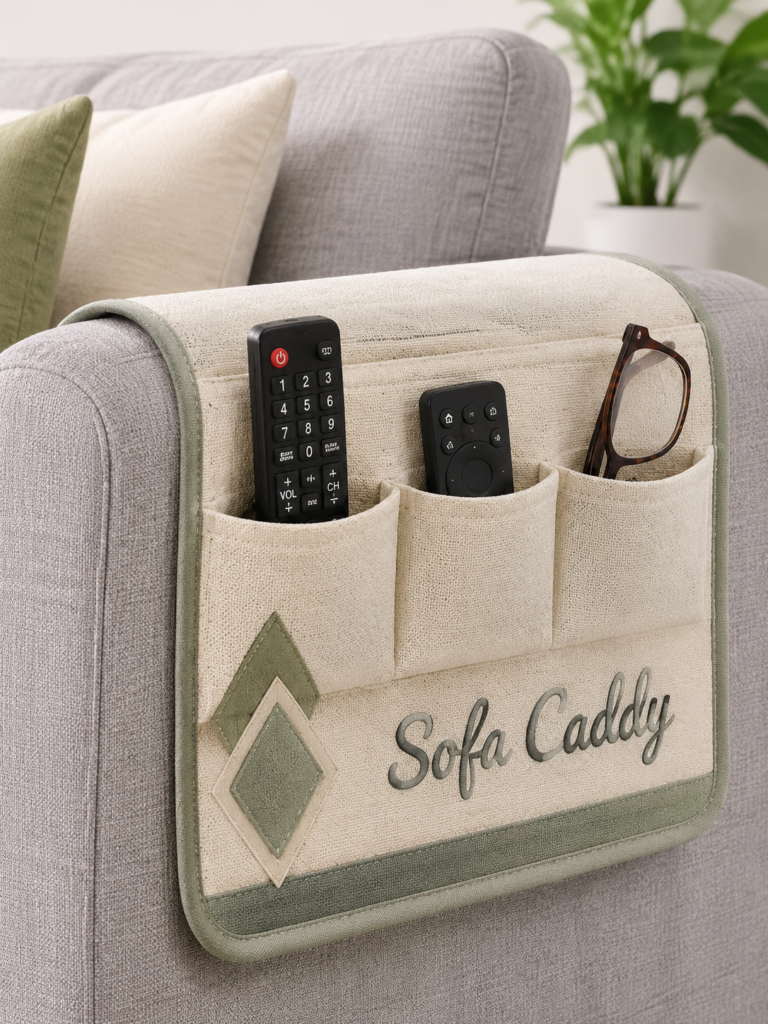
Remote controls, reading glasses and other small items can easily get lost between sofa cushions or left on different surfaces around the room.
A sofa-arm pocket gives these everyday essentials a regular place. Use your Cricut to cut the fabric pieces and add labels, initials or decorative details before sewing the sections together.
Measure the sofa arm first, as its width, shape and padding will affect how the organiser fits. Include pockets that are wide enough for the items they will hold, and make the part that rests over the arm long enough to stay in position.
A non-slip backing or suitable fastening can help prevent the organiser from shifting when items are removed.
For homeowners, this is a useful way to keep frequently used items close without adding another table beside the sofa.
A personalised version could include separate pockets for television remotes, reading glasses and small household accessories, with fabric choices to match the living room.
Extra income can start with manageable projects. Browse 31 Easy Cricut Projects to Make and Sell for Extra Money.
12. Custom Felt Furniture-Foot Protectors
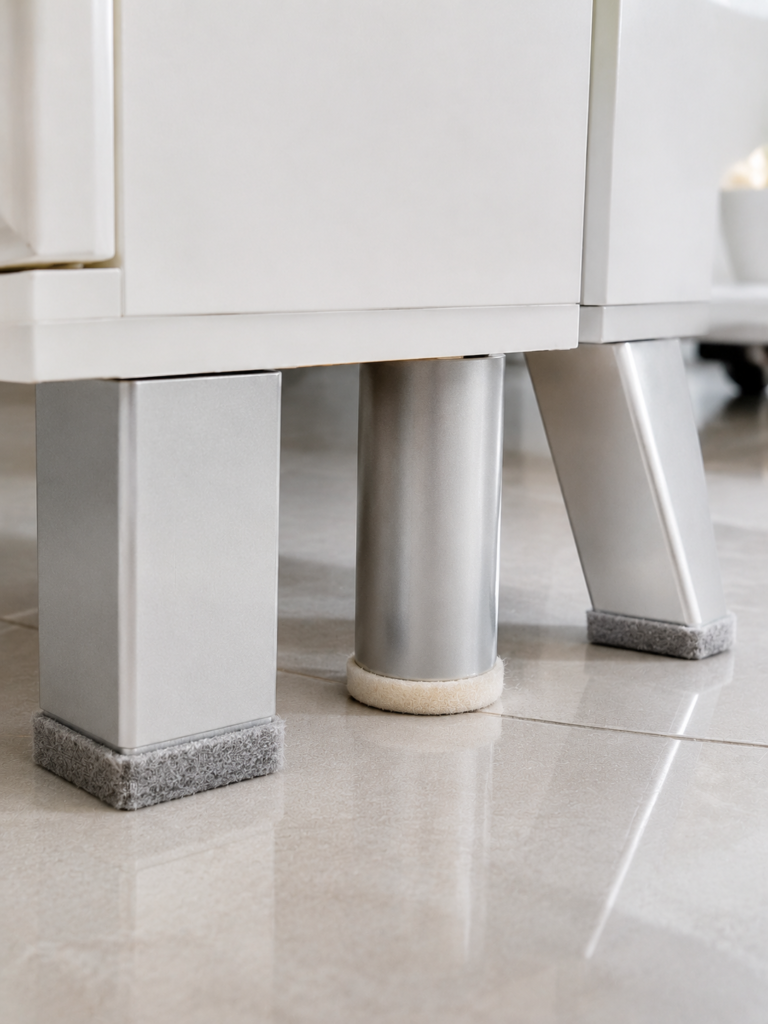
Chairs and tables do not always have standard-shaped feet, which can make it difficult to find protective pads that fit properly.
With a Cricut, you can cut felt into shapes that match unusual furniture legs, including square, angled or irregular designs. This gives you a closer fit than using a round pad on a foot that has a completely different shape.
Start by tracing the bottom of each furniture leg onto paper or measuring it carefully. Use the outline to create a cutting design, then choose felt that your Cricut machine can handle.
The material should be thick enough for the furniture and the type of floor it will protect. Attach the finished pieces with a suitable adhesive or use adhesive-backed felt.
Check them regularly and replace any that become thin, loose or worn, as exposed furniture feet can scratch the floor.
For homeowners: Custom-cut protectors are useful for older furniture, handmade stools and pieces with unusual leg shapes. You can make a set for each item rather than trimming standard pads to fit.
For craft sellers: Offer sets in different shapes and sizes, or accept measurements from customers who cannot find suitable ready-made protectors.
Labels and custom organisers can make everyday storage easier to manage. See 27 Easy Cricut Projects for Organizing Your Home.
13. Felt Cabinet and Drawer Bumpers
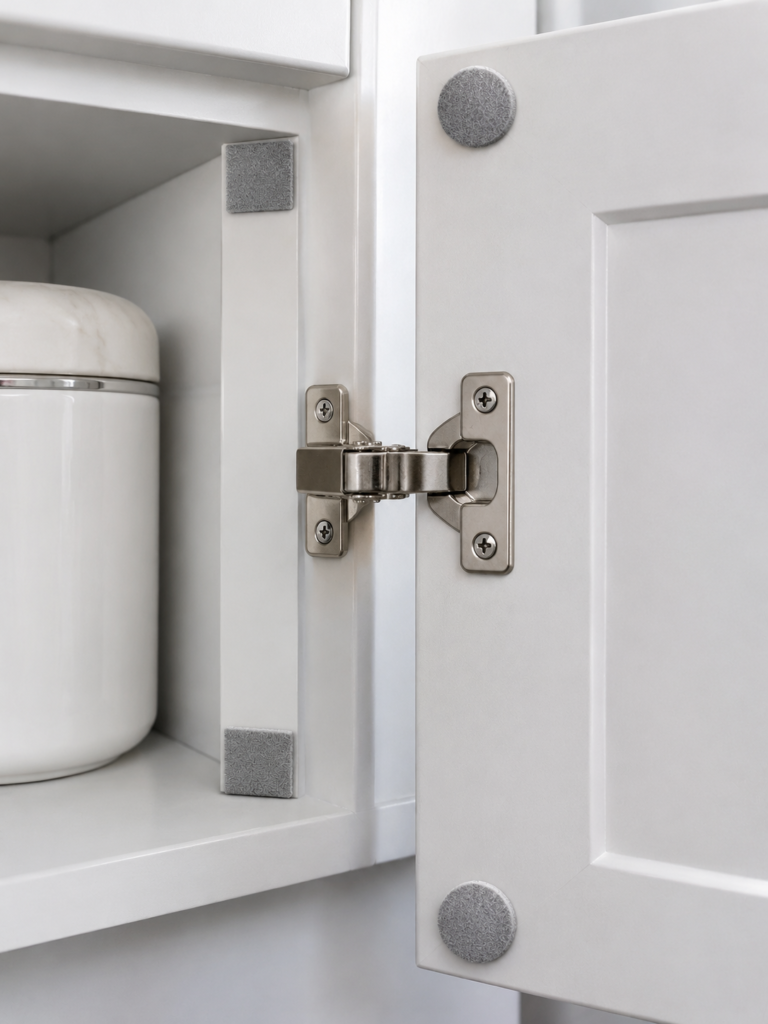
Cabinet doors and drawers can make a sharp sound when they close, especially when their surfaces meet hard wooden frames.
Small felt bumpers placed at the contact points can soften that impact and reduce some of the noise. Your Cricut can cut the felt into small circles, squares or other shapes that suit the furniture.
First, identify where the door or drawer touches the frame when closed. Clean and dry those spots before attaching the pads so the adhesive has a suitable surface.
Choose a thickness that cushions the contact without preventing the door from closing properly. These bumpers can reduce the noise of contact, but they will not correct a misaligned door, loose hinge or faulty drawer runner.
For homeowners: Making your own pads allows you to choose the size and thickness needed for different cabinets and drawers around the house.
A useful add-on for craft sellers: Package small bumper sets in different shapes and thicknesses. They may work better as part of a household maintenance bundle than as a large standalone product.
Give everyday kitchen items a personal touch with 25 Easy Cricut Projects for Your Kitchen.
14. Decorative Acoustic Felt Tiles
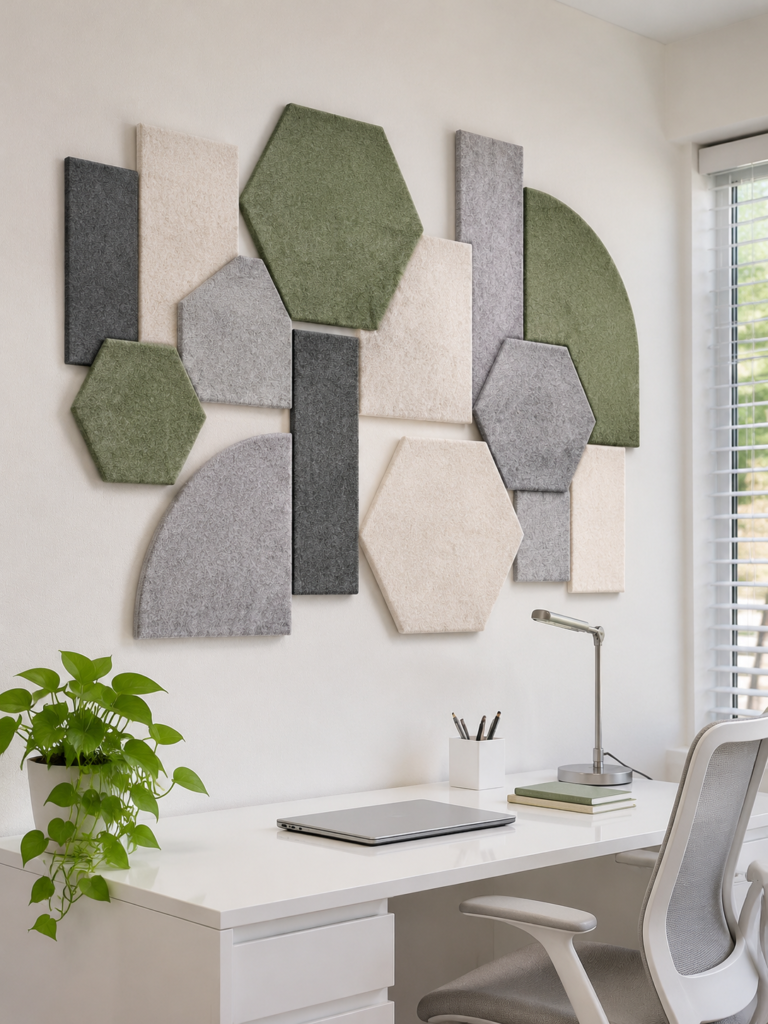
A home office or study can feel quite echoey when sound reflects off large, hard surfaces. Felt wall panels can add a softer surface to the room while introducing colour and pattern.
Use your Cricut to cut compatible felt sheets into geometric shapes, curved pieces or repeated patterns, then arrange them on a suitable backing to create a decorative wall feature.
The thickness and amount of felt used will affect the finished panel, so consider the size of the wall area and the layout before cutting.
Some felt panels may help soften sound reflections, but the result depends on the materials, thickness, backing and installation.
A small decorative panel should not be described as soundproofing or given an acoustic performance rating without proper testing. Use a secure mounting method suitable for the panel’s weight and the wall surface.
For homeowners: These panels can introduce texture and colour to a workspace without relying on framed pictures or ordinary wall art.
For a custom collection: Craft sellers can offer coordinated sets in different shapes, colours and dimensions, with clear information about the materials and mounting requirements.
Leftover vinyl and cardstock still have plenty of creative potential. Put them to use with 23 Cricut Projects You Can Make with Scrap Materials.
15. Personalised Washable Linen Labels
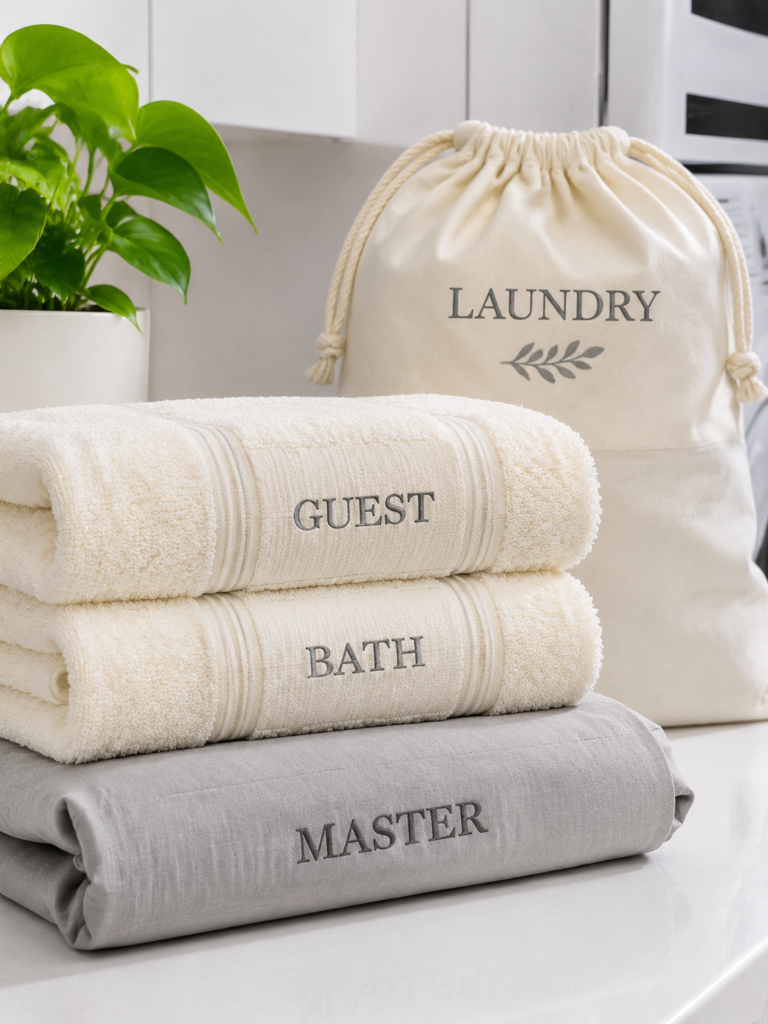
In a busy household, towels, bed sheets and reusable laundry bags can easily get mixed up, especially when several people share the same storage space.
Personalised labels make it easier to identify who owns an item or which room a linen set belongs to. Use your Cricut to cut names, initials or short labels from heat-transfer material suitable for the fabric.
Check the fabric care label and the heat-transfer material manufacturer’s instructions before applying the design.
Different fabrics require different heat settings, and some delicate materials may not be suitable for heat application.
Place the label along an edge or another discreet area where it will not rub against the skin during use. Wash a sample first to check how well the design holds up before making a full set.
For homeowners: Matching labels can help organise guest towels, family linen and reusable laundry bags, particularly in homes where several sets are stored together.
A possible personalised order: Offer name or room-label sets for households, guest accommodation and people preparing linen for a new home. Make the fabric and wash-care requirements clear to buyers.
Personalised presents can make birthdays and special occasions more memorable. Find inspiration in 31 Easy Cricut Projects for Gifts.
16. Pet Bed Name Patches
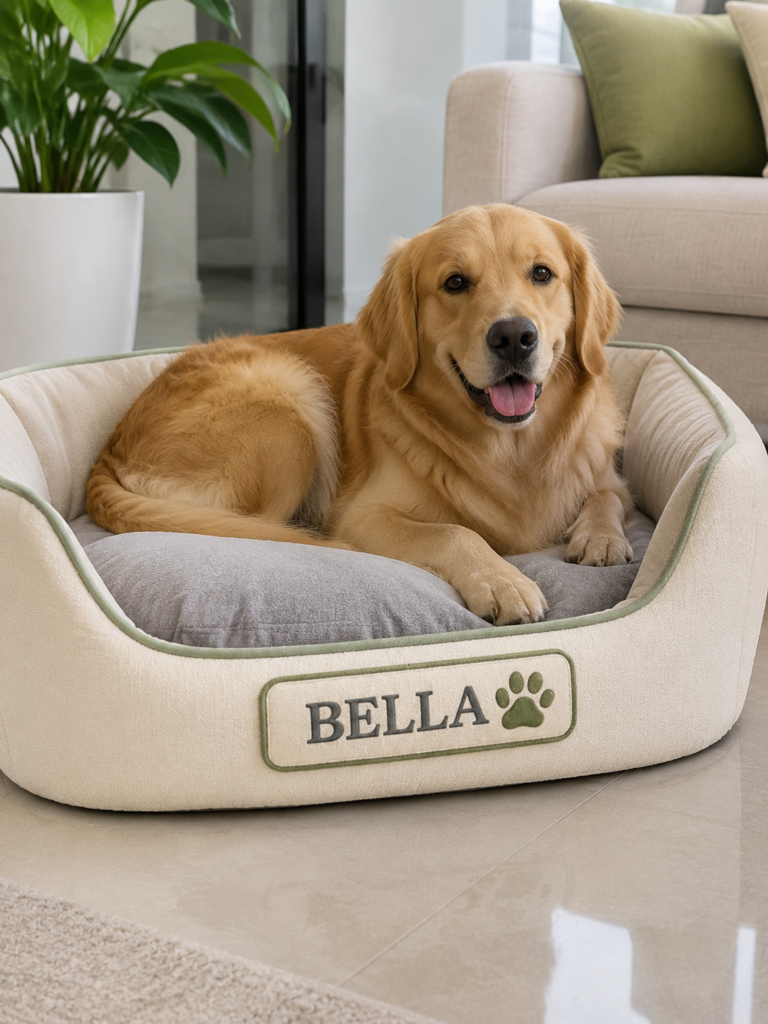
A pet’s bed can be personalised with a name patch sewn or applied to its removable cover.
Use your Cricut to cut the name from suitable heat-transfer material or create a fabric appliqué that can be stitched onto the cover. This gives a plain pet bed a recognisable detail without changing its shape or padding.
Check the bed cover’s fabric composition and washing instructions before choosing the decoration method.
Apply the patch where it will remain comfortable for the animal and will not interfere with removing the cover for cleaning.
Avoid loose threads, small detachable decorations, beads or other pieces that a pet could chew off and swallow. Make sure the finished patch remains secure after washing and regular use.
For pet owners: A personalised cover can help distinguish beds in homes with more than one pet, especially when the beds are similar in colour or design.
For craft sellers: Offer name patches in different sizes and lettering styles, or make personalised covers when customers provide the bed dimensions and fabric requirements.
Custom details can give familiar spaces a fresh look. Browse 29 Easy Cricut Projects for Home Decor.
17. Pet Crate Name Panels
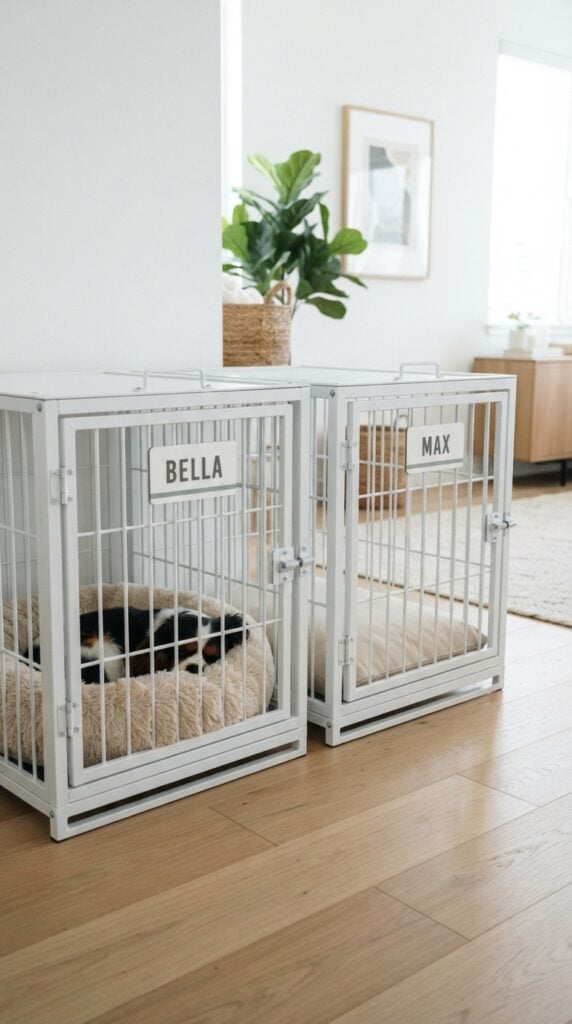
When several pets have their own crates, a name panel can make it easier to identify each one.
You can cut a pet’s name or a simple design with your Cricut and apply it to a suitable purchased panel or compatible surface on the outside of the crate. Keep the design simple enough to read without taking up too much space.
Measure the available area before cutting, and check that the material adheres properly to the crate’s surface.
Position the panel away from ventilation openings, door hinges, latches and any moving parts. It must not create sharp edges, loose pieces or anything the animal can pull off and chew. The crate should remain just as safe and functional after decoration.
For multi-pet households: Different name panels can make individual crates easier to identify, particularly when several are kept in the same room.
For craft sellers: Personalised panels can be made to order using the pet’s name, preferred lettering and the dimensions of the crate’s available display area.
Cardstock is useful for far more than simple paper cutouts. See 27 Easy Cricut Projects Using Cardstock for creative ways to use it.
18. Custom Garden Plant Markers
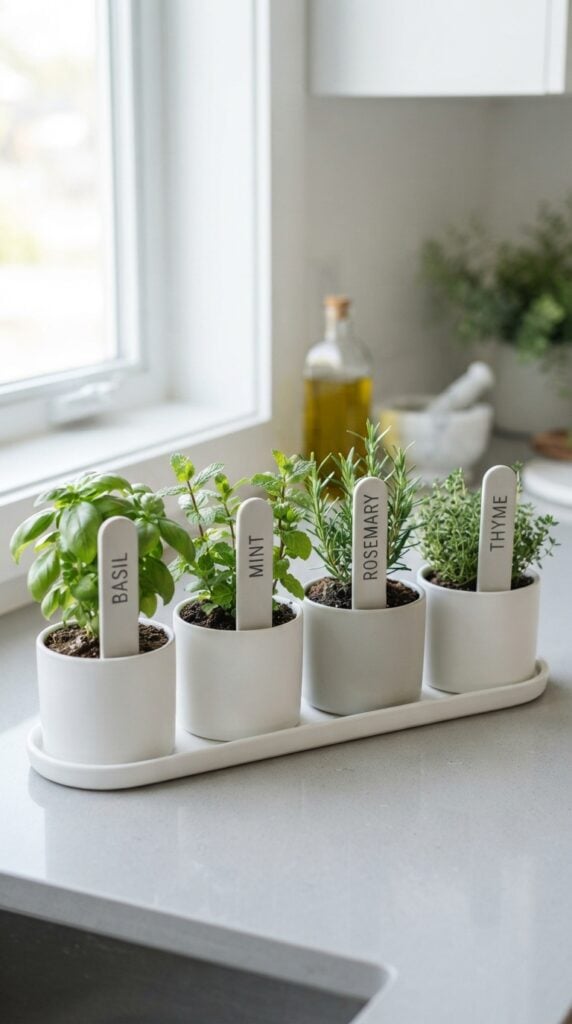
Keeping track of plants becomes difficult when several herbs, flowers or seedlings look alike, especially while they are still growing.
Custom plant markers give each one a clear name or symbol. Use your Cricut to cut the lettering from suitable outdoor-rated vinyl and apply it to purchased garden stakes or other marker blanks designed for outdoor use.
Choose materials with sunlight and rain exposure in mind. Ordinary paper labels, unprotected wood and indoor vinyl may fade, peel or break down when left outside.
A smooth, clean marker surface also helps the lettering adhere properly. Keep the writing large enough to read when the marker is placed among the plants, and leave enough room for longer plant names.
For edible gardens, use marker materials suitable for the intended location and avoid placing decorative materials where they could contaminate the plants or soil.
For gardeners: Matching markers can make herb beds, seedling trays and flower borders easier to organise, while allowing room to add plant names or short care notes.
For craft sellers: Offer sets for herb gardens, vegetable patches and flower beds, with custom wording for customers who want to label particular plants.
Add colour and lasting designs to suitable blanks with 25 Easy Cricut Projects Using Cricut Infusible Ink.
19. Garage Parking Guide Stencil
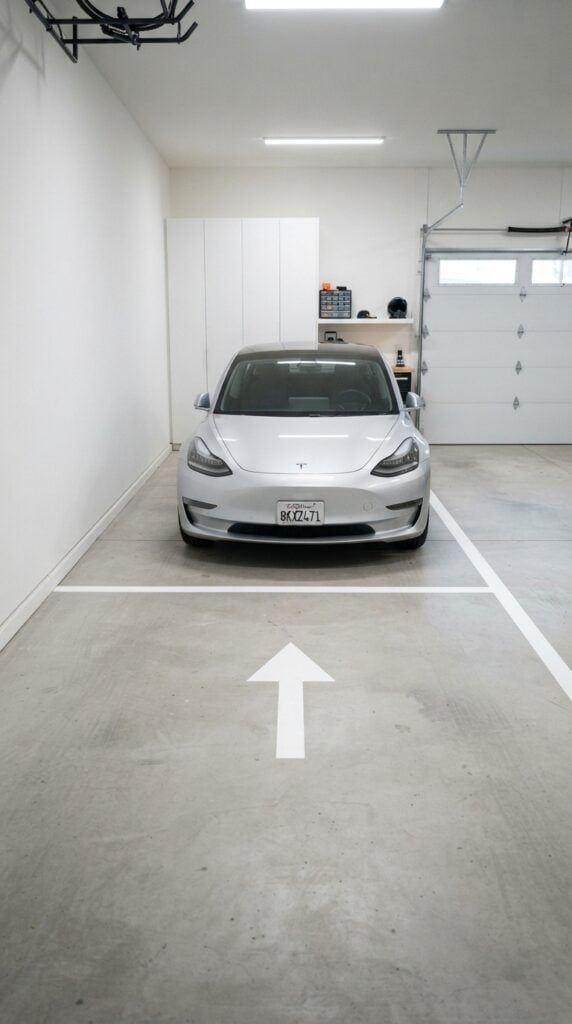
A tight garage can make parking stressful, particularly when there is little room between the vehicle, walls and stored belongings.
A floor guide gives the driver a clear point to aim for each time they park. Among these Cricut projects to make for your home, this one stands out for its practical use.
You can cut a reusable stencil with a simple line, arrow or stopping marker and use it to apply a design to a private garage floor.
To position the marking correctly, park the vehicle where you want it to stop and check the clearance around the car, including enough space to open the doors.
Transfer the measurements to the floor before placing the stencil. Use paint specifically designed for the concrete or garage-floor coating, and follow the manufacturer’s instructions for surface preparation and drying or curing.
The stencil determines the shape of the marking, but the paint and floor preparation affect how long it lasts. Keep the finished guide away from walkways, exits and safety equipment.
For homeowners: A parking guide can make everyday parking easier in a narrow garage, especially where a small difference in positioning affects access to doors or storage.
For craft sellers: Reusable stencil kits with parking lines, arrows and stopping markers could appeal to homeowners who want a simple garage organisation aid. Include measurements and clear instructions for choosing suitable floor paint.
Vinyl opens up plenty of customisation possibilities, even for new users. Start with 23 Cricut Projects for Beginners Using Vinyl.
20. Leftover Paint Identification Labels
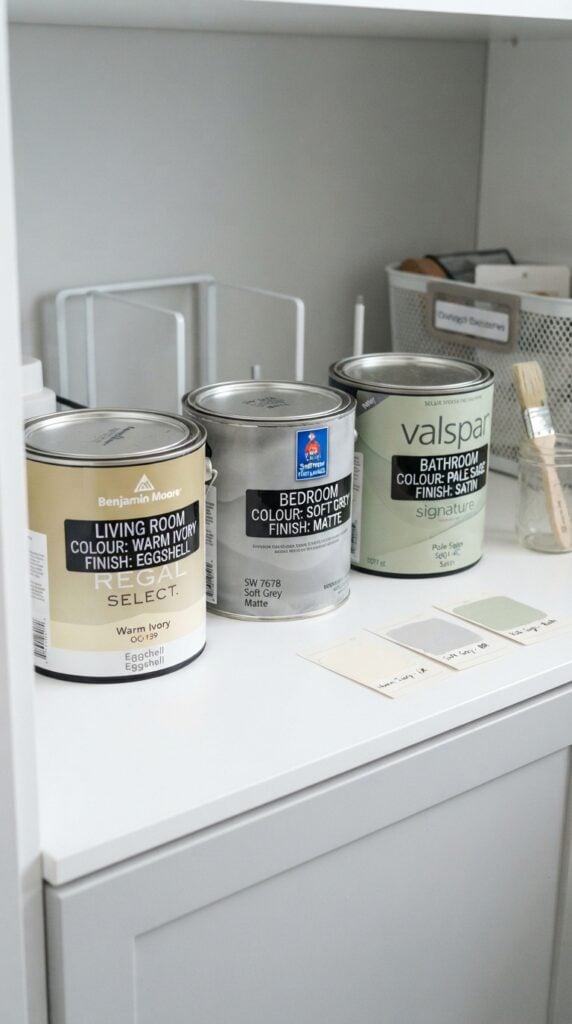
A half-used paint container can be difficult to identify months after a room makeover, particularly when several shades look similar.
Rather than opening containers to check their contents, homeowners can use labelled paint storage to keep important details together. Cricut can cut adhesive labels with spaces for the room name, colour, finish and purchase or storage date, where known.
Keep the wording short and readable, and leave enough room to record the details accurately.
A matching colour-record card can provide extra space for paint codes, brand names and other information that may be useful when buying a replacement.
The custom label must supplement the original manufacturer’s label, not cover its safety warnings, product details or instructions. Keep paint in its original, properly sealed container and follow the manufacturer’s storage guidance.
For homeowners: This simple labelling system makes it easier to find the correct paint for future touch-ups and avoid confusing similar colours.
For a useful product set: You could combine Cricut-cut paint labels with colour-record cards to create a small home-maintenance organiser. Offer enough writing space for customers to record details by hand.
More handmade products could mean more options for your shop. Explore 25 Easy Cricut Projects to Make and Sell for Extra Money.
21. HVAC Filter Replacement Reminder Labels
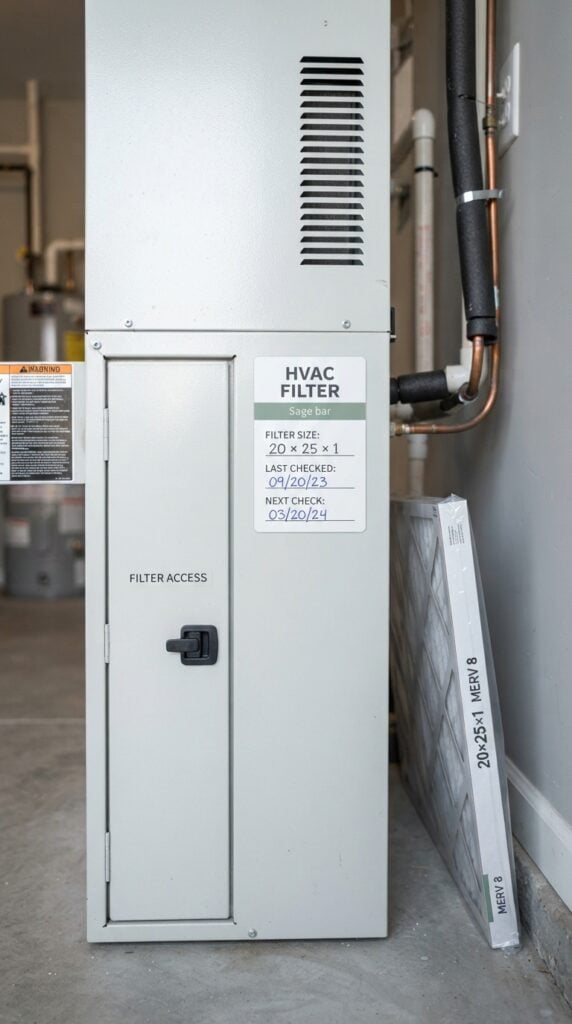
Air filters are easy to overlook because they are often hidden inside a heating, ventilation or air-conditioning system.
A reminder label placed near the filter access area can make routine checks easier to track. Use your Cricut to cut a small label with spaces for the filter size, last replacement date and next inspection date.
Choose a suitable surface on the outside of the filter housing or a nearby maintenance area. Do not cover air openings, access panels or warning labels, and never attach vinyl directly to the filter.
The replacement interval should follow the HVAC manufacturer’s recommendations and the filter instructions.
Household conditions, filter type and system usage can also affect how frequently it needs checking or changing, so a reminder label should not prescribe one schedule for every home.
For homeowners: A clearly marked maintenance area can help prevent filter checks from being forgotten, particularly in homes with several routine maintenance tasks.
For craft sellers: Consider adding these to a wider household maintenance label collection, with writable spaces for dates and filter sizes. Their practical use makes them more suitable as an add-on than as a large standalone product.
Simple designs can still attract paying customers. See 21 Simple Cricut Projects for Beginners That Actually Sell.
22. Circuit Breaker Directory Labels
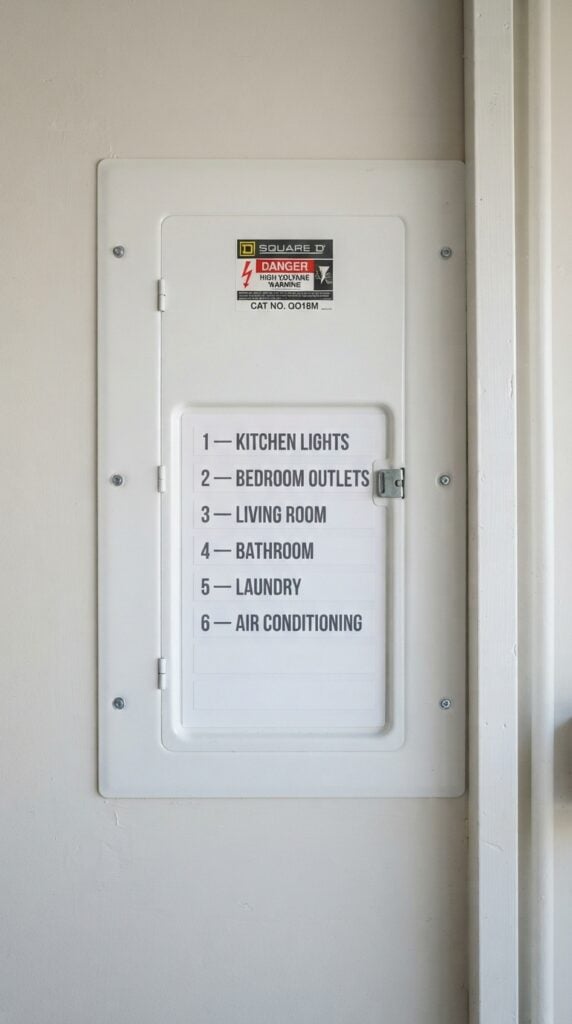
When the power goes out in one part of the house, a clear circuit directory can make it easier to identify the breaker connected to that area.
Use your Cricut to cut neat lettering for a directory card or a set of labels that fit the designated directory space on the electrical panel. You can include blank spaces for descriptions such as lighting, kitchen sockets or a particular appliance.
The descriptions must be accurate. A breaker should not be labelled based on an assumption about which room or appliance it controls.
Have the circuits properly identified by a qualified electrician before completing the directory.
Keep the manufacturer’s instructions and safety warnings visible, and limit this Cricut project to preparing the labels or directory card. Do not open the electrical panel, touch wiring or attempt to modify the equipment.
For homeowners: An accurate directory saves the confusion of checking several breaker switches when a particular circuit needs attention.
For a practical custom product: A directory template with numbered spaces and room for verified circuit descriptions could be useful to homeowners. Prioritise clear lettering and easy-to-read layouts over decorative designs.
New to Cricut? These 22 Easy Cricut Projects for Beginners You Can Make at Home offer a comfortable place to start.
23. Main Water Shutoff Identification Tag
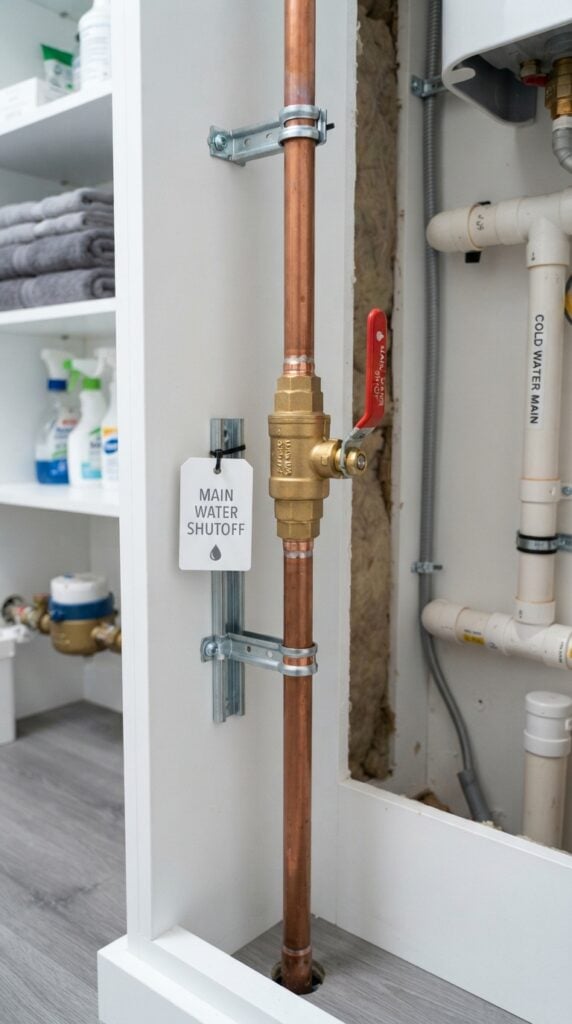
Knowing where the main water shutoff valve is located can save valuable time when a pipe leaks or a plumbing fitting fails. However, the valve may be tucked away in a utility room, basement, cupboard or outdoor service area.
A clearly marked tag helps household members and visitors identify its location without searching through the property.
Use your Cricut to cut the words “Main Water Shutoff” and apply them to a durable, suitable tag or sign blank.
First, confirm which valve controls the home’s main water supply before making the label. Choose a material that can withstand the conditions around its location, including moisture where relevant.
Attach the tag to a nearby surface without covering the valve, blocking access or interfering with its operation.
The label should make identification easier, but household members should also know how to operate the valve safely.
For homeowners: This is one of the more practical Cricut projects to make for your home because it prepares the household for a plumbing problem before one occurs.
For craft sellers: You could offer simple plumbing identification tags with clear wording and durable materials. Keep the designs easy to read and provide suitable attachment options for different installation areas.
Build confidence with straightforward makes from 19 Easy Cricut Projects for Beginners.
How to choose materials that will last around the home
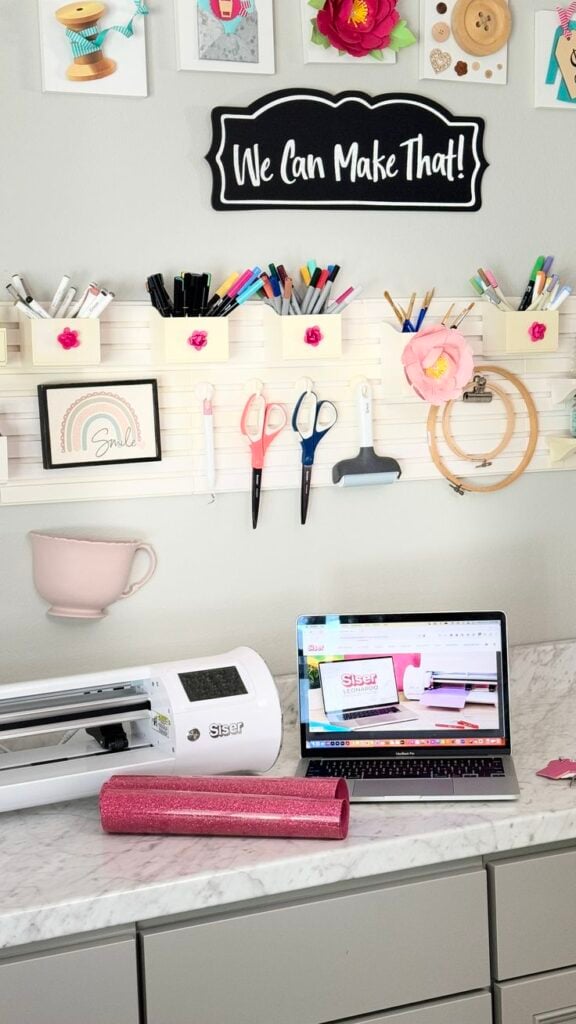
The material you choose can determine whether a Cricut project remains useful or starts peeling, fading or wearing out after a short time.
When making Cricut projects to make for your home, consider where the finished item will be used and what it will be exposed to.
- For outdoor projects: Choose outdoor-rated vinyl for suitable exterior surfaces, and check its weather-resistance claims before use.
- For adhesive designs: Permanent and removable vinyl serve different purposes. Check the manufacturer’s surface recommendations and removal instructions before applying either type.
- For fabric accessories: Confirm that the iron-on material is compatible with the fabric and can withstand its recommended application temperature and washing conditions.
- For furniture protectors: Select felt with enough thickness for the furniture’s weight and an adhesive that bonds properly to the intended surface.
- For painted projects: Use paint or coating designed for the actual surface, whether it is concrete, wood or another material.
- For everyday items: Check cleaning, washing and maintenance instructions so the finished project can withstand its expected use.
Personalised presents are a lovely way to make simple projects more meaningful. Browse 33 Cricut Projects for Beginners That Make Great Personalized Gifts.
What to measure before cutting
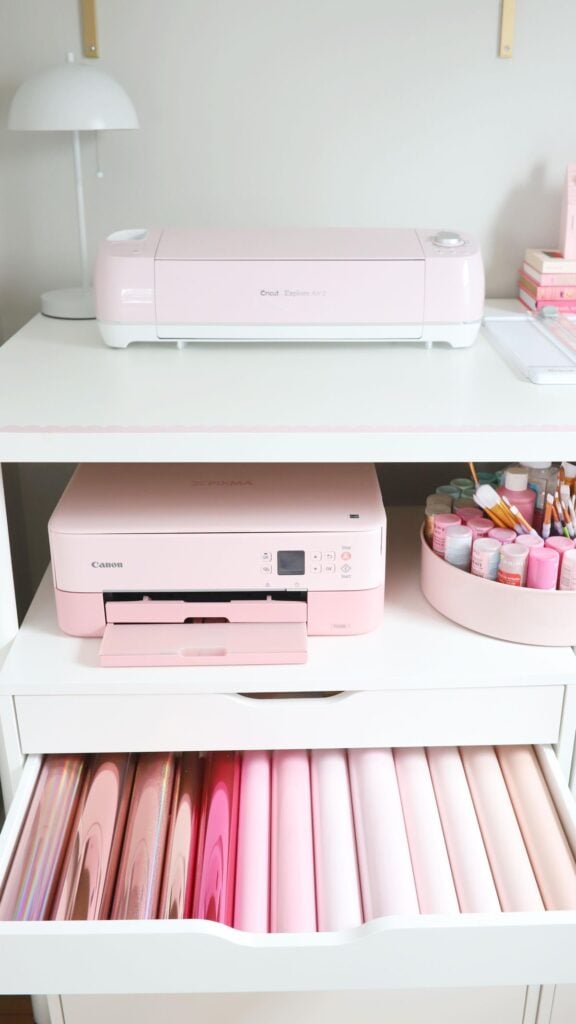
Accurate measurements help prevent wasted materials and designs that do not fit.
Before creating your design in Cricut Design Space, measure the actual object or surface where the finished project will go. Do not rely on estimated dimensions or assume that similar items have identical measurements.
Pay attention to these details:
- Curved surfaces: Measure around the curve or use a flexible measuring tape where necessary. A flat measurement may not represent the usable area accurately.
- Fabric projects: Allow extra material for seams, hems, folds and fastening points rather than cutting to the finished size alone.
- Plaques and blanks: Measure the usable design area, leaving room around edges, holes, fittings and other obstructions.
- Repeated patterns: Plan the spacing and total coverage before cutting multiple shapes, particularly for window markings and decorative layouts.
- Oversized designs: Check your machine’s cutting limits and divide larger designs into manageable sections when necessary. Plan where the sections will join before cutting.
Christmas crafting offers plenty of opportunities for seasonal keepsakes and gifts. See 31 Easy Cricut Projects for Christmas.
Mistakes that can affect the finished result
Even a well-designed Cricut project can disappoint when the material, surface or attachment method is unsuitable. These common mistakes are worth avoiding before you begin:
- Ignoring machine compatibility: Check whether your particular Cricut model can cut the selected material and whether the correct blade, mat and settings are required.
- Using the wrong vinyl: Permanent vinyl is not automatically suitable for every surface or environment. Check the manufacturer’s recommendations before application.
- Applying too much heat: Some fabrics cannot tolerate the temperature required by certain iron-on materials. Test compatibility and follow the application instructions.
- Skipping test cuts: Unfamiliar materials may need adjustments to pressure, blade settings or cutting technique. Test a small piece before committing to the full design.
- Overlooking exposure conditions: Sunlight, moisture, friction and frequent handling can shorten the life of materials that are not designed for those conditions.
- Relying on decorative adhesive for support: Vinyl and craft glue are not substitutes for strong hardware, stitching or suitable fasteners when an item must carry weight.
- Assuming the cut design protects the object: A Cricut-cut decoration does not make a surface waterproof, heat-resistant or food-safe. Those properties depend on the material and any suitable protective finish used.
Staring at your machine without an idea can stall a creative session. Get fresh inspiration from 30 Cricut Projects to Make When You Don’t Know What to Make.
Conclusion
Not every worthwhile Cricut project needs to become a display piece.
A custom label that saves you from guessing, a door accessory that solves an everyday annoyance or a marker that helps you find an important household fitting can earn its place in your home through regular use.
These Cricut projects to make for your home show just how many possibilities sit beyond the usual signs and wall decorations.
Take a look around your own space, identify one thing that could work better, and turn that small frustration into your next Cricut project.