This blog post walks you through a simple step-by-step process on how to sew a reversible bucket hat from making your own pattern, to stitching your project that is perfect for beginners.
Before I started sewing, I always wondered how simple piece like a bucket hat was made. This made me always curious, and I’ll end up loosening the stiches just to know how the pieces were drafted and joined together to form the perfect size bucket hat.
For some bucket hats I got in our local market here in Nigeria, they were trendy, fit just right and went with everything. But after a few washes, it started looking worn out, and I wished I could make my own, one that I could flip to a different color whenever I wanted a new look. That’s when I though: why not sew a reversible bucket hat myself?
If you love sewing (or are just starting out), this project is a fantastic way to create something stylish and practical. A bucket hat is perfect for sunny days, bad hair days, or just adding a little extra flair to your outfit. And the best part? It’s reversible! Two hats in one—how cool is that?
In this tutorial, I’ll walk you through the process, from drafting your own pattern to sewing the perfect bucket hat. Even if you’ve never made a hat before, don’t worry—I’ve broken it down into simple steps that are easy to follow.
Bookmark this for future reading: How to start sewing your own clothes: A complete beginner’s guide
What You’ll Need to Sew a reversible bucket hat
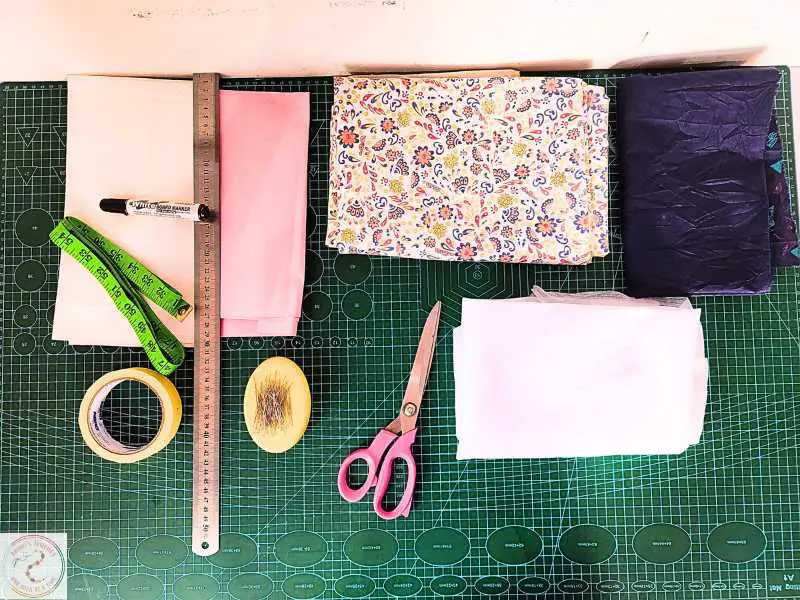
Before we get started, here’s everything you’ll need the bring your reversible bucket hat to life:
Fabric & Interfacing
- Main fabrics: ½ yard (cotton, linen, denim, or any medium-weight fabric). You can easily get this from your stash if you have. I have a lot of stashed fabrics, so getting the fabric for this tutorial wasn’t a problem.
- Lining fabric: ½ yard (a different fabric for the reversible side) Just get creative in mixing the two fabric. You want to get something that matches but not exactly the same. For this tutorial, I used a flowery fabric on one side and used a dark blue almost solid fabric for the lining.
- Fusible interfacing: ¼ yard (to add structure to the brim). This interfacing is very necessary as it helps to create the perfect bucket hat that is not wobbly around the brim area.
Tools & Supplies
- Pattern paper: for drafting out the first pattern.
- Measuring tape
- Fabric scissors and paper scissors
- Pins or tape
- Fabric chalk or marker depending on what you have available
- Sewing machine for putting the piece together
- Pressing Iron for that neat and clean finish
Step 1: How to Sew a Reversible Bucket Hat: Creating Your Pattern
Think of this as building the blueprint for your hat. Once you have your pattern, you can use it over and over again to make hats in different fabrics.
In Nigeria, we rarely make use of already made patterns for our sewing projects. We make our patterns from scratch! So I’ll be walking you through the patter making as well as the sewing for a reversible bucket hat. Trust me, it’s not that difficult. Aren’t you lucky to be reading this! haha!
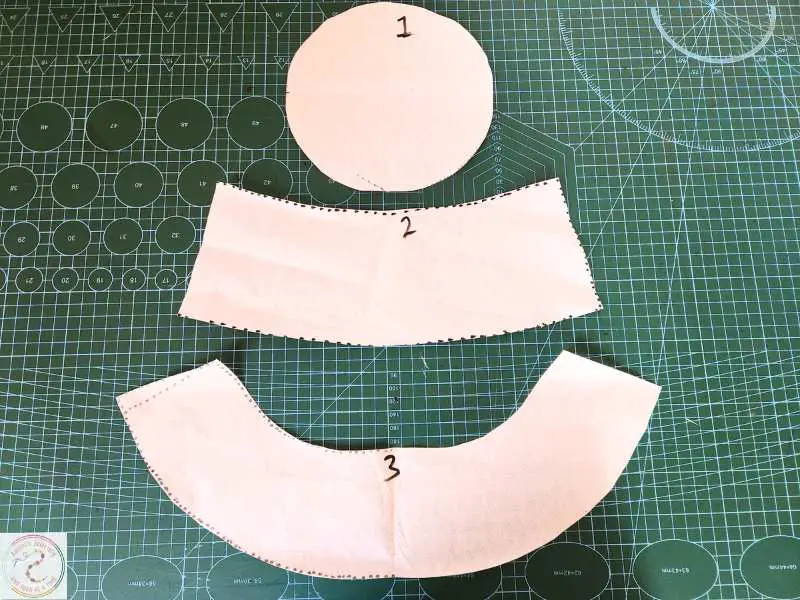
1. Draft the Crown (Top of the Hat)
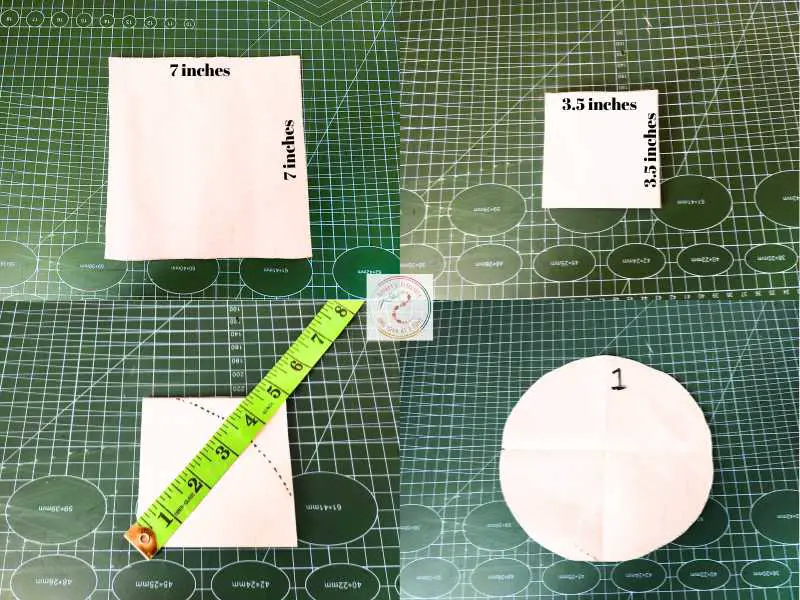
- Draw and cut a 7-inch length and 7 inches width from your pattern paper. (6.5″ for the actual hat + 0.5″ seam allowance).
- Fold the paper into half on both sides to create a 3,5 inches length and 3.5 inches width size
- From the pivot point at the middle, measure around the edge (circumference) of the circle 3.5 inches—write this number down because we’ll need it for the next piece.
- The cut out piece will form the crown pattern of the bucket hat
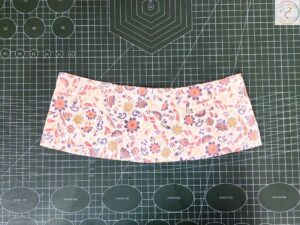
2. Draft the Side Band (Middle Section of the Hat)
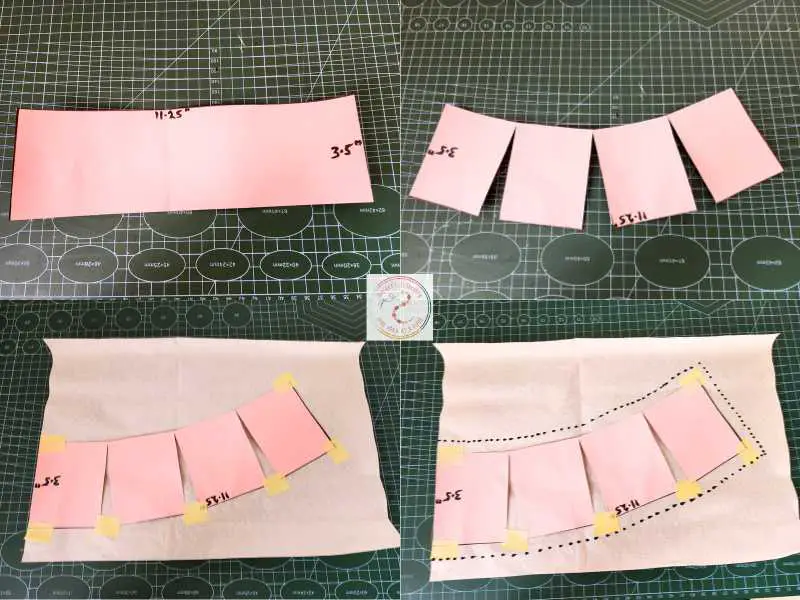
- Take a piece of paper and mark:
- Width = half the circumference of your circle. This gave me 11.25 inches, making the circumference of my crown 22.5 inches
- Height = 3.5 inches
- Fold the paper into 4 equal parts to make vertical creases, then cut small slashes along these fold lines, but don’t cut all the way through—we’re about to use a slash-and-spread method to achieve the side band.
- Take another sheet of paper and carefully spread out the slashed pattern, keeping each cut 0.5 inch apart.
- Secure with pins or tape, add a 0.5-inch seam allowance around, and cut it out.
- Voilà! You now have your side band pattern.
3. Draft the Brim (Bottom Part of the Hat)
- Measure the bottom edge of your side band and divide that number by two. This gave me 13 inches and when divided by 2 is 6 inches.
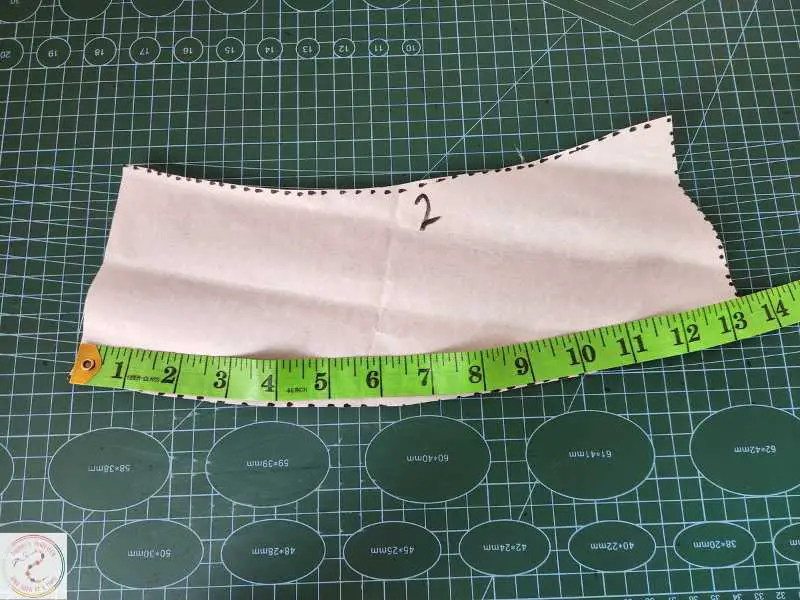
- Draw a rectangle with:
- Width = half of that bottom edge measurement 6.5 inches
- Height = 2.5 inches
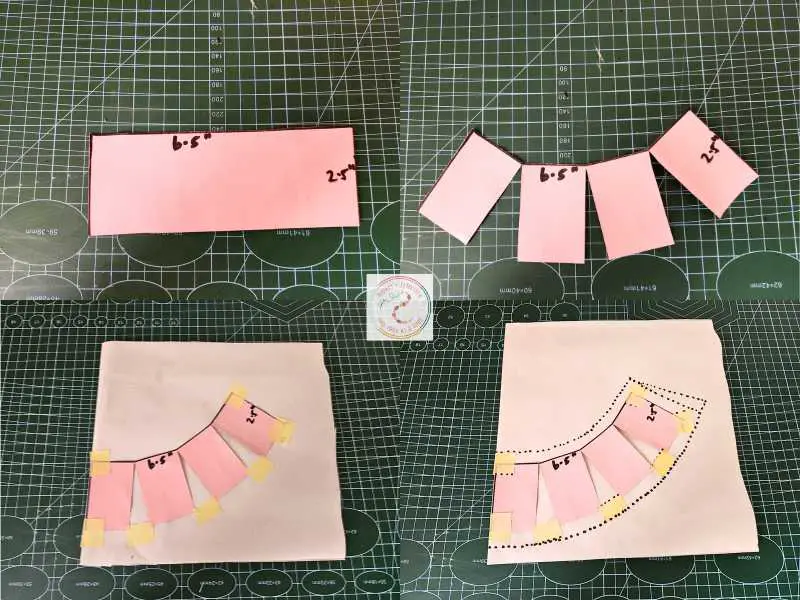
- Fold this paper into four and create slashes, but don’t cut to the end.
- Place the slashed piece on a folded paper, spreading the cuts 0.75 inches apart.
- Secure with pins or tape, add a 0.5-inch seam allowance, and cut it out.
- Congratulations, you’ve got your brim pattern!
Step 2: How to Sew a Reversible Bucket Hat: Cutting Your Fabric
Now it’s time to cut out your fabric. This is where things start to feel real! To cut you fabric, you will simple trace the pattern on your choice fabric.
- Crown: Cut 1 piece from both fabrics.
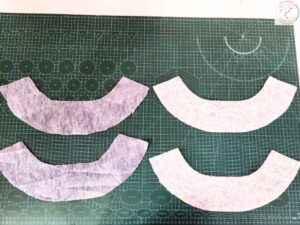
- Side Band: Cut 2 pieces from each fabric.
- Brim: Cut 2 pieces from each fabric + 1 piece of interfacing per fabric for structure.
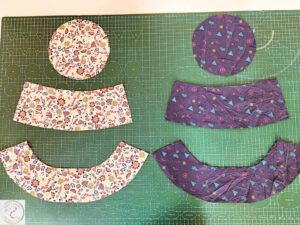
Press the interfacing onto the brim fabric with an iron—this will give your hat a nice, crisp finish.
Step 3: How to Sew a Reversible Bucket Hat: Sewing the Hat Together
This is the fun part for me because it becomes so real and I can literally imagine the finished product at this point.
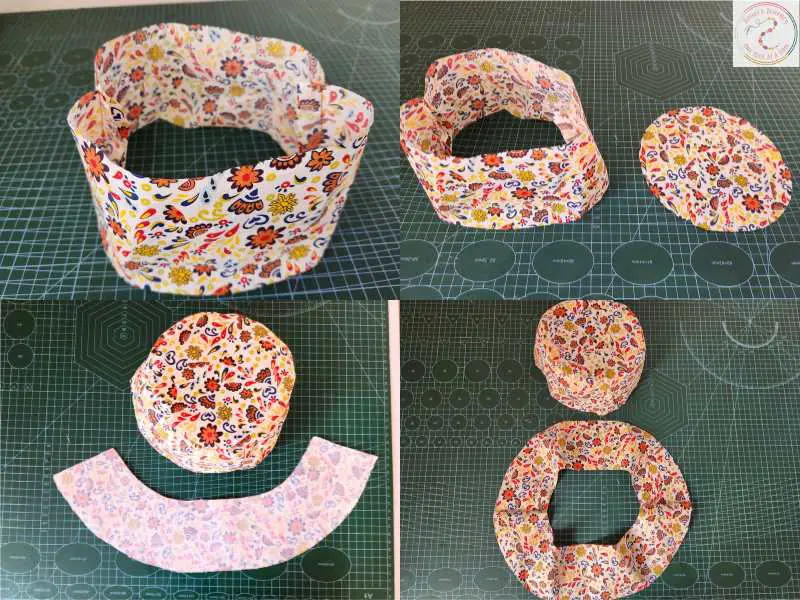
1. Sewing the Side Band
- Take the two side band pieces and sew them together at the sides to create a loop.
2. Attaching the Crown
- Pin the side band loop to the crown, right sides facing.
- Sew around using a 0.5-inch seam allowance—this forms the main body of your hat.
3. Assembling the Brim
- Sew the two brim pieces together to form a circle.
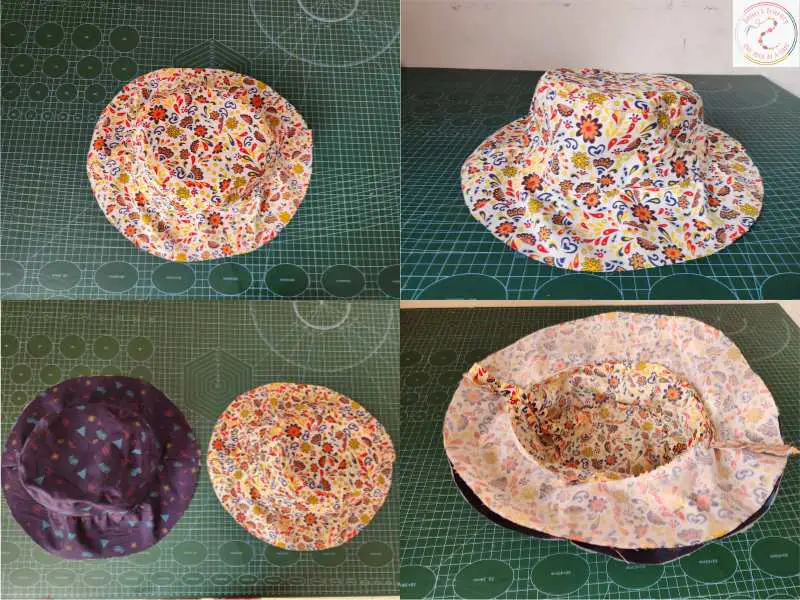
- Attach the brim to the bottom of the side band, pinning carefully as you go.
- Stitch it together using a 0.5-inch seam allowance.
- Repeat all these steps with your lining fabric so you have two hat pieces.
4. Joining the Two Hat Layers
- Place the two hat pieces right sides together and pin them all around.
- Sew all the way around with a 0.5-inch seam allowance, leaving a small opening.
- Reach inside, turn the hat right side out, and press it flat.
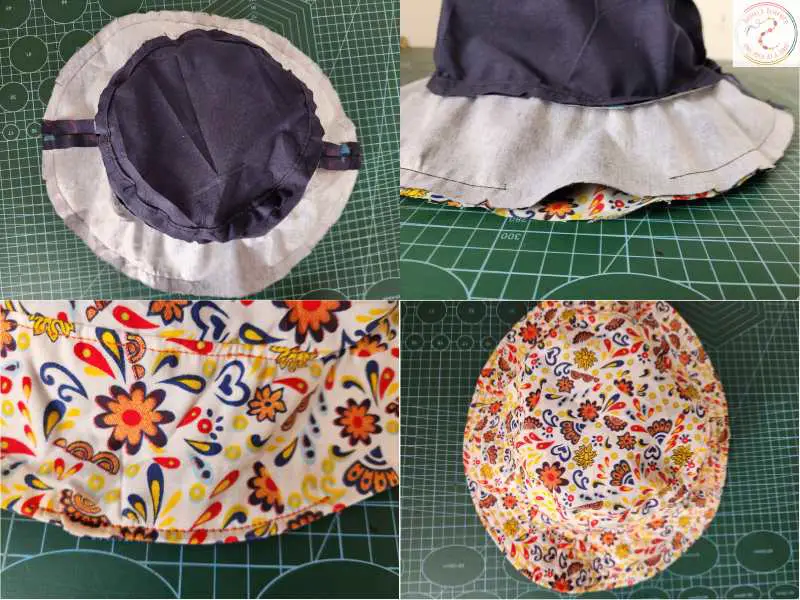
5. Adding the Final Touches
- Sew the opening shut with a neat topstitch.
- To give the brim a professional look, stitch multiple rounds along the brim, spacing them evenly.
- Give your new bucket hat a final press with an iron.
And just like that, you’ve just made yourself a reversible bucket hat and it is ready to wear!
Final Thoughts
Who knew making a hat could be this fun? The best part about this bucket hat is that you get two styles in one. Feeling bold? Flip to a bright, fun fabric. Keeping it neutral? Switch to the other side. It’s like having two hats, but you only had to sew one!
I’d love to see what fabrics you choose. Kindly send me a picture or tag me when you make yours! And if you enjoyed this tutorial, let me know what other DIY sewing projects you’d like to see next.
Kindly subscribe to our weekly newsletter to get more fun sewing projects like this directly in your e-mail.
Other fun projects to sew:
Reversible tote bag tutorial
Reversible sun hat tutorial
Reversible baby bib