I really love the fact that I can make just about anything I want to because of course I’m a sewist. Imagine cooking in the kitchen, and realizing that you need a handy pot holder for the purpose of handling hot pots.
Instead of buying one from your local shop or online, you can simply make one from the comfort of your home. How cool is that! Get ready, because you are about to see a Pot holder sewing tutorial that is simple and beginners friendly.
There’s something special about handmade kitchen accessories. Not only do they add a personal touch to your space, but they also make cooking and baking feel even more enjoyable.
A few weeks ago, I found myself pulling a hot tray out of the oven with a folded dish towel, only to feel the heat creeping through. That’s when I realized: I needed better pot holders! But instead of buying them, I decided to sew my own.
Pot holders are one of the easiest and most practical sewing projects, perfect for beginners. Plus, they make great DIY gifts for friends and family who love to cook! So, let’s make some stylish and functional pot holders to protect our hands and kitchen surfaces.
What You’ll Need to sew a Pot Holder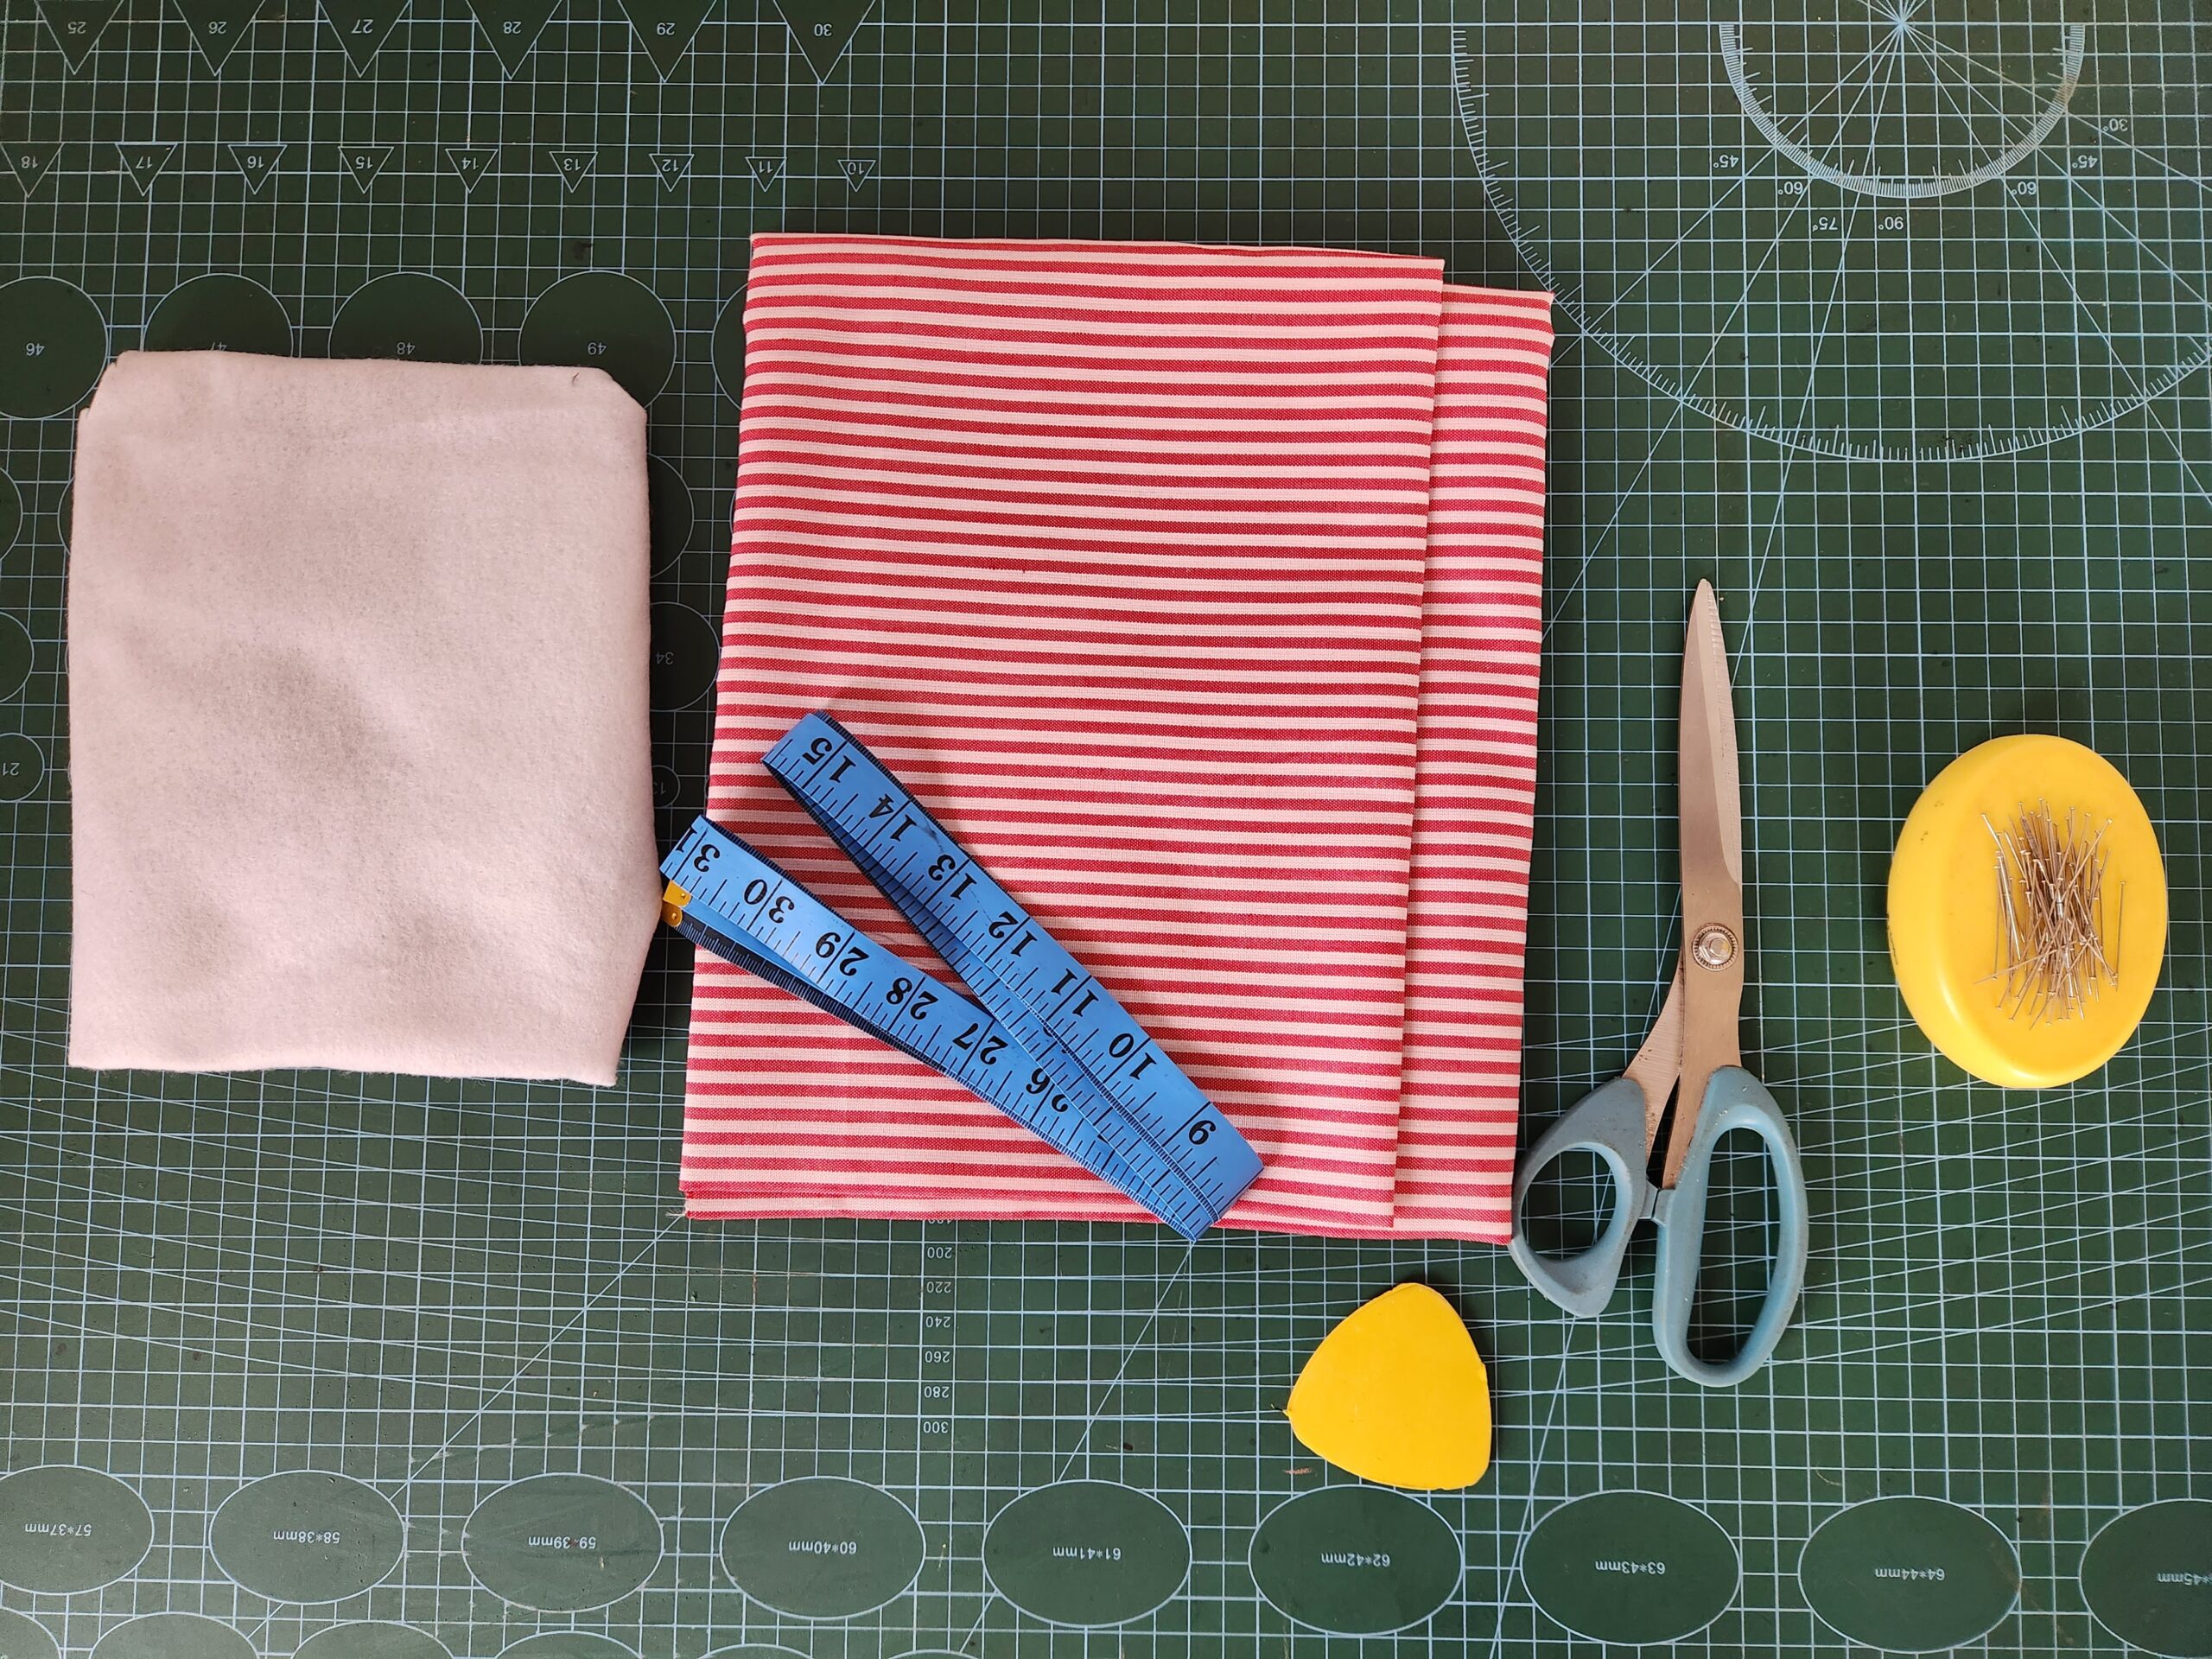
Fabric & Padding
Main fabric: Two squares measuring 8” x 8” (choose heat-resistant cotton fabric)
Soft gum padding or batting: Two squares measuring 8” x 8”
Loop strap fabric: One strip measuring 5” x 2”
Tools & Supplies
Fabric scissors
Sewing pins
Measuring tape
Fabric chalk or marker
Sewing machine
Pressing iron
Now that you have everything ready, let’s get started!
How to sew a Pot Holder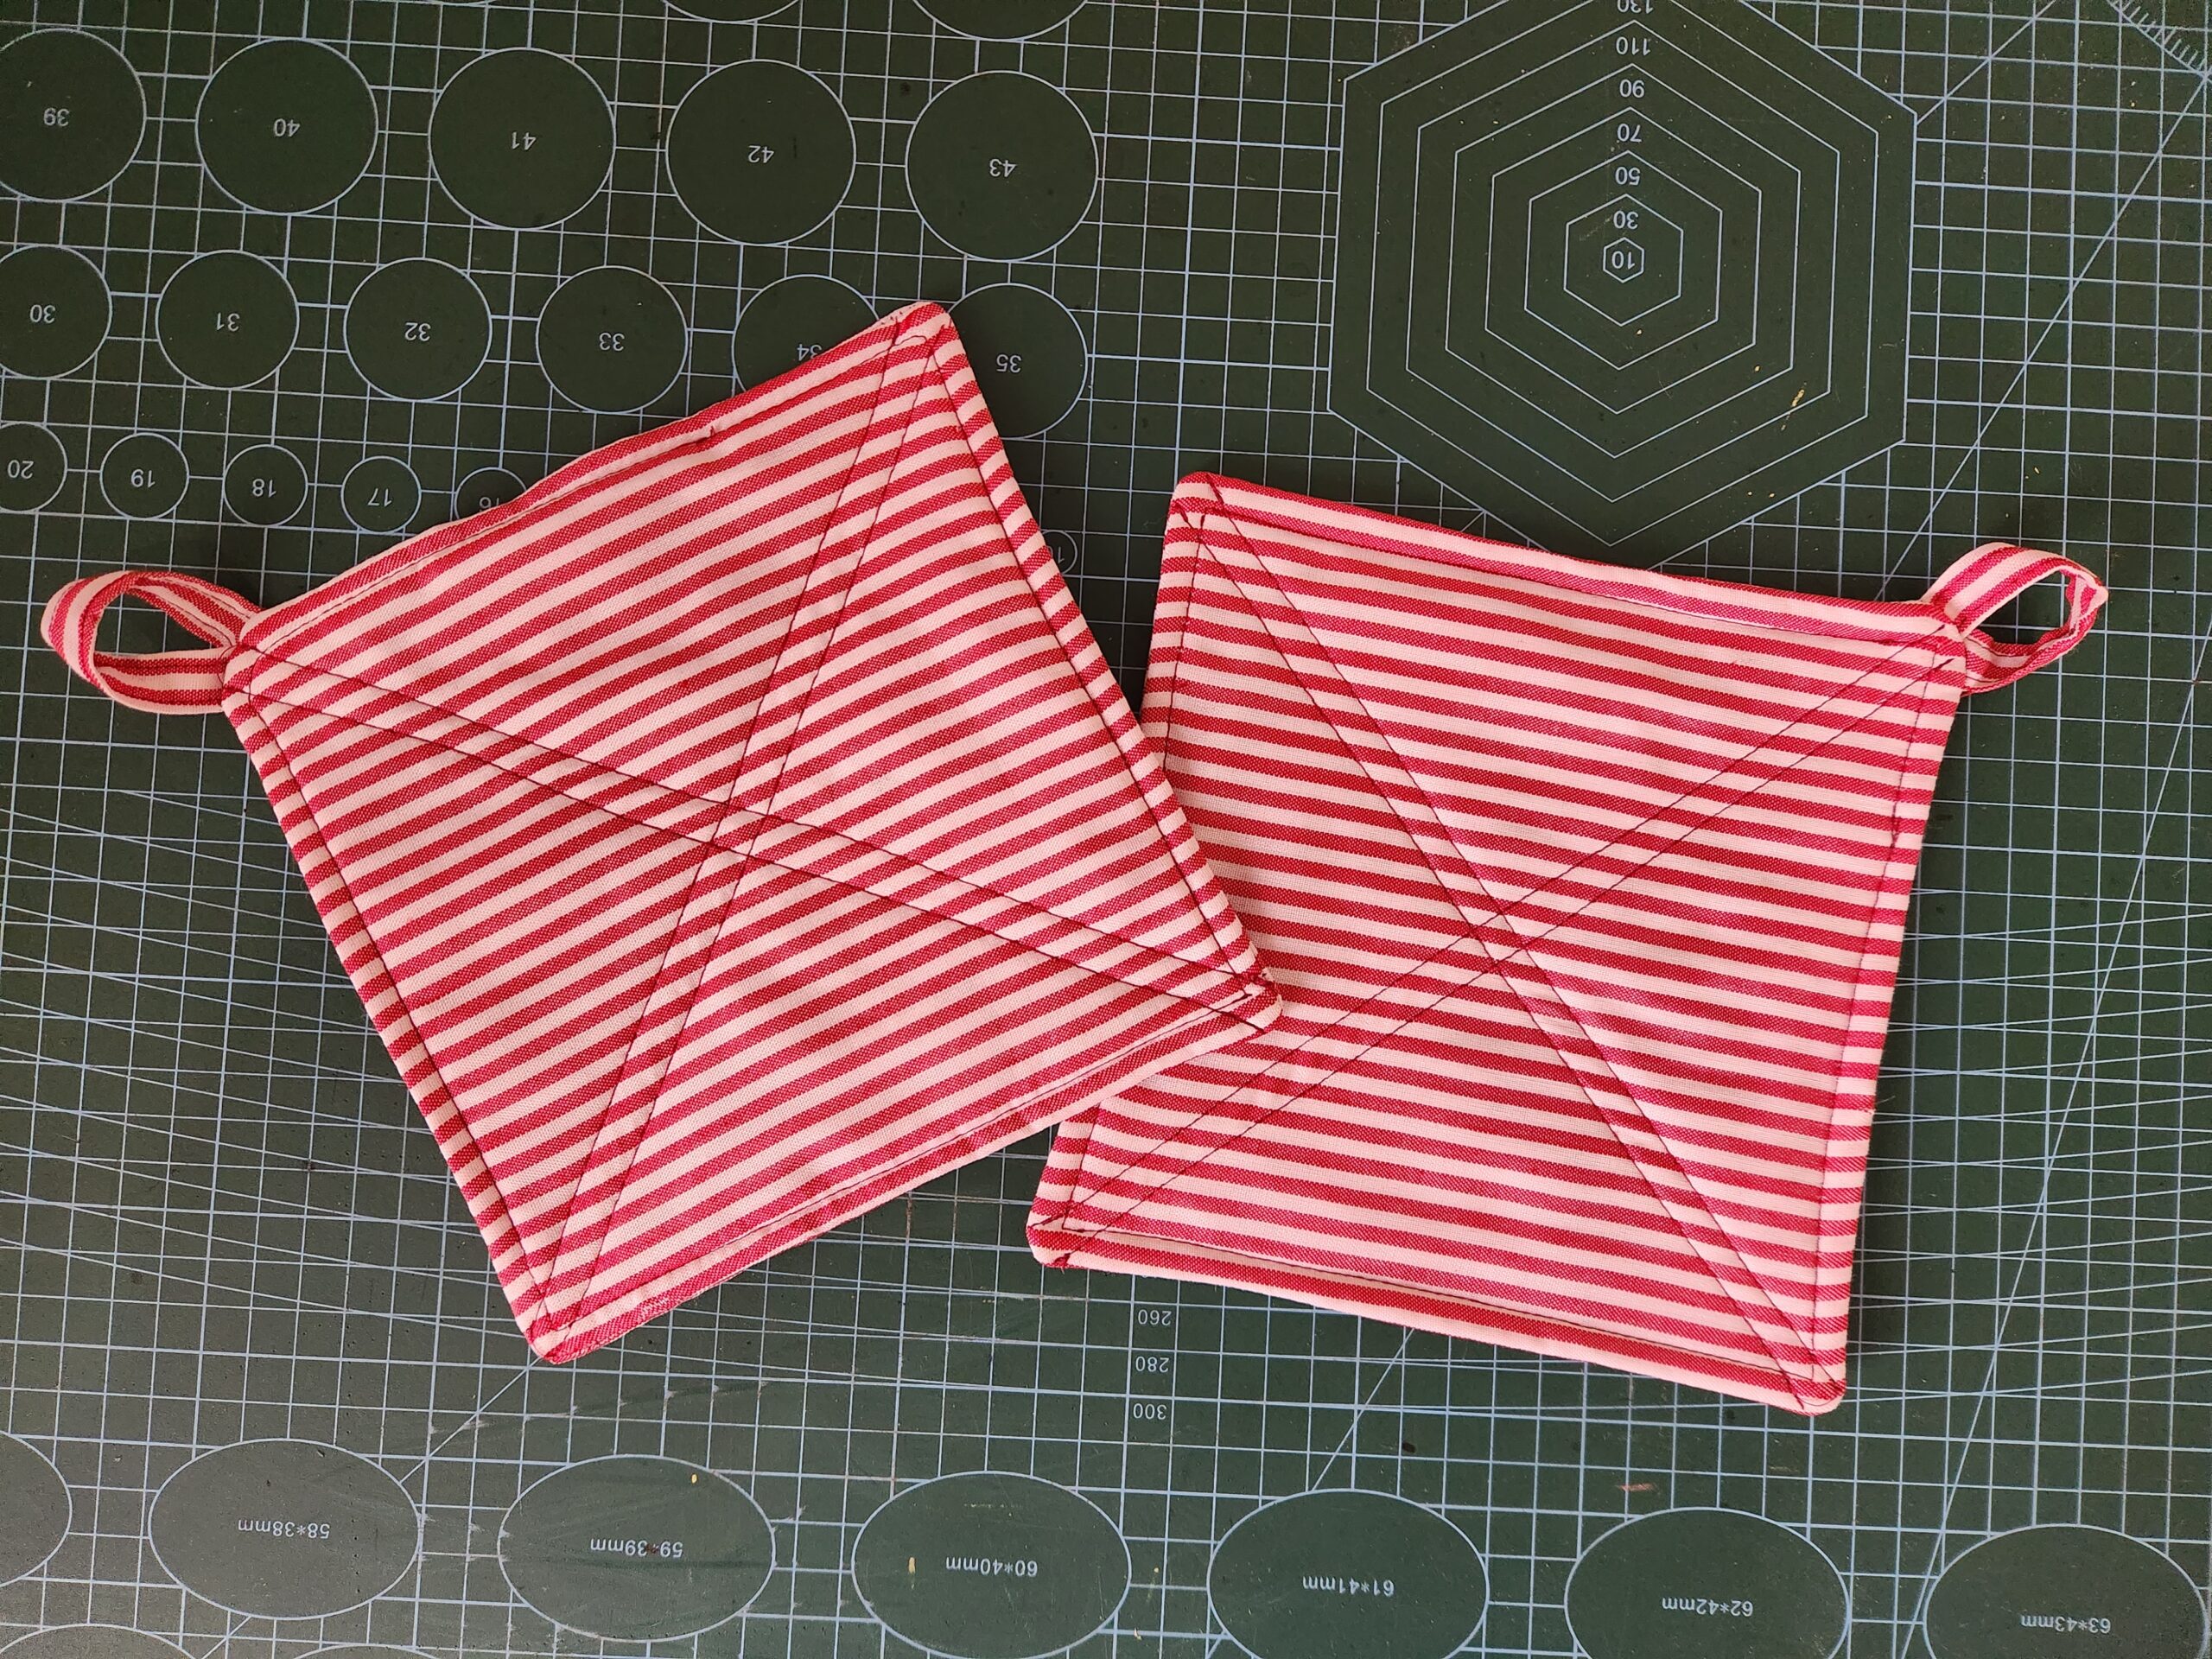
Step 1: Preparing Your Fabric & Padding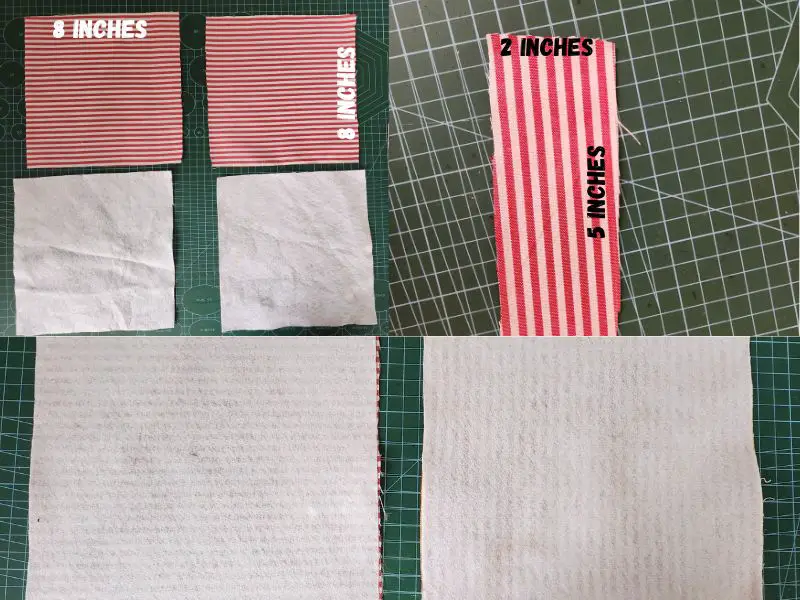
1. Cut two fabric squares measuring 8” x 8”—these will form the front and back of your pot holder.
2. Cut two pieces of soft gum padding of the same size. This padding will add thickness and heat resistance to your pot holder.
3. Use an iron to fuse the padding to the wrong side of each fabric piece. This will help keep everything in place while sewing.
4. cut a strap of 5″ x 2″ fabric
Step 2: Making the Loop Strap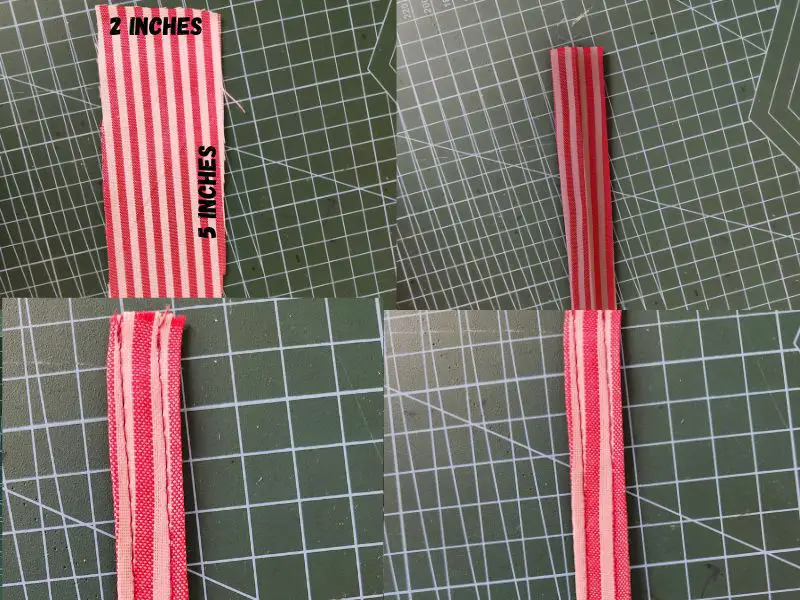
1. Take the 5” x 2” fabric strip and fold it in half lengthwise, right sides together.
2. Sew along the open edge using a 0.25-inch seam allowance.
3. Turn the strap inside out and press it flat with an iron.
4. Fold it into a loop and set it aside—we’ll attach it later.
Step 3: Assembling the Pot Holder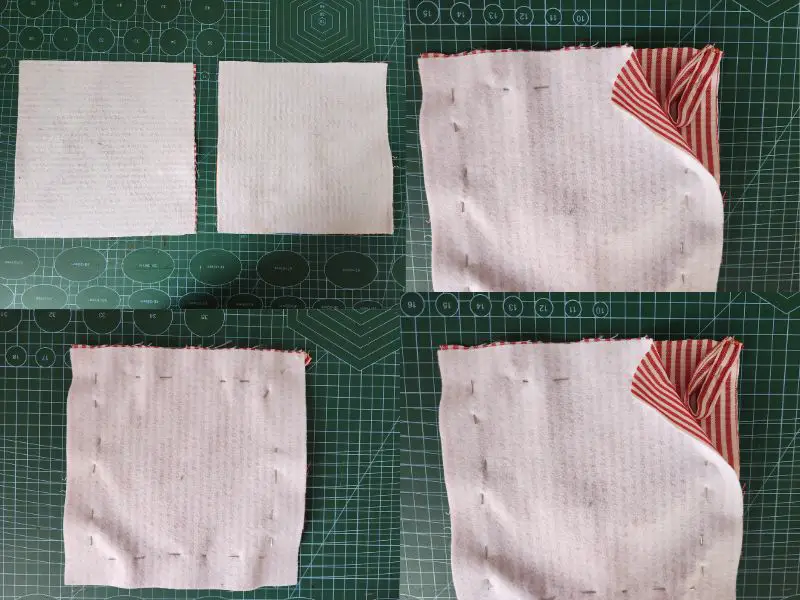
1. Take your two fabric pieces with padding attached and place them right sides together.
2. Pin them all around to keep the layers aligned.
3. Take the loop strap you made earlier, fold it in half, and place it between the two fabric pieces on one corner. Pin it securely so it stays in place while sewing.
Step 4: Sewing & Turning Inside Out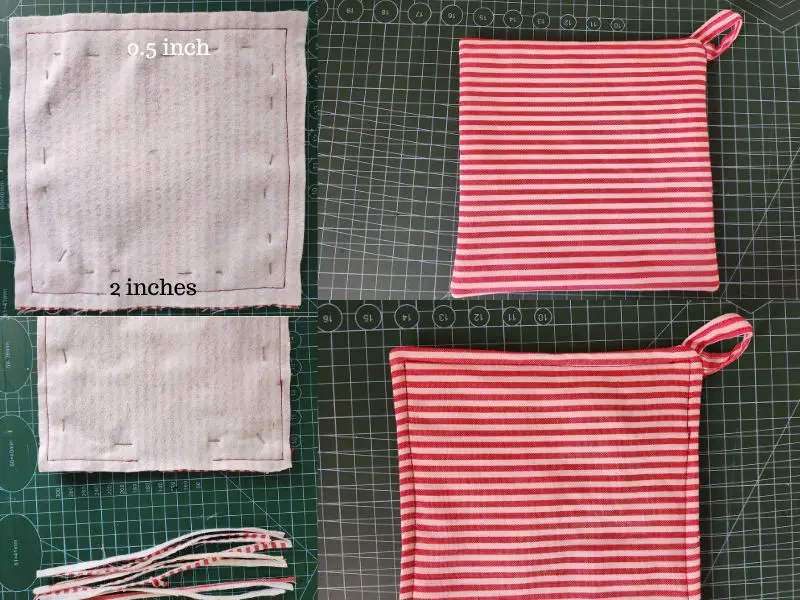
1. Sew around all four sides using a 0.5-inch seam allowance but leave a small opening (about 2 inches) on one side for turning.
2. Clip the corners slightly to reduce bulk when turning.
3. Turn the pot holder inside out through the opening. Use a pointed tool (like a chopstick or pencil) to push out the corners neatly.
4. Press the pot holder with an iron to smooth out any wrinkles.
Step 5: Topstitching & Adding Design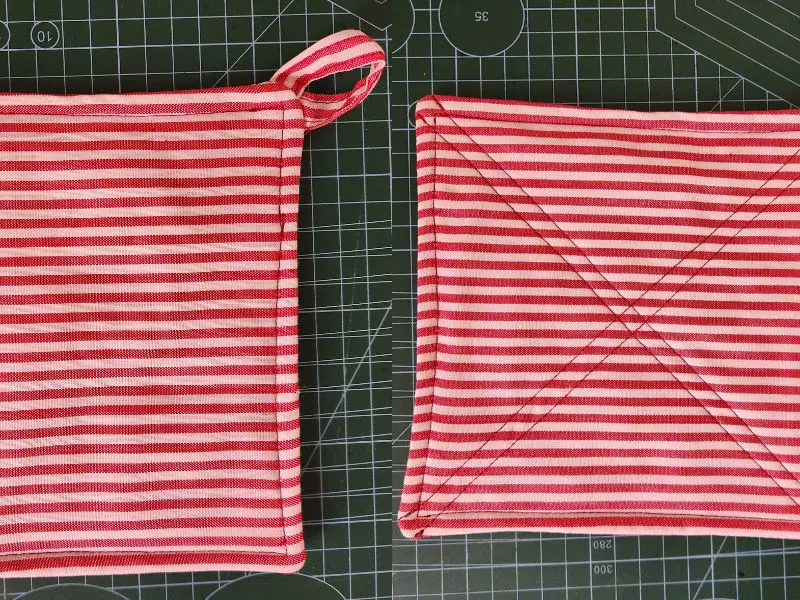
1. Topstitch around the edges to close the opening and give the pot holder a neat, finished look.
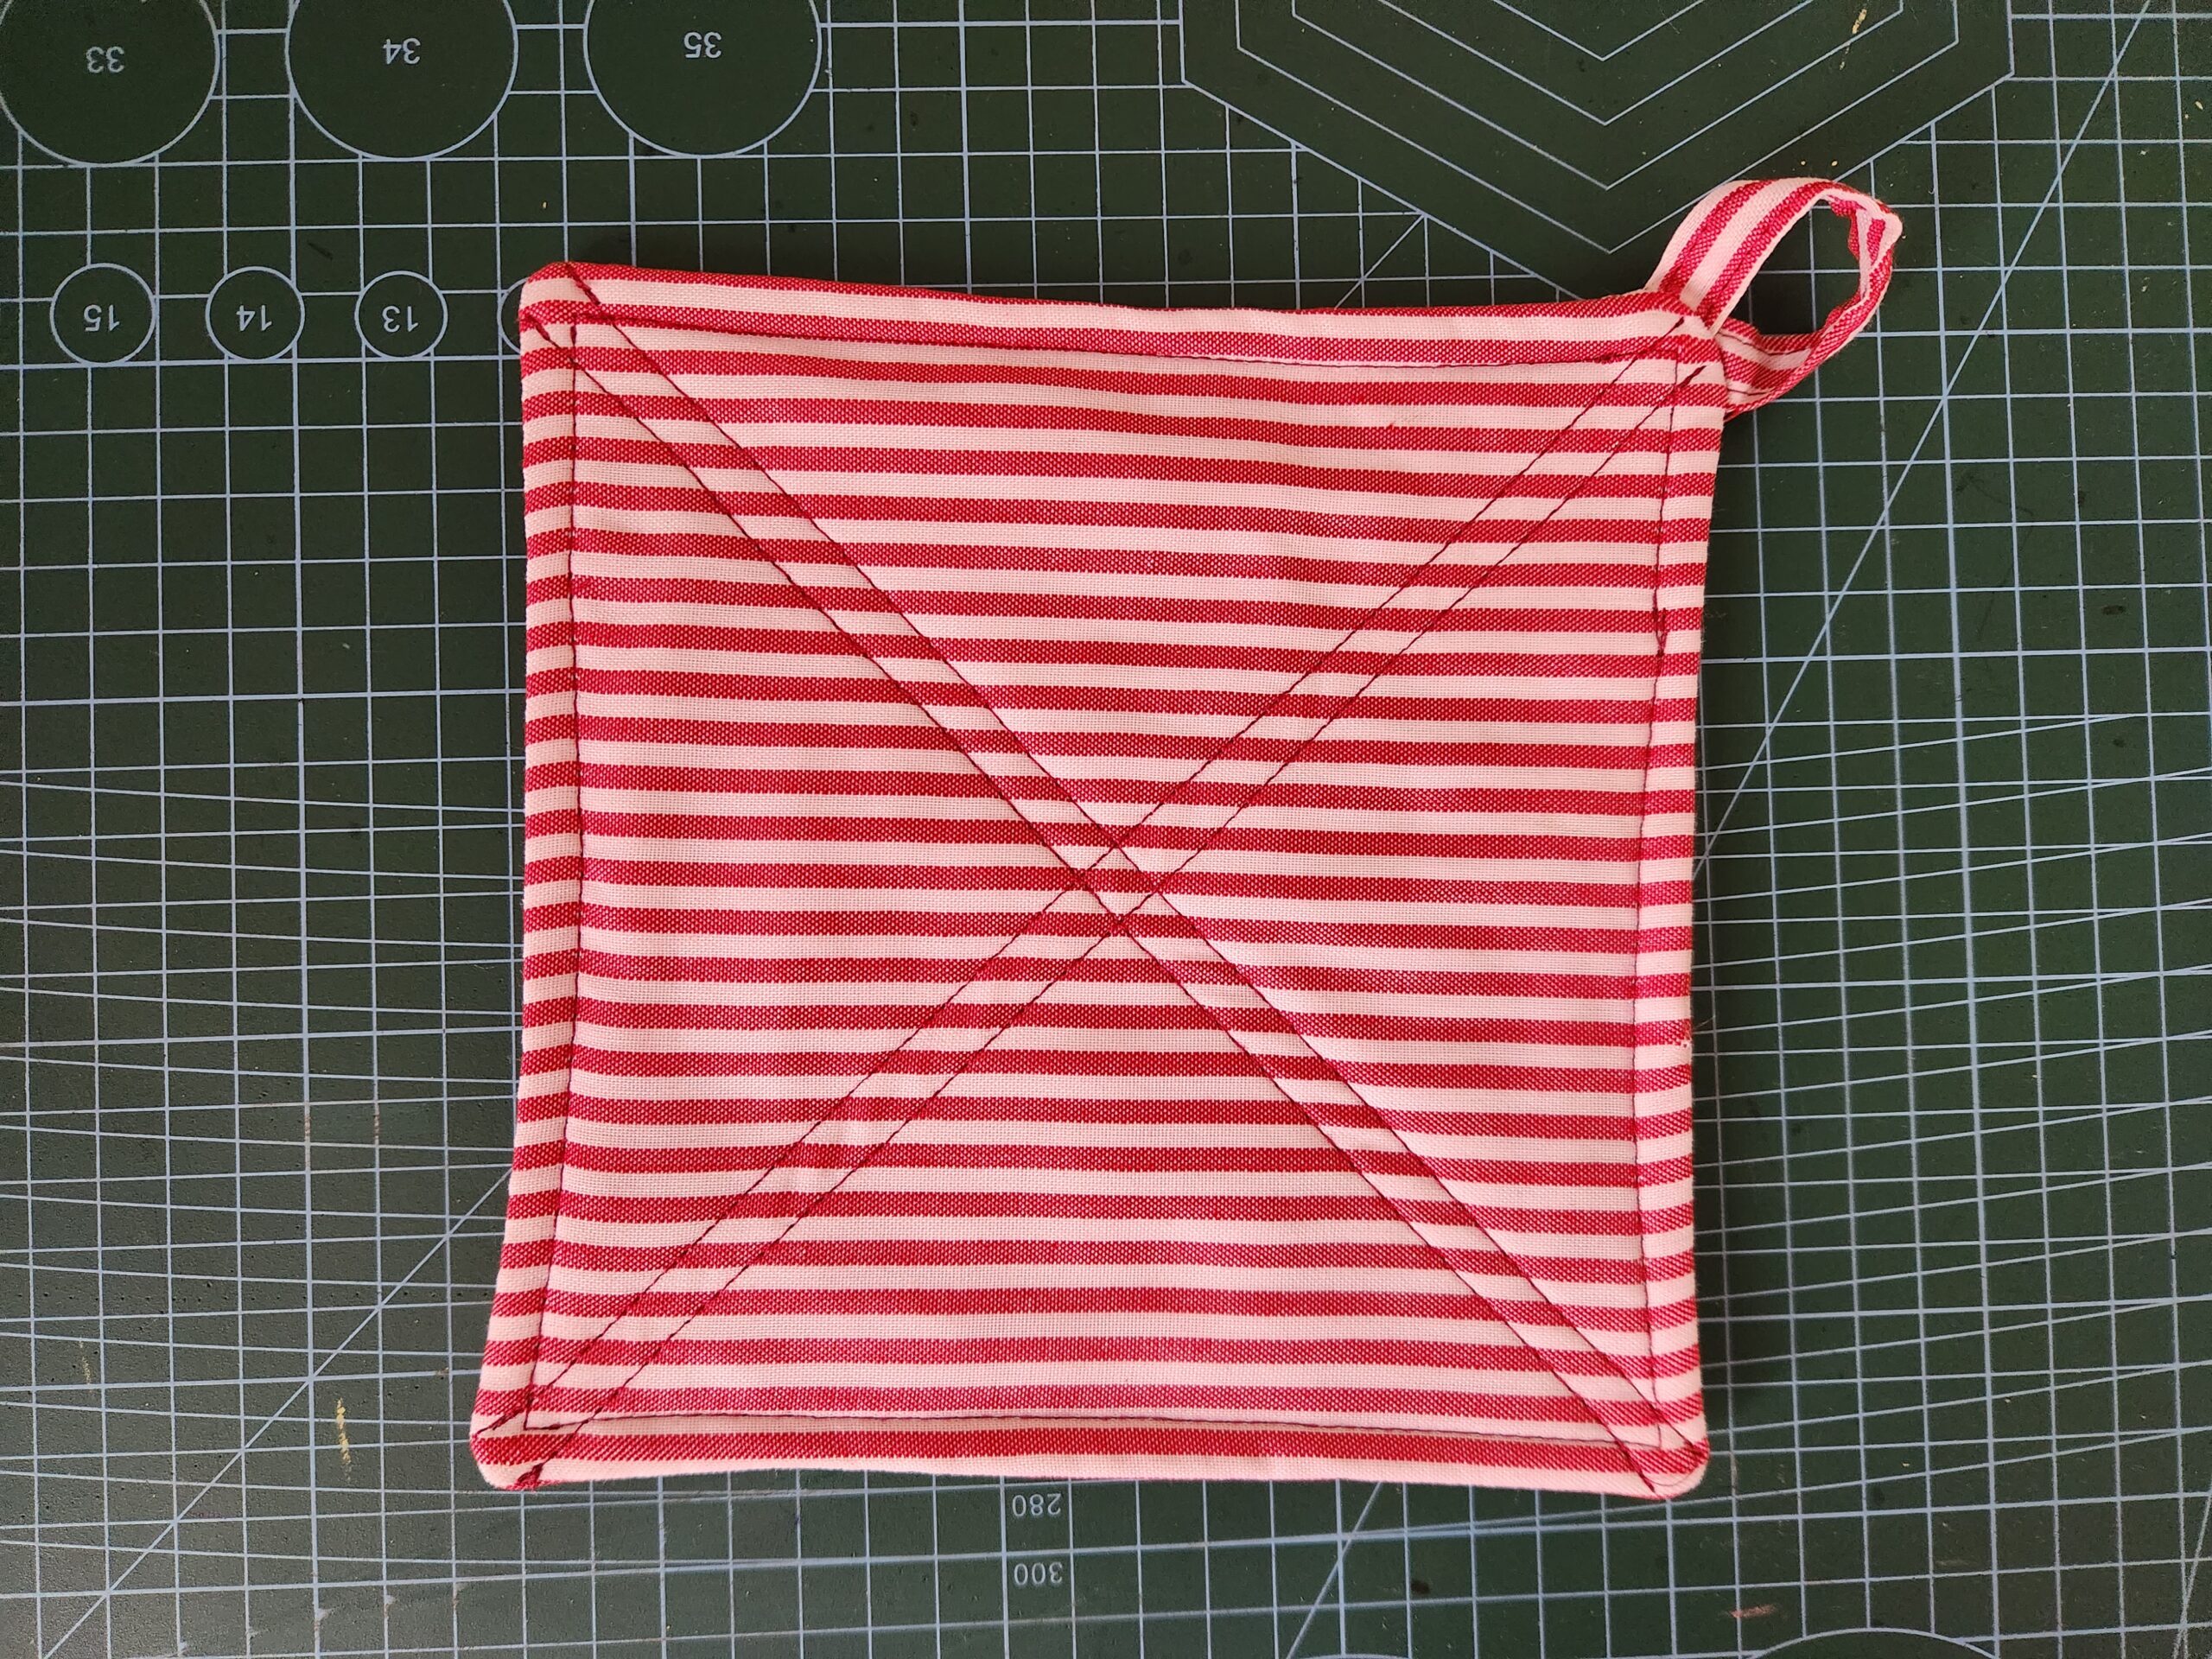
2. For extra styling and durability, sew a decorative stitch pattern on the surface—this could be an X shape, diagonal lines, or even a quilted pattern. This helps keep the padding in place and makes your pot holder look professionally made.
Step 6: Repeat for the Second Pot Holder
Since we always need at least two pot holders in the kitchen, go ahead and repeat the same steps to make a second one.
Your DIY Pot Holders Are Ready!
And there you have it—a beautiful, handmade pot holder that’s not only functional but also adds a cozy, handmade charm to your kitchen. Whether you keep them for yourself or gift them to someone special, these pot holders are a must-have for every home cook.
What design will you try? Let me know in the comments—or tag me in your photos when you make yours!
Happy sewing!
You may also like: