Want to add a whimsical, colorful touch to your home or party decor? This DIY organza flower garland is the perfect project, it’s lightweight, beautiful, and incredibly fun to make. Whether you’re decorating for a birthday, baby shower, wedding, or simply sprucing up your creative space, this garland will steal the show.
Even better? You can use just a few basic sewing tools and some organza fabric. and you’re good to go.
Supplies You’ll Need: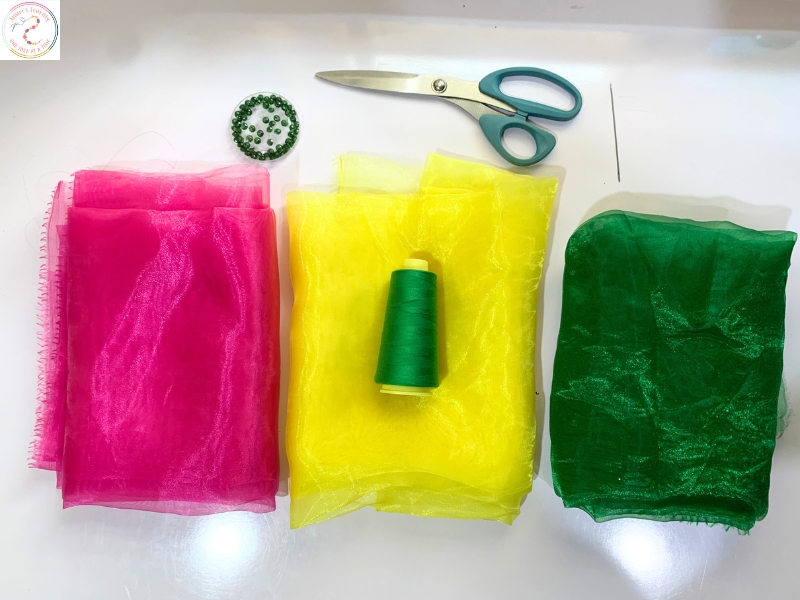
3 yards of organza fabric (use 2–3 different colors for a vibrant look)
Sewing machine
Large hand needle
Sewing thread
Scissors
Pins
Beads (optional, for decorative flair)
Pressing iron (optional but helpful for crisp finishing)
Step-by-Step Instructions
1. Cut the Fabric into Strips
Cut your organza into several 7-inch wide strips (use all your colors if combining multiple for a rainbow effect).
The length of each strip doesn’t have to be perfect — just keep them long enough to sew together.
2. Join the Fabric Pieces
Join all your fabric strips end to end, alternating colors if using more than one. This gives your garland a beautiful gradient look.
Once joined, fold the entire strip in half lengthwise, with the right sides facing each other, and pin along the open edge.
Sew along the pinned edge with a ½-inch seam allowance to create a long tube.
3. Turn & Press the Fabric Tube
Carefully turn the fabric tube right side out, hiding the seam inside.
Press with an iron if needed to make it smooth and place the seam in the middle (this will help the ruffle stay symmetrical when pleated).
4. Prepare the Needle and Thread
Thread a large needle with a long piece of thread (around 40 inches or more, depending on your desired garland length).
Optional: Insert 10–15 beads onto the thread before beginning the ruffles — this gives a charming, sparkling effect between flower segments.
5. Create the Ruffle Flowers
Here’s the fun part, turning your fabric strip into a flowy garland:
Begin making small pleats or ruffles along the fabric strip.
As you fold each pleat, insert the needle through the center of the pleat to hold it in place.
Continue pleating and stitching through the center until you’ve used up your fabric or reached your desired garland length.
Tip: The more pleats you make, the fuller and fluffier your garland will look!
Once done, add another 10–15 beads on the thread for the ending flourish.
6. Finish Your Flower Garland
Remove the needle and tie a knot at the end of the last bead to secure everything.
Bring the starting point and end point of the garland together and tie them in a knot.
Adjust and fluff your pleats as needed to get your desired fullness and shape.
Display Ideas for Your Flower Garland
Hang it across a window or curtain rod
Drape it around a mirror or headboard
Use it as a photo booth backdrop
Wrap it around a party table or staircase railing
Make a mini version as a gift wrap topper or Christmas tree garland
Final Thoughts

This organza flower garland is proof that DIY decor doesn’t have to be expensive or complicated. It’s a great way to bring color and personality to any space, and you can customize it endlessly with different fabrics, colors, and bead styles.
You may also like: