One of the things I love most about sewing is the joy of turning simple fabrics into something beautiful and functional—especially pieces that elevate your style while keeping you comfortable. A perfect example? This DIY wide brim summer hat.
It’s the kind of project that makes you feel accomplished—whether you’re shielding yourself from the sun on a beach day or adding flair to your weekend outfit. The best part? You can customize it to your taste with any fabric you love.
In this tutorial, I’ll walk you through making your own sun hat with a wide brim that offers style and sun protection all in one. It’s beginner-friendly, fun to make, and the finished result looks store-bought (if not better!).
Materials Needed: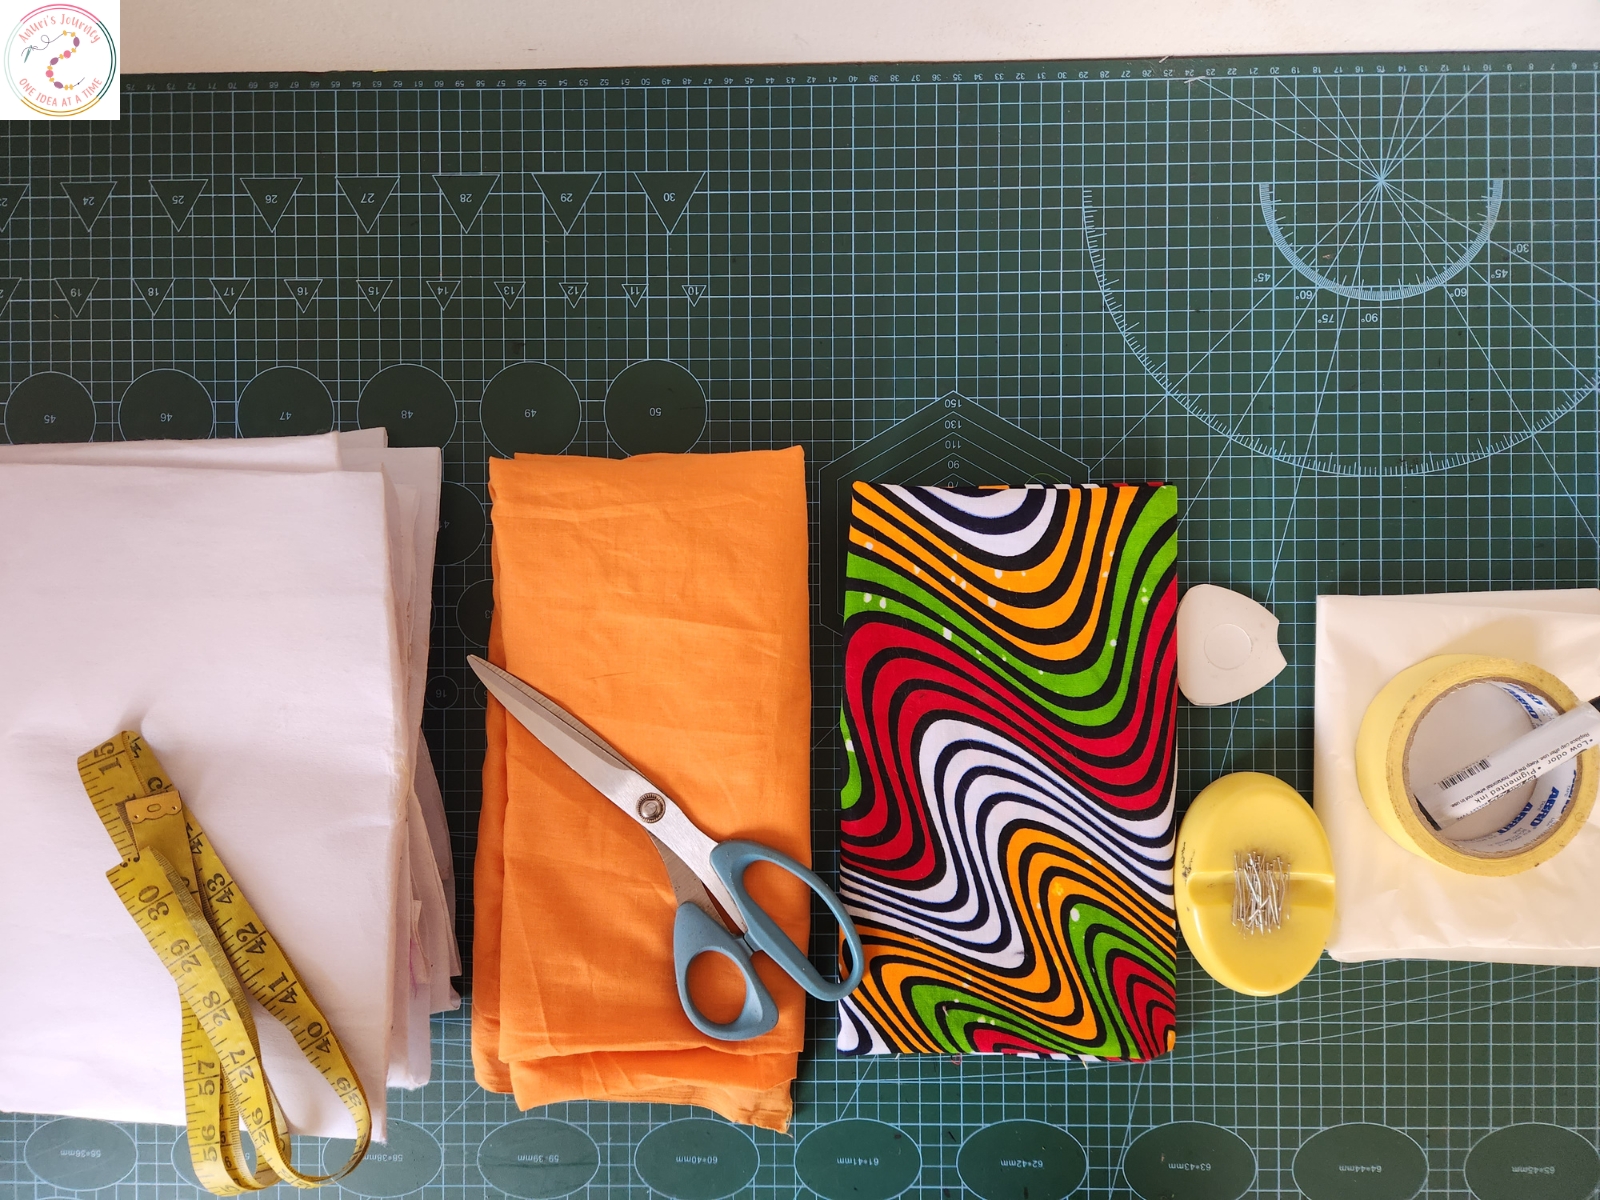
2 yards of fabric
(1 yard for the main fabric, 1 yard for linen or your lining fabric)
1 yard of thick fusible interfacing
Sewing machine
Sewing thread
Scissors
Measuring tape
Pattern paper
Tailor’s chalk or fabric pen
Ink marker
Masking tape or pins
Affix pins
Pressing iron
Step-by-Step Instructions:
1. Draft the crown of the hat (first piece):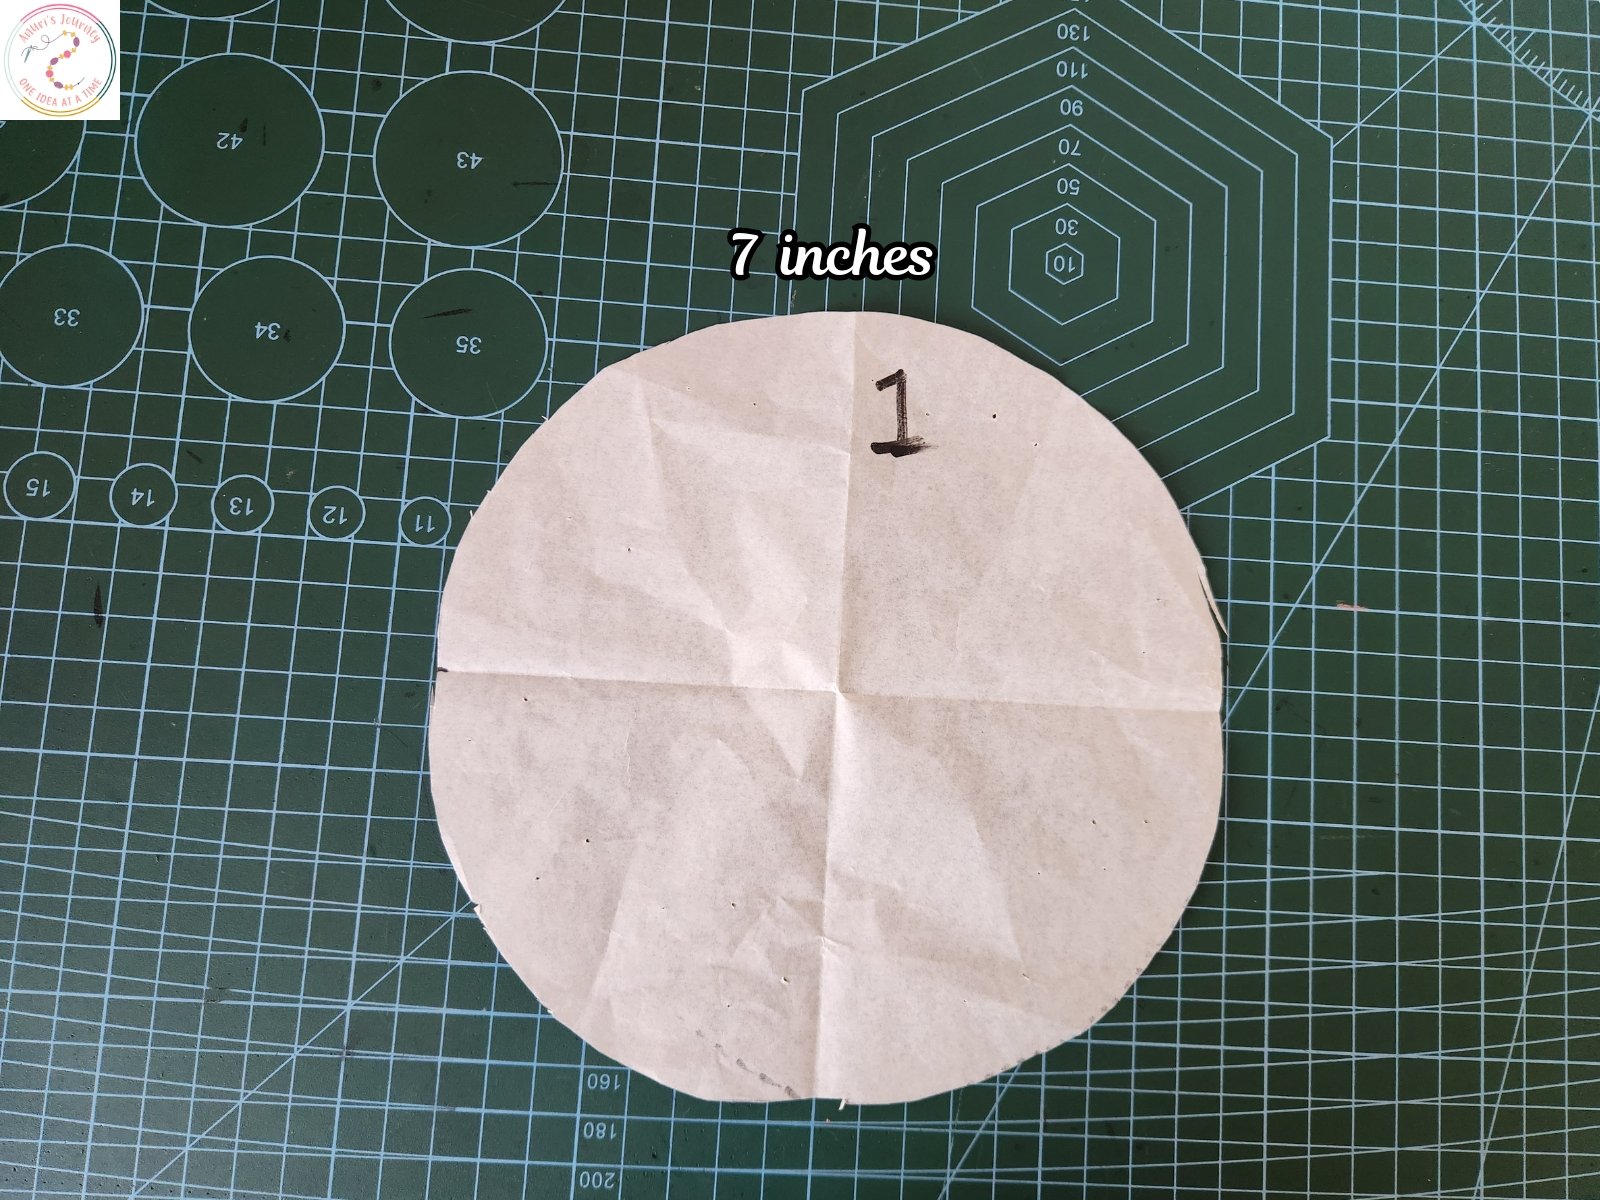
On your pattern paper, draw a circle with a 7” diameter. This includes 6.5” for the actual pattern and 0.5” as joining allowance.
Measure around the circle to get the circumference. Note down this number—it will guide the next piece.
2. Create the side band (second piece):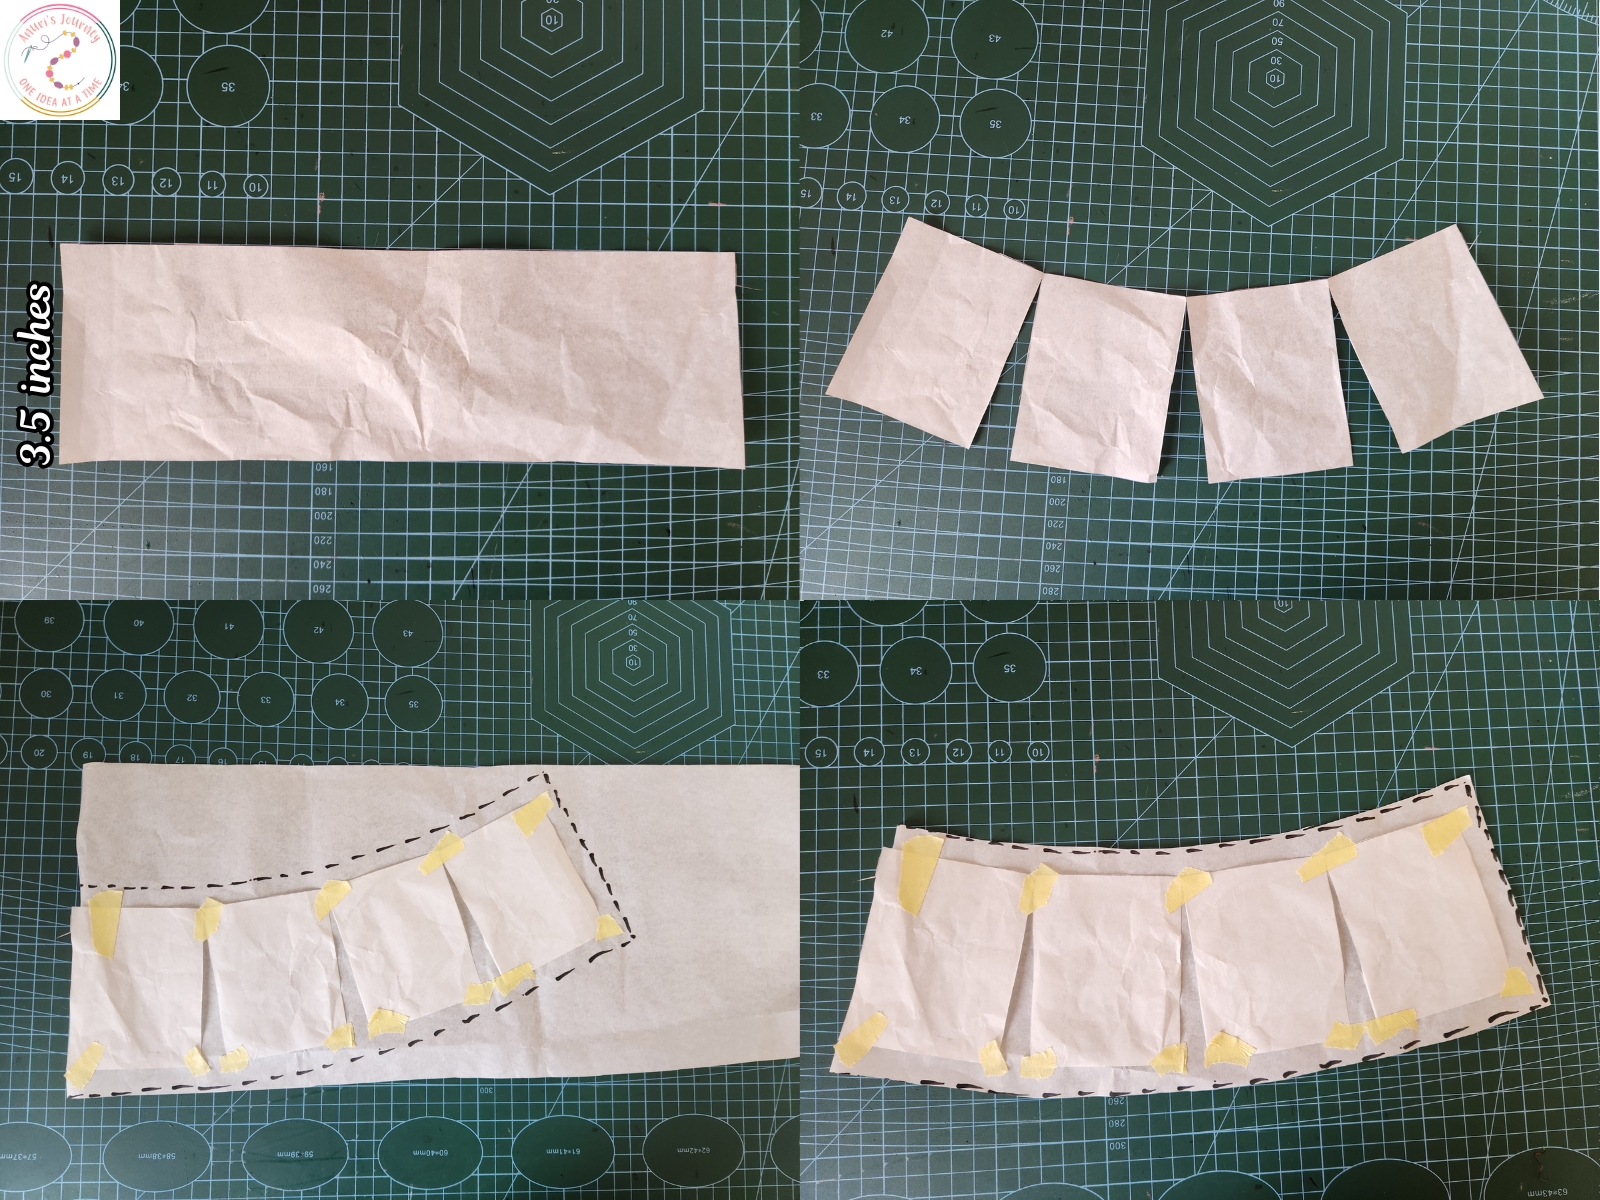
On another sheet of pattern paper, draw a rectangle measuring:
Horizontal = your noted circumference,
Vertical = 3.5”.
Fold this rectangle into four equal sections, and slash the folds without cutting all the way through (we’re using the slash and spread method to give the band a slight flare).
Place the slashed paper onto another pattern paper and spread the slashes 0.5” apart.
Tape or pin it down and add 0.5” seam allowance all around.
Cut out this final version—this is your second pattern piece.
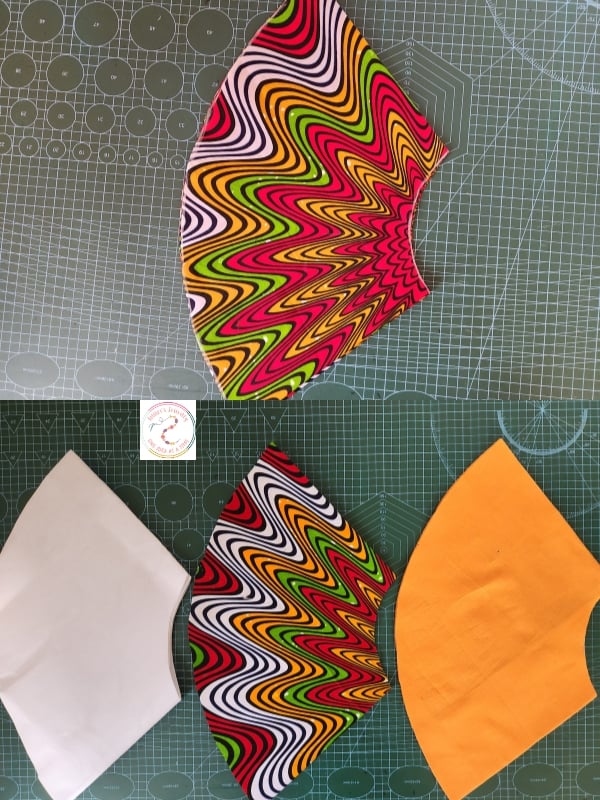
3. Cut your fabric: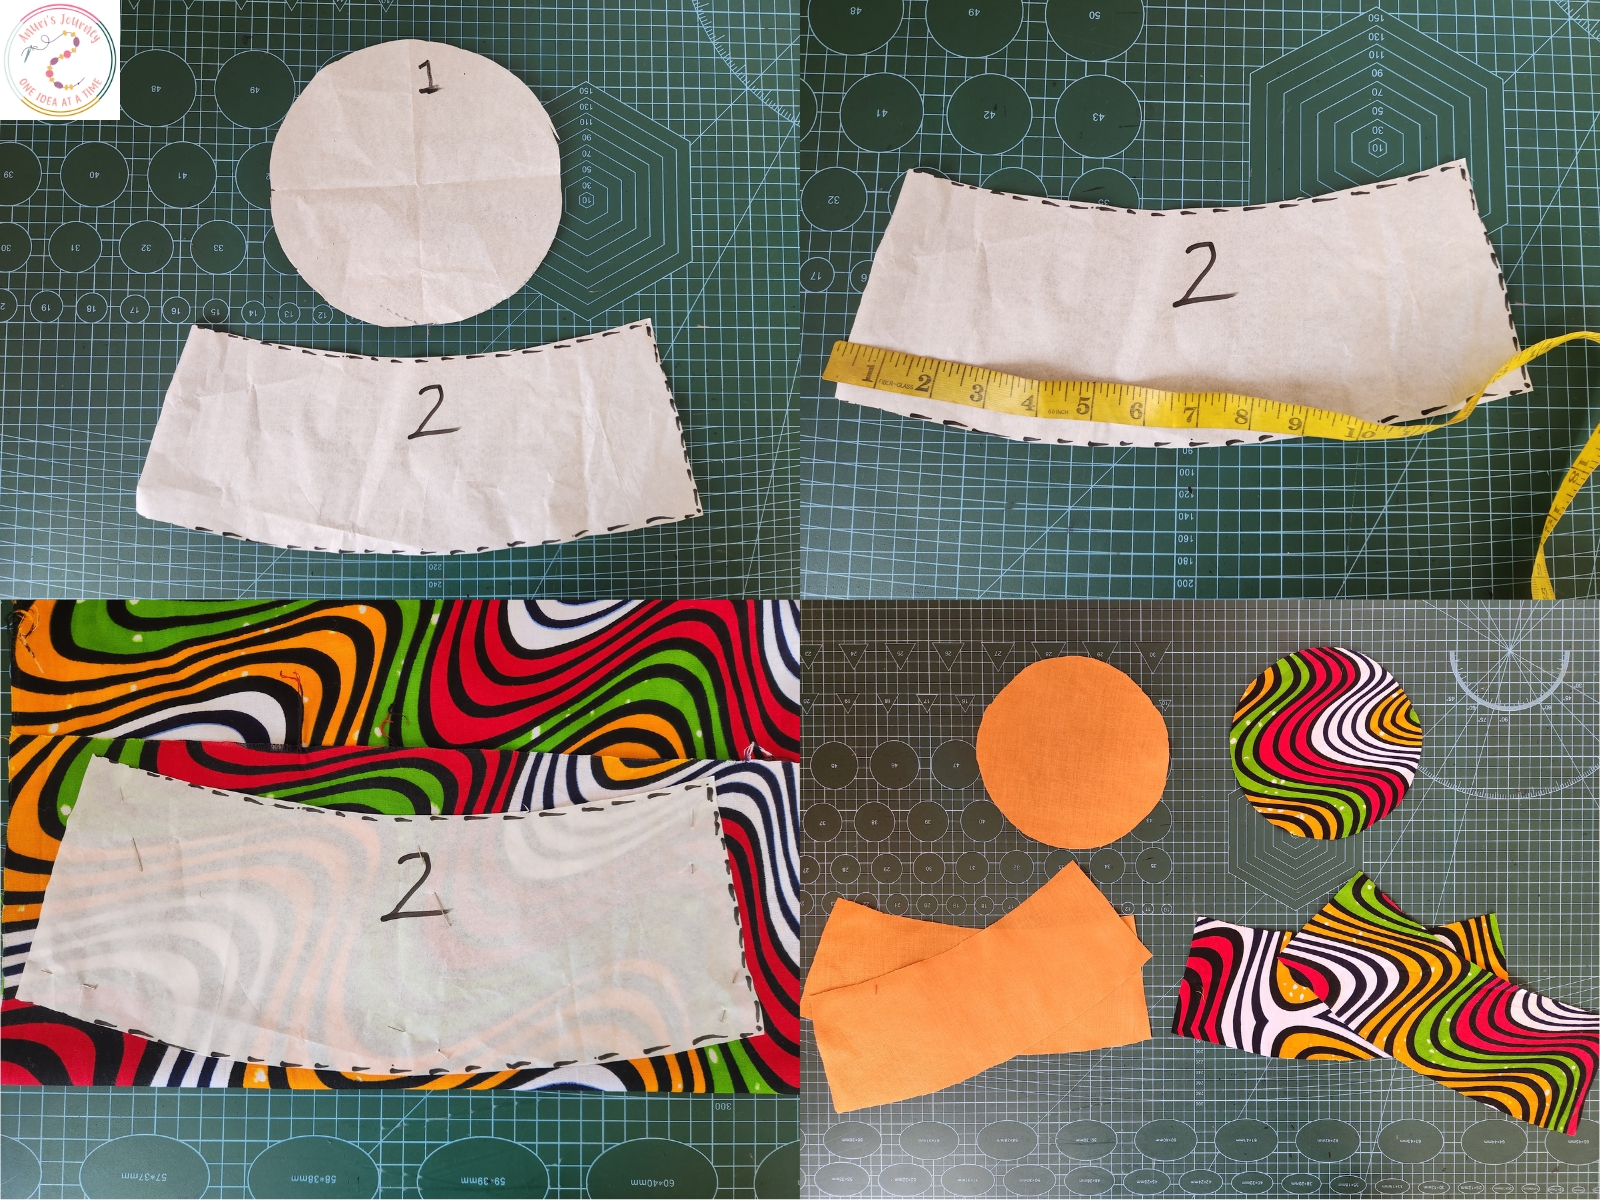
Cut two pieces of the second pattern on both the main fabric and the linen.
Cut one piece of the first circle pattern on both the main fabric and the linen.
4. Create the brim (third piece):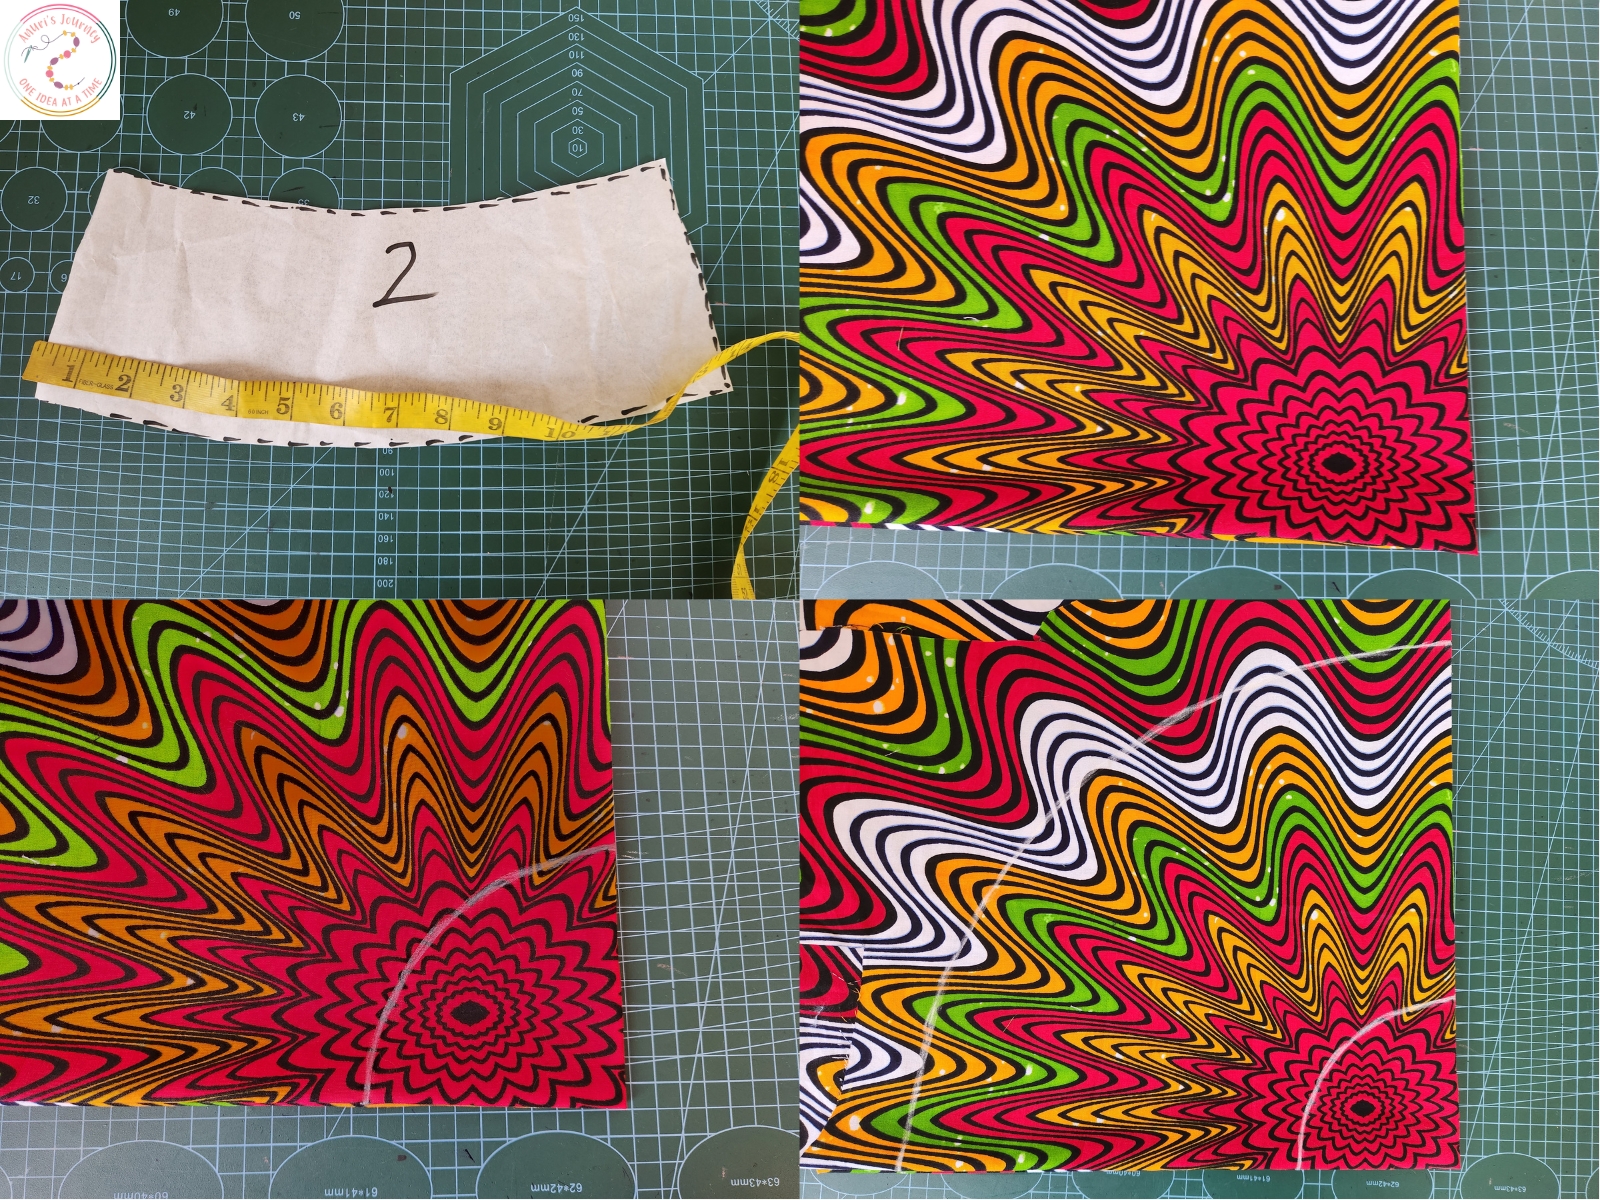
Measure around the bottom edge of your second piece and note that figure.
Double the number, then divide it by 6.28 to get your flare radius.
Fold your fabric into four (to cut a full 360° flare).
From the corner tip, mark the radius all around to form the inner circle of the brim.
From this curve, measure and mark 9” outward to create the full width of your brim.
Cut it out—this is your third piece.
Repeat for the linen.
5. Prepare the interfacing: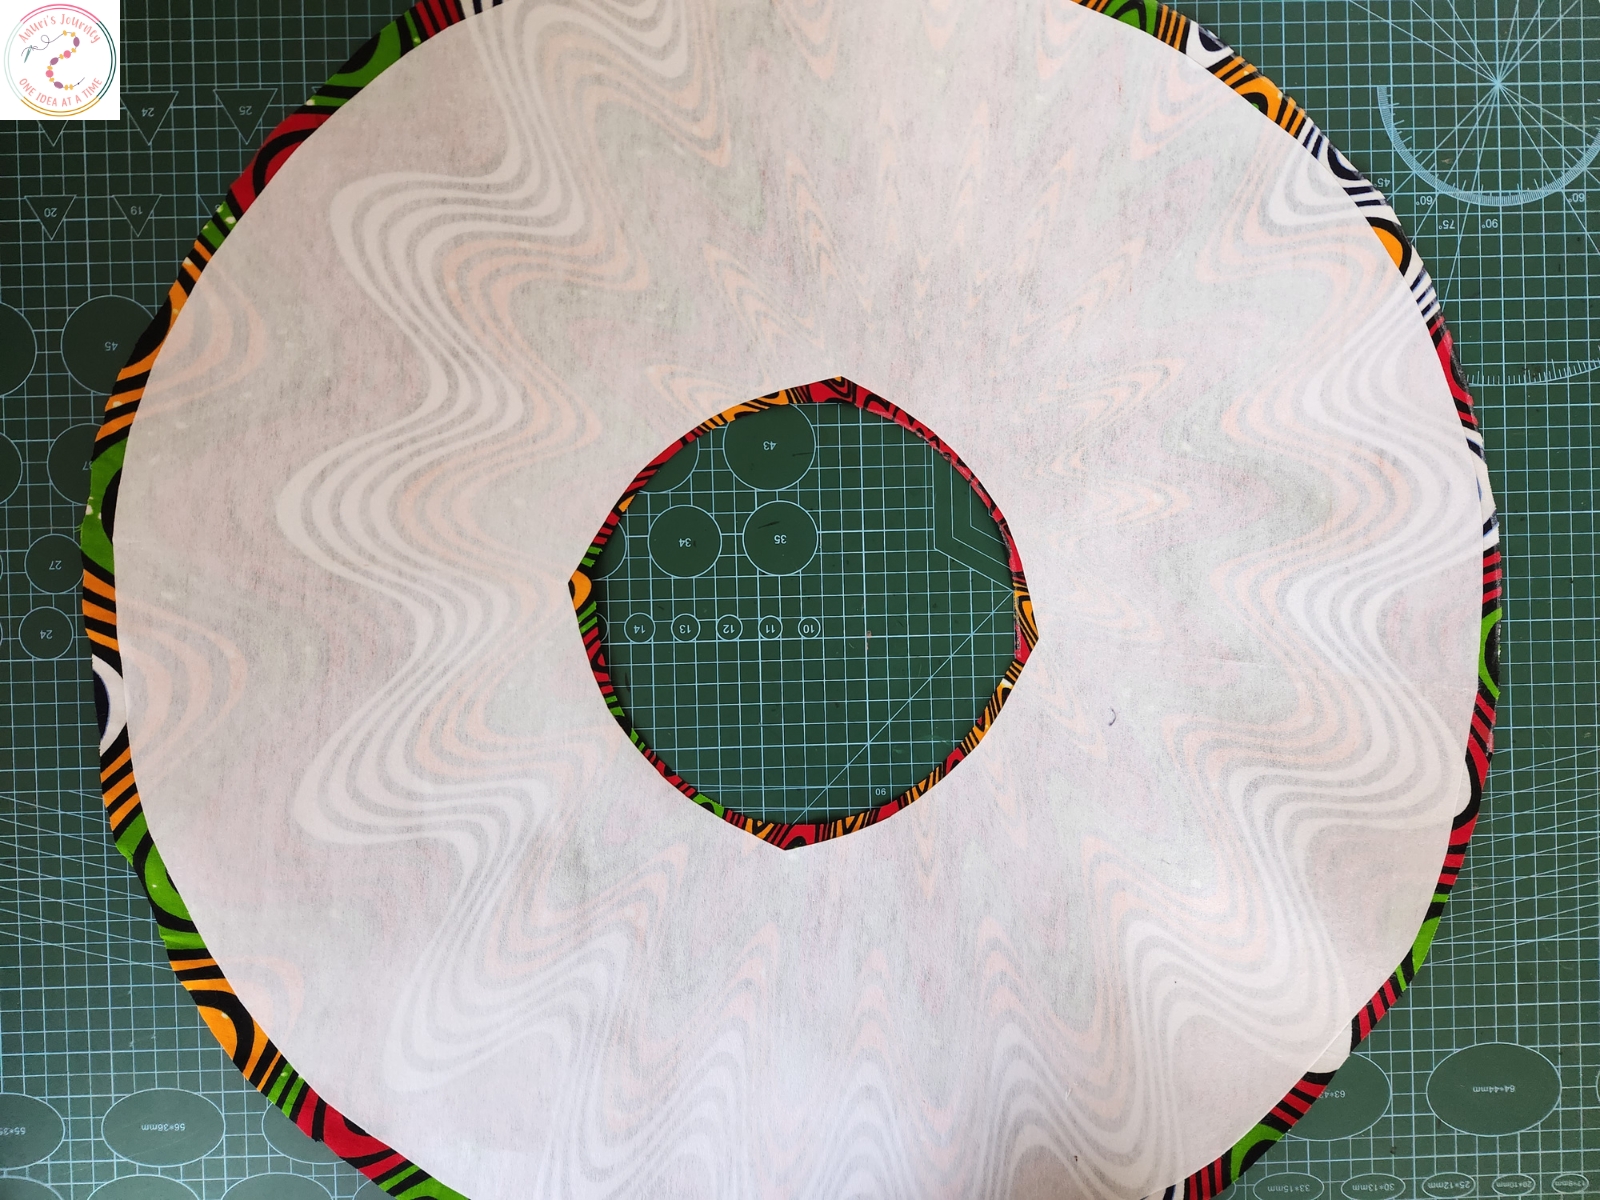
Cut one brim piece out of the fusible interfacing, but make it 0.5” smaller than your fabric brim.
Fuse the interfacing to the wrong side of the main fabric brim and linen brim using a pressing iron.
6. Start assembling the hat:
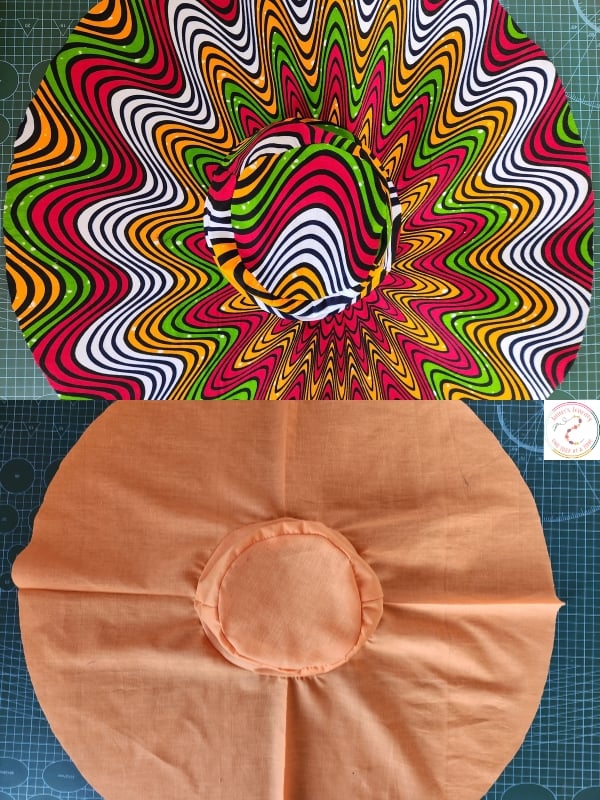
Join the two side band (second piece) panels together at the sides.
With right sides together, pin the top circle (first piece) to the top of the side band. Sew around with 0.5” seam allowance.
Pin the brim (third piece) to the lower edge of the side band, right sides together. Sew with 0.5” seam allowance.
Press all seams flat.
Repeat these steps for the linen side of the hat.
7. Join the main and lining fabrics: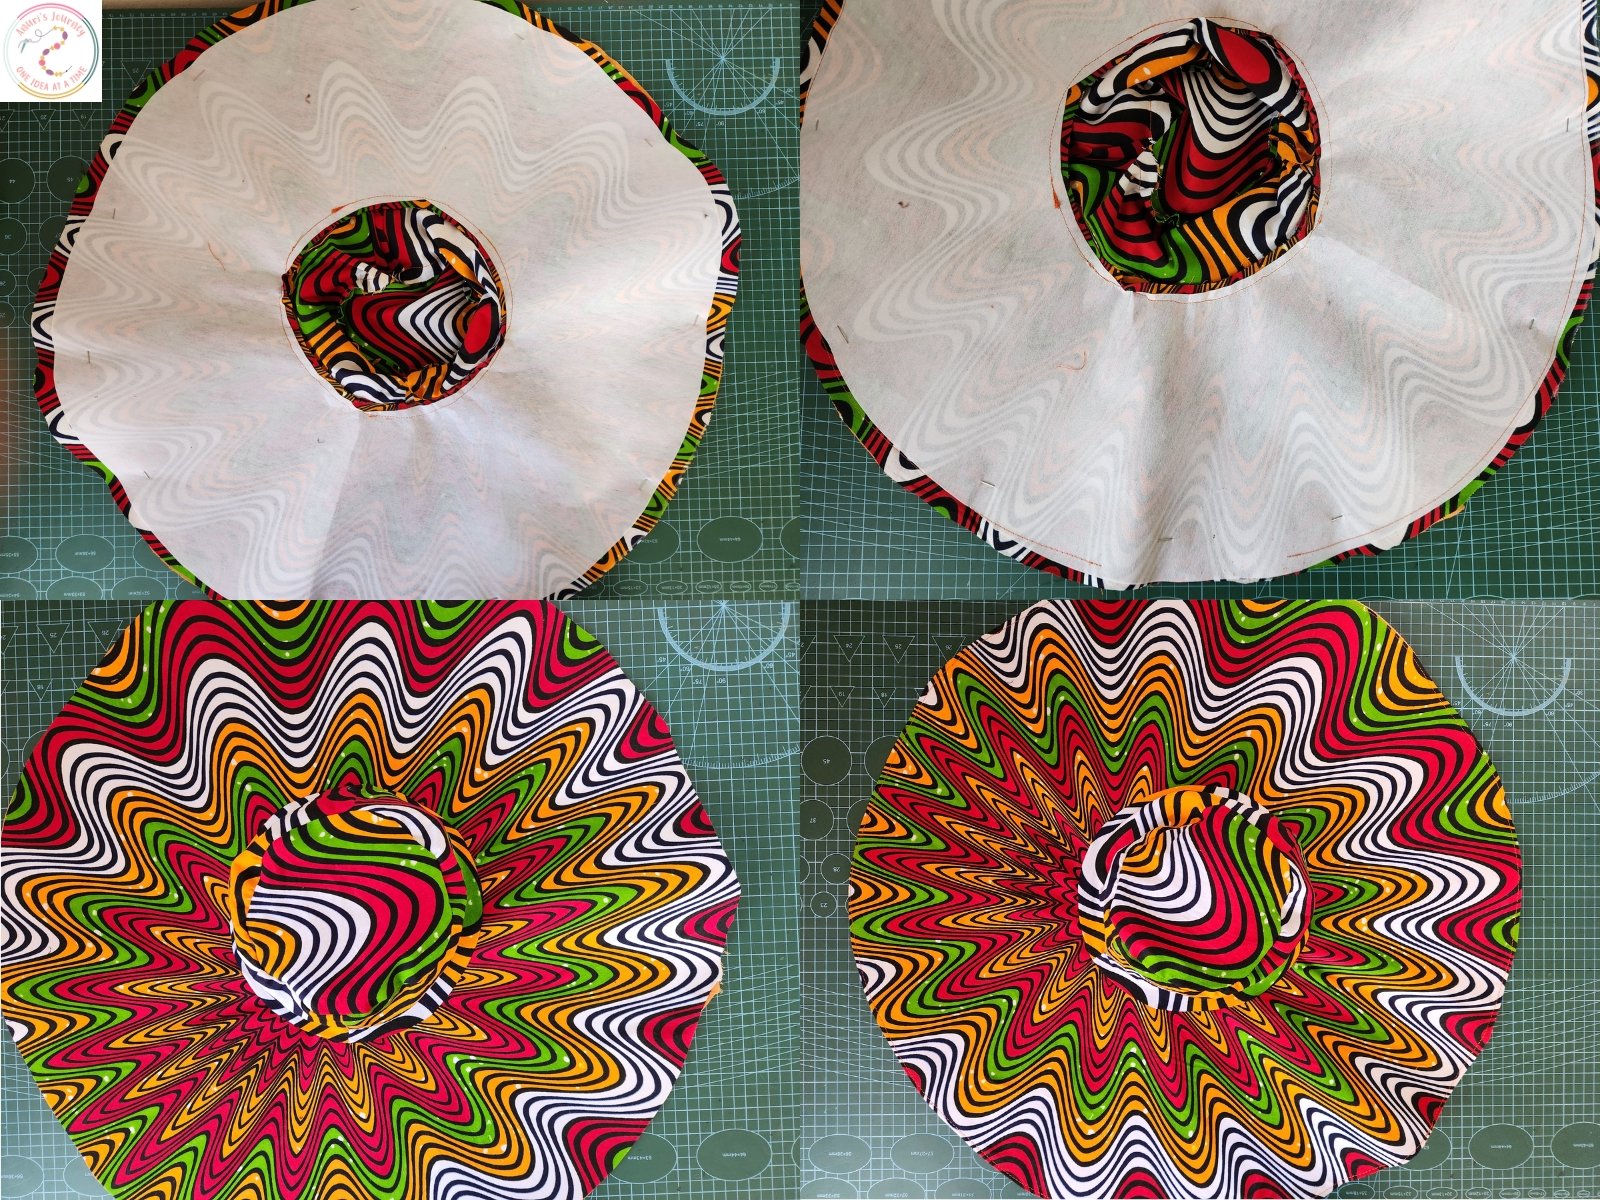
Place the main fabric hat and the linen hat right sides together.
Pin them together and sew around the edge of the brim with 0.5” seam allowance, leaving a 4” opening for turning.
Carefully turn the entire hat right side out through the opening.
Give the hat a thorough press to smooth everything out.
8. Final touches:
Tuck in the raw edges of the opening and topstitch all around the brim to close it and add a clean, crisp finish.
For extra flair and stability, you can add multiple rows of circular topstitching around the brim—spaced about ½” apart.
And that’s it—your Wide Brim Summer Hat is ready to wear.
You’ll love how elegant and sun-smart this hat feels. Whether you’re dressing up a picnic outfit, heading to the beach, or just protecting your face from the summer heat, this hat will be your go-to.
And don’t be surprised if friends start asking where you bought it.
You may also like: