Some of my favorite moments are when I get to sit down and craft something small but beautiful—especially when it’s for my girls. One of the simplest, cutest little DIYs we’ve come to love around here is the fabric hair clip. It’s such a sweet accessory, and the best part is, you can personalize it with fun prints, bold colors, or delicate appliqués depending on your mood.
Whether you’re making this for your daughter, as a thoughtful handmade gift, or even for yourself, this easy project will add that perfect pop of charm to any hairstyle. And don’t worry if you’re not a sewing expert—you’ll only need a few basic stitches and some glue.
So, let’s delve into this simple, no stress tutorial for creating your own fabric hair clip.
Materials Needed: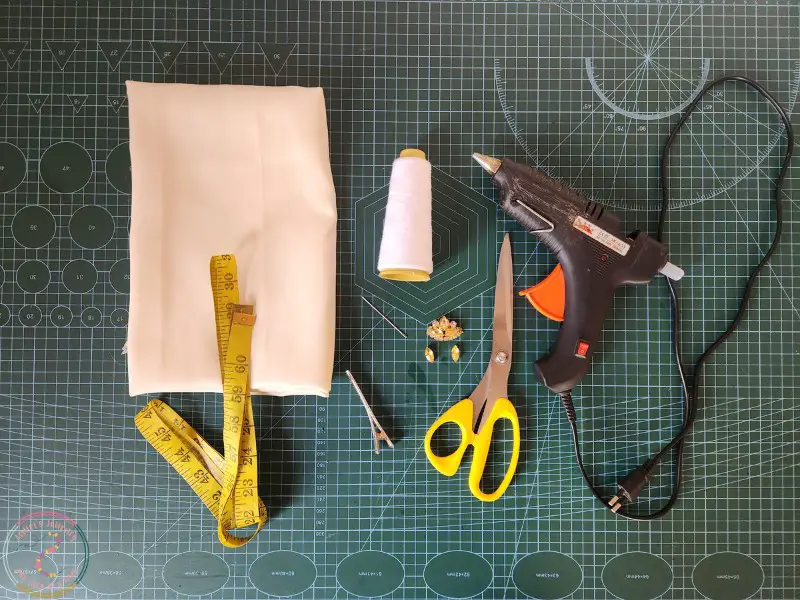
¼ yard of fabric (cotton works great)
Measuring tape
Stitching thread
Scissors
Affix pins (or straight pins)
Hair pin (also called an alligator clip or barrette)
Glue gun
Appliqués (optional – for extra flair)
Step-by-Step Guidelines on How to make a Fabric Hair Clip: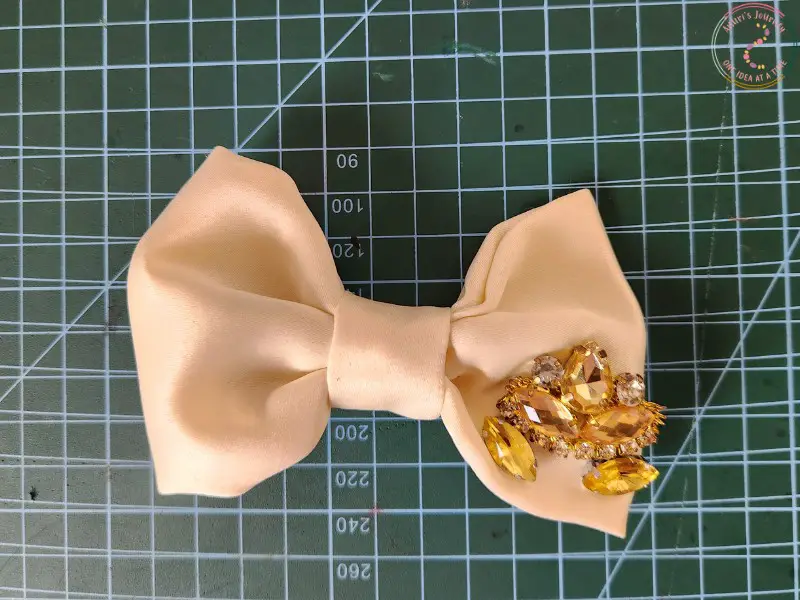
1. Cut your fabric: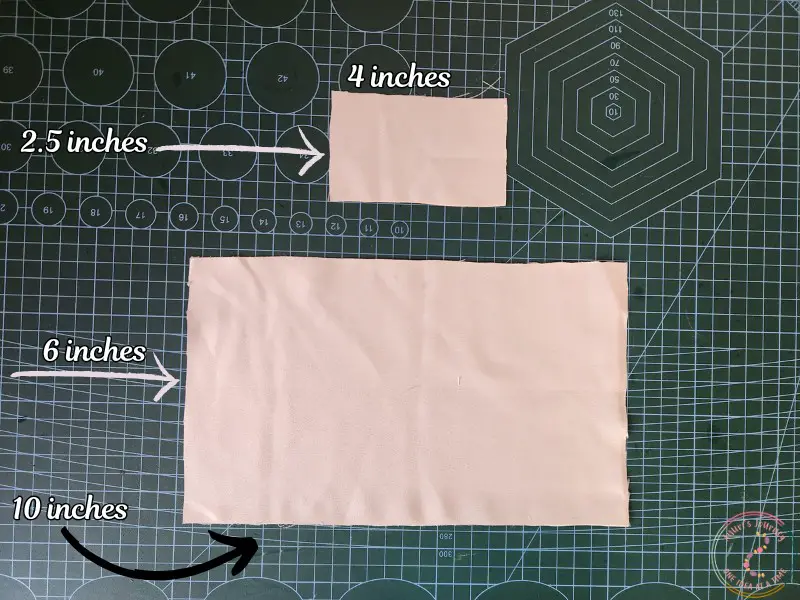
Cut one piece of fabric measuring 10 inches × 6 inches.
Also cut a smaller piece for the band that measures 4 inches × 2.5 inches.
2. Fold and shape the main bow: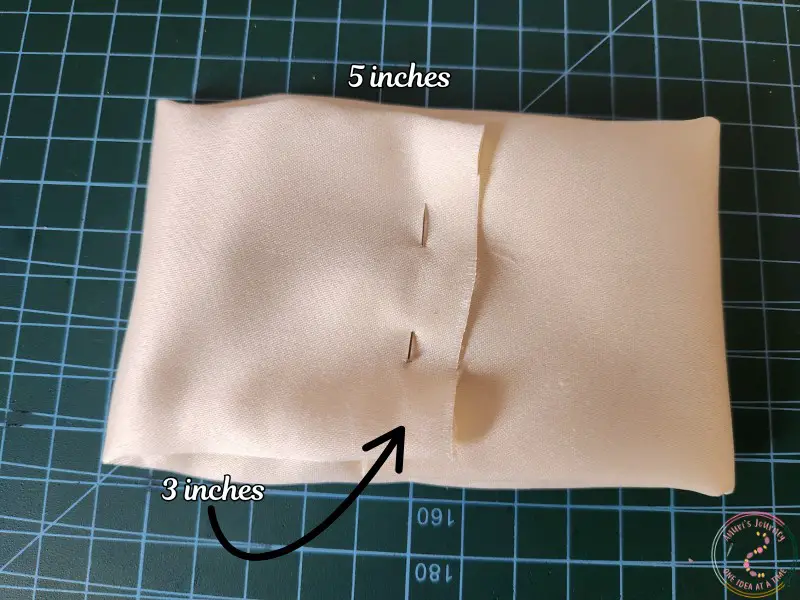
Take the larger piece and fold it in half lengthwise, and then widthwise so it becomes approximately 5 inches × 3 inches.
Find the middle point of the folded fabric and secure it with affix pins.
3. Stitch the center:
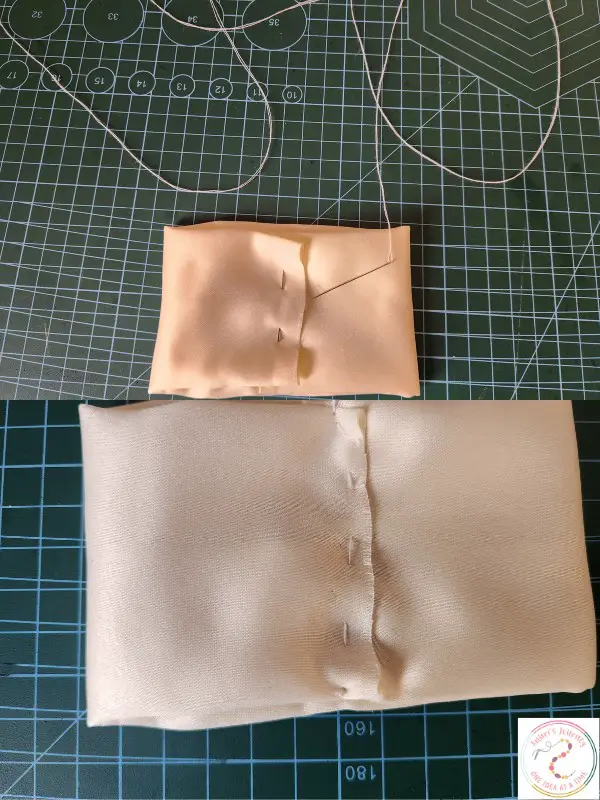
Thread your needle and use a few small hand stitches to secure the center point where the fabric layers meet. This will give your bow that gathered shape.
4. Wrap and tie the middle:
Next, gently fold the middle of the bow accordion-style to form even pleats.
Wrap it tightly with a bit of thread, yarn, or thin rope to hold the shape. Secure with a knot.
5. Create the center band: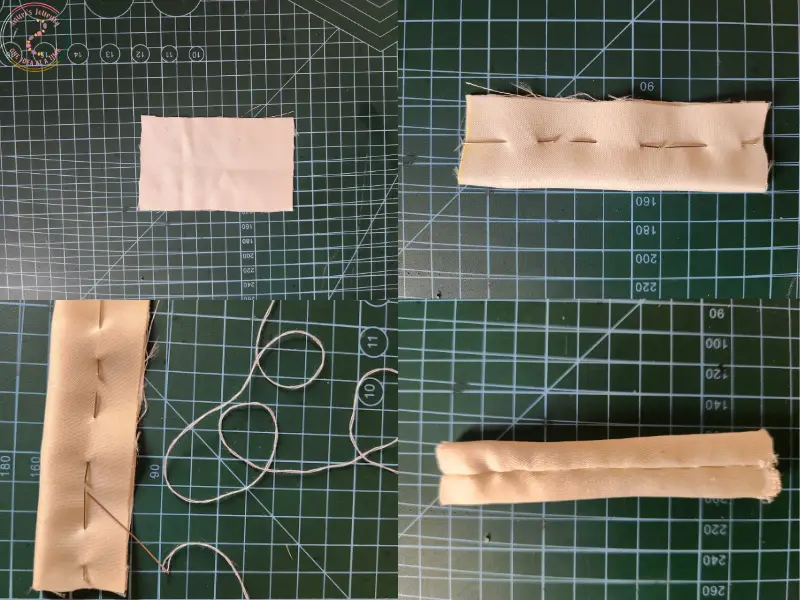
Take your small fabric strip (4″ × 2.5″), fold it in half lengthwise, and stitch along the long edge with a ¼-inch seam allowance.
Turn it right side out so you have a neat fabric tube.
6. Wrap the bow’s center:
Use this fabric tube to wrap around the center of the bow, covering the tied thread. Tuck the raw edges under and stitch the band at the back to secure it.
7. Attach the hair pin:
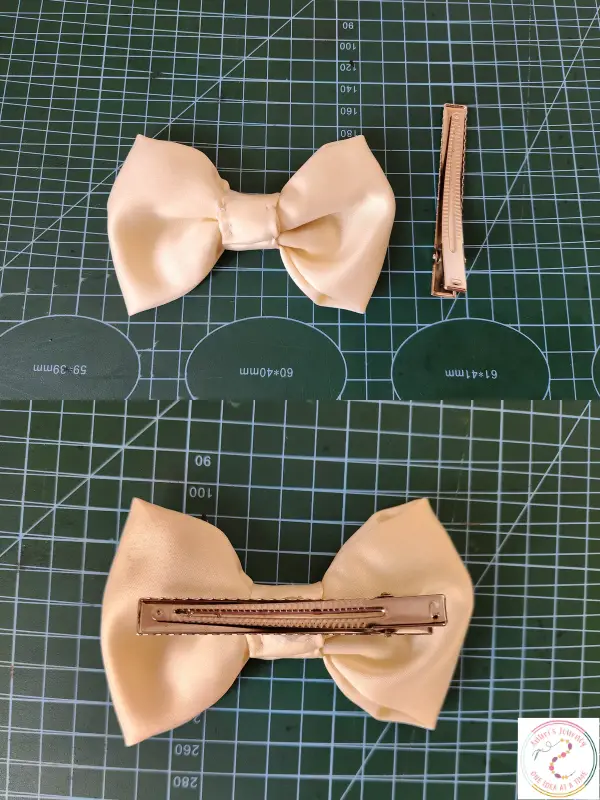
Place a small dot of hot glue on the back of the bow and press your hair pin or clip onto it. Let it cool and dry completely.
8. Add some sparkle:

If you want to add a little extra magic, glue or stitch on an appliqué, charm, or even a button right at the center of the bow.
And Your Fabric Hair Clip is Done.
Isn’t it adorable? This project is such a fun way to use up fabric scraps or match accessories to outfits. You can whip up a few in under 30 minutes and give them out as party favors, gifts, or just keep them as part of your growing handmade collection.
Little things like this remind me why I love sewing and crafting—it’s not just about making things, but about making memories too.