There’s something truly charming about hair bows, especially the ones you make by hand. As a mom of two little girls, I’ve come to appreciate how a simple bow can brighten up any outfit and add that extra sprinkle of sweetness. Whether you’re making these for your kids, as a gift, or just to add a personal touch to your accessories, this DIY fabric hair bow tutorial is a fun and satisfying sewing project you can complete in under an hour.
The best part, you don’t need a lot of fabric, and it’s beginner-friendly—even if you’re just starting to get comfortable with a sewing machine. Let’s get right into it.
Materials Needed
½ yard of fabric (cotton works best)
¼ yard of light fusible interfacing
Sewing machine
Matching sewing thread
A pair of fabric scissors
Hand sewing needle
Elastic hair band
Pressing iron
Straight pins
Instructions
Step 1: Cut the Main Bow Pieces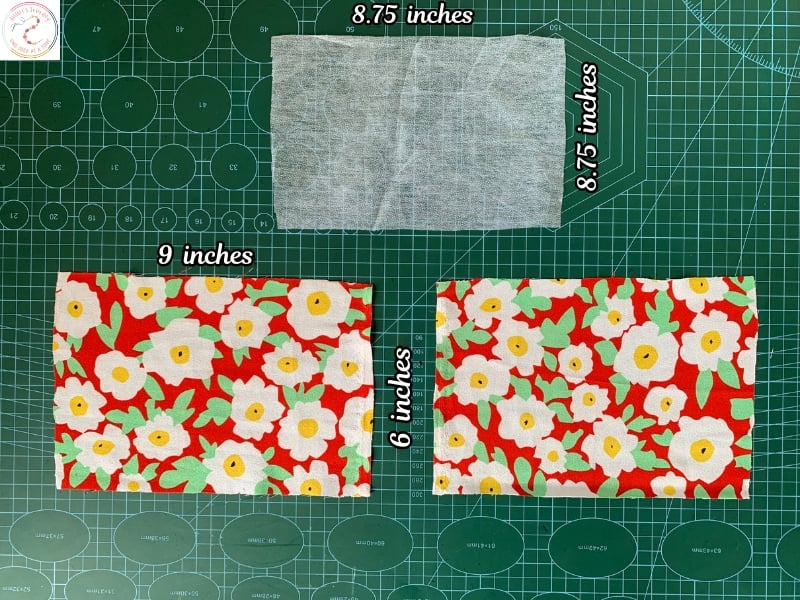
Cut two rectangles of fabric, each measuring 9” × 6”.
Cut one piece of fusible interfacing, measuring 8.75” × 5.75” (that’s ¼ inch smaller on all sides).
Step 2: Fuse the Interfacing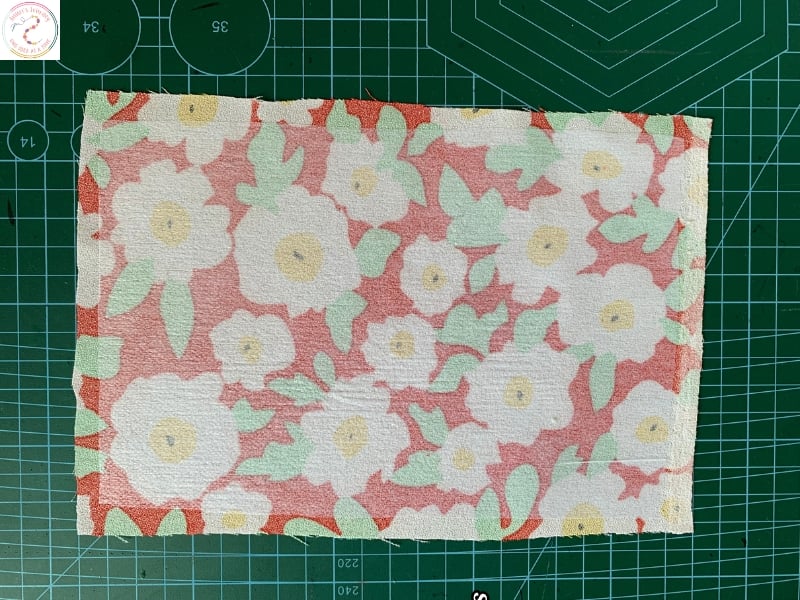
Place the interfacing on the wrong side of one fabric piece.
Gently press with a hot iron (no steam) to fuse it in place.
Step 3: Sew the Bow Base
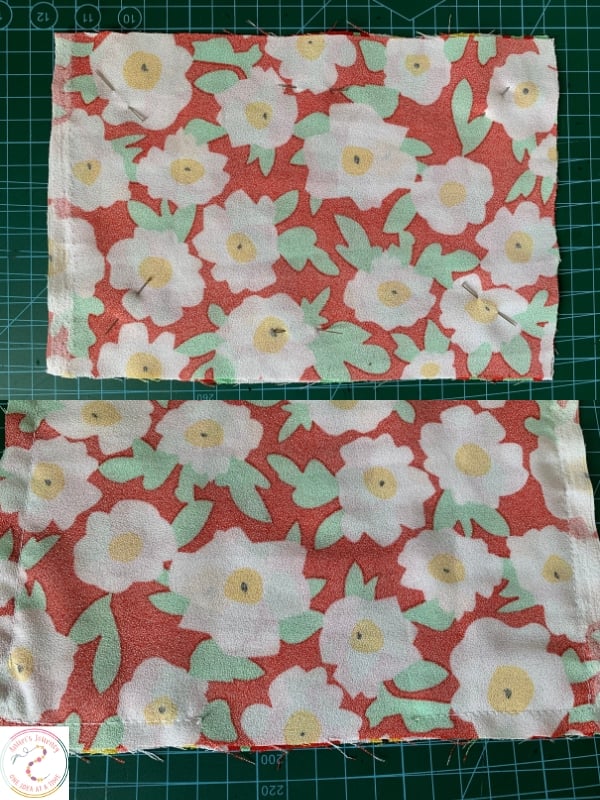
Place the two fabric pieces right sides together, and pin them around the edges.
Sew all around using a ¼ inch seam allowance, leaving a small opening (about 2”) on one long side for turning.
Step 4: Turn and Press
Turn the sewn piece right side out.
Use a blunt tool or your fingers to push out the corners neatly.
Fold in the raw edges at the opening and press flat.
Sew a neat topstitch around the entire rectangle to close the opening and add a polished look.
Step 5: Make the Center Band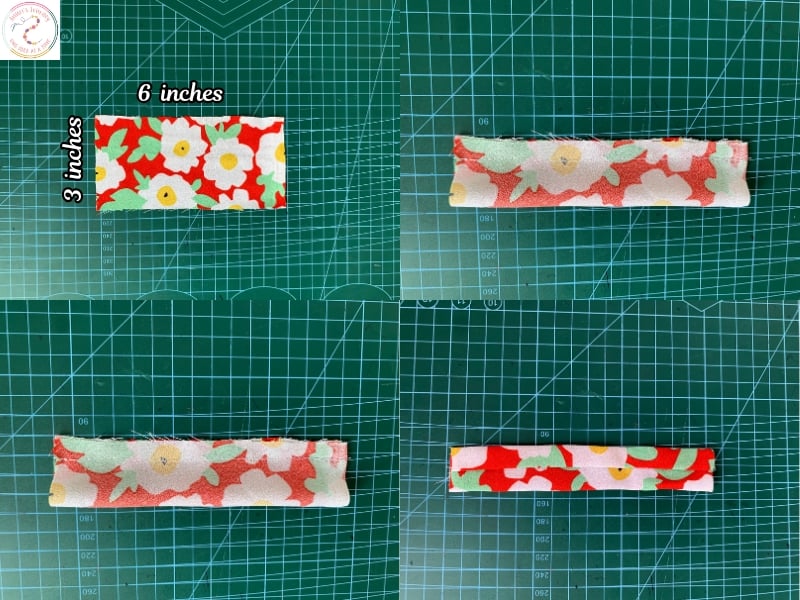
Cut another piece of fabric measuring 6” × 3”.
Fold it in half lengthwise, right sides facing, and sew along the long edge with a ½ inch seam allowance.
Turn it right side out.
Position the seam line at the center back, then press flat with an iron. This will serve as the middle band that wraps around the bow.
Step 6: Add Decorative Fold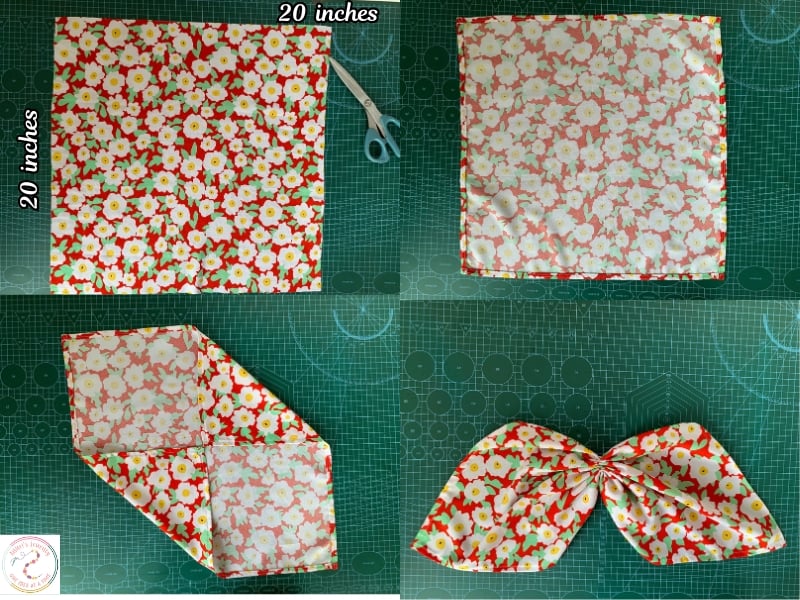
Cut a larger square piece of fabric measuring 20” × 20”.
Fold all four edges in by ¼ inch and topstitch to give it a clean finish.
Bring in two diagonal corners (like folding a napkin into a bow shape).
Using a needle and thread, hand-sew the center where the corners meet, pulling tightly to create a nice gathered fold.
Step 7: Assemble the Bow
Take the rectangular bow base and fold it at the center like an accordion (you can pinch and pleat until you get a nice bow shape).
Hold this shape in place with a pin or a quick stitch.
Step 8: Combine the Layers
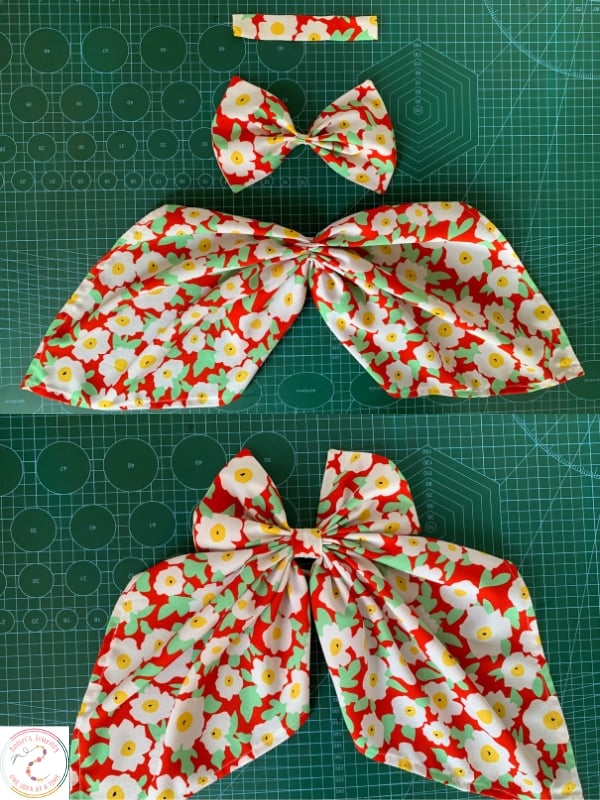
Stack the pleated rectangle on top of the diagonally gathered fabric piece.
Hold both together at the center and wrap with the small fabric band you made earlier.
Step 9: Add the Hair Band
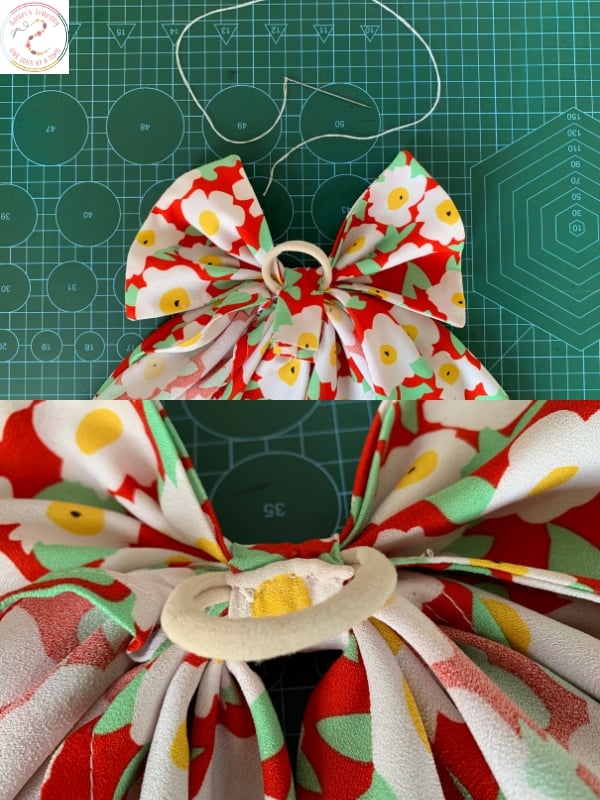
At the back, fold the band neatly and insert the elastic hair band underneath it.
Using your hand sewing needle, securely stitch the ends of the center band in place, attaching the elastic hair band as you go.
Your Fabric Hair Bow is Ready.
You’ve just made a stunning handmade fabric hair bow! It’s bold, cute, and full of character—just like the person who will wear it. Don’t stop at one; try experimenting with different fabrics, patterns, and sizes to create a collection of bows for every outfit or occasion.
You may also like: