This site contains affiliate links. I may earn a small commission, at no cost to you.
There’s something incredibly heartwarming about sewing clothes for a baby. Maybe it’s the delicate size of the pieces, the joy of picking out adorable fabric, or just knowing your hands created something cozy and cute for a little one. I remember the first time I made a baby frock dress—my heart melted when I held up the finished piece. It was tiny, charming, and full of love. If you’ve ever wanted to sew a handmade dress for a baby, this tutorial is perfect for you!
In this post, I’ll guide you step-by-step on how to sew a classic, sleeveless baby frock dress that fits babies aged 6 to 12 months. It features a lined bodice, gathered skirt, and a neat zipper at the back. Even if you’re new to sewing, you can absolutely make this with patience and practice.
Materials You’ll Need: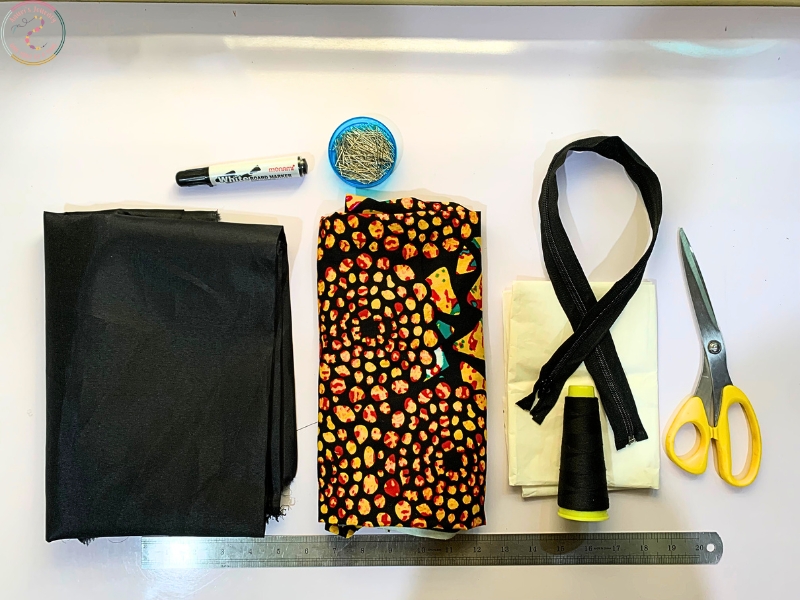
2 yards of fabric (1 yard for the main fabric, 1 yard for the lining)
Sewing machine
Sewing thread
Scissors
Pins or clips
Measuring tape or ruler
Iron and ironing board
Paper and pencil (to draft the pattern)
8–9 inch zipper
Measurements (Standard for 6–12 Months)
Chest: 18–19 inches
Shoulder to waist: 6–7 inches
Total frock length: 15–17 inches
Step-by-Step Sewing Guide
1. Draft the Pattern
Front Bodice
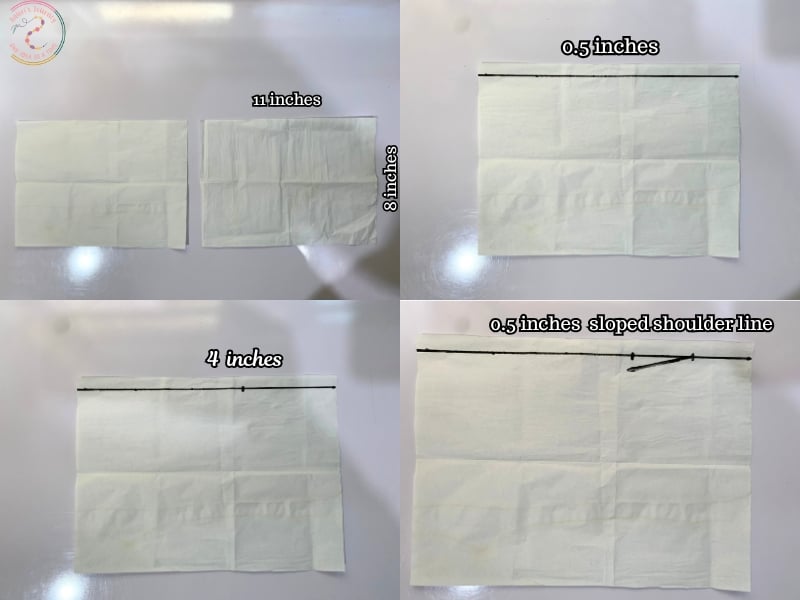

1. Use a paper size 11” × 8” for the front pattern.
2. Mark 0.5″ down from the top and draw a horizontal line. This line is your starting line and will serve as seam allowance.
3. From one end of the line, mark 4″ for the shoulder width (half of 8”).
4. Drop the shoulder by 0.5” and draw a slanted shoulder line.
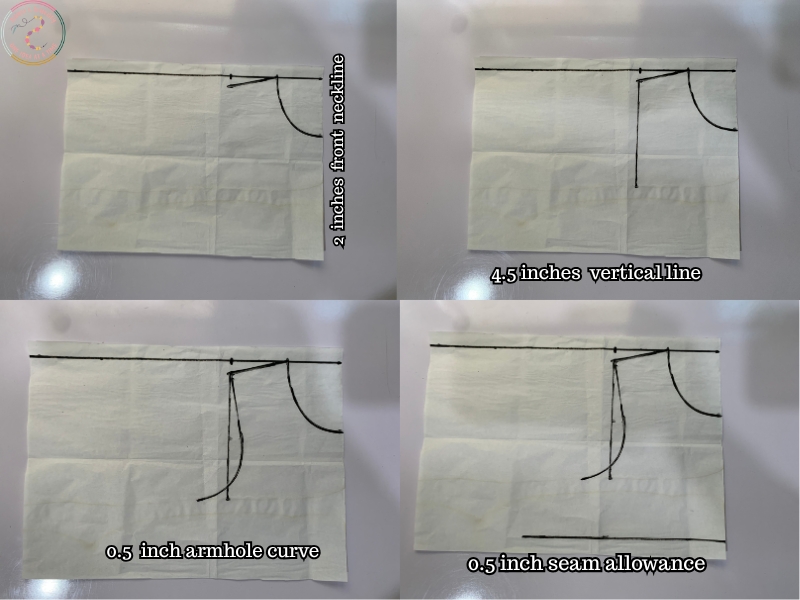
5. From the top edge, measure 2″ down and curve for the front neckline.
6. Measure 4.5” down from the shoulder tip to mark the armhole depth. Draw a vertical line down, then find its midpoint and go in by 0.5”, then curve to create the armhole.
7. From the top line, mark 7” down to create the waistline. Mark 5” horizontally from the edge and connect to shape the bodice width.
8. Add 0.5” seam allowance around the pattern, excluding the center fold edge.
Your front pattern is ready.
Back Bodice
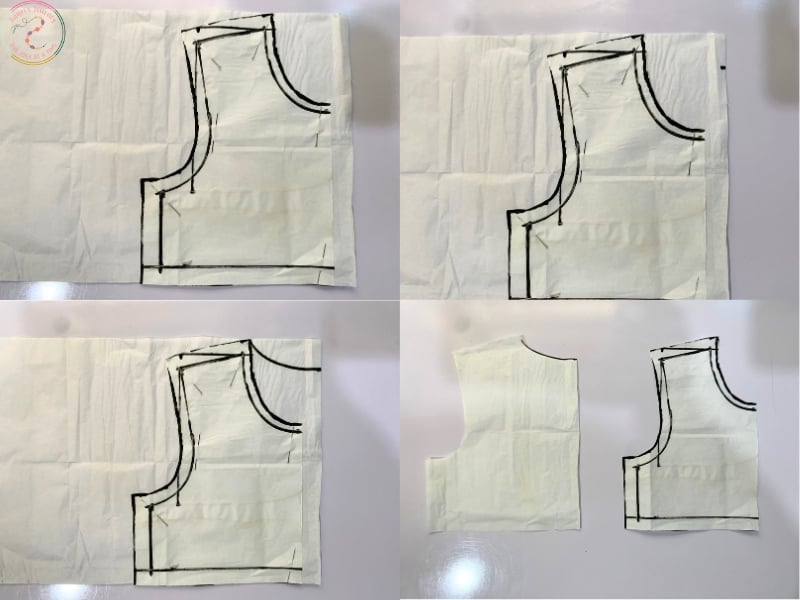
1. Take another paper and place the front pattern on it, allowing for a 0.5” extension at the center back (for zipper allowance).
2. Adjust the neckline to be 1” deep (instead of 2” like the front).
3. Trace the rest of the pattern and cut out.
2. Cutting the Fabric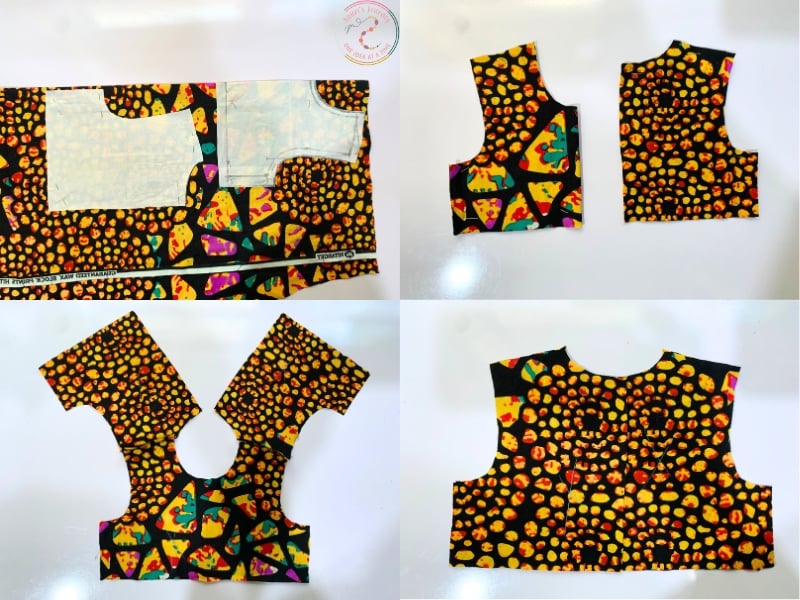
1. Fold your fabric and place the front pattern on the fold.
2. Place the back pattern beside it (not on fold).
3. Cut out the main fabric and repeat the same for the lining.
4. Cut a skirt piece (main fabric) measuring 60” × 12”.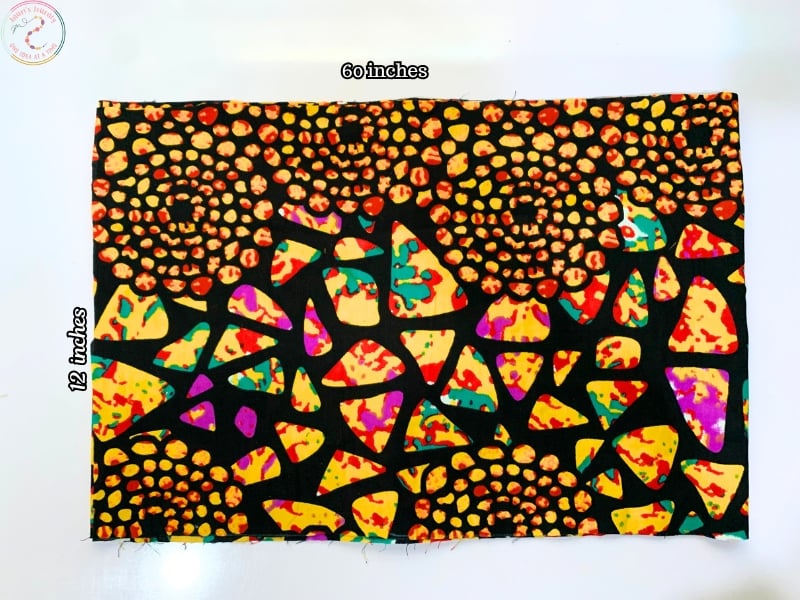
5. Cut the skirt lining slightly shorter — 60” × 11”.
3. Sew the Bodice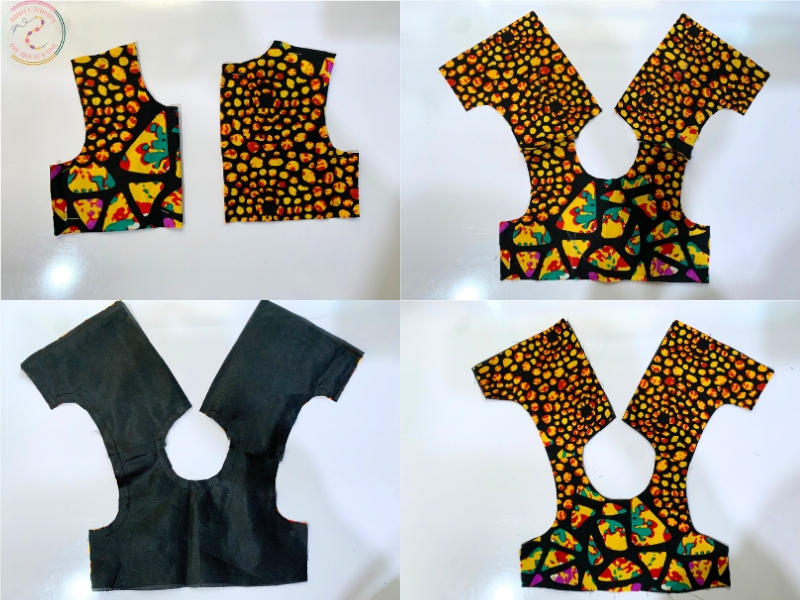
Join Front & Back Bodices:
With right sides together, sew the shoulder seams of the main fabric.
Repeat for the lining.
Join Lining to Main:
Place main bodice and lining right sides together.
Sew around neckline and armholes.
Clip curves, turn inside out from the shoulders, and press flat.
4. Sew Side Seams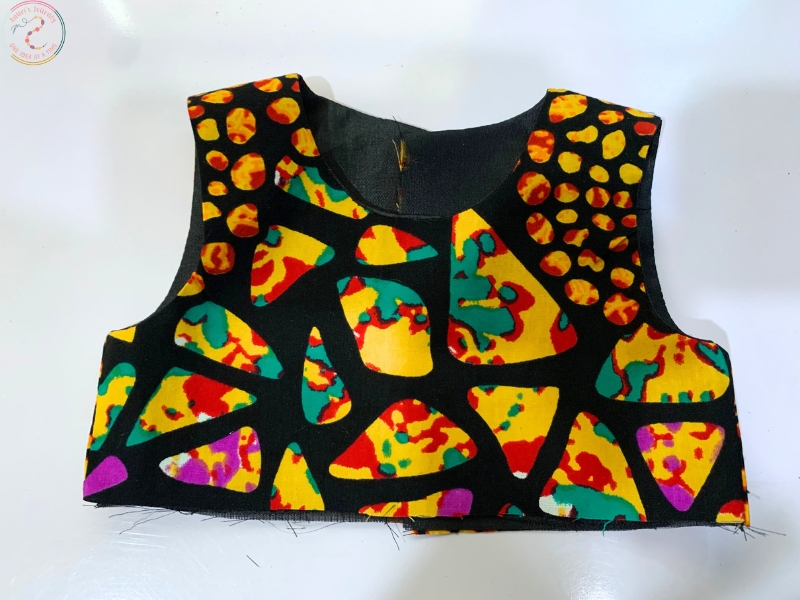
Open the joined bodice and align side seams — main to main, lining to lining.
Sew the side seams in one continuous line.
Turn right side out and give it a good press.
5. Prepare & Attach the Skirt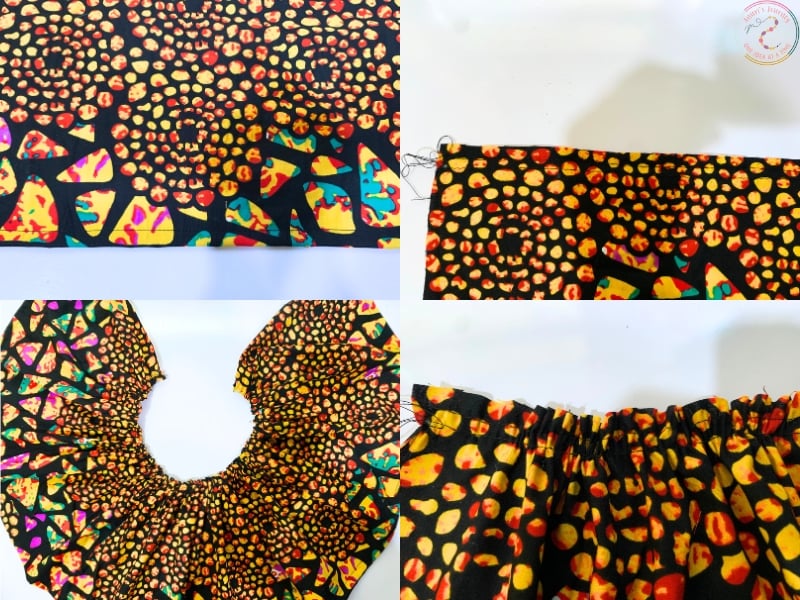

Hem the Skirt:
Fold bottom edge 0.5” twice and sew to create a clean hem on both the main fabric and the lining.
Gather the Skirt:
Sew two rows of long stitches at the top edge.
Pull threads gently to gather until it matches the width of the bodice.
Repeat for the lining.
Layer the skirt and skirt lining (wrong sides together), and treat them as one piece.
Attach Skirt to Bodice:
Pin the gathered skirt to the bottom of the bodice (right sides together).
Sew with a 0.5” seam allowance and remove pins.
Press the seam upward.
6. Add Back Zipper Closure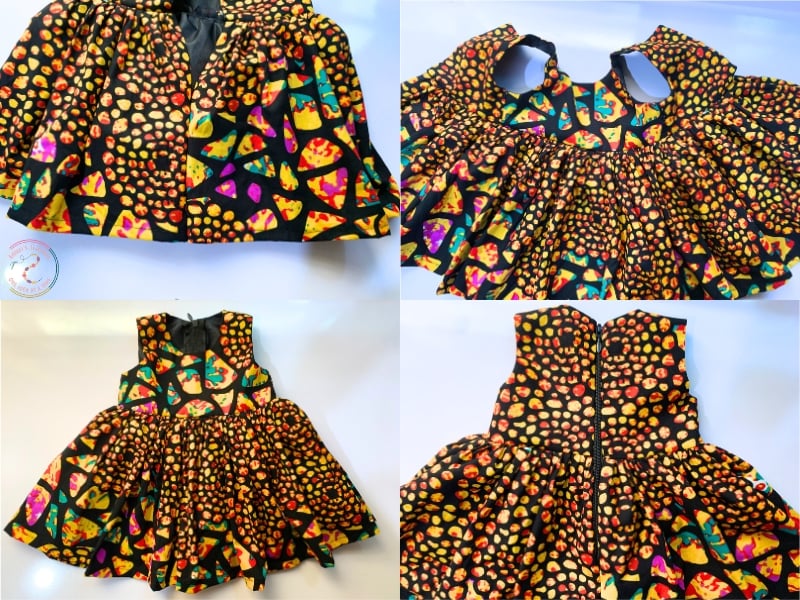
1. Sew the back opening from the hem up to about 6”.
2. Insert the zipper into the remaining back opening and sew in place using a zipper foot.
3. Press flat for a neat look.
7. Finishing Touches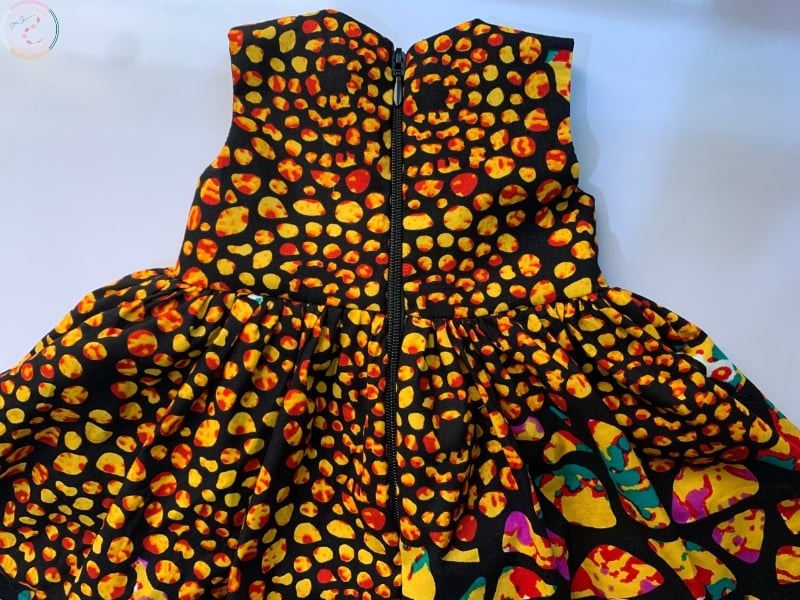
Topstitch around the neckline and armholes if desired.
Add embellishments like bows, lace, buttons, or embroidery for a unique finish.
Give the entire frock one final press.
And There You Have It—A Beautiful Baby Frock Dress.
You’ve just sewn a custom, handmade baby frock dress! Whether you’re gifting it to a little one, sewing for your own baby, or adding it to your handmade collection, this project is full of charm and satisfaction. Don’t forget to take pictures and celebrate your finished masterpiece.
You may also like: