There is something so fulfilling about combining creativity with functionality. That’s exactly what happened when I decided to make my own yoga mat carrier. I didn’t want to keep stuffing my mat under my arm or balancing it awkwardly in the car. I wanted something simple, stylish, and handmade, and that’s how this DIY tote-style yoga mat carrier came to life.
If you enjoy yoga, Pilates, or even outdoor workouts, this tutorial will walk you through how to make your own beginner-friendly yoga mat carrier that looks good and works great. It’s lined for added strength, comes with a comfortable strap, and has a drawstring closure to keep your mat secure.
Whether you’re sewing this for yourself, gifting it to a yoga lover, or adding it to your handmade shop, you’ll love how easy and functional it is.
Materials You’ll Need:
Outer fabric: 20” x 30”
Lining fabric: 20” x 30”
Strap fabric: 4” x 32” (or use cotton webbing)
Drawstring strap fabric: 3” x 32”
Scissors
Pins or clips
Sewing machine
Matching thread
Pressing iron (optional but recommended)
Safety pin
Fits a standard rolled yoga mat comfortably.
Step-by-Step: Make Your Own Yoga Mat Carrier
1. Cut and Prepare Fabric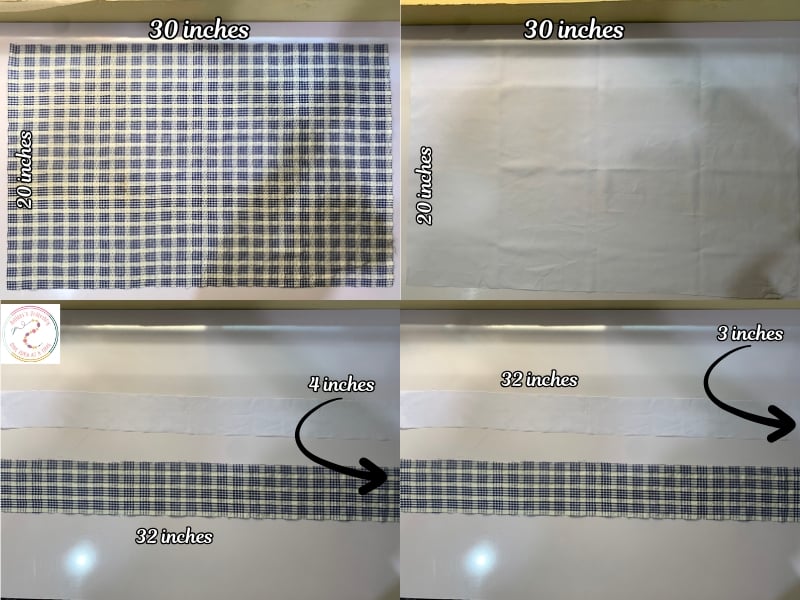
Outer Fabric: Cut a rectangle measuring 20” x 30”.
Lining Fabric: Cut another rectangle of the same size.
Strap: Cut a strip measuring 4” x 32” (or prepare your webbing).
Drawstring Strap: Cut a strip measuring 3” x 32”.
2. Sew the Outer Shell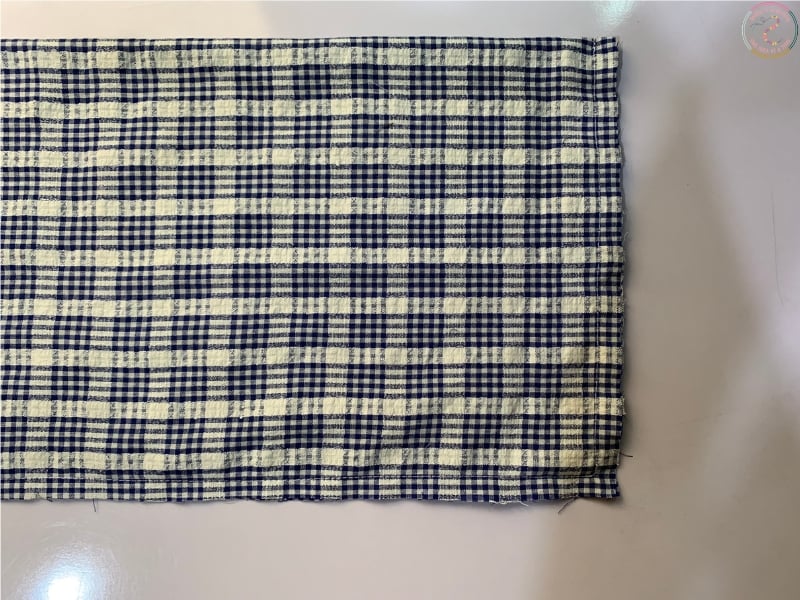
1. Fold the outer fabric in half lengthwise (right sides together) to create a 10” x 30” piece.
2. Sew along the long edge and one of the short edges with a 0.5” seam allowance.
3. This creates a tube shape with one closed end — this will be the bottom of the bag.
3. Make the Lining
1. Repeat the same steps for the lining fabric:
Fold in half lengthwise.
Sew down the long edge and one short end — but leave a 4” gap in the side seam for turning the bag later.
2. This lining will go inside the outer shell and make the bag stronger and neater.
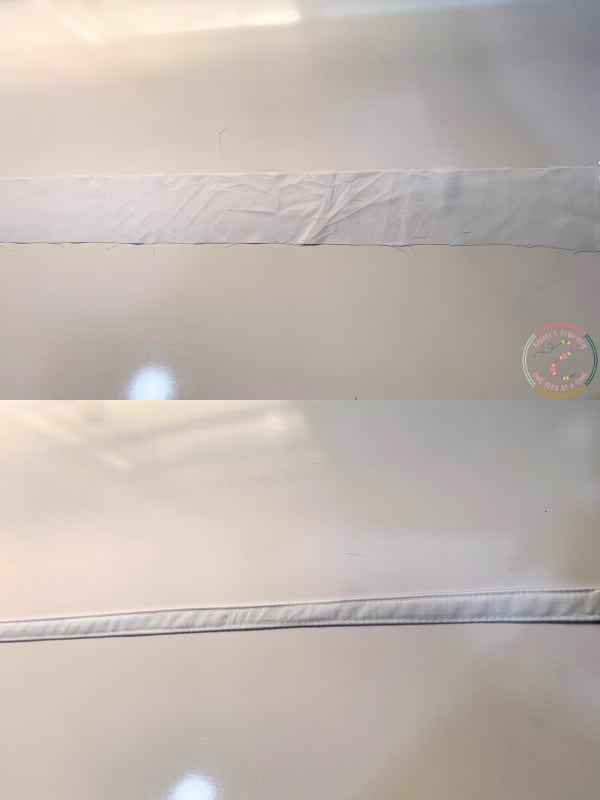
4. Create and Attach the Strap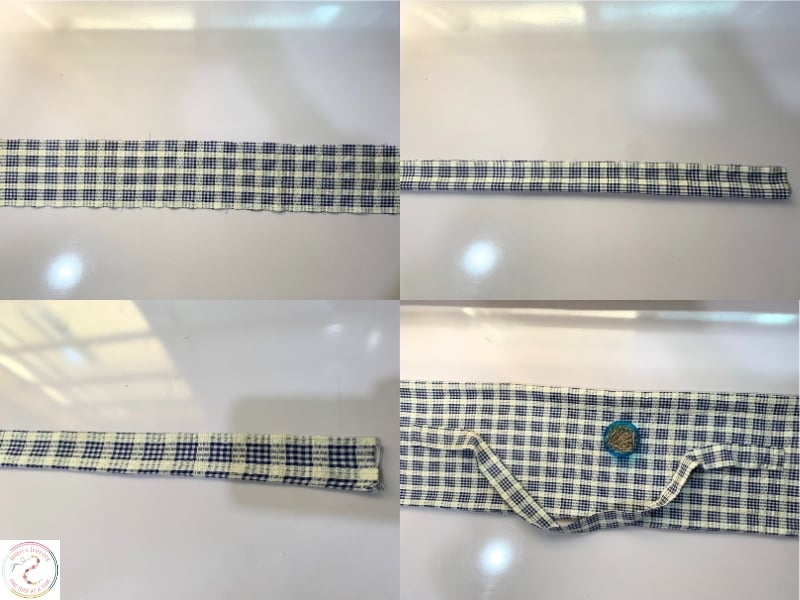
1. Fold the 4” x 32” strap piece in half lengthwise (right sides together) and sew down the long edge.
2. Turn the strap right side out and press flat.
3. Pin the strap to the outer fabric tube:
Place one end 3” from the top edge.
Place the other end 2” from the bottom edge.
Both should be centered on the same side of the bag, about 5” away from the side seam.
4. Secure with pins for now.
5. Assemble the Outer and Lining Pieces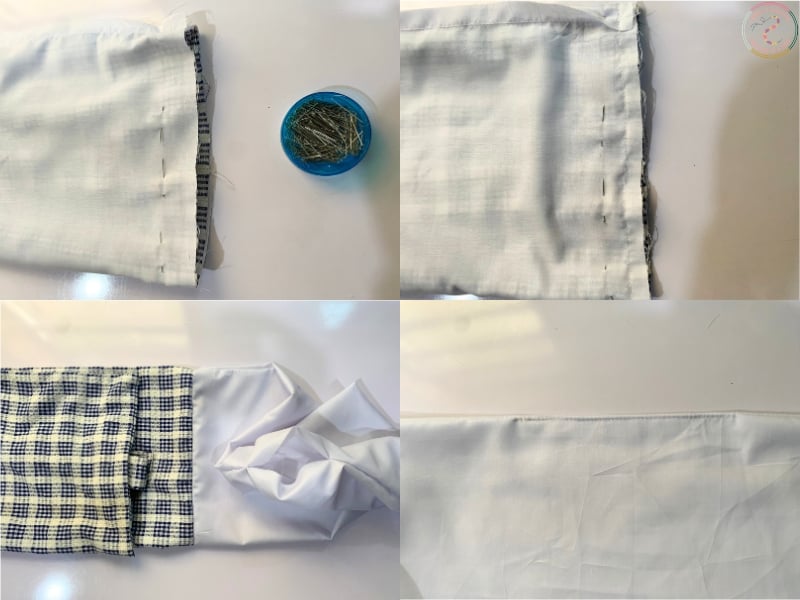
1. Turn the outer fabric right side out.
2. Place it inside the lining tube (which is still wrong side out), aligning side seams and matching top edges.
3. Pin all around the top edge, then sew with a 0.4” seam allowance.
4. Turn the bag right side out by pulling everything through the 4” opening left in the lining.
5. Press the entire bag, especially the seams, for a crisp finish.
6. Topstitch the opening in the lining to close it.
6. Prepare the Drawstring Strap
1. Take the 3” x 32” fabric strip and fold it lengthwise to make a 0.75” strap:
Fold in half, then fold each edge inward and topstitch along both sides.
2. You now have a long drawstring strap ready to use.
7. Make a Channel for the Drawstring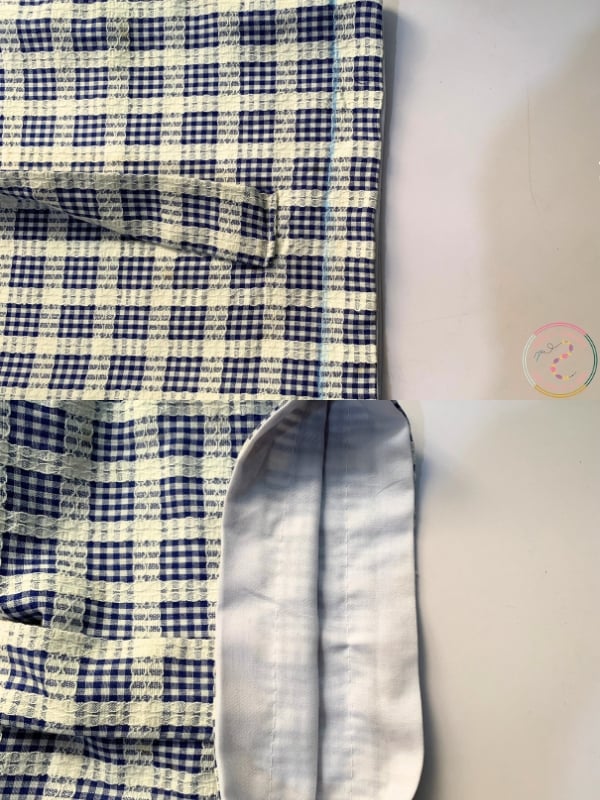
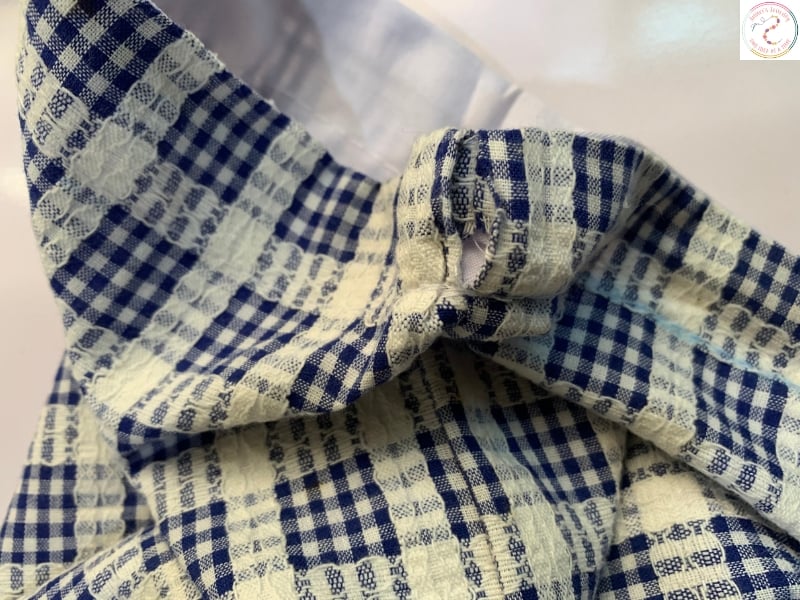
1. Mark 1” from the top edge of the bag all around. This will be the casing line.
2. Sew a straight stitch along that line, creating a channel.
3. On the vertical seam line, open a small hole (using seam ripper or scissors) where the drawstring will enter.
8. Insert the Drawstring

1. Attach a safety pin to one end of the drawstring strap.
2. Insert it into the casing through the hole and push it all the way around until it comes out the other side.
3. Adjust the strap evenly on both sides.
Final Touch:

Insert Your Mat & Go.
Slide your rolled yoga mat inside, pull the drawstring to secure the top, and swing it over your shoulder, your new yoga mat carrier is ready for use.
Why You’ll Love This Carrier
Beginner-friendly sewing project
Reusable and washable
Lightweight yet durable
Great gift for yoga lovers
Can be made in fun prints or calming neutrals
You may also like: