One thing every makeup lover needs, besides flawless brushes, is a reliable and organized way to store them. Personally, I got tired of my brushes rolling around in my makeup bag or getting dusty on my vanity. That’s why I decided to sew a simple yet stylish makeup brush roll, and I haven’t looked back since.
This sewing project is not only beginner-friendly, but it’s also the perfect mix of practical and pretty. With a roll-up design, multiple pockets, and a secure strap, it keeps your brushes neatly stored whether you’re traveling or tidying up your beauty space at home.
Let’s dive into this fun and functional DIY.
Supplies You’ll Need
Main fabric (cotton or canvas): ½ yard
Lining fabric: ½ yard
Pocket fabric (can match or contrast): 18” x 8”
Fusible interfacing: 18” x 10” (adds structure)
Ribbon or strap: 34” long (or make your own)
Sewing machine
Thread
Pins or clips
Scissors
Measuring tape or ruler
Tailor’s chalk or fabric marker
Pressing iron
Step-by-Step Instructions
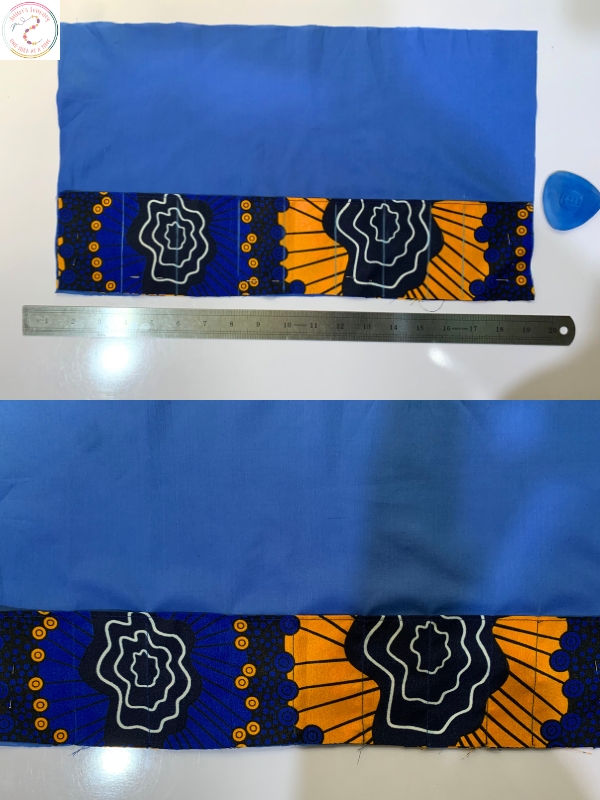
1. Cut Your Fabric
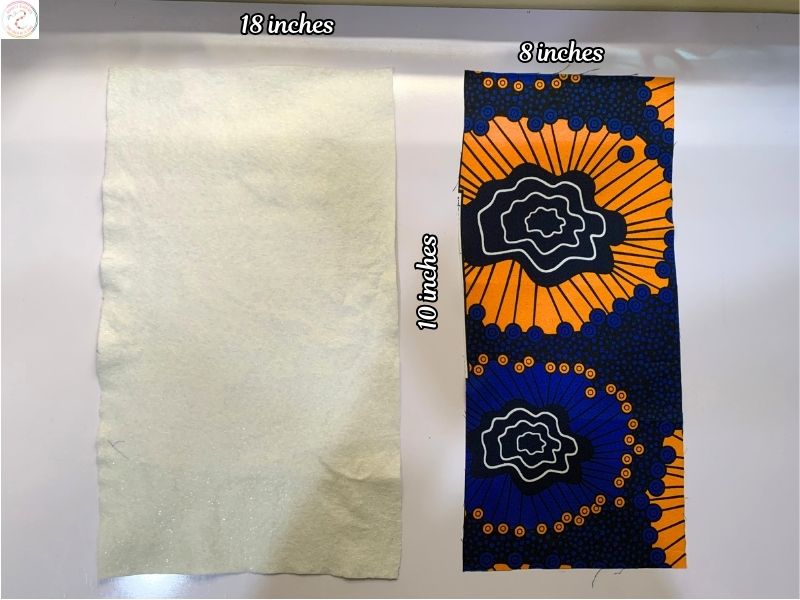

Outer fabric: 18″ wide × 10″ tall
Lining fabric: 18″ × 10″
Pocket fabric: 18″ × 8″
Interfacing: 18″ × 10″
Strap: 3” × 34” (or use ready-made ribbon)
Feel free to adjust the size based on how many brushes you want the roll to hold.
2. Prepare the Pocket

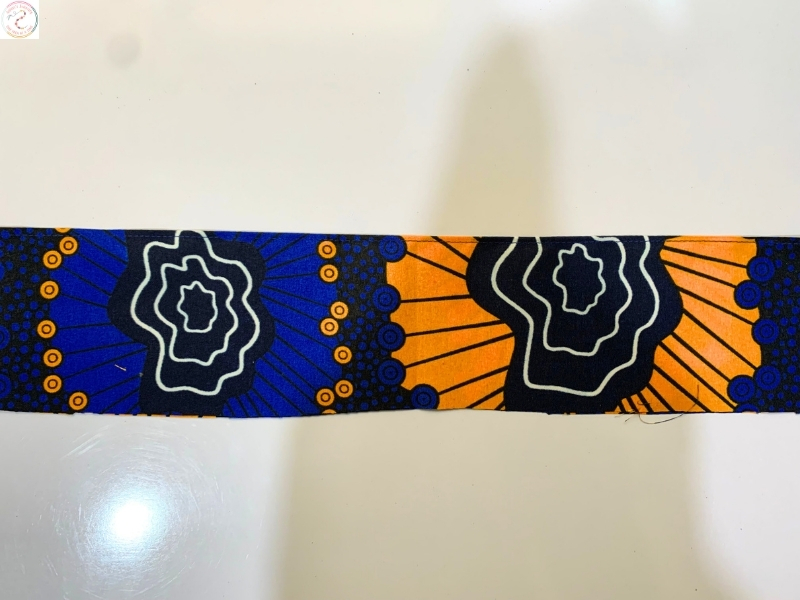
1. Fold the pocket fabric in half lengthwise (wrong sides together). It will now measure 18” × 4”.
2. Press the fold flat with an iron.
3. Topstitch along the folded edge for a clean, finished look, this will be the top of your brush pockets.
3. Attach the Pocket to the Lining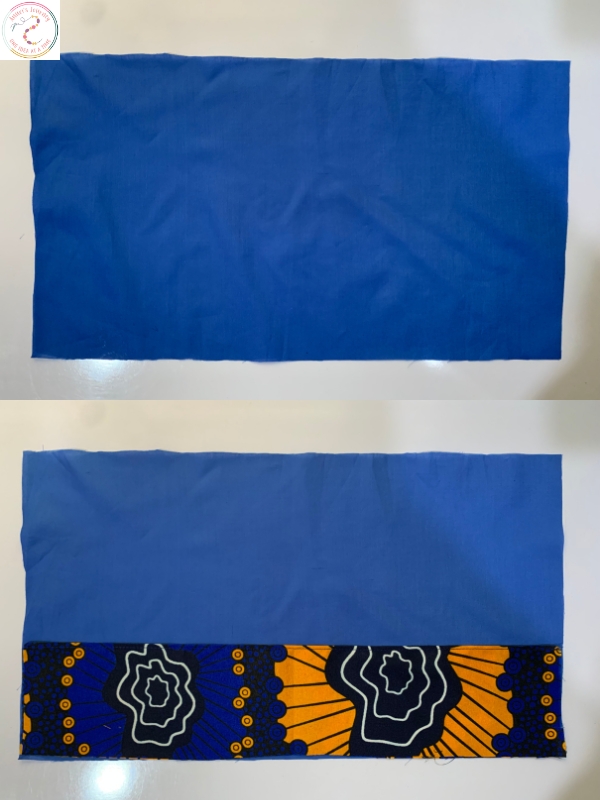
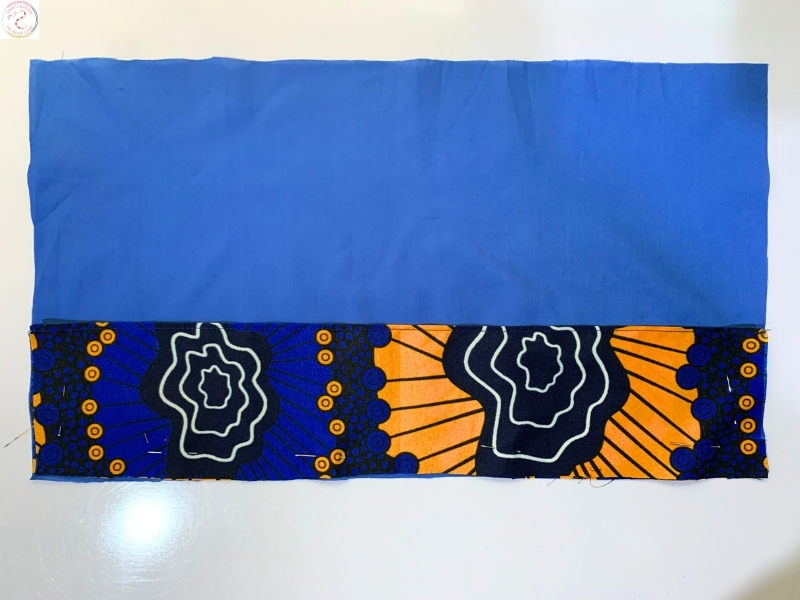
1. Lay the lining fabric right side up.
2. Place the folded pocket piece along the bottom edge, aligning raw edges.
3. Pin in place along the sides and bottom.
4. Create Brush Slots
1. Using a ruler and chalk or fabric pen, mark vertical lines along the pocket.
2. Space the lines 1″ to 2.5″ apart depending on the sizes of your brushes. Customize the spacing as needed.
3. Sew along the lines from top of pocket down to the bottom to form individual brush slots.
5. Make the Strap
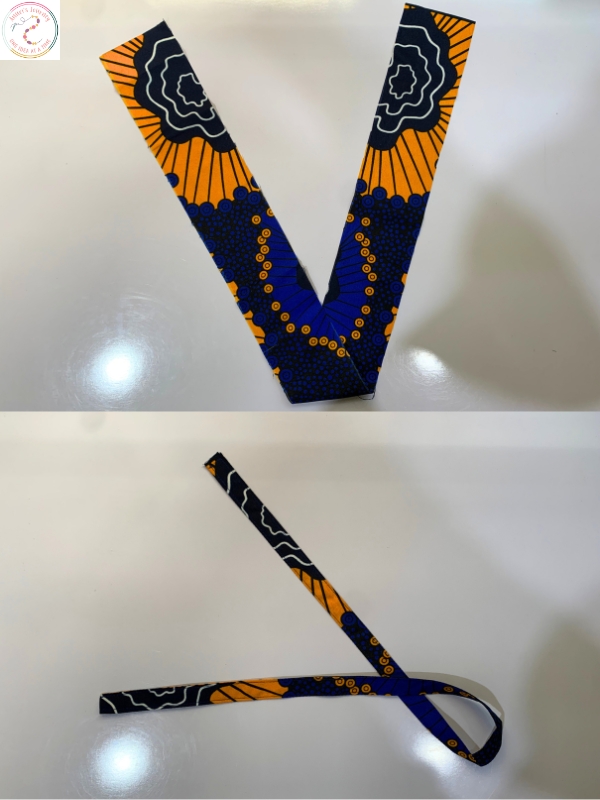
1. Take your 3” x 34” fabric strip.
2. Fold it in half lengthwise, then fold the raw edges in again (like bias tape).
3. Stitch along the open side to make a narrow strap measuring about 0.75” wide.
Alternatively, you can use ribbon or cotton webbing.
6. Assemble the Brush Roll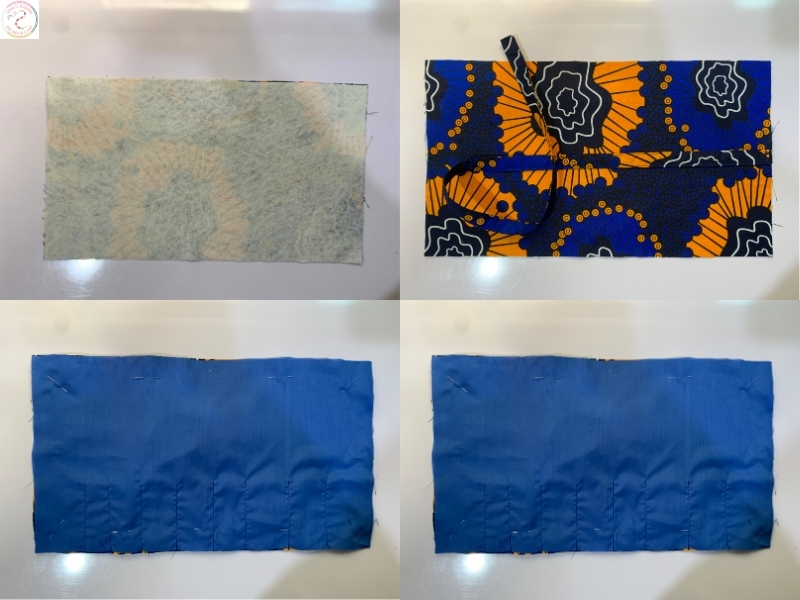
1. Fuse the interfacing to the wrong side of the outer fabric using an iron.
2. Stitch one end of the strap onto the side edge of the outer fabric (about halfway down the short side).
3. Place the outer fabric and lining (with pocket attached) right sides together.
4. Pin all the layers in place.
7. Sew Everything Together
1. Sew all the way around the rectangle using a ¼” seam allowance.
2. Leave a 3″ gap on one side for turning.
3. Clip the corners to reduce bulk.
4. Turn the entire piece right side out through the gap.
5. Use a pencil or turning tool to push out corners neatly.
6. Press the entire roll flat with your iron.
7. Topstitch all the way around the edge to close the gap and give it a professional finish.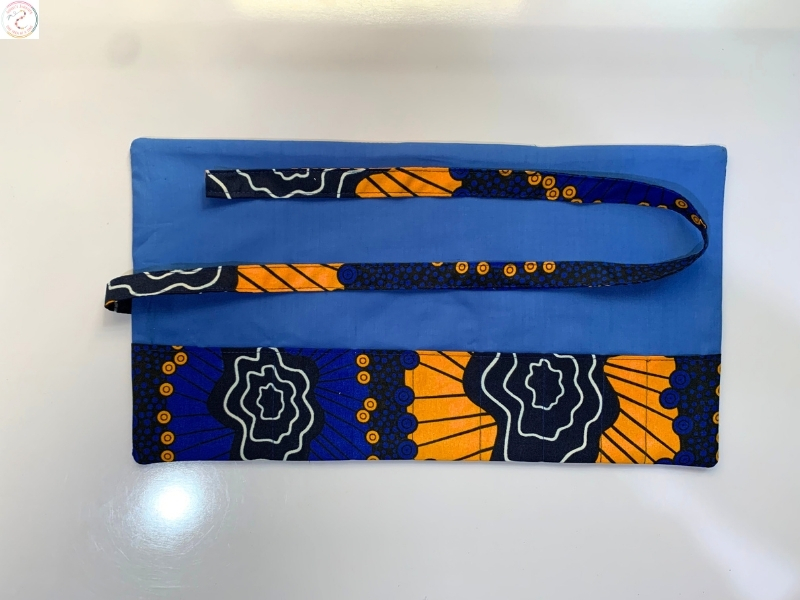
Final Touch: Roll It Up.
Place your brushes inside the slots, fold the top of the roll down to protect the bristles (optional), roll everything up from one side, and tie it securely with the strap.
Why You’ll Love This Makeup Brush Roll
Keeps brushes clean, organized, and protected
Travel-friendly and compact
Totally customizable, match your personal style
A great DIY gift idea for makeup lovers
Perfect stash buster for leftover fabric.
You may also like: