There’s something incredibly rewarding about making your own essentials, especially when they’re both practical and pretty. As someone who works on her laptop every day, I knew I needed a laptop sleeve that was both protective and personalized. But instead of buying one, I decided to make it myself, and I haven’t looked back since.
This fabric laptop sleeve is one of my favorite quick sewing projects. It’s simple, beginner-friendly, and gives you the flexibility to choose fun fabrics and create a snug fit for your laptop. Whether you’re looking to protect your device on the go or just want something cuter than a plain black sleeve, this tutorial will guide you step-by-step through the process of making your own padded laptop sleeve, right at home.
Materials Needed:
1 yard of fabric (½ yard for the outer/main fabric, ½ yard for the lining)
Thick gum padding (½ yard)
Sewing machine
Sewing thread
Affix pins
Scissors
Pressing iron
Measuring tape
Tailor’s chalk or fabric marker
Velcro strap (for the closure)
Step-by-Step Instructions:
1. Cut your fabric pieces:

Measure your laptop. For this example, we’re using a laptop that’s 11″ tall and 15″ wide.
To get your fabric size, double the vertical measurement (11″ × 2 = 22″) and add 5 inches for flap and seam allowance:
22″ + 5″ = 27″ (height)
Horizontal: 15″ + 1″ = 16″ (width)
Cut out both the main fabric and lining fabric to measure 27” × 16” each.
2. Create the flap shape: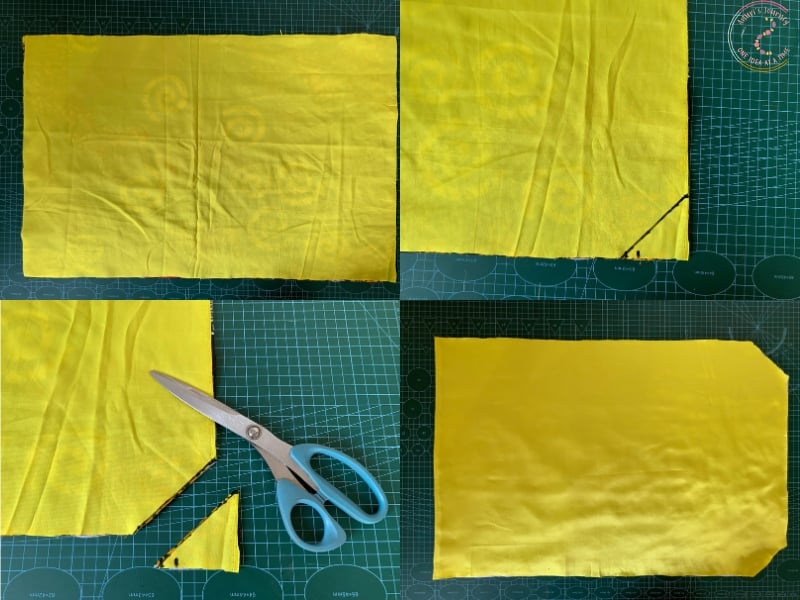
On the top edge of the fabric, measure 2.5 inches inward from the corner and 2.5 inches down along the edge. Mark both points, then draw a curved line connecting them and cut along it. Repeat this on the other top corner of both the main fabric and lining to create a rounded flap.
3. Add padding for protection: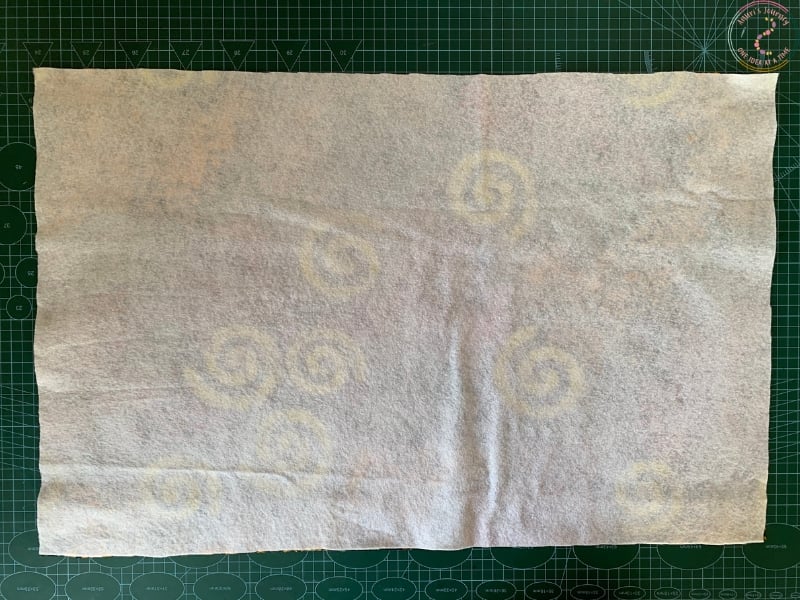
Use the main fabric as a guide to cut the same shape from the thick gum padding.
With the wrong side of the main fabric facing up, use a hot pressing iron to fuse the padding securely onto the back.
4. Optional quilting detail (for added texture):
To create a quilted effect, mark horizontal and vertical lines 3 inches apart on the right side of the main fabric. Stitch along the lines using your sewing machine. This step adds a decorative, padded finish but can be skipped if you prefer a plain look.
5. Join the main fabric and lining:
With right sides facing each other, align the main fabric and lining. Pin along the bottom edge and sew with a ½-inch seam, leaving a small opening in the middle for turning later.
6. Press and fold: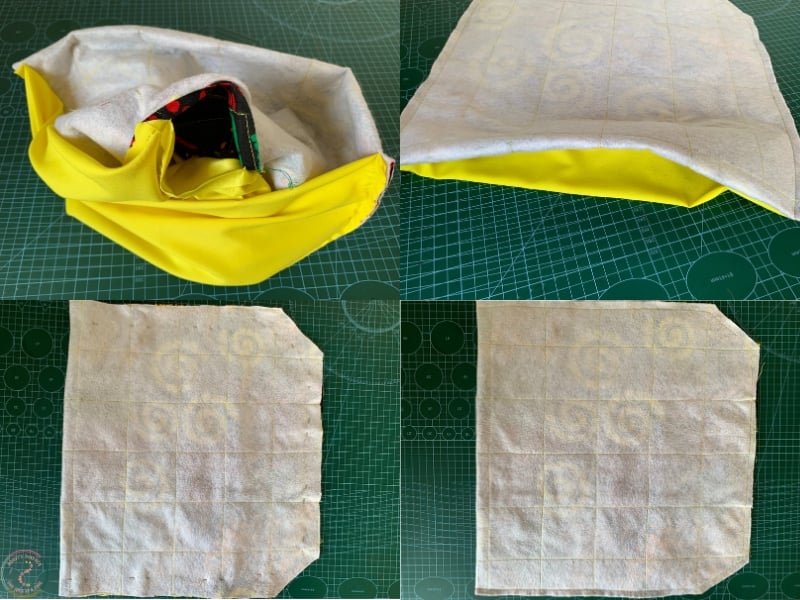
Open up the fabrics and press the seam flat with an iron.
Place the two fabrics wrong sides together so they form a single piece again.
From the top edge (flap area), measure 4.5 inches down and mark the spot—this is how far up your laptop sleeve will go.
7. Create the sleeve pocket:
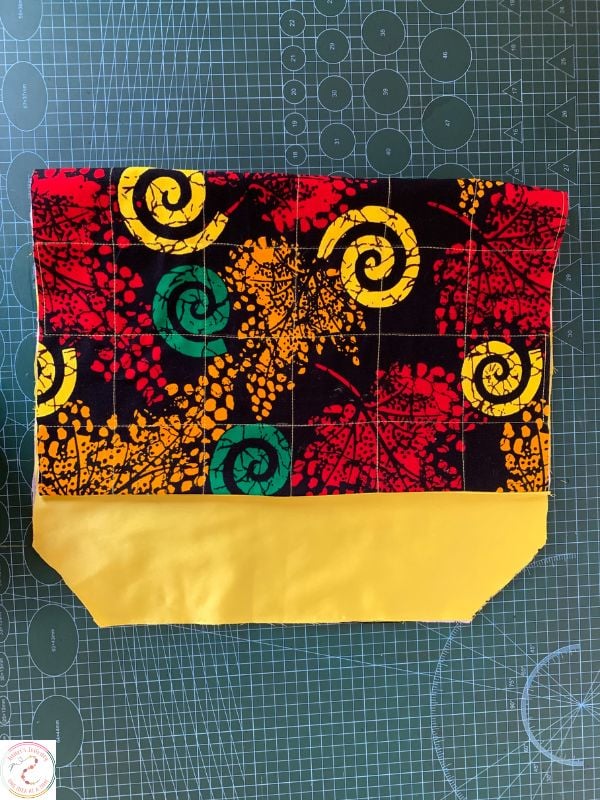
Fold the bottom section up to meet the 4.5″ mark. (You can test the size by sliding your laptop inside to make sure it fits nicely.)
8. Attach Velcro for closure: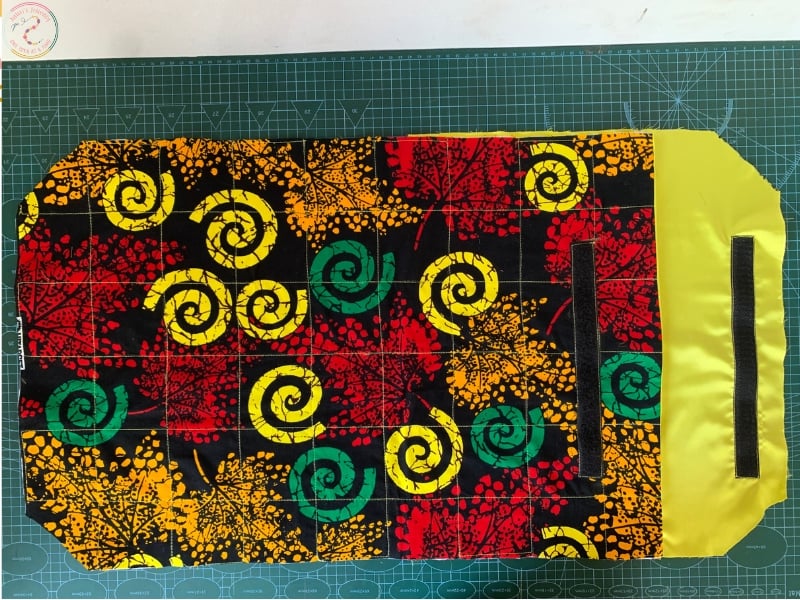
On the lining side of the flap, place one piece of Velcro 1 inch from the top edge and pin in place.
On the outer fabric of the bottom part, place the other Velcro piece 2.5 inches from the bottom edge so that both Velcro strips align properly when folded. Sew them securely with a machine.
9. Pin and sew the sides:
Keeping the fold in place, pin the sides together.
Now flip out the main fabric from underneath to bring it over the lining, aligning all edges.
Pin all around and sew along the sides and top flap, using a ½-inch seam allowance. Leave the bottom opening unstitched. Trim off bulky corners carefully.
10. Turn right-side out:
Through the opening left at the bottom, turn the entire sleeve right-side out, gently pushing out the corners.
11. Finishing touches:
Press everything flat with an iron for a neat finish.
You can add a top stitch around the flap if you’d like a more polished look (optional).
Finally, use a hand needle to stitch the bottom opening closed.
And your laptop sleeve is ready to use.
Now you’ve got a stylish, custom-made sleeve to protect your device—and show off your sewing skills. This project also makes a thoughtful handmade gift for students, remote workers, or anyone who carries their laptop around.
Play around with different fabrics—think denim, Ankara, faux leather, or even printed canvas. You can even add labels, appliqués, or embroidery for a personal touch.
You may also like: