Looking for a beautiful, practical, and easy sewing project? This DIY drawstring jewelry pouch is just the thing. Whether you’re organizing your earrings, gifting a bracelet, or packing accessories for travel, this circular pouch adds a lovely handmade touch.
It’s cute, compact, and so much fun to sew, even for beginners.
In this guide, I’ll walk you through step-by-step on how to make your own drawstring jewelry pouch using simple materials. You can even make it from fabric scraps you already have at home.
What You’ll Need:
Half yard each of main fabric and lining fabric
Matching sewing thread
Two ribbons or cords, about 40” long each
Optional: Interfacing or batting for added structure
Sewing machine (or needle for hand-sewing)
Fabric scissors or rotary cutter
Pattern paper
Fabric chalk or washable pen
Safety pin (for threading ribbon)
Pins or clips
Step-by-Step Instructions
1. Make and Cut Your Circle Patterns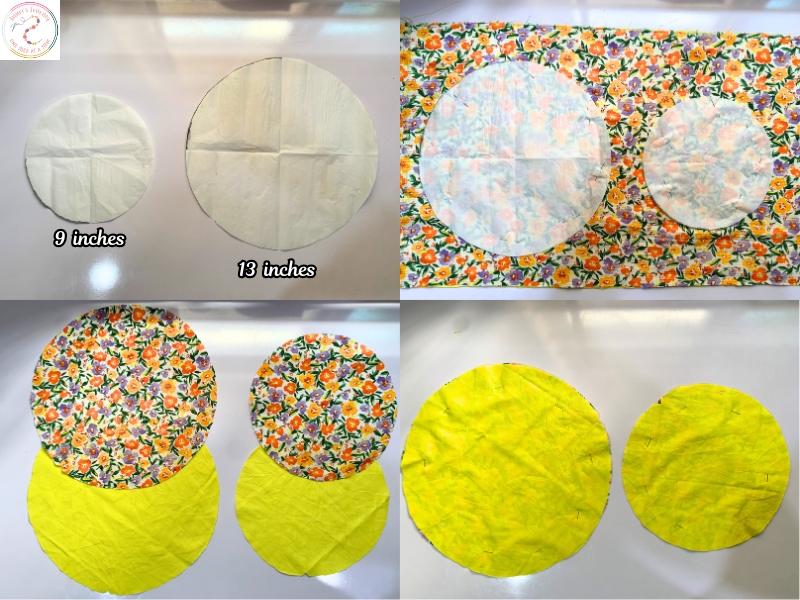
Draw and cut out two paper patterns:
One 13-inch circle
One 9-inch circle
Place each pattern on both your main fabric and lining fabric, and secure with pins.
Cut out:
One 13” circle from each fabric
One 9” circle from each fabric
2. Sew the Circle Pairs Together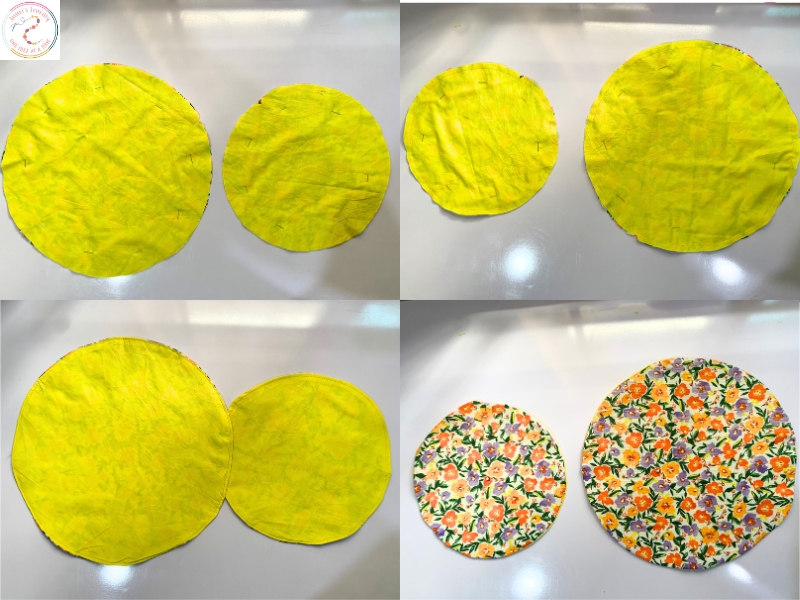
For both the 13” and 9” circles:
Place the main fabric and lining right sides together
Pin around the edge, leaving a 2” gap for turning
Sew all the way around with a ⅜” seam allowance
Turn right side out through the gap
Press flat with an iron
Topstitch around the edge to close the gap and give it a clean finish
3. Create the Inner Pockets

Lay the larger circle flat, with the lining side facing up
Find and mark the center of both circles
Place the smaller circle centered on top of the larger one, wrong sides together
Pin in place
Now create the inner circle and pocket divisions:
Mark a small 3-inch circle in the center of the smaller circle
Sew along this 3” circle to form the base of your pouch
Draw straight lines radiating outward from the center to divide the pouch into compartments (space them based on how many pockets you want — usually 8 works well)
Stitch along those lines from the outer edge of the small circle to the inner edge of the large circle
These lines form the individual jewelry pockets
Tip: Don’t worry about the chalk marks — they’ll wash out later.
4. Mark and Sew the Drawstring Channel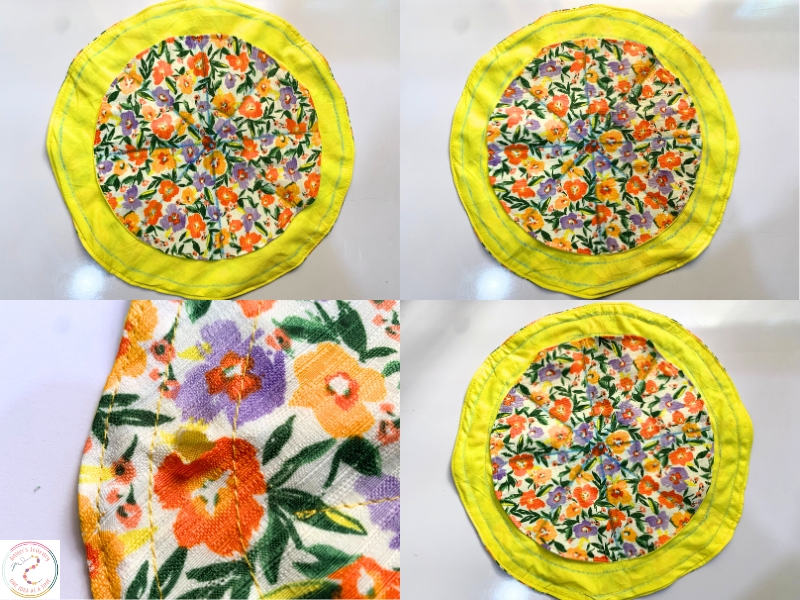
On the larger circle, measure 1 inch down from the edge and mark it all around
Measure another 1 inch below that and mark again
Sew around both circular lines — this forms your drawstring casing
5. Create Slits for the Drawstrings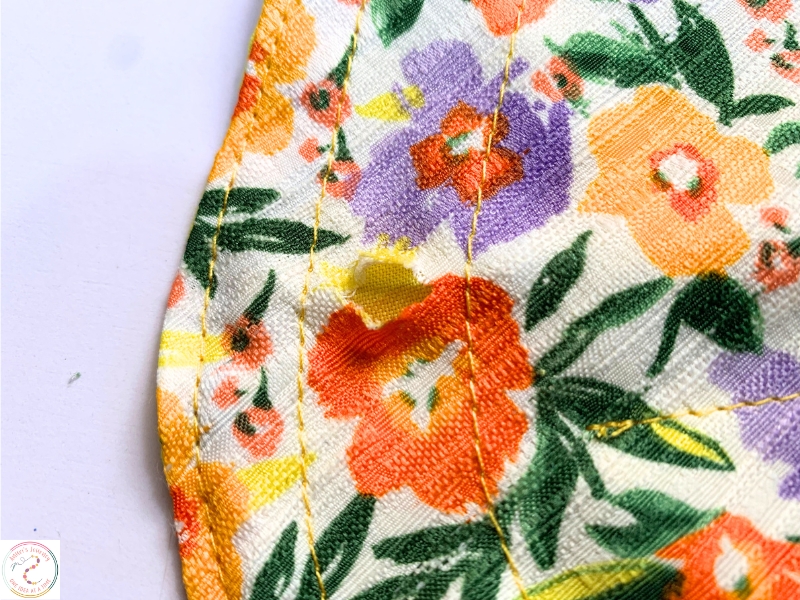
Using a seam ripper or small scissors, carefully make two small slits on opposite sides of the drawstring casing
Only cut through the outer fabric, not the inner lining
6. Thread the Drawstrings
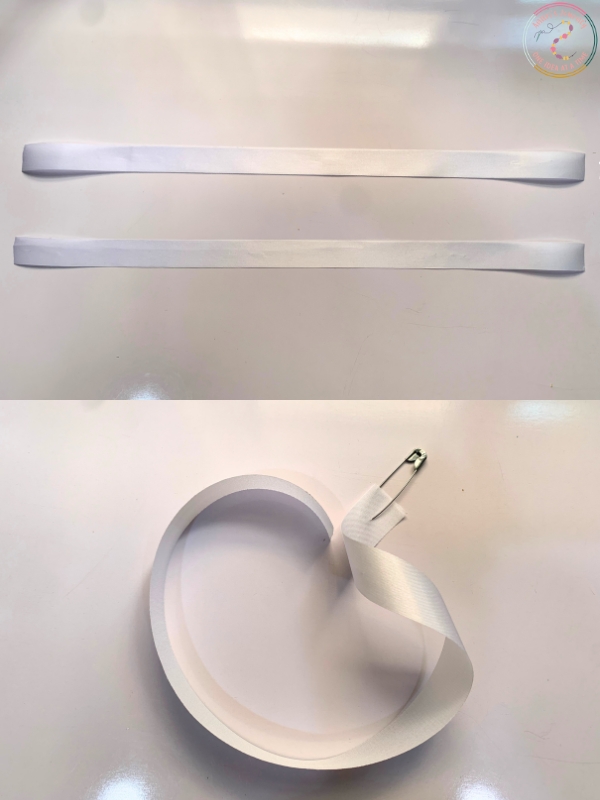
Cut two ribbons or cords, each about 40 inches long
Using a safety pin, thread the first ribbon all the way around the channel, coming out the same slit it went in
Thread the second ribbon through the opposite slit in the same way
This double drawstring makes the pouch close neatly and evenly when pulled.
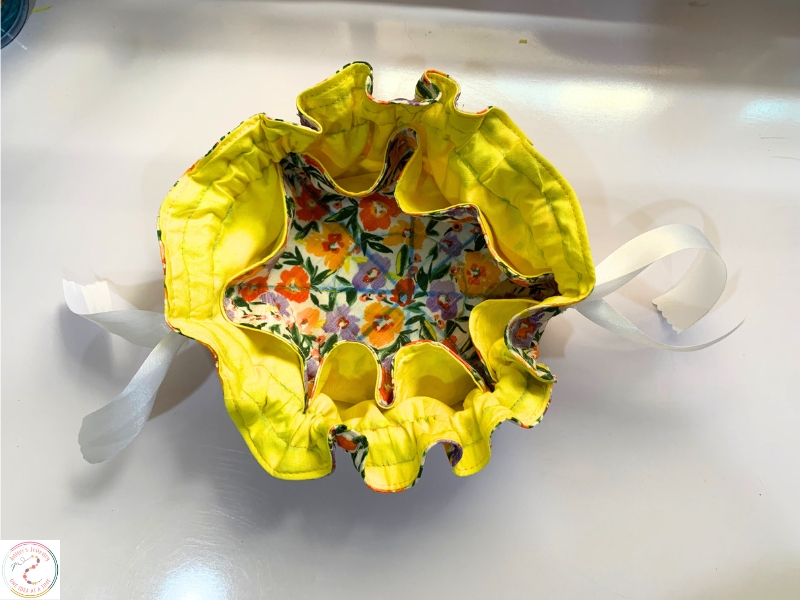
7. Final Touches
Knot the ends of each ribbon
Add beads, charms, or tassels to the ends if you like
Give the pouch a gentle press to smooth it out
Why You’ll Love This DIY Jewelry Pouch
Perfect for gifting — add earrings, bracelets, or rings for a complete handmade present
Travel-friendly — keeps small items organized in your suitcase
Beginner-friendly — easy sewing project with a polished result
Scrap-buster — great for using leftover fabric pieces
You may also like: